cc-rest-imgsegm
Conda environments
This project was initially put together ona M1 Macbook. Please, create a new environment base on the following .yml based on your machine's architecture:
- (ARM) (tf-silicon.yml)[https://drive.google.com/file/d/1nDPqkm4UjDsbs407gZGDxmEVeToegUQN/view?usp=sharing]
- (x86) (tf-linux.yml)[https://drive.google.com/file/d/1x28FEAa2WL3qRQsBAEW5QRszf7eydgPz/view?usp=sharing]
# create the env
conda env create -f tf-xxxxx.yml

# check the env
conda env list

# activate the environment
conda activate tf-xxxxx
It is suggested to open to separate terminal tabs, one to run the Webapp (make sure you run the steps below first) and the other for the Server (where real-time logs will be shown). TOP
Webapp
Strongly suggested to use http-server (npm package) to have a local server which enables to work with the webapp (HTML/JS).
If you don't have node installed on your system, please, use (nvm)[xxx] and install
# install node LTS
nvm install --lts

# globally install http-server
npm install -g http-server

# run the webapp
cd webapp
http-server -o .
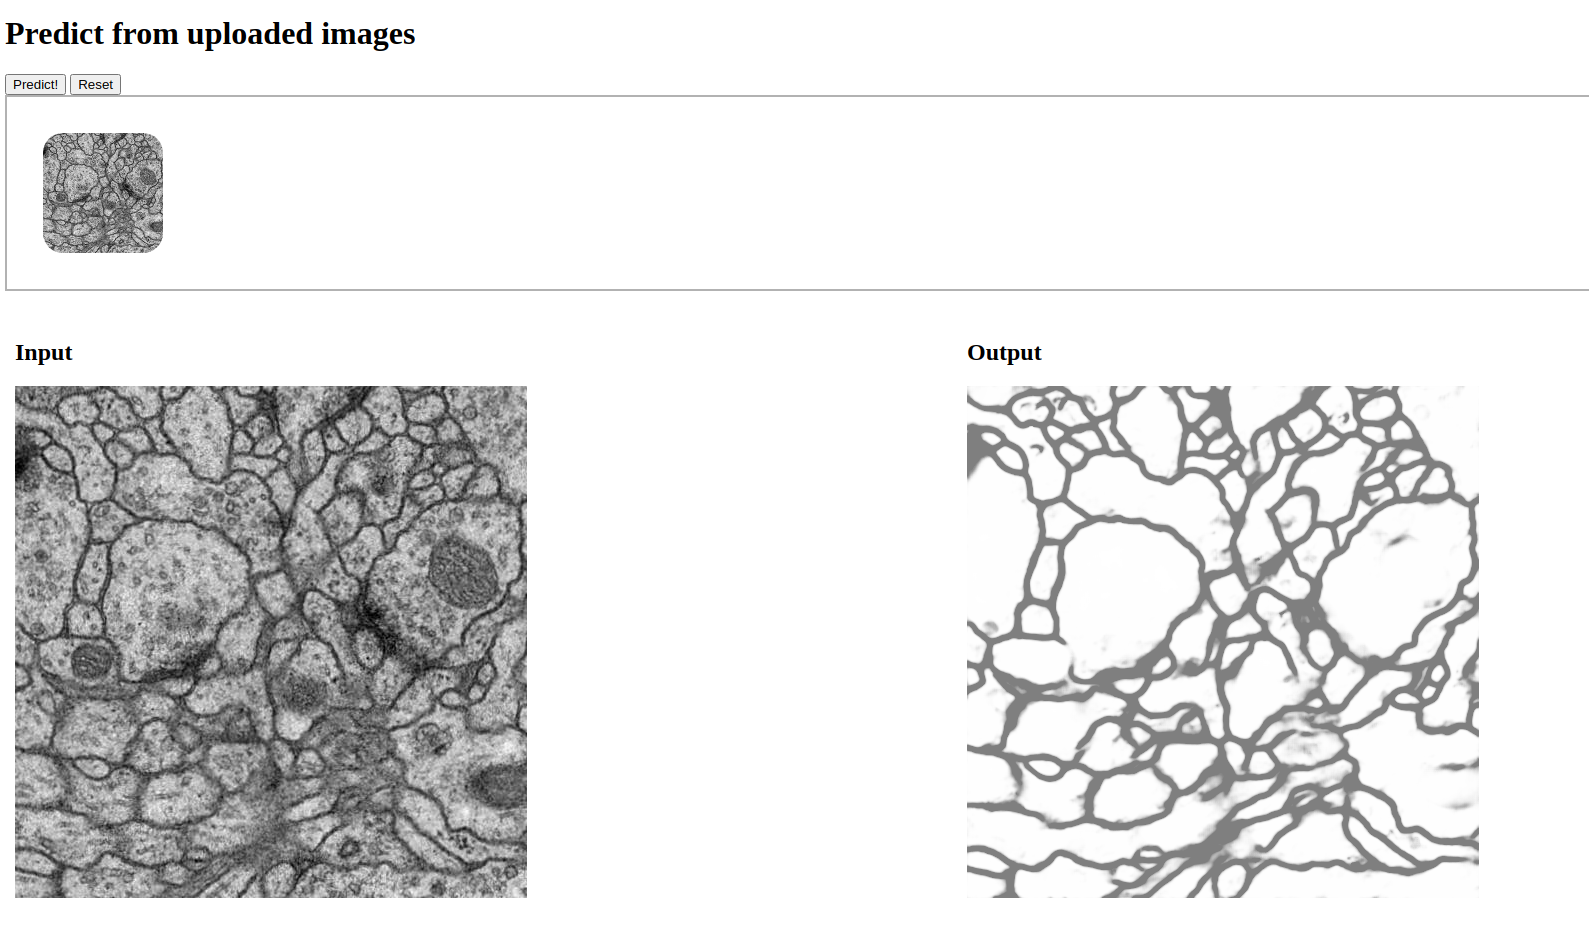
Upload and Predict
You may
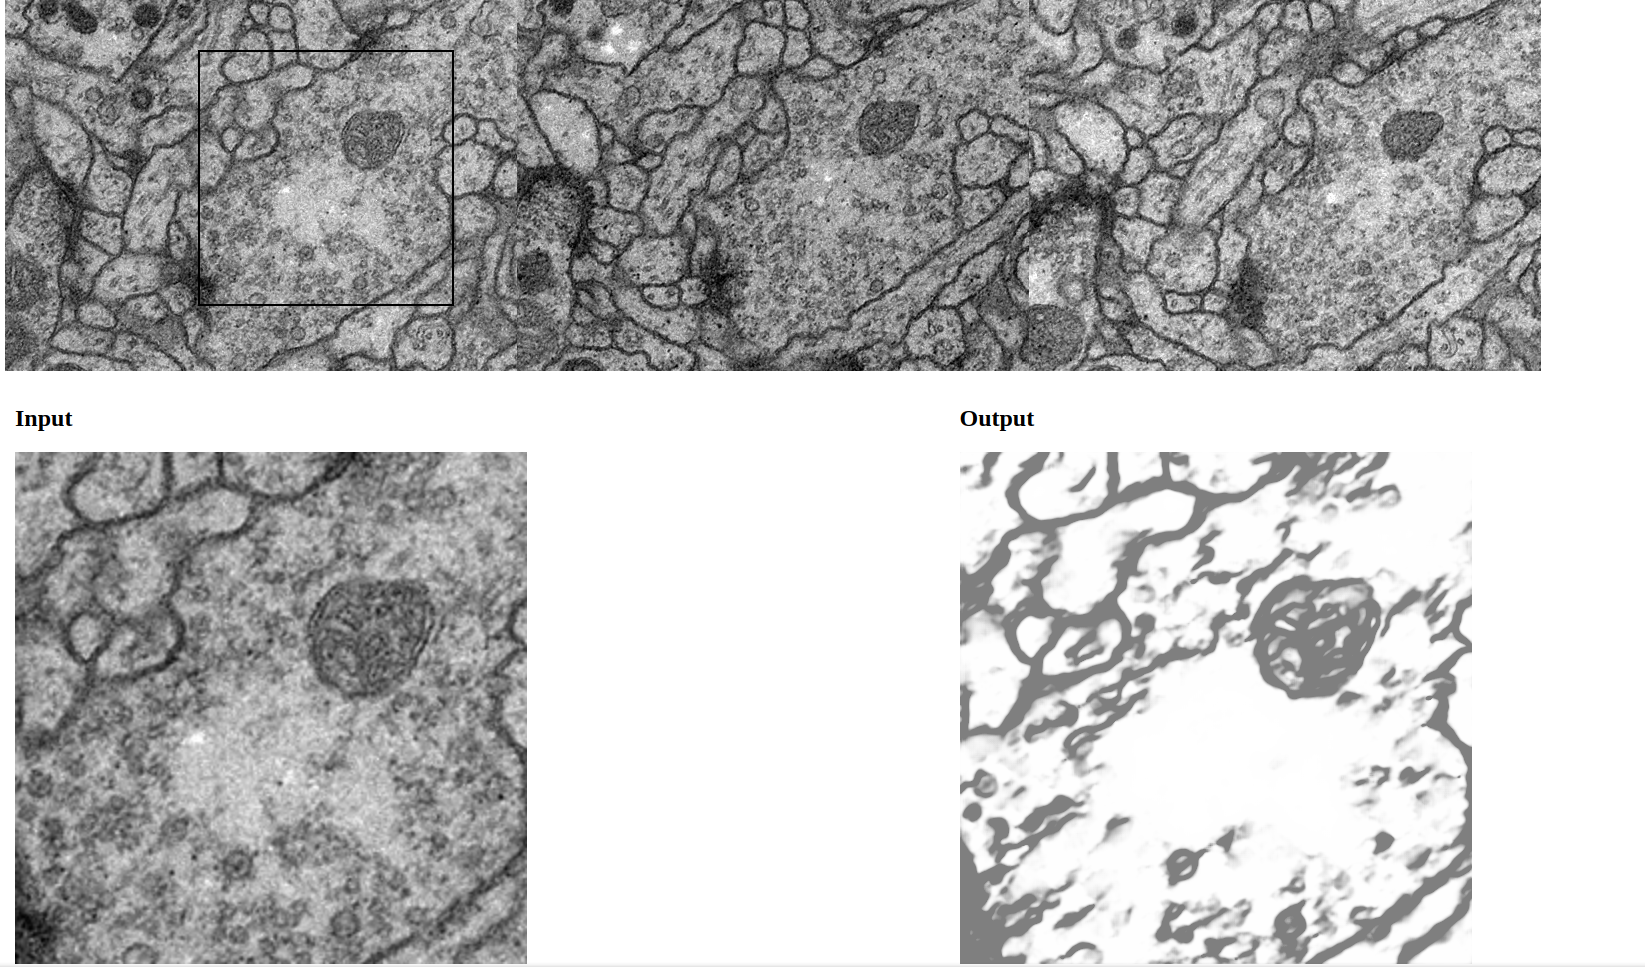
Predict from portion (of a bigger image)
You may use your mouse to move around with a squared pointer to select a portion of a dummy large biomedical image of a nerve. On click, the webapp will extract the selected canvas and it'll send the request to the server to obtain a prediction. That prediction will be displayed to the user in a few seconds.
API Service
Tools like cURL may be used to perform requests programmatically. The feature is work in progress. Here's the list of the available endpoint:
Request
URL: http://0.0.0.0:5000/from_mat

Type: POST

Headers: Content-type: application/json;charset=UTF-8

Body:


{
    // Gray-scaled 512x512 image(s)
    "images": [
        [...],
    ],

    // To inform the server we deal with 0-255 values and not 0-1
    "normalized": false
}
Response
The server will answer back with a JSON containing name of the image(s) in the form of a UUID
along with the input/output URL.
A .mat generated file representing the image sent during
the request whilst the output will contain a URL to actually see the prediction.

Data (with code 200):


{
    "e0af4fcc-2c90-4629-bf08-3baa1d089ed8": {
        "input": "http://0.0.0.0:5000/tmp/2021-08-19_19-21-29/9c85b19c-a8d2-4be0-819f-9cdfa57f4f79.mat",
        "output": "http://0.0.0.0:5000/tmp/2021-08-19_19-21-29/preds/e0af4fcc-2c90-4629-bf08-3baa1d089ed8.png"
    }
}
Sample Request/Response
Request
TYPE: 		POST
URL:  		"http://127.0.0.1:5000/from_mat"
HEADERS: 	"Content-type: application/json;charset=UTF-8"
BODY:
{
	"images": [
		[144,145,148,148,145,134, ... ,116,99,90]
	],
	"normalized":false
}
Response
{
	"e0af4fcc-2c90-4629-bf08-3baa1d089ed8": {
		"input": "http://0.0.0.0:5000/tmp/2021-08-19_19-21-29/9c85b19c-a8d2-4be0-819f-9cdfa57f4f79.mat",
		"output": "http://0.0.0.0:5000/tmp/2021-08-19_19-21-29/preds/e0af4fcc-2c90-4629-bf08-3baa1d089ed8.png"
	}
}
Server
You may want to be sure to have a separate tab opened and with the correct conda environment activated, before proceeding with this.
To startup the serverm, run the following command:
python server.py
Model
The Image Segmentation model comes from this repo. The model was extracted and put behind a Flash server. Simple as that (...and ugly).
Weights
The model comes pre-trained. You may want download the pre_trained.zip here. Zip files are ignored, so you could place it into the server/weights folder and unzip it without the need of removing it.
Playground
The service comes from another project NN4DS. You might find the jupyter notebook file useful to deal with experiments, debug/re-train the model and so on. However, it is not necessary for the sake of the CC project.
Docker
Use the following commands to build images and run docker containers for server and webapp.
Make sure to be into the docker folder (...cc-rest-imgsegm/docker) when running build command.
You can run build command from project's root path, but you must add docker/ to dockerfiles path
and replace build’s context path with. instead of ../
Build & Run Server
Build (takes some time):
docker build -t server/conda-debian:v1.0 --file server.Dockerfile ../
Run (no need to be in docker folder path when running):
docker run -p 5000:5000 server/conda-debian:v1.0
OPTIONAL: Add -d to run container in background
OPTIONAL: Add --name to assign a name to container
Build & Run Webapp
Build:
docker build --rm -t webapp/nginx-alpine:v1.0 --file webapp.Dockerfile ../
Run (no need to be in docker folder path when running):
docker run -p 80:80 webapp/nginx-alpine:v1.0
OPTIONAL: Add -d to run container in background
OPTIONAL: Add --name to assign a name to container
Clean Up
To remove all dangling images
docker image prune
Add -a to remove all images not referenced by any container
Local Kubernetes (minikube)
Some infos about kubernetes
Load docker images into Kubernetes
Swap minikube with any other Kubernetes install version
minikube image load server/conda-debian:v1.0
minikube image load webapp/nginx-alpine:v1.0
Create Deployment service using an image
WARNING: kubectl is an Alias for minikube kubectl --
kubectl create deployment ccserver --image=server/conda-debian:v1.0
kubectl create deployment ccwebapp --image=webapp/nginx-alpine:v1.0
Expose Deployment service
kubectl expose deployment ccserver --type=LoadBalancer --port=5000
kubectl expose deployment ccwebapp --type=LoadBalancer --port=80
Port forwarding of services requests
Actually don't remember if port 80 is correct about forwarding the webapp.
kubectl port-forward service/ccwebapp 80:80
kubectl port-forward service/ccserver 5000:5000
Some utils commands
minikube dashboard open up a browser dashboard for kubernetes
kubectl delete deploy ccserver delete a Deployment service
kubectl delete service ccserverdelete a service related to deployment
kubectl get services ccserver get Info about the service
Kubernetes AWS
5 EC2 Ubuntu machines with docker and kubernetes running on AWS, 1 Master Node and 4 Workers Node.
Public IP Addresses:
- Master EC2 (Kubernetes master node): MASTER EC2 IP ADDR
- Worker-1 EC2 (Kubernetes worker node): WORKER1 EC2 IP ADDR
- Worker-2 EC2 (Kubernetes worker node): WORKER2 EC2 IP ADDR
Add more nodes using:
sudo kubeadm join **MASTER_NODE_EC2_IP_ADDR** --token **KUBE_INIT_TOKEN** \
        --discovery-token-ca-cert-hash **KUBE_INIT_HASH**
Check nodes status using:
kubectl get nodes
Each machine has the user 'ubuntu'.You can access each machine using SSH with the following command:
ssh -i kube-servers.pem ubuntu@REPLACE_WITH_EC2_IP_ADDR
kube-servers.pem is the public key generated inside the AWS account. (in project root /aws)
Deploy webapp from Master Node
WARNING: Before starting with deployments, you must open a local docker repository to permit kubernetes pull images from
local repository instead of public one. Check PROBLEM 1 and PROBLEM 2 section below.
(All .yaml files can
be found in in project root /kubernetes/split-deploy)
1. Apply Webapp frontend pods deployments across nodes
kubectl apply -f webapp-frontend-deployment.yaml
2. Apply Webapp backend pods deployments across nodes
kubectl apply -f webapp-frontend-deployment.yaml
- Command for check all pod status:
kubectl get pods
Add -o wide at the end of this command the check how pods are split across the nodes
- Command for check deployment status
kubectl get deployments
3. Expose the frontend deployment on port 80 outside the cluster using a service. (Default service type: ClusterIP)
This step will create n endpoints, one for each pod related to frontend deployment , these IPs are grouped
and managed by this Service under only one ClusterIP. On the Master node you can use curl <ClusterIP>:80 to access webapp.
kubectl apply -f webapp-frontend-service.yaml
- This is the same of doing:
kubectl expose deployment webapp-frontend --name=webapp-frontend --port=80
- Command for check pods endpoints after service created:
kubectl get endpoints
4. Expose the backend deployment on port 5000 outside the cluster using a service. (Default service type: ClusterIP)
This step will create n endpoints, one for each pod related to backend deployment, these IPs are grouped
and managed by this Service under only one ClusterIP.
kubectl apply -f webapp-backend-service.yaml
- This is the same of doing:
kubectl expose deployment webapp-backend --name=webapp-backend --port=5000
- Command for check pods endpoints after service created:
kubectl get endpoints
5. Forward outside master node requests to frontend/backend services
- Command for forward master node webapp frontend requests on port 8080 to the frontend service on port 80:
kubectl port-forward svc/webapp-frontend 8080:80 --address='0.0.0.0'
Add & at the end of this command to run it on fake backgroung
- Command for forward master node webapp backend requests on port 5000 to the frontend service on port 5000:
kubectl port-forward svc/webapp-backend 5000:5000 --address='0.0.0.0'
Add & at the end of this command to run it on fake backgroung
Webapp should now be running and responding from the outside on http://<master_node_public_ip>:8080
Cleanup
- Command for delete deployments:
kubectl delete deploy webapp-frontend
kubectl delete deploy webapp-backend
- Command for delete services:
kubectl delete svc webapp-frontend
kubectl delete svc webapp-backend
Solutions to some Kubernetes problems
- Problem 1:
- Kubernetes tries to pull image defined in
webapp-nginx-deployment.yamlfrom public docker registry.
- Kubernetes tries to pull image defined in
- Solution: We need to start a local registry and set kubernetes to pull image from local registry instead of public one.
- Use the following command to run a docker container which starts a local registry service on port 5001
docker run -d --restart always -e REGISTRY_HTTP_ADDR=0.0.0.0:5001 -p 5001:5001 --name registry registry:2
- Use the following command to tag the local docker image using the private IP Address of the Master node. Kubernetes
will try to pull image from registry at that IP.docker tag webapp/nginx-alpine:v1.0 172.31.27.155:5001/webapp/nginx-alpine:v1.0
- Use the following command to push the image
docker push 172.31.27.155:5001/webapp/nginx-alpine:v1.0
- Use the following command to check image correctly pushed and can be pulled
curl http://localhost:5001/v2/_catalogorcurl http://172.31.27.155:5001/v2/_catalog
- Use the following command to run a docker container which starts a local registry service on port 5001
Now, if you try to Deploy the webapp, the image will not be pulled anyway because Kubernetes tries to pull using HTTPS
requests, but the local registry accept only HTTP requests. So after kubectl apply... you can check the error message
with kubectl describe pod.
- Problem 2:
- Kubernetes pull images only from trusted registry (HTTPS)
- Solution: Docker daemon needs to be configured to treat the local Docker registry as insecure.
https://docs.docker.com/registry/insecure/- To set registry as insecure, add the following line to this file
/etc/docker/daemon.json:"insecure-registries" : ["172.31.27.155:5001"]
- Restart docker service with
sudo systemctl restart docker - Apply these changes to all cluster nodes
- To set registry as insecure, add the following line to this file


