
This lab illustrates steps to deploy a MicroProfile application, running in a Open Liberty Docker container, into a Kubernetes environment, such as IBM Cloud Private, and minikube (bonus).
If you find an issue with the lab instruction you can report it or better yet, submit a PR.
For questions/comments about Open Liberty's Docker container or IBM Cloud Private please email Arthur De Magalhaes.
You'll need a few different artifacts to this lab. Check if you have these installed by running:
git --help
mvn --help
java -help
docker --help
kubectl --help
helm --help
cloudctl --help
If any of these is not installed:
- Install Git client
- Install Maven
- Install Docker engine
- Install Java 8
- Install kubectl
- Install helm
- Install cloudctl
This lab has been tested on Mac OSX (High Sierra), Ubuntu 16.04 and Windows 10, but it should work with any OS that supports the above software.
This part of the lab will walk you through the deployment of our sample MicroProfile Application into an IBM Cloud Private cluster, which is built on the open source Kubernetes framework. You'll build a MicroProfile application and package it inside a Open Liberty Docker container. You will then utilize a Helm chart that deploys the Liberty container in ICP, with the appropriate service setup, while also deploying and configuring a CouchDB Helm chart that stands up the database that holds the data for this microservice.
- The user's namespace pod security policy must be no more restrictive than
ibm-anyuid-pspor CouchDB will not run - A ClusterImagePolicy must exist that allows the following registry URLs
docker.io/kocolosk/couchdb-statefulset-assembler:*docker.io/couchdb*
In this lab you will use a few command line interfaces (CLIs):
docker: A tool that acts as a client to interact with Docker daemon.kubectl: A powerful tool for running commands against any Kubernetes clusters including ICP.cloudctl: A command line tool to interact with IBM Cloud Private.helm: Is a tool for managing Kubernetes charts which are packages of pre-configured Kubernetes resources.
To access your cluster using these tools, you need to log in to your cluster. Once you are logged in, a protected connection between your machine (client) and the ICP cluster you want to reach will be set up.
- Log in to the VM that you set up previously.
- Log in to your cluster:
Your machine is setup to resolve
cloudctl login -a https://mycluster.icp:8443 -c id-mycluster-account --skip-ssl-validation
mycluster.icpinto the ip address of the master node of a shared ICP cluster. - Enter the credentials: admin/admin
- Select the
defaultnamespace when prompted. - Once you are successfully logged in, you should see the following message:
Configuring kubectl ...
Property "clusters.mycluster" unset.
Property "users.mycluster-user" unset.
Property "contexts.mycluster-context" unset.
Cluster "mycluster" set.
User "mycluster-user" set.
Context "mycluster-context" created.
Switched to context "mycluster-context".
OK

Configuring helm: /home/student/.helm
OK
- Create a unique namespace (For example: use your github username):
kubectl create namespace <NAMESPACE>
- Configure your namespace:
kubectl -n <NAMESPACE> create rolebinding <NAMESPACE>-psp --clusterrole=ibm-anyuid-clusterrole --group=system:serviceaccounts:<NAMESPACE>
- Switch to the namespace that you created:
cloudctl target -n <NAMESPACE>
- You can now explore
kubectlandcloudctlCLIs. - Run the following commands to get familiar with these tools:
kubectl version: Print the client and server version information.kubectl cluster-info: Display cluster info.kubectl config view: Display merged kubeconfig settings.kubectl help: Get help!cloudctl version: Check CLI and API version information.cloudctl cm nodes: List of all nodes in the cluster.cloudctl cm masters: List of all master nodes.cloudctl cm master-get <MASTER_NODE_ID>: View the details about a master node.cloudctl catalog charts: List of Helm charts in the cluster helm repositories. Soon, you'll learn about Helm charts!cloudctl help: Get help!
- Congratulations!
You can access your IBM Cloud Private cluster management console from a web browser.
- Find out the master ip which we will use in the later steps:
You should get an output similar to the following:
cloudctl cm masters
ID             Private IP     Machine Type   State      K8s Status
mycluster-m1   <MASTER_IP>    -              deployed   Ready
- From a web browser, browse to the URL for your cluster. The URL is
https://<MASTER_IP>:8443. - Enter the credentials: admin/admin
- From the top horizontal menu bar, click Catalog.
- The Catalog provides a centralized location from which you can browse for and install Helm charts in your cluster. A chart consists of templates for a set of resources necessary to run an application and includes a values file that configures the resources.
- From the top left main Menu, click on Workloads and then Helm Releases.
- You can see the list of all Helm releases deployed into the cluster. Many of the deployments are internal resources required by ICP itself.
The vote microservice stores feedback from the sessions and displays how well all sessions were liked in a pie chart. If the vote service is configured (via server.xml) to connect to a CouchDB database, the votes will be persisted. Otherwise, the vote data will simply be stored in-memory. This sample application is one of the MicroProfile showcase applications.
You can clone the lab artifacts and explore the application:
- Clone the project into your machine:
git clone https://github.com/microservices-api/kubernetes-microprofile-lab.git
- Navigate into the sample application directory:
cd kubernetes-microprofile-lab/lab-artifacts - See if you can find where technologies described below are used in the application.
-
JAX-RS is used to to define the endpoints for the application, and performs JSON data binding on incoming and outgoing JSON data so that the rest of the code can utilize the data as POJOs.
-
CDI is used to instantiate data access objects (DAO's) and manage invocation of life cycle operations such as
@PostConstricut. -
JSON-P is used to implement custom JAX-RS MessageBodyReader/Writer classes for binding between JSON and POJO.
-
MicroProfile Config is used to inject CouchDB's URL, username and password to the application.
-
MicroProfile Fault-Tolerance is used in the CouchAttendeeDAO and CouchSessionRatingDAO to:
- impose timeouts on various operations using
@Timeout. - automatically retry failed operations using
@Retry. - limit the maximum resources allocated to parallel operations using
@Bulkhead.
- impose timeouts on various operations using
-
MicroProfile Health is used to provide an UP/DOWN health check of the service. The following health checks are implemented:
- HashMapDAO to determine if the in-memory storage is accessible (which is always) and gives an example of an UP status.
- CouchAttendeeDAO to determine if it can connect to the database backend.
- CouchSessionDAO to determine if it can connect to the database backend.
-
MicroProfile Metrics is used to gather metrics about the time it takes the HashMapDAO objects to complete their operations, and to keep a count of the amount of times each REST endpoint is requested.
By now you should have a general understanding about the applications. Now you will see how you can package the sample application into a Docker container.
The application is packaged as a Docker image, using a Dockerfile that contains instructions on how the image is built.
Dockerfile
FROM open-liberty:microProfile1
COPY server.xml /config/server.xml
COPY target/microservice-vote-1.0.0-SNAPSHOT.war /config/apps/vote.war
This Dockerfile describes that our container is built on top of open-liberty:microProfile1 Docker image and includes our applications along with the server.xml needed to run the app.
The following steps will build the sample application and create a docker image that includes the vote microservice:
- Navigate into the sample application directory if you are not already:
cd kubernetes-microprofile-lab/lab-artifacts - Build the sample application:
mvn clean package
- Build and tag the Docker image:
Replace
docker build -t mycluster.icp:8500/<NAMESPACE>/microservice-vote .
<NAMESPACE>with your username. As an example:docker build -t mycluster.icp:8500/userX/microservice-vote . - You can use the Docker CLI to verify that your image is built:
docker images
We will use IBM Cloud Private's internal Docker registry to host our image. This allows our image to remain secured on-premises, while being available to your enterprise. You can control which Kubernetes namespace they are available under.
-
Log in to your private image registry using the provided credential (admin/admin):
docker login mycluster.icp:8500
-
Now that you're logged in the registry, you can
docker pushyour tagged image (microservice-vote) into the ICP Docker registry:docker push mycluster.icp:8500/<NAMESPACE>/microservice-vote
-
Your image is now available in the Docker registry in ICP. You can verify this through the management console:
Console -> Container Images.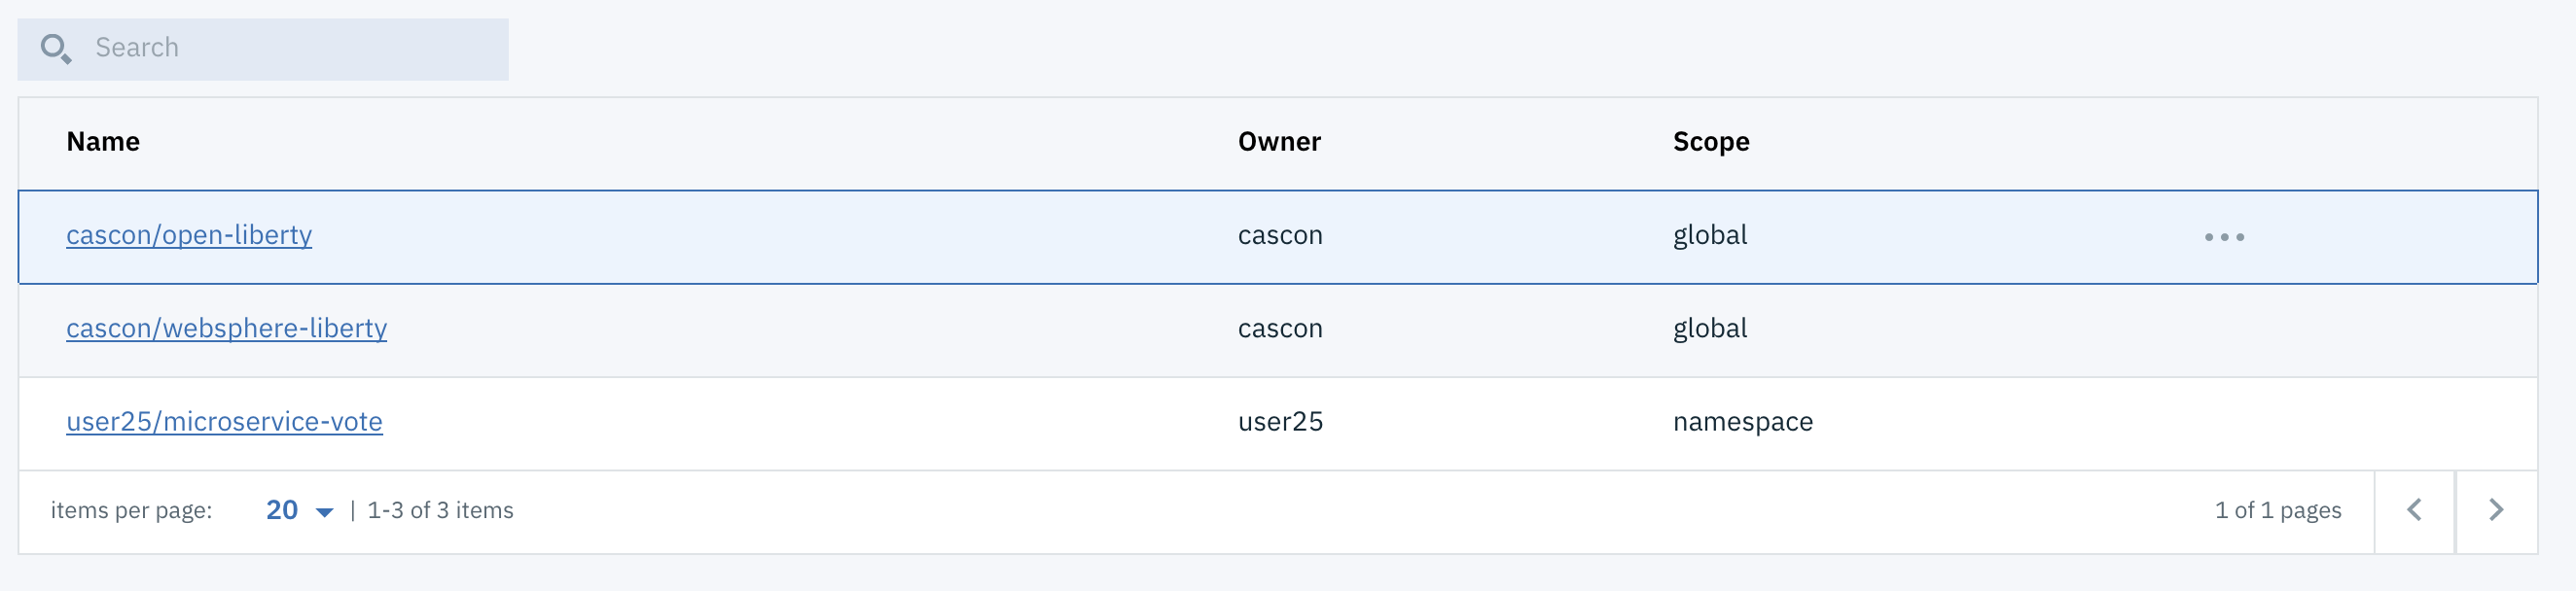

You can use ICP Dashboard to deploy Helm charts into your Kubernetes cluster through the Catalog page. In addition, you can use Helm command line tool to install a Helm chart which we will do in this part of the lab.
First, let's see what are Helm charts. Helm is a package manager for Kubernetes (analogous to yum and apt). You can use it for managing Kubernetes charts (analogous to debs and rpms), which are packages of pre-configured Kubernetes resources. Instead of running a bunch of commands or maintaining multiple configuration files to create Kubernetes resources, Helm packages all the resources required to successfully run a service or multiple dependent services in one chart.
Now let's deploy our workload using Helm charts:
- Deploy the microservice using Helm:
Note: create a unique username to distinguish your application from others, it is valid to have the same value for USERNAME and NAMESPACE.
helm install --tls --name=vote-<USERNAME> --namespace=<NAMESPACE> helm-chart/microservice-vote --set ibm-websphere-liberty.image.repository=mycluster.icp:8500/<NAMESPACE>/microservice-vote
- Run the following command to see the state of deployments:
You should get an output similar to the following:
kubectl get deployments,statefulsets
You might need to wait until the database deployment is available, indicated byNAME DESIRED CURRENT UP-TO-DATE AVAILABLE AGE deployment.extensions/vote-userx-ibm-websphere 1 1 1 1 45s NAME DESIRED CURRENT AGE statefulset.apps/couchdb-couchdb 1 1 45s
1in the AVAILABLE column. - Let's check on our deployment in the ICP dashboard. From the management console, go into
Workloads -> Deployments. - Click on the Namespace menu on the top right of the page.
- Select the namespace that belongs to you.
- You should see a deployment
vote-<USERNAME>-ibm-websphere. - Similarly, you will see
couchdb-couchdbwhen you go intoWorkloads -> Statefulsetsunder your namespace. - Feel free to click on any of the deployments and see details about each deployments.
- Now lets see what Kubernetes resources this Helm chart created in addition to Deployment resources. From the management console, go into
Workloads -> Helm Releases. - Click on your Helm release name. You can use the search box to find it.
- Release page shows all the Kubernetes resources created on the cluster.
- See that there are four resources created under Service.
- Click on
vote-<USERNAME>-ibm-websphere. This would take you to another page. - You should see a link for Node port
https. Click on the link. Note that if you go to thehttpslink, your browser might complain about the connection being not secure. You can ignore this error. - You should see the Open Liberty Welcome Page.
- Add
/openapi/uito the URL to reach the OpenAPI User Interface. For example,https://<IP>:<PORT>/openapi/ui. - Congratulations! You have successfully deployed a MicroProfile container into a Kubernetes cluster!
The vote application is using various MicroProfile specifications. The /openapi endpoint of the application exposes the MicroProfile OpenAPI specification. The /openapi/ui endpoint is a value-add from Open Liberty. This UI allows developers and API consumers to invoke the API right from the browser!
- Expand the
POST /attendeeendpoint and click theTry it outbutton. - Place your username (e.g. userX) in the
idfield, and place your name in thenamefield.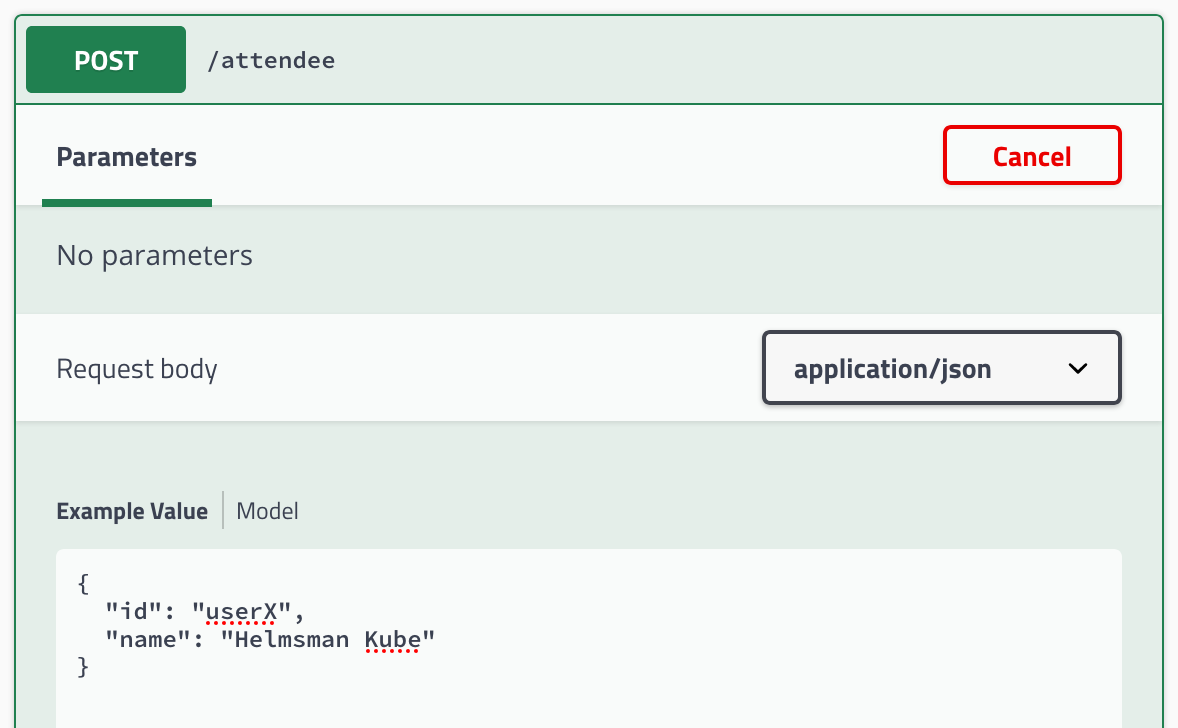
- Click on the
Executebutton. Scroll down and you'll see thecurlcommand that was used, theRequested URLand then details of the response. This entry has now been saved into the CouchDB database that our microservice is using.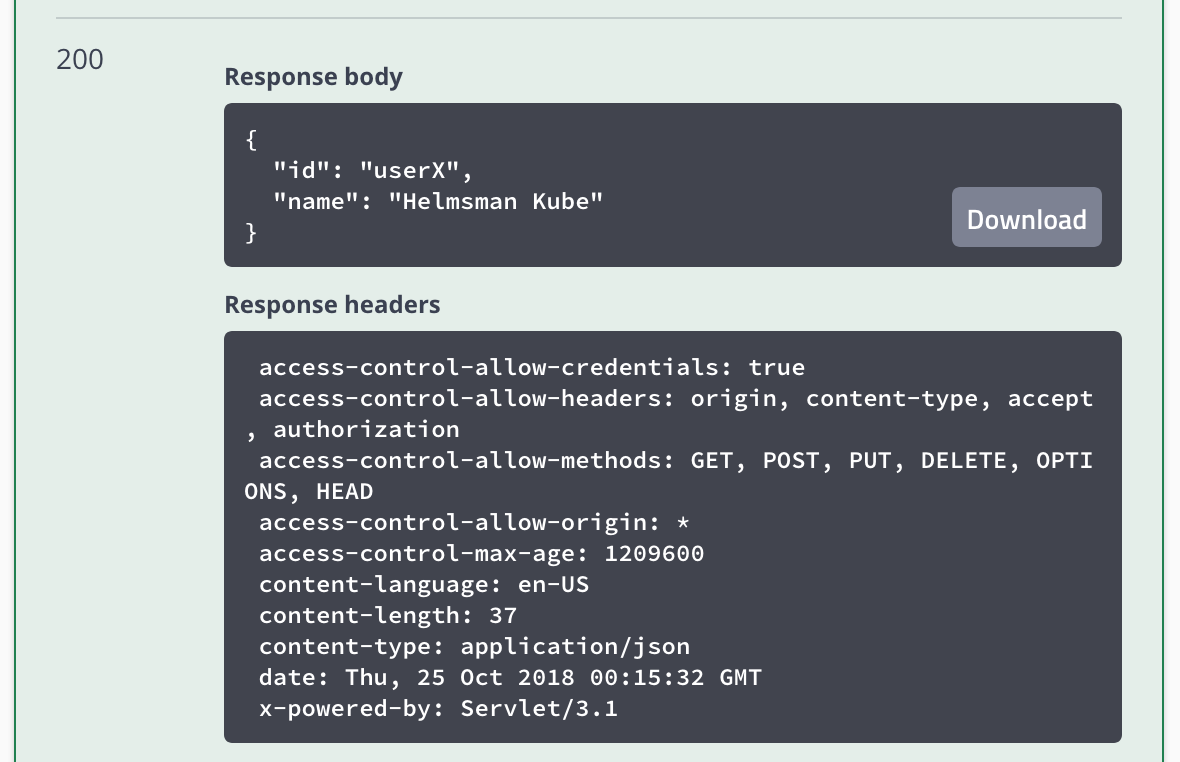
- Now expand the
GET /attendee/{id}, click theTry it outbutton, and type into the textbox theidyou entered from the previous step. - Click on
Executeand inspect that theRespond bodycontains the same name that you created in step 2. You successfully triggered a fetch from our Open Liberty microservice into the CouchDB database. - Feel free to explore the other APIs and play around with the microservice!


In this part of the lab you will practice how to make changes to the Helm release you just deployed on the cluster using the Helm CLI.
So far, the database you deployed stores the data inside the container running the database. This means if the container gets deleted or restarted for any reason, all the data stored in the database would be lost.
In order to store the data outside of the database container, you would need to enable data persistence through the Helm chart. When you enable persistence, the database would store the data in a PersistentVolume. A PersistentVolume (PV) is a piece of storage in the cluster that has been provisioned by an administrator or by a automatic provisioner.
The steps below would guide you how to enable persistence for your database:
- In Part 3, you would've observed that calling
GET /attendee/{id}returns thenameyou specified. CallingGETwould read the data from the database. - Find the name of the pod that is running the database container:
You should see a pod name similar to
kubectl get pods --namespace <NAMESPACE>
couchdb-couchdb-0. - Delete the CouchDB pod to delete the container running the database. Replace
<POD_NAME>with the pod name from the previous step:kubectl delete pod <POD_NAME> --namespace <NAMESPACE>
- Run the following command to see the state of deployments:
You should get an output similar to the following:
kubectl get pods --namespace <NAMESPACE>
You might need to wait until the database deployment is available.NAME READY STATUS RESTARTS AGE couchdb-couchdb-0 2/2 Running 0 3m vote-userx-ibm-websphere-5b44d988bd-kqrjn 1/1 Running 0 3m
- Call the
GET /attendeeendpoint from the OpenAPI UI page and see that the server does not return any attendee from the database. - Navigate into the sample application directory if you are not already:
cd kubernetes-microprofile-lab/lab-artifacts - Now let's enable persistence for our database:
helm upgrade --tls --recreate-pods --force --reuse-values --set couchdb.persistentVolume.enabled=true --set image.repository=mycluster.icp:8500/<NAMESPACE>/microservice-vote vote-<USERNAME> helm-chart/microservice-vote
- List the deployed packages with their chart versions by running:
You can see that the number of revisions should be 2 now.
helm ls --namespace <NAMESPACE> --tls
- Run the following command to see the state of deployments:
You need to wait until the deployments are ready.
kubectl get pods --namespace <NAMESPACE>
- Refresh the site, then add a new attendee through the OpenAPI UI.
- Now repeat Steps 1-5 in this section to see that even though you delete the database container, data still gets recovered from the PersistentVolume.
In this part you were introduced to rolling updates. DevOps teams can perform zero-downtime application upgrades, which is an important consideration for production environments.
Congratulations! You finished the lab! You got to use a few powerful tools to interact with Kubernetes to deploy a microservice into IBM Cloud Private. Although this lab is finished but the journey to Kubernetes should not end here! Head to the Learn more section to see other great resources.
Here are some details about the shared cluster used during CASCON 2018 workshop:
- IBM Cloud Private 3.1.1 is installed on the cluster
- The cluster has one master node and six worker node.
- NFS client provisioner Helm chart is installed on the cluster. The NFS client provisioner is an automatic provisioner for Kubernetes that uses your already configured NFS server, automatically creating Persistent Volumes.
- Kubernetes Basics
- IBM Cloud Private: Deploying Microservices with Kubernetes
- Helm - Quickstart Guide
Join the ICP technical community to stay up to date with news related to IBM Cloud Private.
In the bonus/take-home section you'll build a MicroProfile application and package it inside a Open Liberty Docker container. You will then utilize a helm chart that deploys the Liberty container into a Kubernetes cluster (minikube), with the appropriate ingress and service setup, while also deploying and configuring a Couchdb Helm chart that stands up the database that holds the data for this microservice.
We will walk you through the deployment of our sample MicroProfile Application into a minikube. You'll notice that we're using the exact same artifacts (Helm charts & Docker containers) as the steps for ICP. However, minikube is the simplest way for a developer to get a Kubernetes cluster up and running locally in their laptop.