This guide shows an easy way to Create a Google Platform AI platform notebooks in GCP with latest version of Fastai, Pytorch, CUDA drivers, python, JupyterLab everything ready and up-to-date to start developing Deep Learning models using GPUs
During these days using GCP Ai Platform Notebooks creation, I have found a lots of issues using the out-of-box images they have available:
- Python out of date ( version 3.7, until now latest version is python 3.9.1)
- JupyterLab out of date ( version 1.2, until now latest version is python 3.0.7)
- Trying to install latest fastai and retrieving an old version
- Lots of out of date and useless python packages
I tried to find the Best Way to create a notebook in Ai Platform and install all the packages and dependencies required to run Fastai Deep Learning projects.
I spent lots of days testing some combinations of VMs, containers and installations, after i reached final a good solution.
Here I will share the best way that I found ( maybe a better one is possible, feel free to share here if you know it :) ) to create a GCP Notebook instance and have everything updated and running with GPU processing and everything to get started to Deep Learning.
First you need to Create a GCP Notebook Instance as follows:
- Create New Instance
- Custom Instance

Choose the instance name you want and prefer a region/zone with lowest latency you. Can use this tool to discover https://gcping.com/ The Important configs to choose is:
- Debian 10
- PyTorch 1.7 (with Intel MKL-DNN/MKL)
The Hardware and machine type can be whatever you prefer, but I recommend the following:
- n1-standard-8 (8 vCPUs, 30 GB RAM)
- NVIDIA Tesla T4
- Mark option to Install GPU NVIDIA Drivers
- Boot disk Type SSD Persistent Disk 200 GB

After Creating the Instance and it starts up, click "Open JupyterLab" and open terminal type the following commands:
Remove old jupyterlab and reinstall the latest one
conda uninstall jupyterlab -y
conda install -c conda-forge jupyterlab=3 -y
Install the latest python version and dependencies required in a new env and activate it
Create a new conda environment with python 3.9 ( latest when I wrote this document ) named fastai, but you choose the name you prefer
conda create --name fastai python=3.9 -y
conda activate fastai
Now install fastai, pytorch and other dependencies required
conda install -c fastai -c pytorch fastai -y
conda install -c fastai fastbook -y
git clone https://github.com/fastai/fastbook.git
pip install -Uqq fastbook
If you want to use the GCS tools to read/write on Buckets, install/update the following packages:
pip install --upgrade google-cloud-storage
If you want install some additional and useful packages for Data Science for example:
- wandb - Weights & Biases - Dev tools for ML
- gh - GitHub CLI
conda install -c conda-forge wandb gh
To finish config jupyterlab to use the created fastai (or the name you chose) environment as kernel
conda install ipykernel -y
ipython kernel install --user --name=fastai
Now restart JupyterLab
-
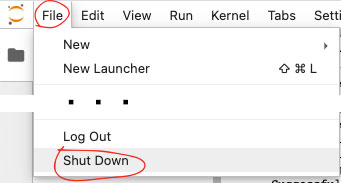
Go to File -> Shut Down to shut down the JupyterLab
-
Close browser tab
-
Go to AI Platform Notebooks and click again on "OPEN JUPYTERLAB"
-
Change the kernel to the previously created fastai (or the name you chose)


Now your ready to go and start coding
- Python v3.9.1
- Pytorch v1.7.1
- Fastai v2.2.5
- Nvidia Cuda Driver 11
- JupyterLab v3.0.7
- Leozítor Floro de Souza - Github