brXM SAML integration with Okta using Spring Security
- Navigate to http://developer.okta.com/
- Click on Get Started
- Fill in your own name and email address
- Okta will send you a confirmation email, including your temporary password and a link to your new developer Okta instance
- Navigate to the link in the email, and input your email address and the temporary password provided to you
- Fill in the form presented to complete your registration, and click on Create My Account
- You should now have an empty Okta instance with no apps, and only one user.
- Click on Admin, then Add Applications
- Click on Create New App
- Select SAML 2.0 and click Create
- Add a reasonable name to the app and click Next
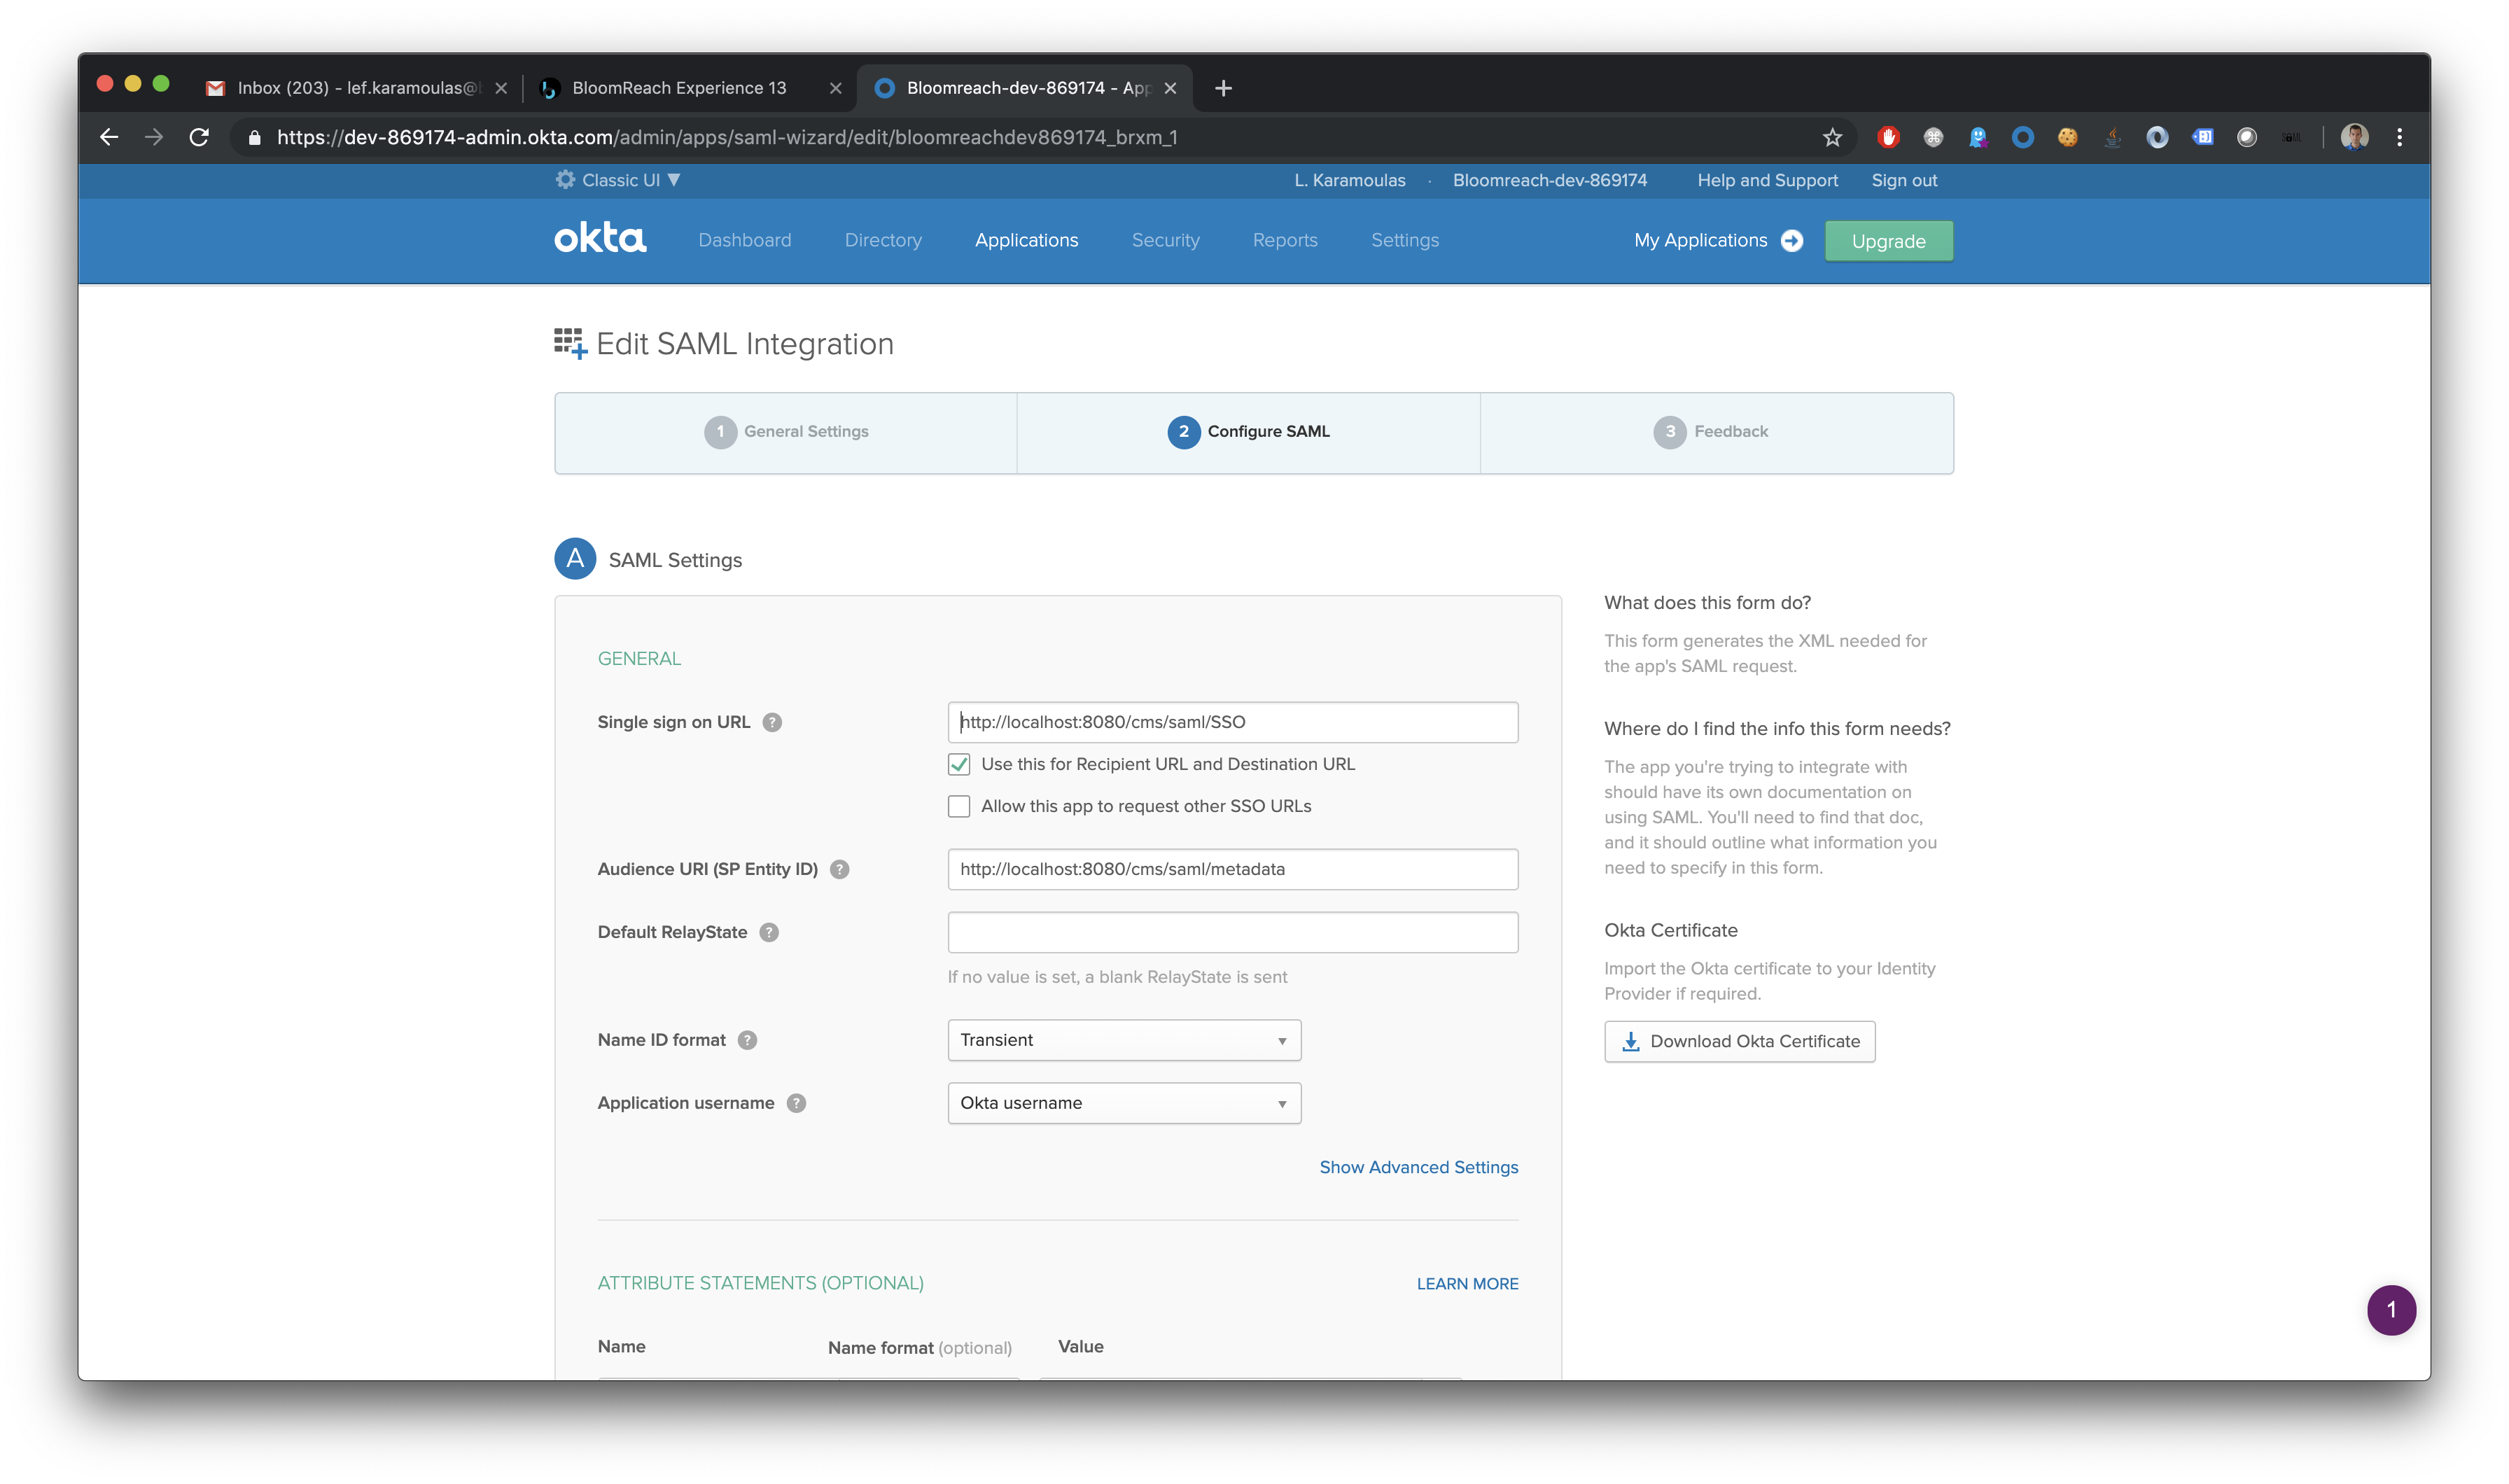
- Fill in Single sign on URL with
https://localhost:8080/cms/saml/SSO - Fill in Audience URI with
https://localhost:8080/cms/saml/metadata - Your configuration should look like this
- The rest of the fields can be left as they began, click Next
- Select I'm an Okta customer adding an internal app
- Check This is an internal app that we have created
- Click Finish
- Click View Setup Instructions
- Copy the xml IDP Metadata from the Optional section into a filein your project:
cms/src/main/resources/metadata/okta.xml

- Return to your Okta home screen and click Admin
- Click Assign Applications
- Select Colombia and yourself, then click Next
- Click Confirm Assignments
- Generate a keystore and key in
cms/src/main/resources/security:$ keytool -genkeypair -alias your-alias -keypass your-password -keystore samlKeystore.jks -storepass your-password -keyalg RSA -keysize 2048 -validity 3650 - In cms/src/main/resources/saml/saml.properties replace the properties saml.key and saml.storePass with the values used in the previous step.