- PC requirements
- ADB
- Windows
winget install Google.PlatformTools - Debian-based
sudo apt install adb -y
- Windows
- ADB
- Android Device requirements
- Unlocked bootloader
- Supports Project Treble
- Use Treble Info to check your device.
- DSU Sideloader to load a generic system image (GSI) using a dynamic system update (DSU).
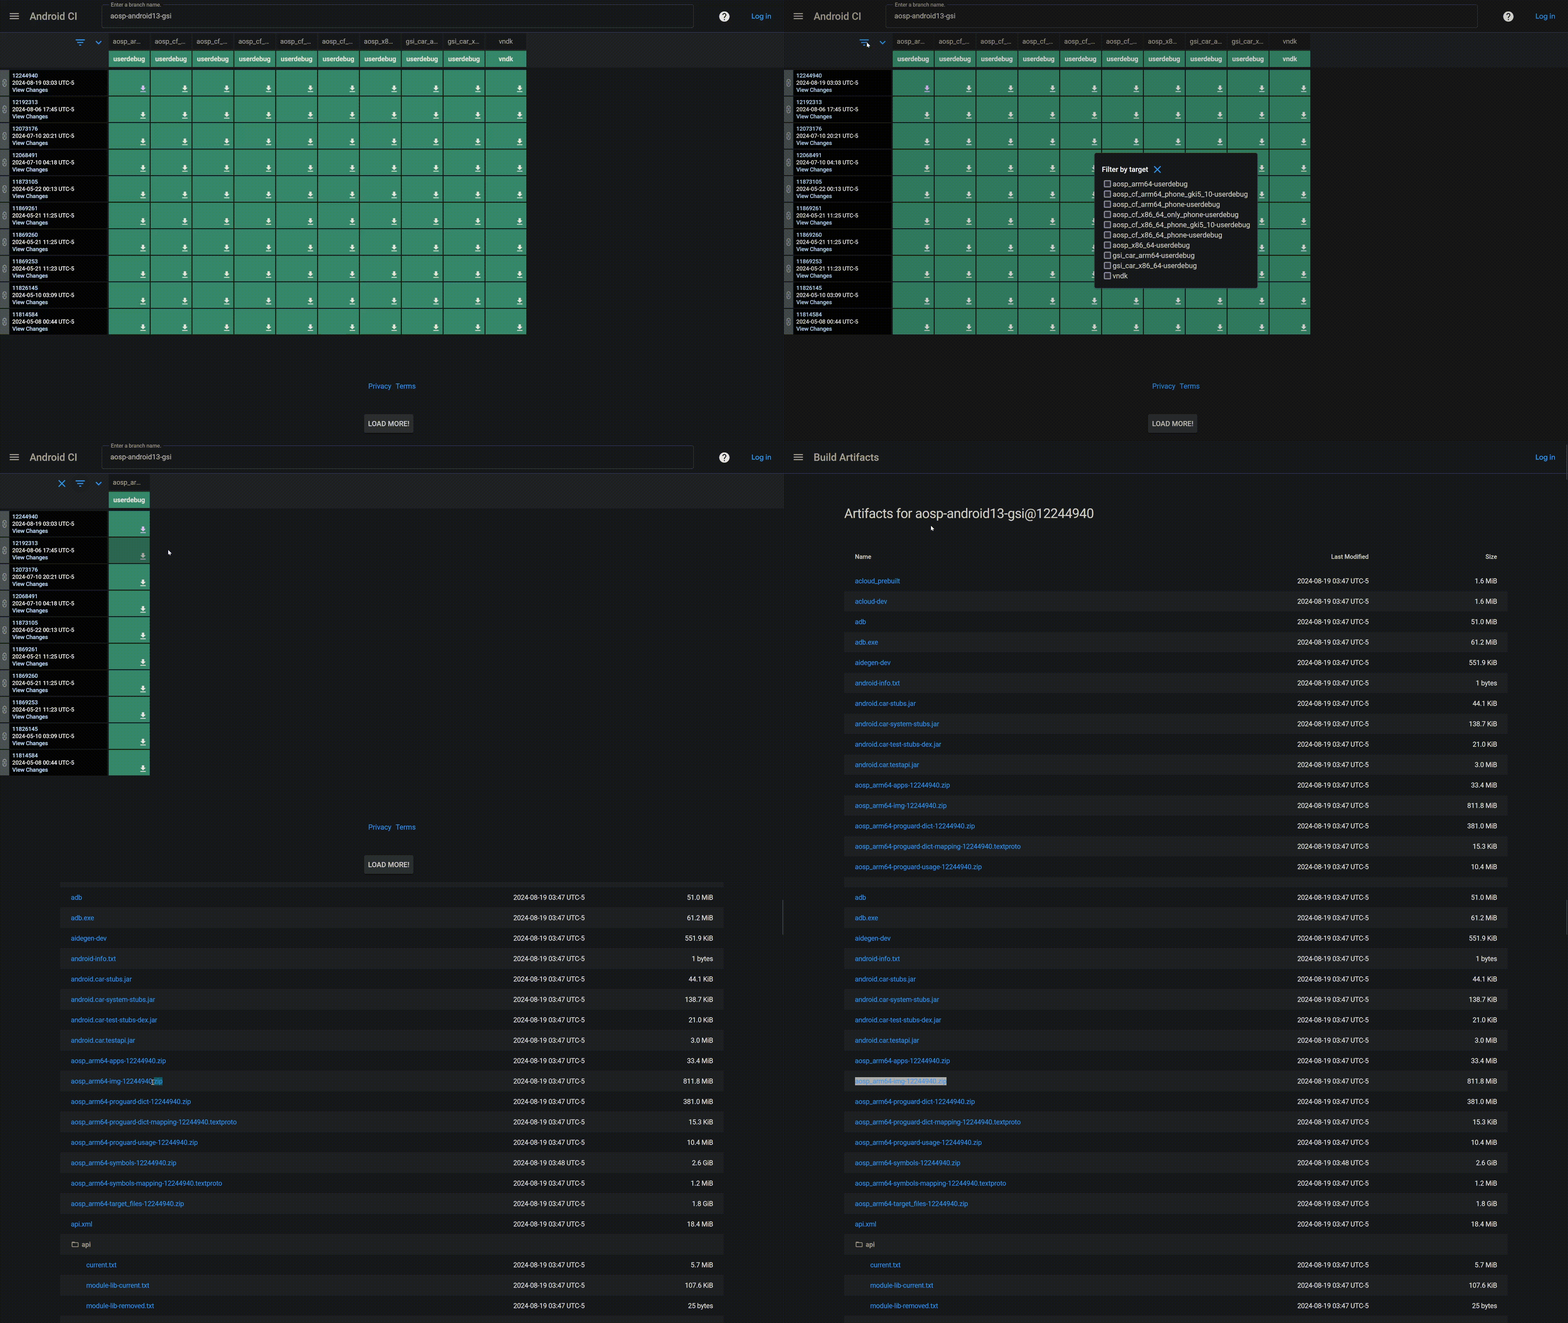
If the prerequisites are met, download a userdebug GSI for your device. Choose a GSI appropriate for your device from Phusson's GSI list. The test device used in this guide is Android 13, so the GSI chosen will the official Google Android 13 GSI. Choose the target aosp_arm64-userdebug and download the aosp_arm64-img-<date-of-build>.zip from the Artifacts page (if your device is also Android 13).
NOTE: When you read the following:
> command
The > is to indicate a command executed on the PC.
If you downloaded on PC, then push the file to the device's download folder with (download path may vary):
> adb push gsi.zip /sdcard/Download/
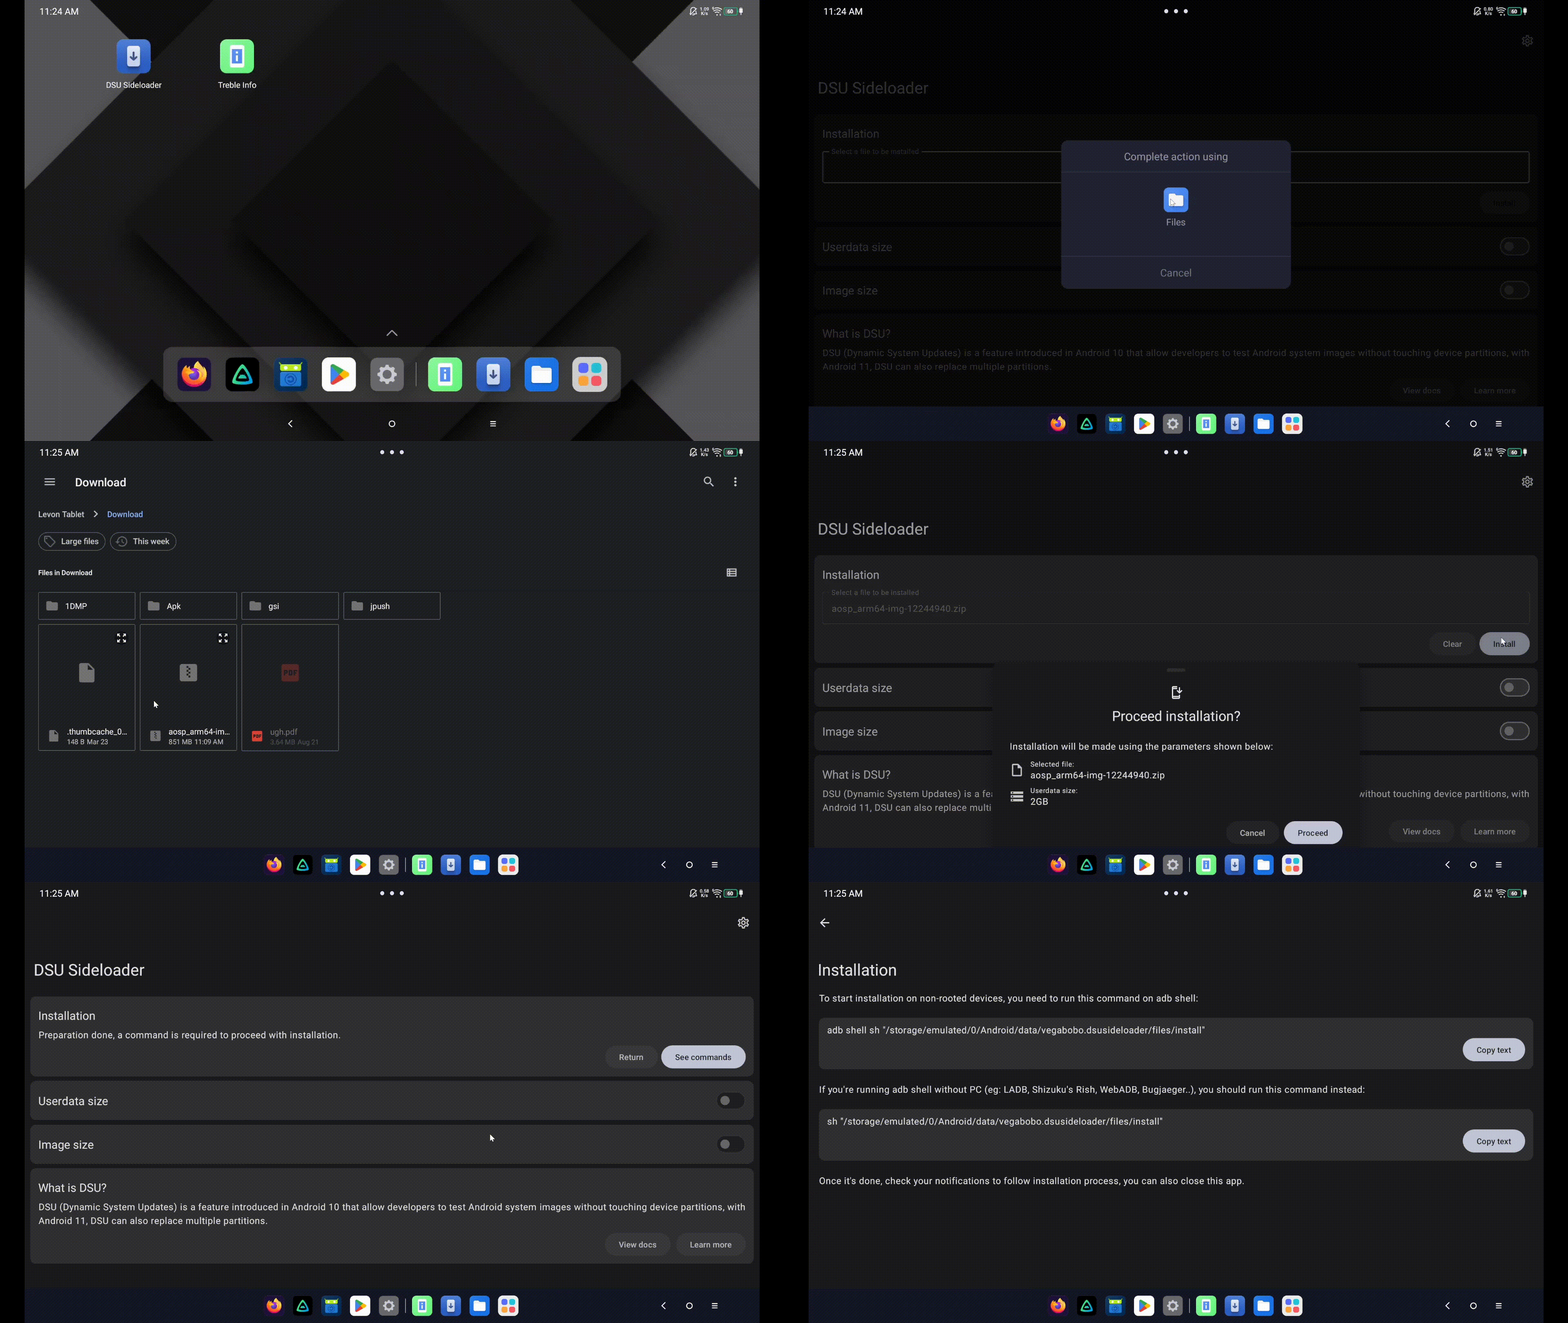
From here, you need to use the DSU Sideloader app to start the DSU activity.
You should then execute the command given by DSU Sideloader. In this case:
> adb shell sh "/storage/emulated/0/Android/data/vegabobo.dsusideloader/files/install"
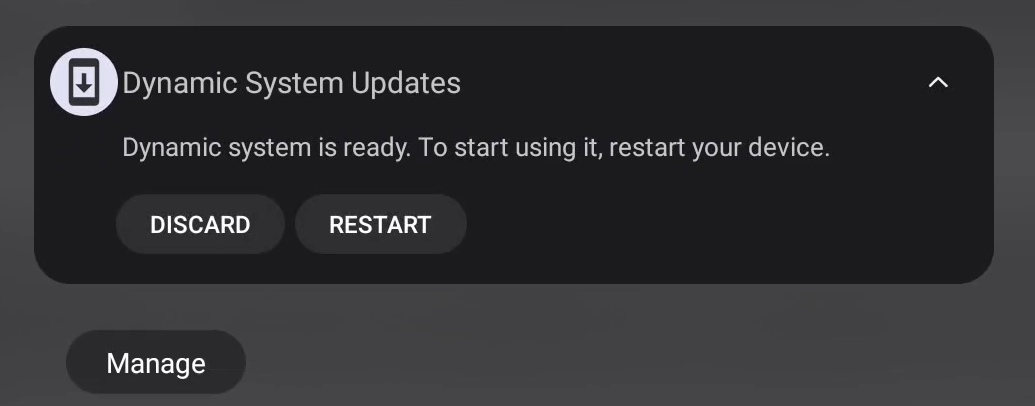
The DSU activity will show up in the notification panel.
The device will reboot and you should be greeted with the GSI you downloaded.
To pull the boot image, we need to find the boot partition of the device. If the device is an A/B device, then there may be two boot partitions, in which case you should pull both.
NOTE: When you read the following:
generic_arm64:/ # command
The generic_arm64:/ # is to indicate a command executed on the Android device. All other lines can be regarded as command output.
Enable adb root and verify you are running as root:
> adb root
restarting adbd as root
> adb shell
generic_arm64:/ # whoami
root
See which slot you are using:
generic_arm64:/ # getprop | grep slot
[cache_key.telephony.get_slot_index]: [4367607590848824471]
[ro.boot.slot_suffix]: [_b]
generic_arm64:/ #
In this case, the device is using slot b so we should be looking for a boot_b partition. Navigate to /dev/, and look around for what should be the boot partition. This is device specific, so look around for the right partition (or partitions).
generic_arm64:/ # cd /dev/
generic_arm64:/dev # find -iname "*boot*"
...
./block/bootdevice
./block/by-name/boot_a
./block/by-name/boot_b
...
In this case we can see that there is a directory called by-name which names the specific partition we are interested in. We can now directly pull these into our PC with adb pull. You can also go ahead and pull any other partitions if you want.
> adb pull /dev/block/by-name/boot_a ./boot_a.img
/dev/block/by-name/boot_a: 1 file pulled, 0 skipped. 151.5 MB/s (100663296 bytes in 0.633s)
> adb pull /dev/block/by-name/boot_b ./boot_b.img
/dev/block/by-name/boot_b: 1 file pulled, 0 skipped. 149.7 MB/s (100663296 bytes in 0.641s)
Exit out of the DSU using the notification.
You can then push the boot.img(s) back onto the device once stock ROM is back after reboot, and verify the file type.
> adb push boot_b.img /sdcard/Download/
boot_b.img: 1 file pushed, 0 skipped. 169.0 MB/s (100663296 bytes in 0.568s)
> adb shell file /sdcard/Download/boot_b.img
/sdcard/Download/boot_b.img: Android boot image v2
End of guide


