In labs up to this point, you've been using GitHub to record and commit your work. As you learned in lecture, GitHub is merely a hosting service (with some other nice features) for git. In this lab, we'll be walking through the real git.
As you've done before, everything git related usually starts with a clone. Once you have created your copy of the Lab 4 repository (lab-4-<GitHub username>), click the green "Clone or download" button in the top right, then copy the URL it shows you. Now you can run the command git clone <URL>. As we know, all this command does is to download a copy of the remote repository to your local machine.
Now if you run ls, you should see a directory called lab-4-<GitHub username>. cd into this directory and run ls again and you should see all the same files that GitHub shows in the browser for this repository.
One of the most frequently used git commands is git status. Any time you are inside a git repository (i.e. your current directory or one of its parents is an initialized git repository), you can run git status to see precisely what state your repository is in.
Make sure you are in the lab 4 directory and try running git status. The output of this command tells you many things.
The first line On branch master tells you that you are currently working from the master branch of the repository (more on branches later).
The second line Your branch is up to date with 'origin/master' tells you that your local repository (the files stored on your computer) are in the same state as the files stored remotely on the GitHub repository.
The third line nothing to commit, working tree clean tells you that you have not made any changes to the files in the repository at this point.
It is important to understand how useful git and GitHub can be for collaboration. For a moment, let's pretend that you and someone else are both working on solving Lab 4 together. We will simulate someone else pushing changes to Lab 4 while you are working on it locally. To do this, make sure you have already cloned the Lab 4 repo onto your local machine. Next, in your web browser, navigate to your Lab 4 repository in GitHub.
Open the answers.txt file in GitHub from the web browser and under Part 1, write a message to yourself. This can be anything you want. Go ahead and commit this message to the master branch. Again, make sure this change is made from GitHub in your web browser!!
Now, locally in your terminal, run git status again in the Lab 4 directory. Notice the output this time! Wait.... it's still the same. Why does git status tell us Your branch is up to date with 'origin/master' if we just made a change to the master branch in GitHub?
Even though we made a change to a file in the remote server (GitHub), we need to tell git that it needs to fetch new information from the remote server before it will know that we made a change. Run git fetch in the Lab 4 directory and then git status again.
This time notice how git tells you
Your branch is behind 'origin/master' by 1 commit, and can be fast-forwarded. (use "git pull" to update your local branch)
This means that there is one commit (the message you wrote to yourself) on the branch origin/master that is not in your current branch. Let's get this commit into your current branch! Just like git tells you, run git pull to pull the new changes from the remote branch into your local branch. If you run git status, you should see that everything is up to date again (also look at answers.txt and see that your message is now there!).
Open answers.txt on your local computer (NOT FROM GITHUB) with a text editor and fill out the remaining question for Task 1
Now that we've made a change to answers.txt we need to actually commit this change. Run git status in the Lab 4 directory. Notice how git lists the Changes not staged for commit. As expected, answers.txt is listed as a file that we have changed.
To commit the change, we need to first stage answers.txt so it is ready to be committed. To do this, run git add answers.txt and then run git status again. git now tells us that Changes to be committed: includes answers.txt.
Perfect! We are now ready to make our commit. Run git commit and in the text editor that pops up, write a detailed commit message such as "Added description for 'git fetch' in answers.txt". After you save your commit message and exit the text editor, your commit is complete!
Now if we go back to GitHub, we should see this change right???? WRONG! Remember from Task 1 that syncing your local git repository with the remote server (GitHub) is not automatic! To push your local changes to the remote server, run git push. Now check the GitHub Lab 4 repository again. BAM! There are your fancy new changes.
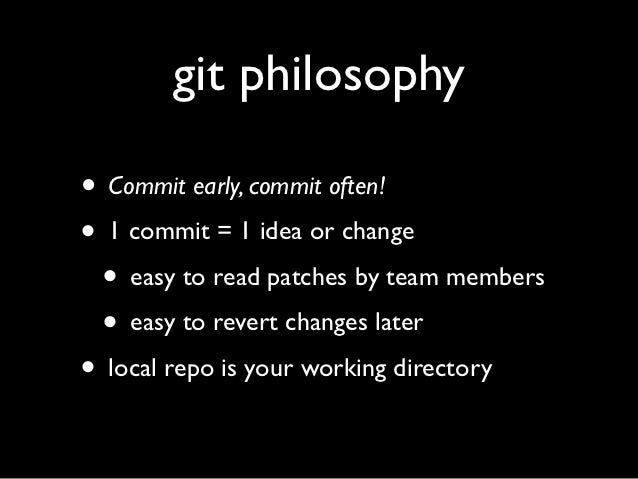
IMPORTANT NOTE: In a git repository, NONE of your work will be saved without making a commit. A commit is the only way for you to tell git that it needs to care about the changes you made. Because of this, a common and extremely important git mantra is COMMIT EARLY AND COMMIT OFTEN. Keeping this in mind as you work on more involved projects with git will save you hours of headache about losing files and undoing yesterday's stupid, dumb changes you thought were genius at 3 in the morning (I speak from experience).
Open answers.txt on your local computer (NOT FROM GITHUB) with a text editor and answer the question for Task 2, then repeat the steps we just did to commit this change and push it to GitHub.
Now that we know the basics of pulling changes from remote, committing changes, and pushing local changes to a remote server, the usefulness of git for large projects should be clear.
Again, let's imagine that you and another student are working on this lab together. While planning how to complete the lab on time, you two have decided that the other student will work on task 1 while you concurrently work on the rest of the tasks. In git, when different work items (in this case the different tasks) are distributed to different people to work on, it is good practice to create a new branch for each work item.
To understand what a branch is, try to visualize a git repository as a timeline of changes. Along this timeline, there are commits which represent a milestone of changes being saved to the repository. At any point in time, you may create a new branch which splits the current timeline into two parallel lines that are maintained seperately and receive their own commits.
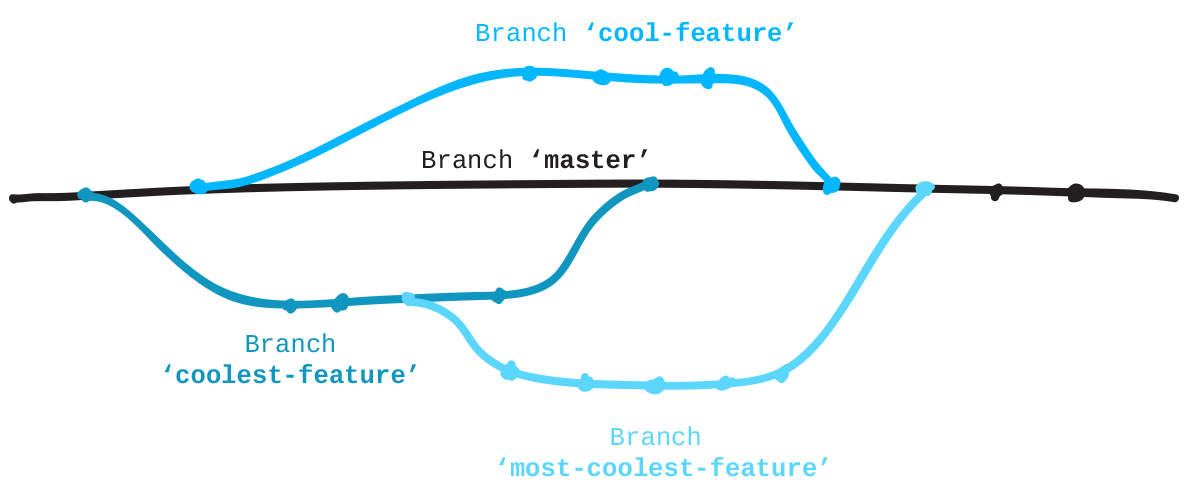
For our example with this lab, we would create two branches: task-1-other-student and tasks-2-to-end. The other student would work on task 1 on their branch, making and committing changes along the way. When they are done with task 1, they would merge their task-1-other-student branch with the master branch. A merge incorporates the changes from one branch into another.
To see what branches are currently active in your local repository, run git branch. Right now, you should only see master because this is the only branch we have worked on locally. Notice how 'master' is green and has a '*' next to it. This means that we currently have the master branch checked out (i.e. we are working off the master branch and changes we commit will go here).
To see all branches (both local and remote) run git branch --all. This time you should see several more branches. The two we care about for this lab are remotes/origin/branch-A and remotes/origin/branch-B. Currently, both of these branches are remote and to work off of them, we need to create a local branch that will track these remote branches.
To do this, first run git checkout origin/branch-A. git will let you know that you are now in a detached head state. All this means is that the current branch you are on does not have a corresponding local branch. To create a local branch for our remote branch-A, run the exact command that git tells you to: git checkout -b branch-A. This command does two things: First, it creates a new local branch from our current state called branch-A, then it checks this branch out to make it our active branch. Now if we run git branch again, we will see we have a local copy of branch-A and that it is our currently active branch.
Repeat these same steps to create a local copy for branch-B.
Now when you run git branch, you should see 3 branches: 'master', 'branch-A', 'branch-B'.
The other branches are present in the repository, but not currently active. To change branches (think of this as jumping from one parallel git timeline to another in our timeline visualization) run git checkout branch-A. If all is well, you should run git branch again and see that branch-A is now your active branch. From branch-A open up answers.txt in a text editor. Notice how the answers you committed earlier are no longer there! This is because the commits that contain your answers were made to the master branch and we are now on branch-A. Do not worry though! We will get your changes back later.
While working off of branch-A (i.e. you have run git checkout branch-A), open answers.txt in a text editor and under the line that tells you to write a message from branch-A, write yourself a message! Then commit this change using the steps we learned earlier. When you try to push this branch, notice how git tells you fatal: The current branch branch-A has no upstream branch. To push the current branch and set the remote as upstream, use git push --set-upstream origin branch-A. All this means is that git does not know which remote branch to push this local branch to. Run the exact command git tells you to resolve this problem.
Next, run git checkout branch-B to checkout branch-B.
Open answers.txt again. Notice how the change you just made is not there anymore! Again, this is because we have switched to a different branch which is not aware of the commit you just made.
In answers.txt under the line that tells you to write a message to yourself from branch-B, write another message! Again, follow the steps we learned earlier to commit this change.
Now, we will create a new branch branch-C and make another change.
The command to create a new branch is git branch NEW_BRANCH_NAME. It is very important to realize that in git, when a new branch is created, it branches from the currently active branch. Since we are currently on branch-B, if we run git branch branch-C, a new branch branch-C will be created which contains all of the commits in branch-B up to this point.
Run git branch branch-C and then git branch again. Notice how branch-B is still the active branch, but now a new branch branch-C has been created. git branch merely creates a branch, but does not check it out as the active branch. Switch to branch-C by running git checkout branch-C.
Again, open answers.txt and notice how, exactly as we predicted, the message we wrote from branch-B is there, but the message we wrote from branch-A is not. Under the line that tells you to write yourself a message from branch-C, write a message and commit it as we did above.
Now that we've made a bunch of changes, we need to get them all back into the master branch!
Ensure that you have committed all the changes you've made, and check out the master branch.
Open up answers.txt and notice how none of the messages we wrote from the various branches are there! There are three branches we need to incorporate into the master branch: branch-A, branch-B, and branch-C.
To merge branch-A into the master branch, run git merge branch-A.
Remember how earlier we ran git pull to retrieve changes from the remote master branch into our local master branch? The command git pull does two things. First, it runs git fetch to retrieve the specified branch from remote and it then runs git merge to merge those fetched changes into the current branch. We are doing the exact same process here, except we tell git to merge changes from a different local branch branch-A into the local master branch (since we are merging a local into another local branch, the fetch step of git pull is not needed and we just run git merge).
Open answers.txt again. We now have the message we wrote from branch-A! Using this same process, merge the changes from branches branch-B and branch-C into master. If everything went smoothly, answers.txt should now contain all the answers you previously wrote along with all the messages from the various branches. Nicely done!
Mistakes happen, and it's ok. git is here to help. In this section we will go over a few useful tips for using git when things go south.
Make sure you have no un-committed changes (i.e. git status shows nothing to commit) and that GitHub is up to date with your local repo (i.e. run git push to push all your local changes to GitHub).
Run rm answers.txt (yes, really) and with the press of the enter key, permanently wipe away all of the hard work you've put into this lab up until this point. POOF! As your finger descends onto the enter key, time begins to slow down... You realize the mistake you're about to make but it's too late, you can't pull back fast enough... And with that... It's over. Gone.
If it weren't for git, you'd be royally screwed. Run git status and notice how git tells you that you deleted answers.txt. To remedy this mistake, simply run git checkout answers.txt.
Amazingly, answers.txt is right back how it was and there was no need to worry in the first place!
The command git checkout FILENAME will reset the file FILENAME to the last committed state that git knows about. This command will not, however, retrieve uncommitted changes!!! If we had made a change to answers.txt and then deleted it before committing this change, that change would be lost forever!
Again, make sure you have no un-committed changes (i.e. git status shows nothing to commit).
In the lab directory, there should be a bash script called TODO_6_Setup.sh. Run /bin/bash TODO_6_Setup.sh.
If everything went smoothly..... Wait wtf. What did this script do. Shit. Ok, looks like someone was trying to mess with you and changed around what this script does and it thoroughly messed with your repo. It looks like this script deleted answers.txt again. Not to worry! We know how to fix this. Follow the same steps as TODO 5 to get answers.txt back!
Lesson 1: NEVER RUN A RANDOM BASH SCRIPT WITHOUT FIRST UNDERSTANDING WHAT IT DOES EVEN IF A LAB TELLS YOU TO

Ok by now you probably realize that the above steps no longer work. When running git checkout answers.txt you are greeted with a beautiful message that says error: pathspec 'answers.txt' did not match any file(s) known to git. This problem is a little more involved than a simple accidental deletion of a file.
Time for plan B. We have our repo stored in GitHub along with our local copy, right? So we should just be able to go to our repository on GitHub, open up answers.txt in the web browser and copy and paste all of our hard work back to our local repo! Sounds great! Go ahead and do that now.
GITHUB SAVES THE DAY AGAIN!!!!

Ok so that didn't work.... answers.txt is no longer in the GitHub repository either! Now what?
Time for Plan C, the actual way to fix this. First, open the TODO_6_Setup.sh to see what it actually did. It looks like this script first deleted answers.txt, then actually committed this change and pushed this changed to our GitHub repo. That wasn't very nice of this person to do. Luckily, we are git pros and can fix any problem thrown our way!
Run git log. This command displays a list of all of the commits that have been made to this branch up to this point.
We can see that the most recent commit has a nasty message and the change that was actually committed was to delete our precious answers.txt file.
This commit is identified by a long string of numbers and characters that looks something like this b6697b978139bfdcb2d6ebfa2aeb90be81d06c44
To get answers.txt we will employ the command git revert. A revert is a reversal of the changes from a specific commit. If we revert the commit that the bad script made, we will be undoing the deletion of answers.txt and thus have answers.txt back as it was before.
From the git log list, copy the long identifier for the commit made by the script. Press q to exit out of the log view.
Run the command git revert BAD_COMMIT_ID_YOU_COPIED. As if you were making a normal commit, git will open a text editor where you can create a message for this revert and then commit it. Save your message and exit the text editor. Your revert is now complete! You should see answers.txt back and better than ever!
Make sure to also run git push to push this revert to your GitHub repository as well!
Lesson 2: The only thing in git that is permanent is deleting un-committed changes, or deleting changes that have not been pushed to a remote server. Everything else can be reversed!