This is a step-by-step guide to set up MemoriLens, a Raspberry Pi Zero as a time-lapse camera and automatically upload the images to a server.
- Raspberry Pi Zero
- Camera module (2, 3) and Camera Adapter for Pi Zero
- SD Card (minimum 8 GB)
- HDMI to mini HDMI cable, USB to micro USB cable, micro USB to USB cable
- WiFi Network - 2.4GHz
- SSH Access to a remote server
- Keyboard and Monitor (if not set up through SSH)
-
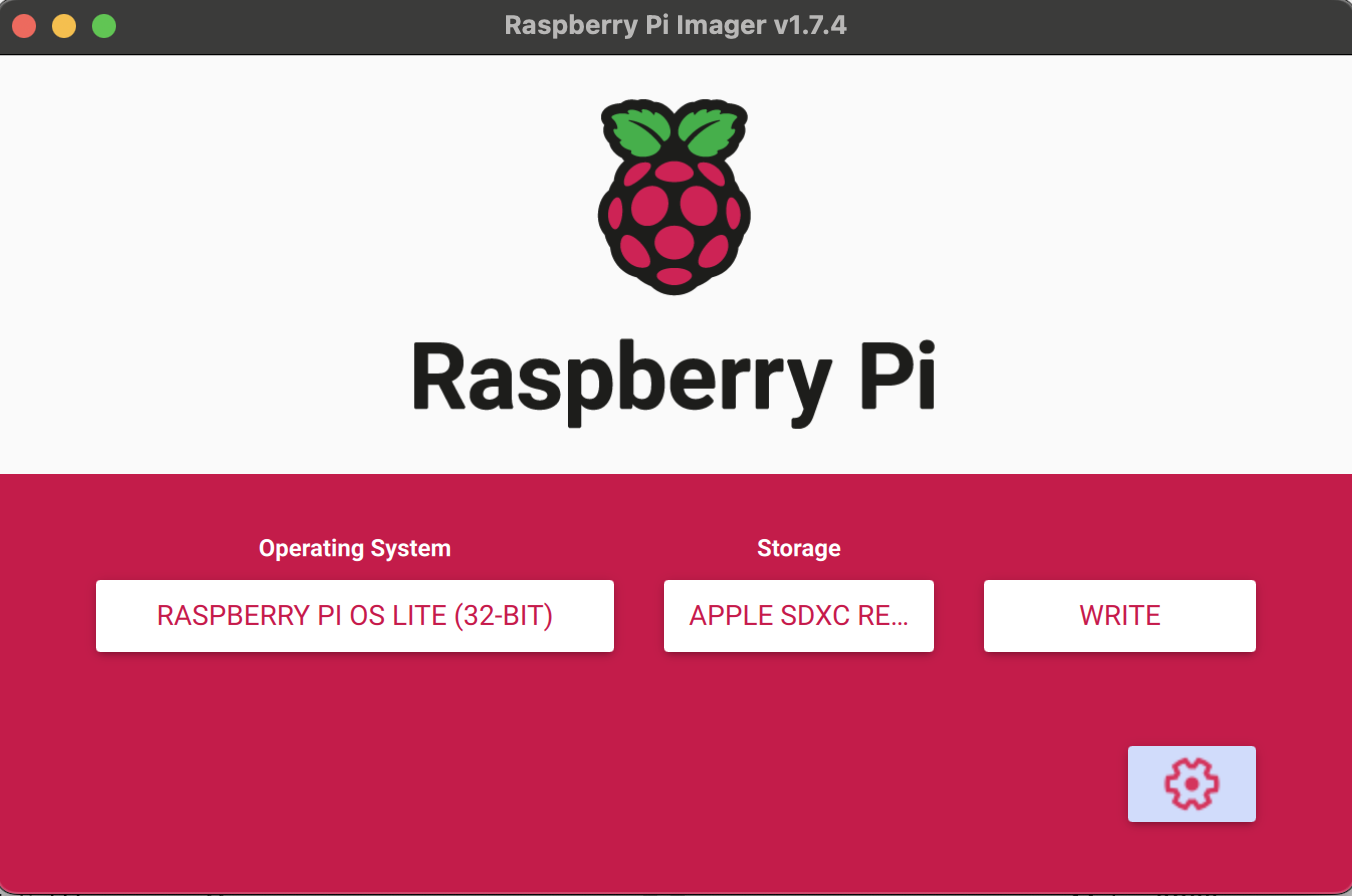
Load Raspberry Pi OS lite 32 bit to the SD card using Raspberry Pi Imager: https://www.raspberrypi.com/software/
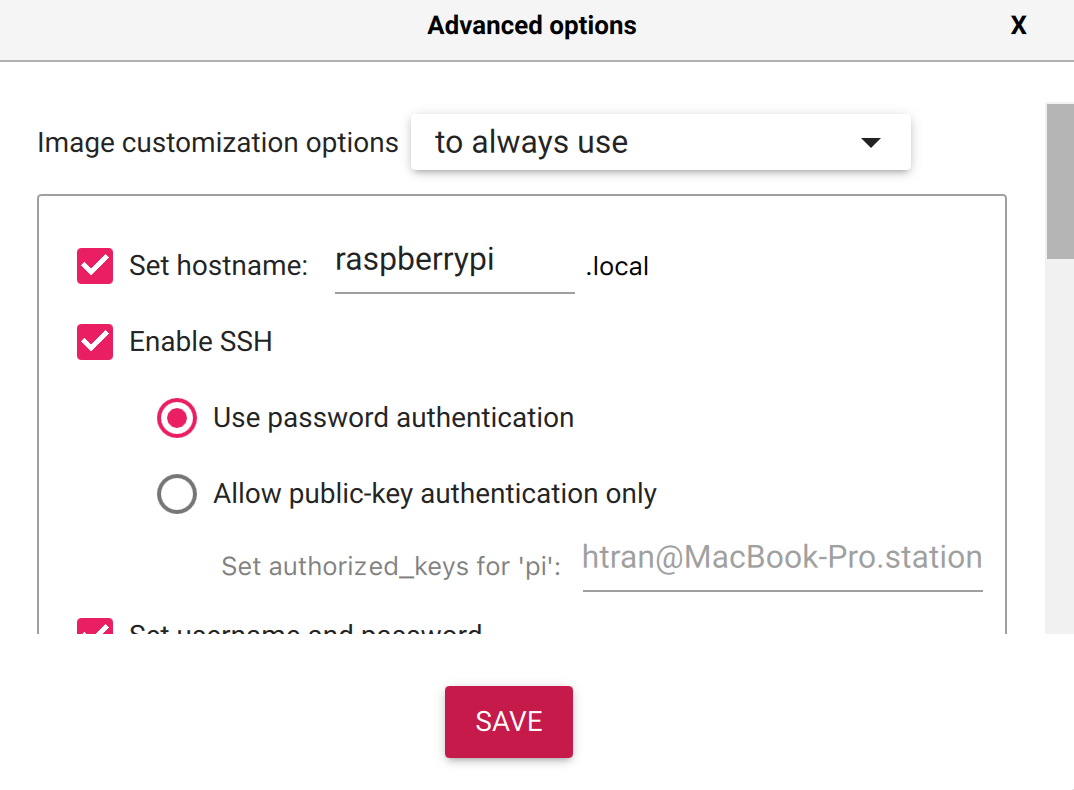
- Config the SSH and Wifi at the UI
-
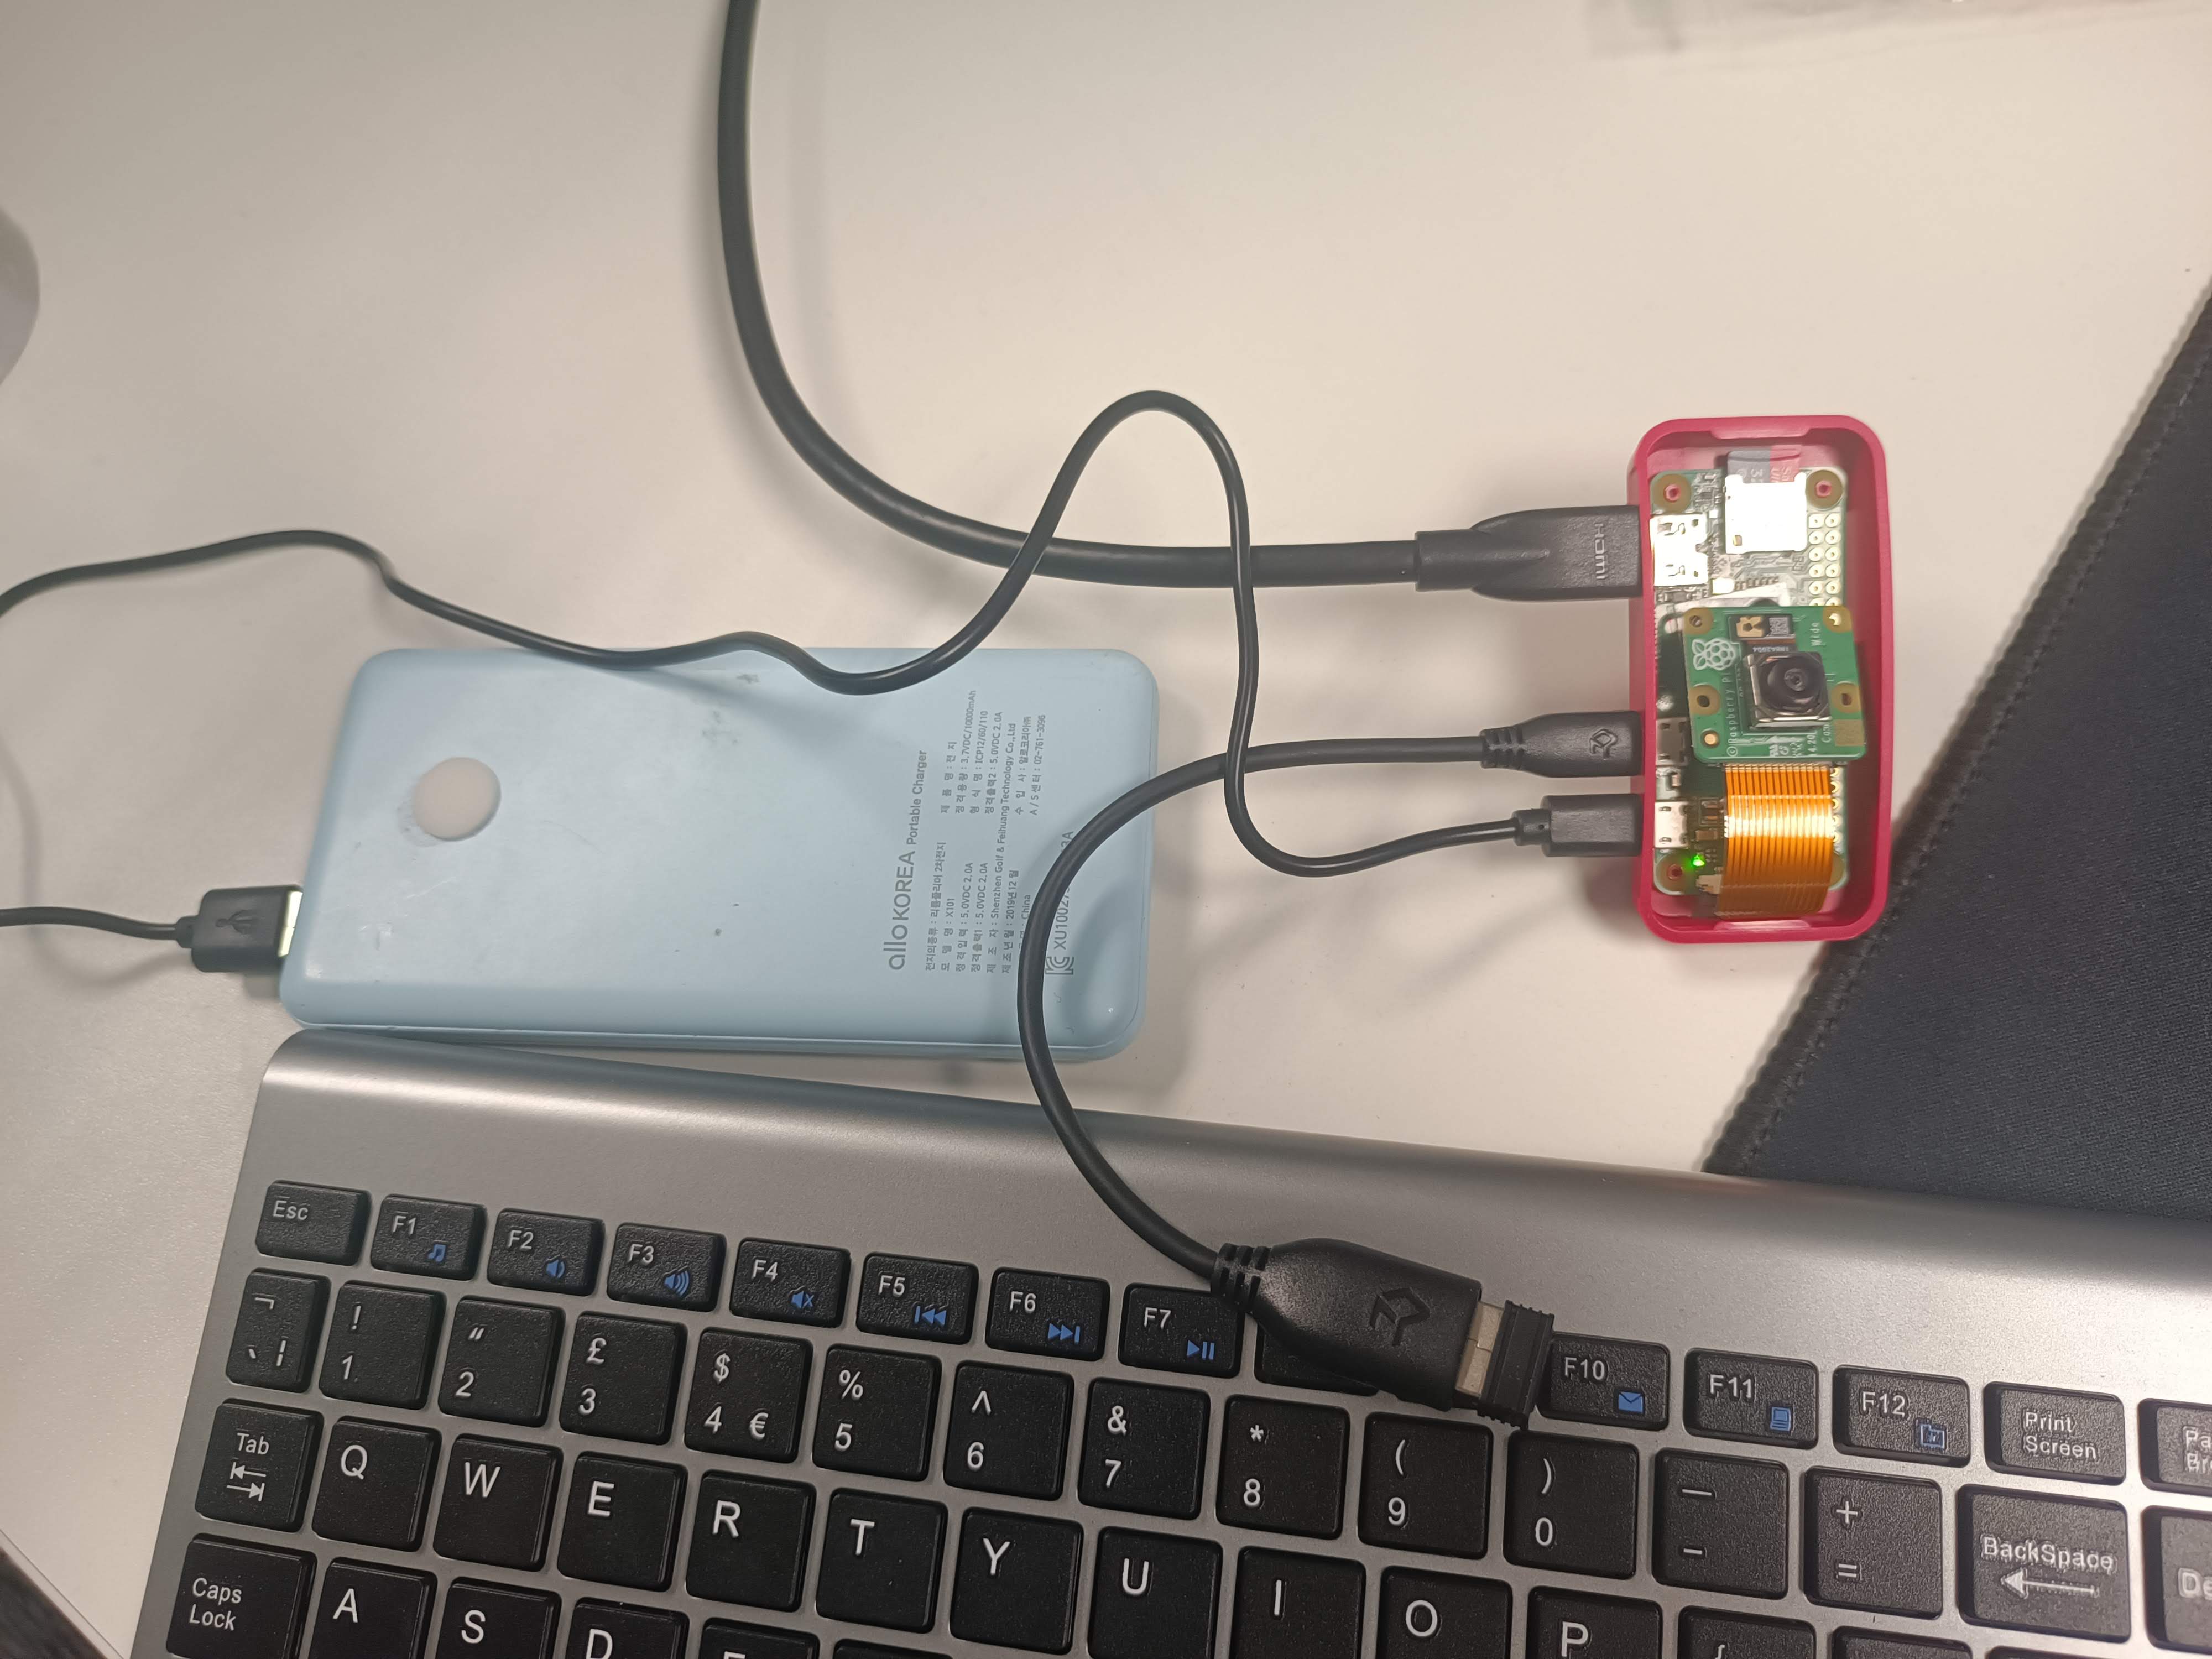
First boot with Raspberry Pi Zero and set it up as shown in image below.
-
Login with the username
piand passwordpass1234(Note: the password is configed on step 1) -
Configure WiFi:


sudo raspi-config
Select System Options -> Wireless LAN and configure your WiFi network.
- Update software:
sudo apt update
sudo apt full-upgrade
- Create a directory for saving images:
mkdir webcam
- Create a script for time-lapse capture:
nano webcam.sh
Add the following code, reference: https://docs.arducam.com/Raspberry-Pi-Camera/Native-camera/Libcamera-User-Guide/
#!/bin/bash
script camera_log.txt
yearmonth=$(date “+%Y%m”)
day=$(date “+%d”)
cd /home/pi/webcam
mkdir -p $yearmonth
cd $yearmonth
mkdir -p $day
cd $day
libcamera-still  -n -t 2000 –width 2560 –height 1440 –rotation 180 –exposure sport –autofocus-speed fast –autofocus-range full -o $(date “+%Y%m%d_%H%M%S”).jpg
sleep 28
libcamera-still  -n -t 2000 –width 2560 –height 1440 –rotation 180 –exposure sport –autofocus-speed fast –autofocus-range full -o $(date “+%Y%m%d_%H%M%S”).jpg
exit
- Grant privilege to the file:
chmod +x webcam.sh
- Create a schedule for running the file:
crontab -e
Add the following line:
* * * * * /home/pi/webcam.sh
This will run the script every two minutes.
- Create a sync job to upload data to a server:
ssh user@server_ip
ssh-keygen
cat .ssh/id_rsa.pub | ssh user@server_ip “cat >> .ssh/authorized_keys”
crontab -e
Add the following line:
* * * * * rsync -avz /home/pi/webcam/* user@server_ip:/path/to/destination/
- Turn on auto-login:
sudo raspi-config
Select System options > Boot / Auto login and turn off the option for auto login in console by choose B2: Console Autologin
- Configure restart for failed jobs:
nano check.sh
Add the following code:
if grep -q “ERROR” camera_log.txt; then sudo reboot; fi
if grep -q “error” camera_log.txt; then sudo reboot; fi

sudo chmod +x check.sh
crontab -e
Add the following line:
* * * * * sudo /home/pi/check.sh
This will run the check script every minute.
- Create a log file:
*/2 * * * * touch /home/pi/camera_log.txt
This will create an empty log file every two minutes.
Feel free to contribute to this project by submitting issues or pull requests.