A smart, reliable, and highly customizable debug menu library for Android apps that supports screen recording, network activity logging, generating bug reports, and many other useful features.
See it in action
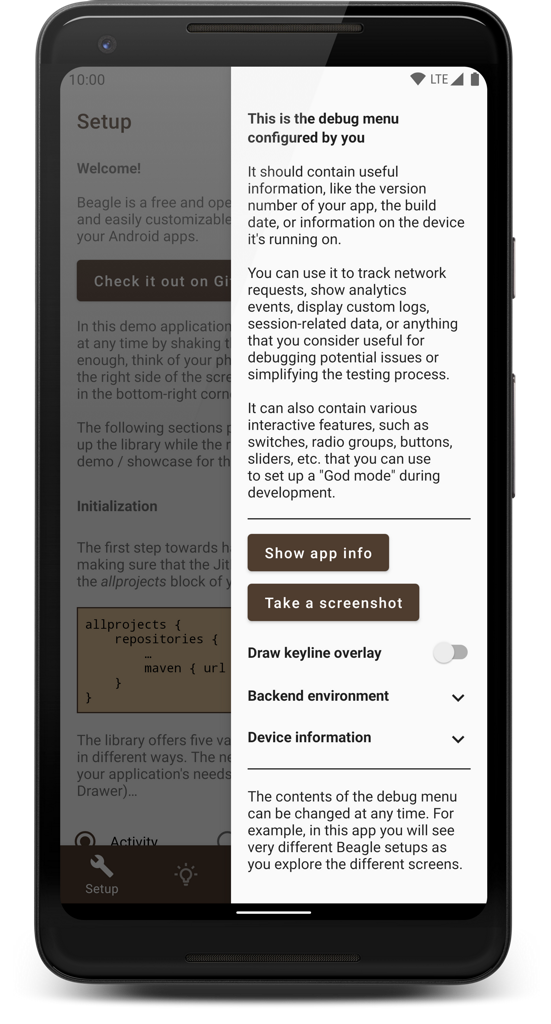
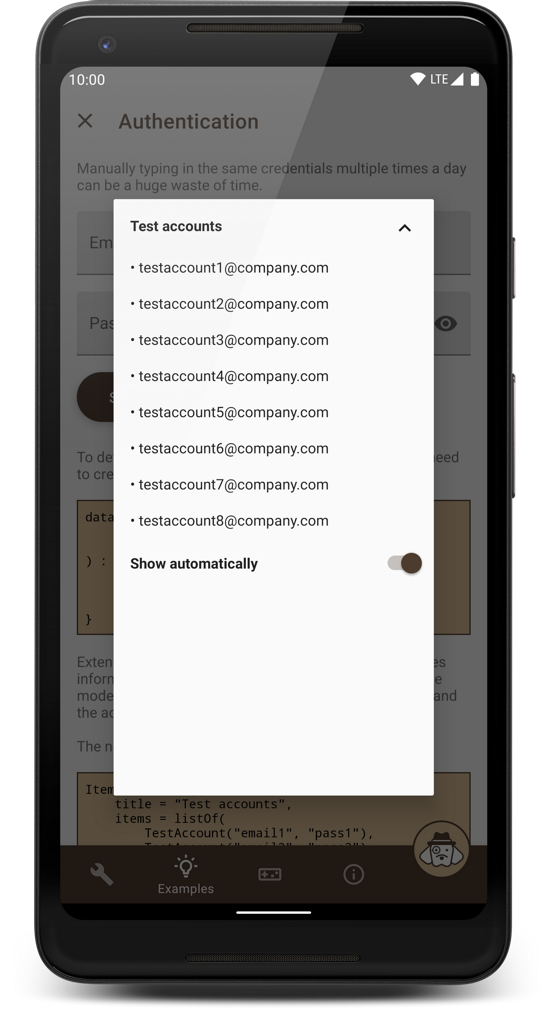
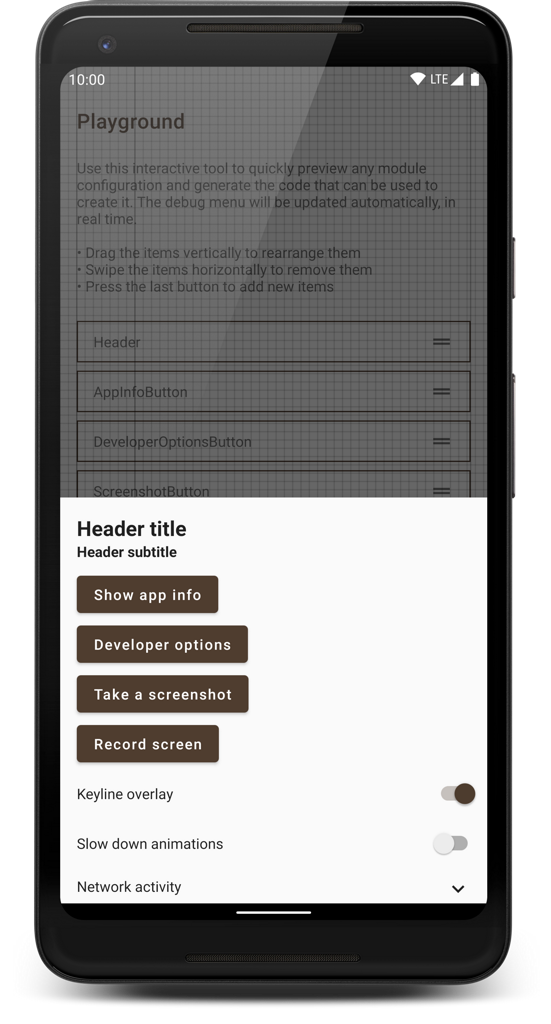
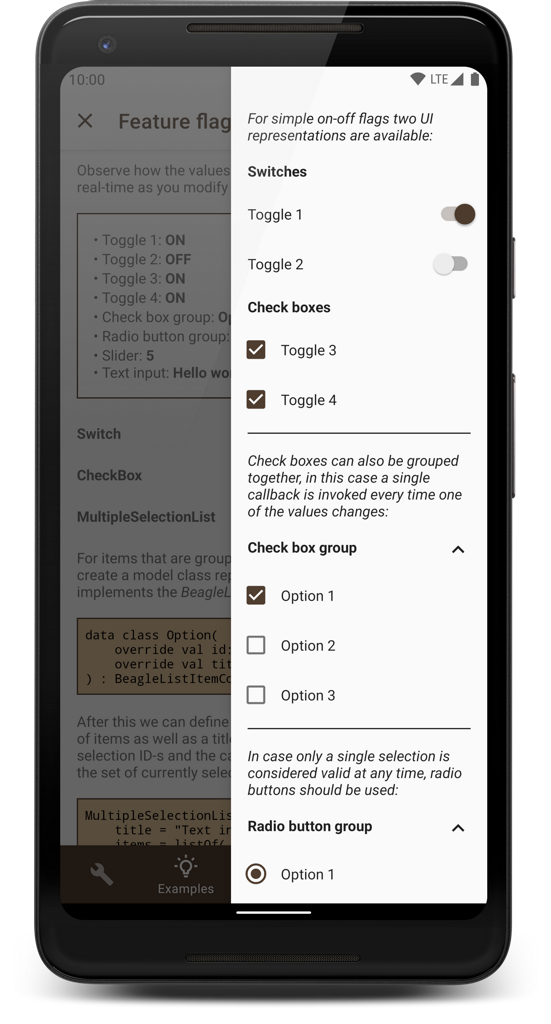
Clone this repository, pick a build variant and run the app configuration. It should look something like this:
This demo application also contains instructions on how to set up Beagle and how to implement the various features that are being showcased. You should definitely consider giving it a try if you're interested in using the library in your projects. If you don't feel like building it for yourself, you can also download it from the Play Store:
The tutorials in the app cover everything from this readme, but in more detail. Another way to get an idea of what can be achieved with the library is this article, which presents various problems that can be solved with Beagle.
Use it in your project
If the wall of text below is too long for your taste, check out this gist that contains all the code you need for a nice configuration. Otherwise, let's do it step by step:
- Minimum SDK level: 16+
- Target SDK level: 31+
- Language: Kotlin 1.5.21+
Make sure that the following is part of your project-level build.gradle file:
allprojects {
    repositories {
        …
        maven { url "https://jitpack.io" }
    }
}The actual UI of the debug menu can be displayed in multiple ways, which is specified by the suffix of the dependency. The following versions exist:
- ui-activity - Displays the debug menu as a new screen (not recommended: modals are more useful).
- ui-bottom-sheet - Displays the debug menu as a modal bottom sheet (recommended).
- ui-dialog - Displays the debug menu as a modal dialog (recommended).
- ui-drawer - Displays the debug menu as a side navigation drawer (highly recommended).
- ui-view - Displaying the
DebugMenuViewis your responsibility (not recommended: shake to open,Beagle.show(),Beagle.hide(), the relatedVisibilityListeneras well as the inset handling logic won't work out of the box). - noop - No UI, no logic. It has the same public API as all other variants, but it does nothing (this is intended for production builds).
So, for example, if you prefer the Drawer UI, something like the following needs to be added to your app-level build.gradle file (check the widget below the code snippet for the latest version):
dependencies {
    …
    def beagleVersion = "2.6.7"
    debugImplementation "com.github.pandulapeter.beagle:ui-drawer:$beagleVersion"
    releaseImplementation "com.github.pandulapeter.beagle:noop:$beagleVersion"
}
The latest version is:
Note: In case of the drawer UI, if you have overwritten the Activity's onBackPressed() method, you might notice that the default back navigation handling does not always work as expected. To fix this, in every Activity's onBackPressed() you should check that Beagle.hide() returns false before doing any other checks or calling the super implementation.
Just one line of code, preferably in the Application's onCreate() method:
Beagle.initialize(this)Optionally you can add the following parameters to this function:
- The appearance of the menu can be personalized by specifying an Appearance instance. For example, here you can specify a custom theme for the debug menu using the
themeResourceIdproperty, in case the one used by theApplication/Activityis not suitable. Note: It's recommended to extend a.NoActionBarMaterial theme. - The behavior of the menu can be personalized by specifying a Behavior instance. For example, adjusting the shake to open threshold or the strength of the haptic feedback is a frequent use case of this class.
By default you can fetch Beagle by shaking the device.
After this a number of modules should be provided, but this configuration can be changed at any time (from any thread) and the UI will automatically be updated. The simplest way of doing this is by calling:
Beagle.set(module1, module2, …)At this point you should be aware of two options:
- The list of built-in modules. Every file in this package is documented. These modules should cover most use cases and have the advantage of also providing a fake, noop implementation which means that no part of their logic is compiled into your release builds.
- The ability to write custom modules. For this a good starting point is looking at the built-in implementations from above, but this document also provides some guidance.
Check out the showcase app for some ideas on what is possible with the built-in modules or for an interactive tool that can be used to preview any module configuration and generate the code for it. A more visual guide to some of the possibilities is this article.
Here is a minimal example that should work for most projects:
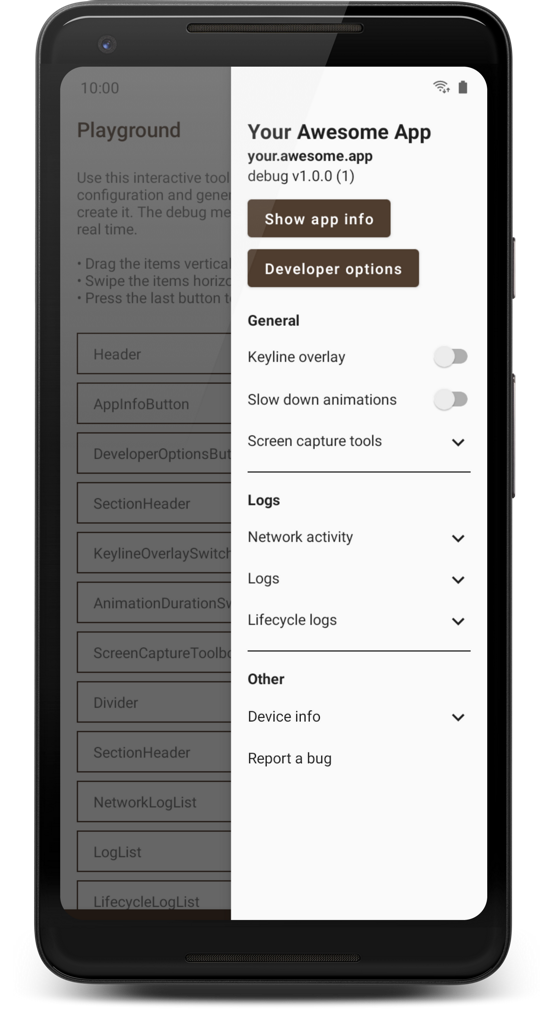
Beagle.set(
    HeaderModule(
        title = getString(R.string.app_name),
        subtitle = BuildConfig.APPLICATION_ID,
        text = "${BuildConfig.BUILD_TYPE} v${BuildConfig.VERSION_NAME} (${BuildConfig.VERSION_CODE})"
    ),
    AppInfoButtonModule(),
    DeveloperOptionsButtonModule(),
    PaddingModule(),
    TextModule("General", TextModule.Type.SECTION_HEADER),
    KeylineOverlaySwitchModule(),
    AnimationDurationSwitchModule(),
    ScreenCaptureToolboxModule(),
    DividerModule(),
    TextModule("Logs", TextModule.Type.SECTION_HEADER),
    NetworkLogListModule(), // Might require additional setup, see below
    LogListModule(), // Might require additional setup, see below
    LifecycleLogListModule(),
    DividerModule(),
    TextModule("Other", TextModule.Type.SECTION_HEADER),
    DeviceInfoModule(),
    BugReportButtonModule()
)
If you ever need to add temporary modules, Beagle.add() has an optional lifecycleOwner parameter that automatically removes the specified modules once the provided lifecycle is over. Manually calling Beagle.remove() with module ID-s is also an option.
Logging
While calling Beagle.log() is the simplest way to add items to LogListModule, a special workaround is needed to access this functionality from pure Kotlin modules. Another frequent use case is integration with Timber.
To access the same functionality that Beagle.log() provides from a pure Kotlin / Java module, first you need to add the following to the module in question:
dependencies {
    …
    api "com.github.pandulapeter.beagle:log:$beagleVersion"

    // Alternative for Android modules:
    // debugApi "com.github.pandulapeter.beagle:log:$beagleVersion"
    // releaseApi "com.github.pandulapeter.beagle:log-noop:$beagleVersion"
}
These libraries provide the BeagleLogger object which needs to be connected to the main library when it is initialized in the Application class:
Beagle.initialize(
    …
    behavior = Behavior(
        …
        logBehavior = Behavior.LogBehavior(
            loggers = listOf(BeagleLogger),
            …
        )
    )
)
To add log messages, now you can call the following:
BeagleLogger.log(…)The messages list will be merged with the ones logged using the regular Beagle.log() function (unless they are filtered by their tags) and can be displayed using a LogListModule. You can also use BeagleLogger.clearLogEntries() if you cannot access Beagle.clearLogEntries().
To automatically add events logged with Timber to the debug menu, planting a special tree is the simplest solution:
Timber.plant(
    object : Timber.Tree() {
        override fun log(priority: Int, tag: String?, message: String, t: Throwable?) =
            Beagle.log("[$tag] $message", "Timber", t?.stackTraceToString())
    }
)
To create a special LogListModule that only displays these logs, simply set the label constructor parameter of the module to "Timber".
Intercepting network events
Not bundling the network interceptor with the main library was mainly done to provide a pure Kotlin dependency that does not use the Android SDK, similarly to the logger solution described above. However, another reason was to provide the ability to choose between multiple implementations, in function of the project tech stack. At the moment Beagle can hook into two networking libraries to provide content for NetworkLogListModule, but manually calling Beagle.logNetworkEvent() is always an option.
Add the following to the module where your networking logic is implemented:
dependencies {
    …
    api "com.github.pandulapeter.beagle:log-okhttp:$beagleVersion"

    // Alternative for Android modules:
    // debugApi "com.github.pandulapeter.beagle:log-okhttp:$beagleVersion"
    // releaseApi "com.github.pandulapeter.beagle:log-okhttp-noop:$beagleVersion"
}
This will introduce the BeagleOkHttpLogger object which first needs to be connected to the main library, the moment it gets initialized:
Beagle.initialize(
    …
    behavior = Behavior(
        …
        networkLogBehavior = Behavior.NetworkLogBehavior(
            networkLoggers = listOf(BeagleOkHttpLogger),
            …
        )
    )
)
The last step is setting up the Interceptor (the awkward casting is there to make sure the noop implementation does nothing while still having the same public API):
val client = OkHttpClient.Builder()
    …
    .apply { (BeagleOkHttpLogger.logger as? Interceptor?)?.let { addInterceptor(it) } }
.build()Add the following to the module where your networking logic is implemented:
dependencies {
    …
    api "com.github.pandulapeter.beagle:log-ktor:$beagleVersion"

    // Alternative for Android modules:
    // debugApi "com.github.pandulapeter.beagle:log-ktor:$beagleVersion"
    // releaseApi "com.github.pandulapeter.beagle:log-ktor-noop:$beagleVersion"
}
This will introduce the BeagleKtorLogger object which first needs to be connected to the main library, the moment it gets initialized:
Beagle.initialize(
    …
    behavior = Behavior(
        …
        networkLogBehavior = Behavior.NetworkLogBehavior(
            networkLoggers = listOf(BeagleKtorLogger),
            …
        )
    )
)
The last step is setting up the Logger (the awkward casting is there to make sure the noop implementation does nothing while still having the same public API):
val client = HttpClient(engine) {
    …
    (BeagleKtorLogger.logger as? HttpClientFeature<*,*>?)?.let { install(it) }
}
Displaying crash logs
The library can intercept uncaught exceptions and display their stack trace in a dialog. Users will be able to share the crash report using the bug reporting screen that gets opened automatically. This functionality is achieved through a separate dependency that should be added to the main module (where Beagle is initialized):
dependencies {
    …
    debugImplementation "com.github.pandulapeter.beagle:log-crash:$beagleVersion"
    releaseImplementation "com.github.pandulapeter.beagle:log-crash-noop:$beagleVersion"
}
After the dependencies are added, the newly introduced BeagleCrashLogger object should be connected to the main library:
Beagle.initialize(
    …
    behavior = Behavior(
        …
        bugReportingBehavior = Behavior.BugReportingBehavior(
            crashLoggers = listOf(BeagleCrashLogger),
            …
        )
    )
)
Enabling this feature will disable the crash collection of Firebase Crashlytics, as using the two simultaneously has proved to be unreliable.
Improving encapsulation
The noop implementations of every public artifact are the default ways of not including Beagle-related logic in your production releases. While this should be good enough for most projects, it can be improved by creating a separate wrapper module for the debug menu. This would mean hiding every call to Beagle behind an interface that has an empty implementation in release builds. This approach has its own benefits and drawbacks:
- Advantages
- No Beagle imports outside of the wrapper module
- Having a single entry-point to all features related to the debug menu
- Disadvantages
- More cumbersome initial setup
- Losing the ability to use Beagle features in pure Kotlin modules
The debug menu UI doesn't show up
- Make sure that you're not using the
noopartifact in your current configuration - Make sure that you call the
initialize()function in your customApplicationclass, and that class is properly registered in the Manifest - Make sure that your Activity extends
FragmentActivity(for example,AppCompatActivityis a good choice). Watch out, if you're using theEmpty Compose Activitytemplate of Android Studio, you have to change the default parent class!
Crash on app launch
By default Beagle uses the current Activity's theme. However, it requires a Material theme to work, so if you have a crash caused by various theme attributes not being found, override the debug menu's theme with the themeResourceId property of the Appearance instance provided during initialization with a Material theme.
Crash when opening a third party Activity
Beagle works by adding a Fragment on top of every Activity's layout. Sometimes this is not necessary or not possible. While the library comes with a list of excluded Activity package names, you can provide additional filtering if needed, by using the shouldAddDebugMenu lambda property of the Behavior instance provided during initialization.
Gallery or Bug report screens having two toolbars
Set a .NoActionBar Material theme for the themeResourceId property of the Appearance instance provided during initialization.
Documentation
All public functions are documented with KDoc. The BeagleContract file is a good start for learning about all the built-in capabilities. For information on the individual modules, see the relevant class headers.
If you're interested in what's under the hood, this document can be helpful while navigating the source code.
Changelog
Check out the Releases page for the changes in every version.
The library uses semantic versioning: MAJOR.MINOR.PATCH where PATCH changes only contain bug fixes, MINOR changes add new features and MAJOR changes introduce breaking modifications to the API.
Known issues
Check out the Issues page for the list of known problems and for the planned enhancements of the library.
Don't hesitate to open a new issue if you find a bug or if you have any questions / feature requests!
Buy me a beer
If you found my work useful and are considering a small donation, the About section of the the showcase app has an option for you to do so. Thanks in advance!
License
Copyright 2022 Pandula Péter

Licensed under the Apache License, Version 2.0 (the "License");
you may not use this file except in compliance with the License.
You may obtain a copy of the License at

   http://www.apache.org/licenses/LICENSE-2.0

Unless required by applicable law or agreed to in writing, software
distributed under the License is distributed on an "AS IS" BASIS,
WITHOUT WARRANTIES OR CONDITIONS OF ANY KIND, either express or implied.
See the License for the specific language governing permissions and
limitations under the License.

