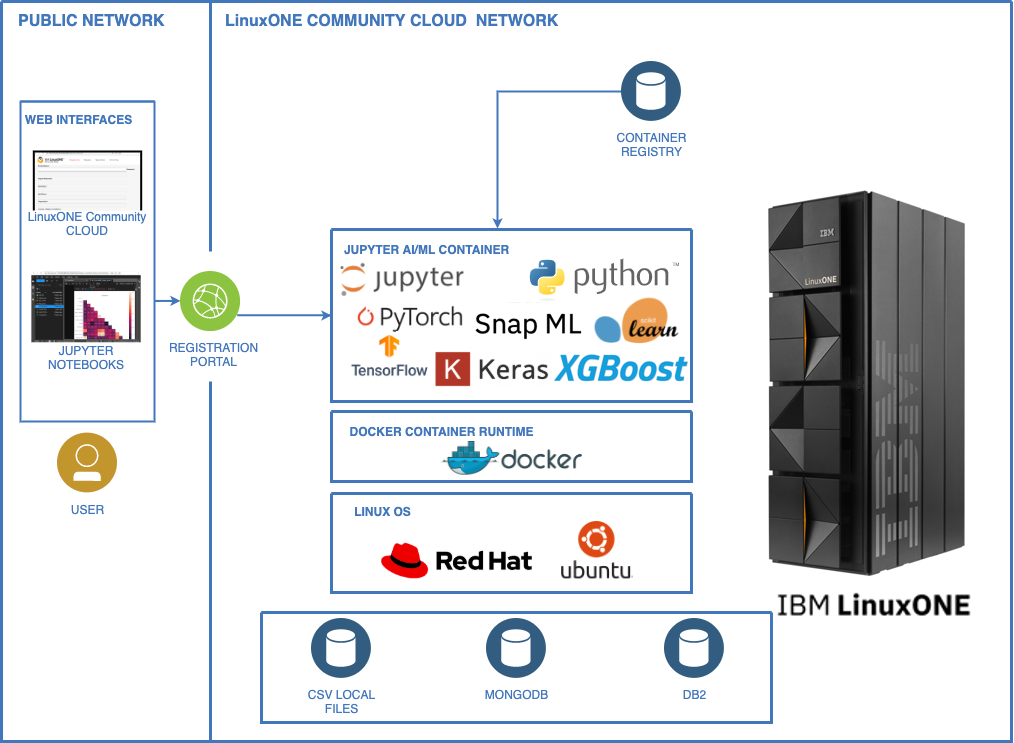
The following guidelines can be used to explore Machine Learning applications using Jupyter Lab and Python ML libraries for IBM LinuxONE / IBM Z. IBM LinuxONE / IBM Z servers are designed to be more powerful than x86, through a combination of processor architecture, clock speed, cache, optimization, and I/O offloading. IBM z16 generation comes with Telum central processor with a new dedicated on-chip accelerator for AI inference. This design enables real time AI/ML processing embedded directly in transactional workloads. Jupyter Lab is packaged as a container that includes popular ML libraries such as Keras, Tensorflow, PyTorch, XGBoost, and SciKit-Learn. It also comes with several ML examples and sample data to train and validate the models.
- The first example demonstrates a client retention analysis using SciKit-Learn.
- The second example demonstrates MNIST handwritten digits recogniton using Keras and Tensorflow.
- Both examples demonstrate exporting of the trained model to portable ONNX format for inferencing in a sample production.
- Register in LinuxONE Community Cloud
- Create your Ubuntu 22.04 instance and ssh key
- Open a secure shell connection and install docker runtime
- Start Jupyter Lab container on the port 38888
- Open Jupyter Lab in the Browser using the public IP address of your instance
- Run Demo notebooks
- Use case #1: Run a client retention analysis notebook.
- Use case #2: Run a MNIST handwritten digits recogniton notebook.
- Use case #3: Export the trained model to a portable ONNX format.
Note: Refer the official documentation from IBM LinuxONE Community Cloud here
- If you have not done so already, go to IBM LinuxONE Community Cloud and register for a free trial account.
- Select Register link.
- Fill out and submit the registration form.
- You will receive an email containing credentials to access the self-service portal. This is where you can request VM instance of Linux on IBM LinuxONE servers.
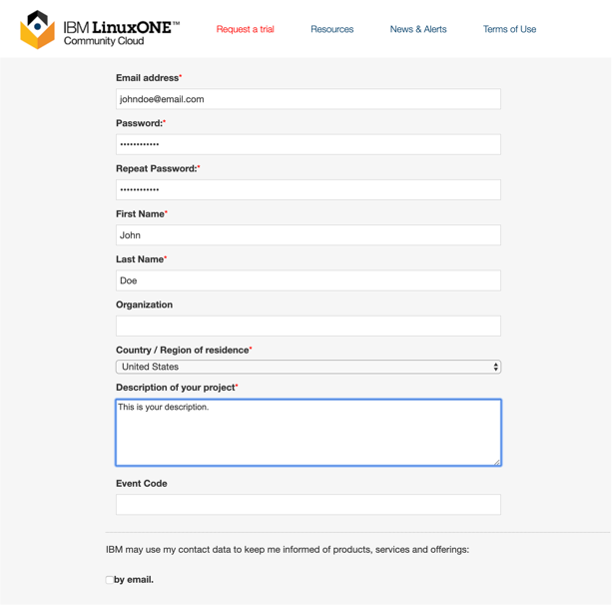
Note: For details or troubleshooting refer the official documentation from IBM LinuxONE Community Cloud here
-
Open a web browser and access the IBM LinuxONE Community Cloud.
a. Enter your Portal User ID and Portal Password b. Click 'Sign In' You will see the home page for the IBM LinuxONE Community Cloud self-service portal.
-
For deploying LinuxONE virtual server the first time, you must set your ssh key for secure shell access. a. Select the Virtual Servers in the upper left corner of the page.
b. Next click your username from the upper right corner of the Home page.
c. Select Manage SSH Key Pairs and import your key or create one for accessing the Linux VMs.
Note: For details or troubleshooting refer the official documentation from IBM LinuxONE Community Cloud here
-
Deploying LinuxONE virtual server. a. Go to the Home page, Service Catalog section and Virtual Servers service. b. Click Manage Instances.
c. Click Create.
-
Provide instance specifications a. Instance Name, without any spaces or special characters. b. Desired Linux image as Ubuntu 22.04. c. SSH key to use. d. Verify that all the information is correct and click Create.
-
Confirm your instance is ACTIVE.
- Newly deployed instance will go through several phases until becoming ACTIVE
-
Open a terminal on your local computer
- On Mac OS X or Linux use Terminal.
- On Windows use PuTTY. Note: Instructions on how to use ssh terminal or PuTTY can be found here here
-
Ensure that you have the SSH private key used to deploy the server.
-
Use SSH to access the Linux guest.
ssh -i <your_key>.pem linux1@148.100.xx.xx -
Download the latest docker installer script and run it
curl -fsSL https://get.docker.com -o get-docker.sh && sudo sh get-docker.sh -
Add current user to the docker goup and grant permissions
sudo usermod -aG docker $USER; newgrp docker -
Start docker service and refresh bash session
sudo systemctl start dockerexec bash # or exit and reconnect via ssh
In this section, you will use the Jupyter Lab tool that is installed in container along with popular ML packages. This tool allows you to write and submit Python code, and view the output within a web GUI.
- Login to the private container registry in IBM LinuxONE Community Cloud
docker login -u l1cc registry.linuxone.cloud.marist.edu
(Refer event information for password)
docker login -u l1cc registry.linuxone.cloud.marist.edu - Pull down the latest container image
docker pull registry.linuxone.cloud.marist.edu/jupyterlab-image-s390x:latest - Start the Jupyer Lab container on port 38888
    mkdir shared && chmod a+w shared

    docker run -p 38888:8888 --name notebook -v /home/linux1/shared:/home/jovyan/shared \
    -d registry.linuxone.cloud.marist.edu/jupyterlab-image-s390x:latest jupyter lab --ServerApp.token='Your_Token'
URL: http://148.100.X.X:38888
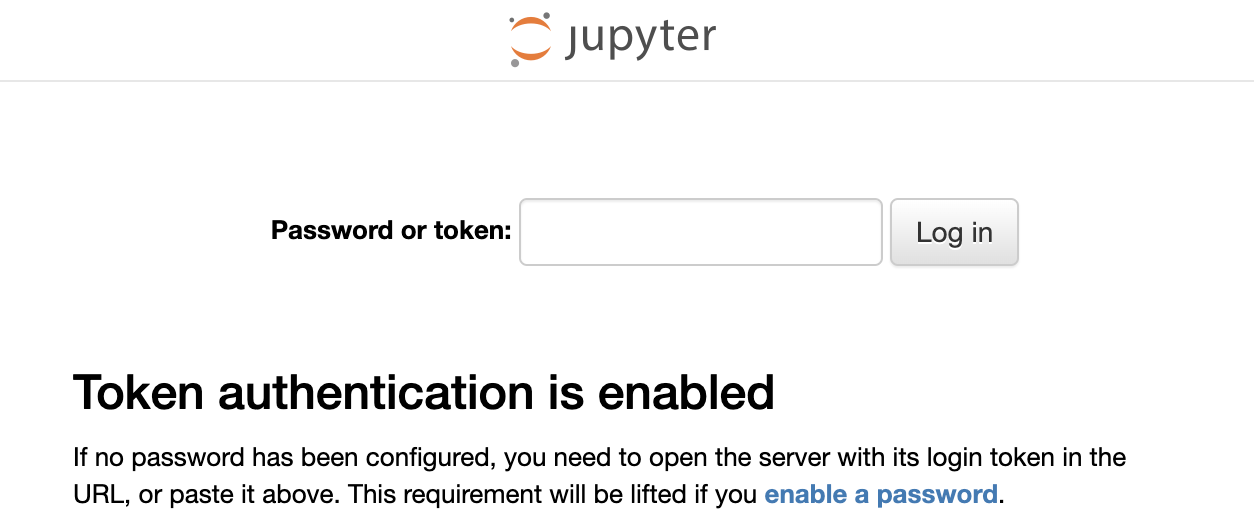
The first page requires you to authenticate before getting to the main Jupyter Lab IDE. Tocken is the one you specified in the docker run command: Your_Token
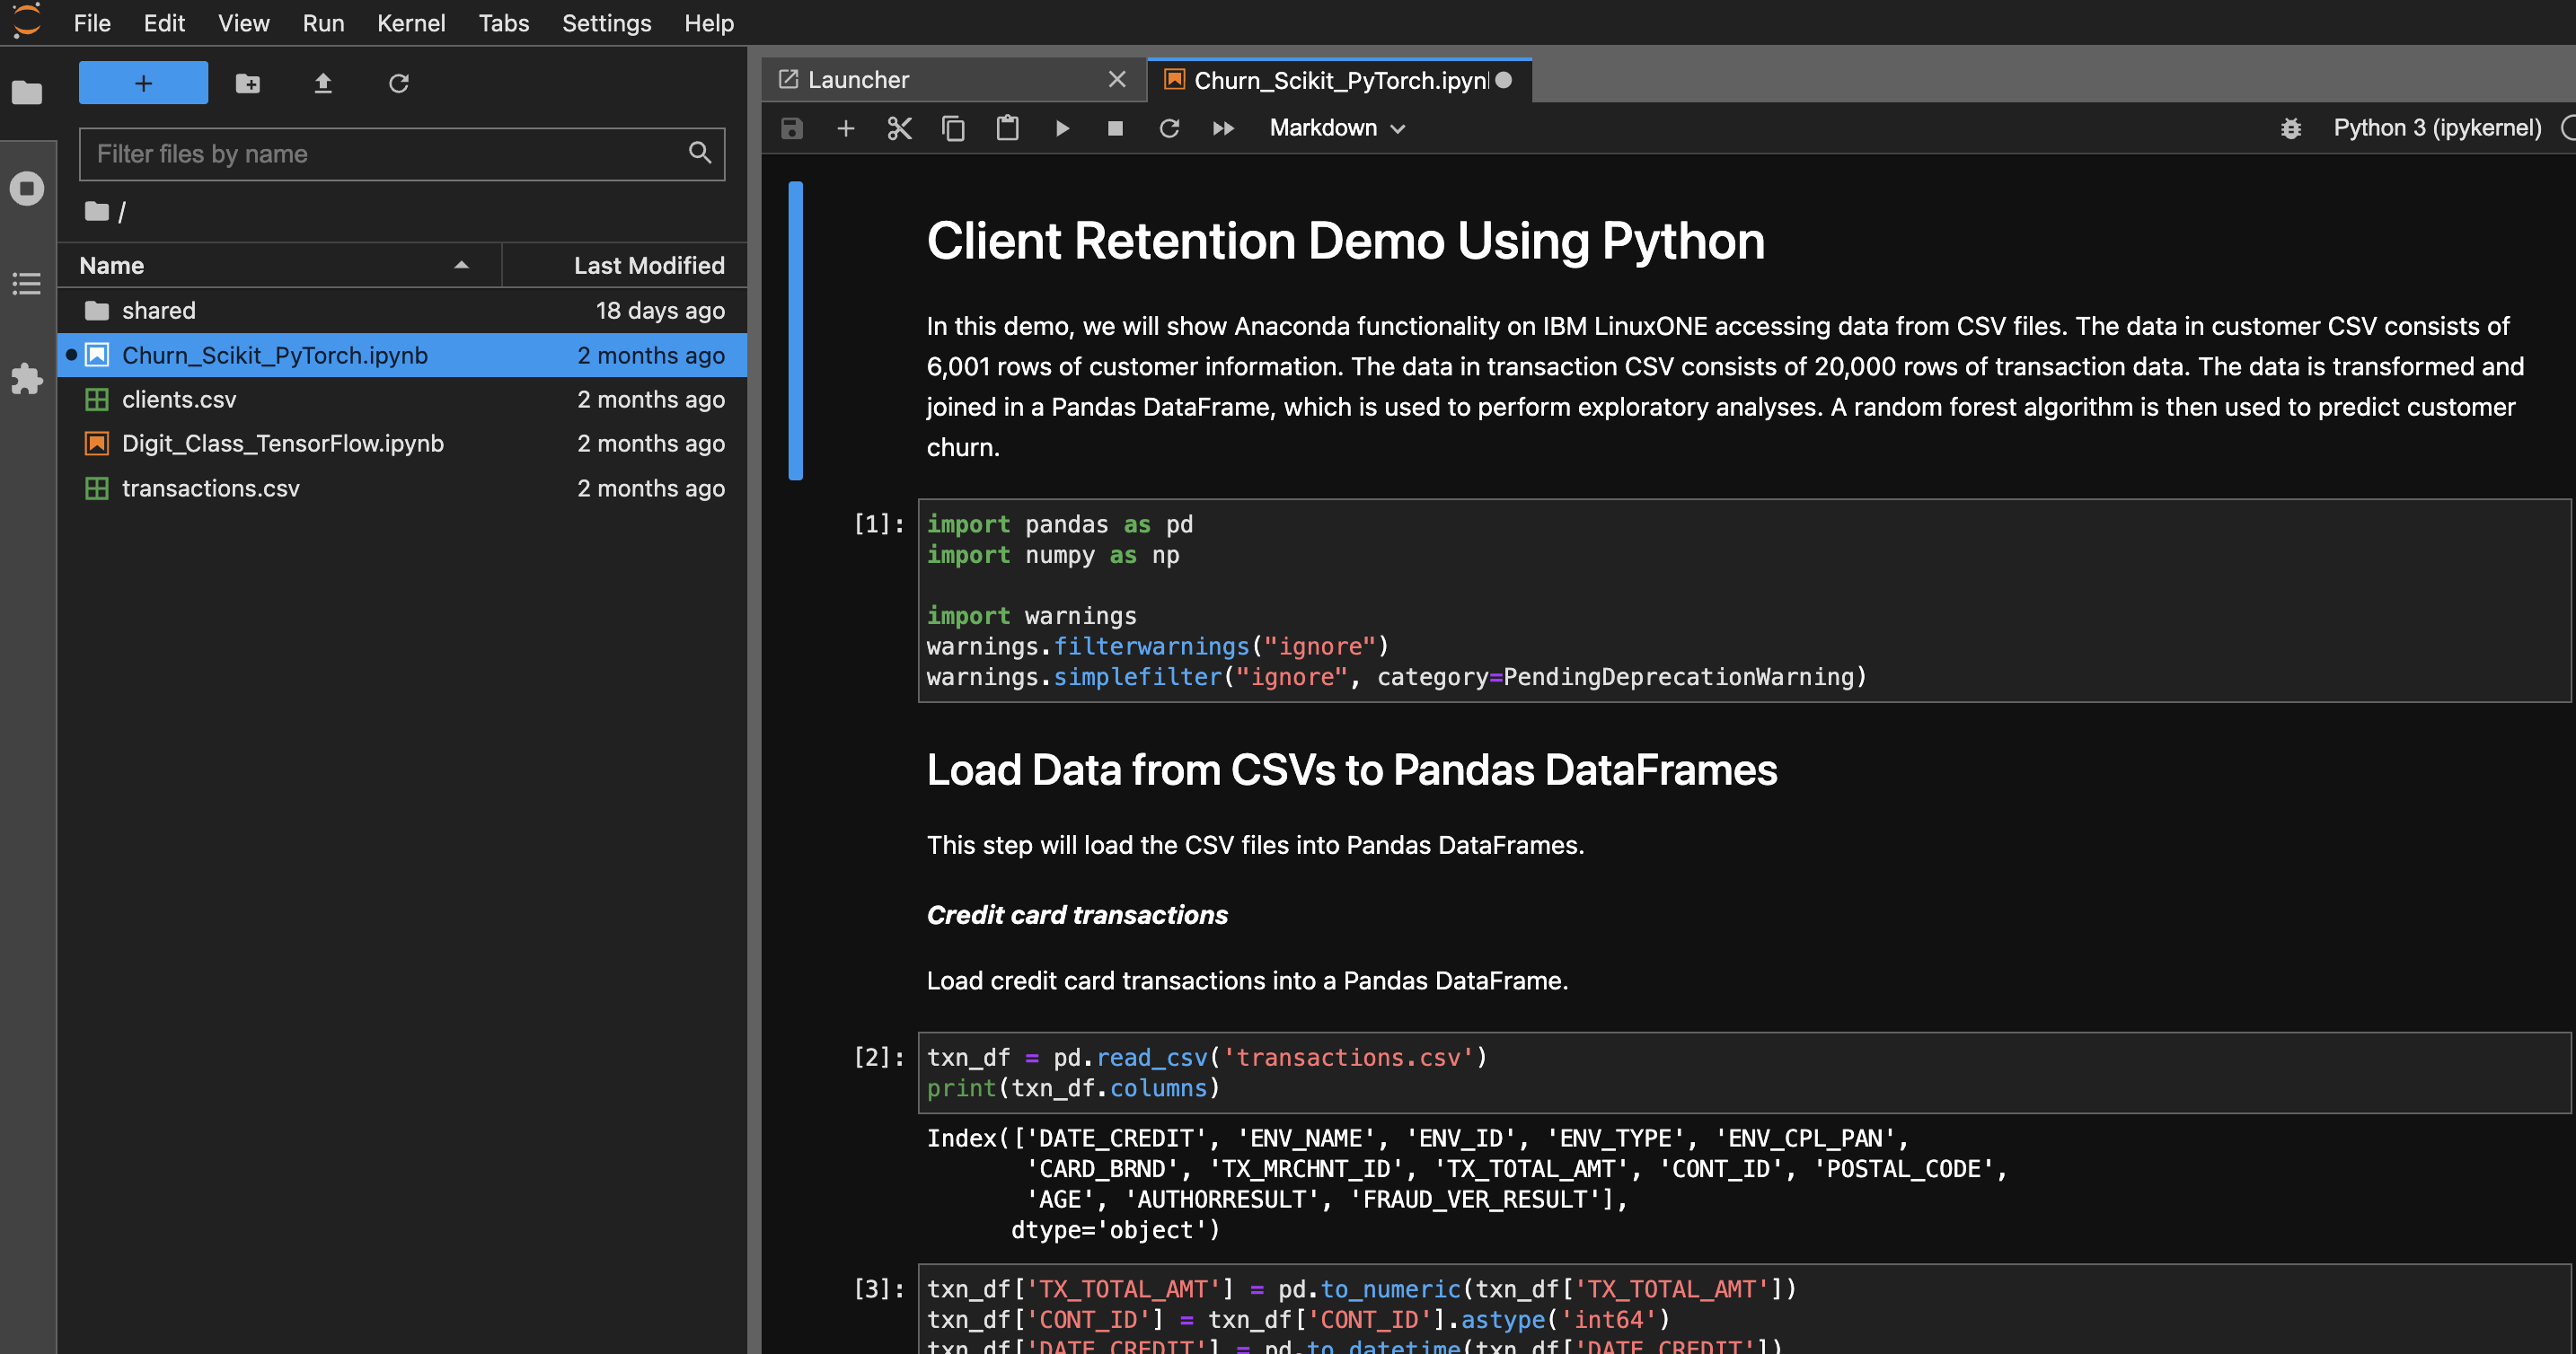
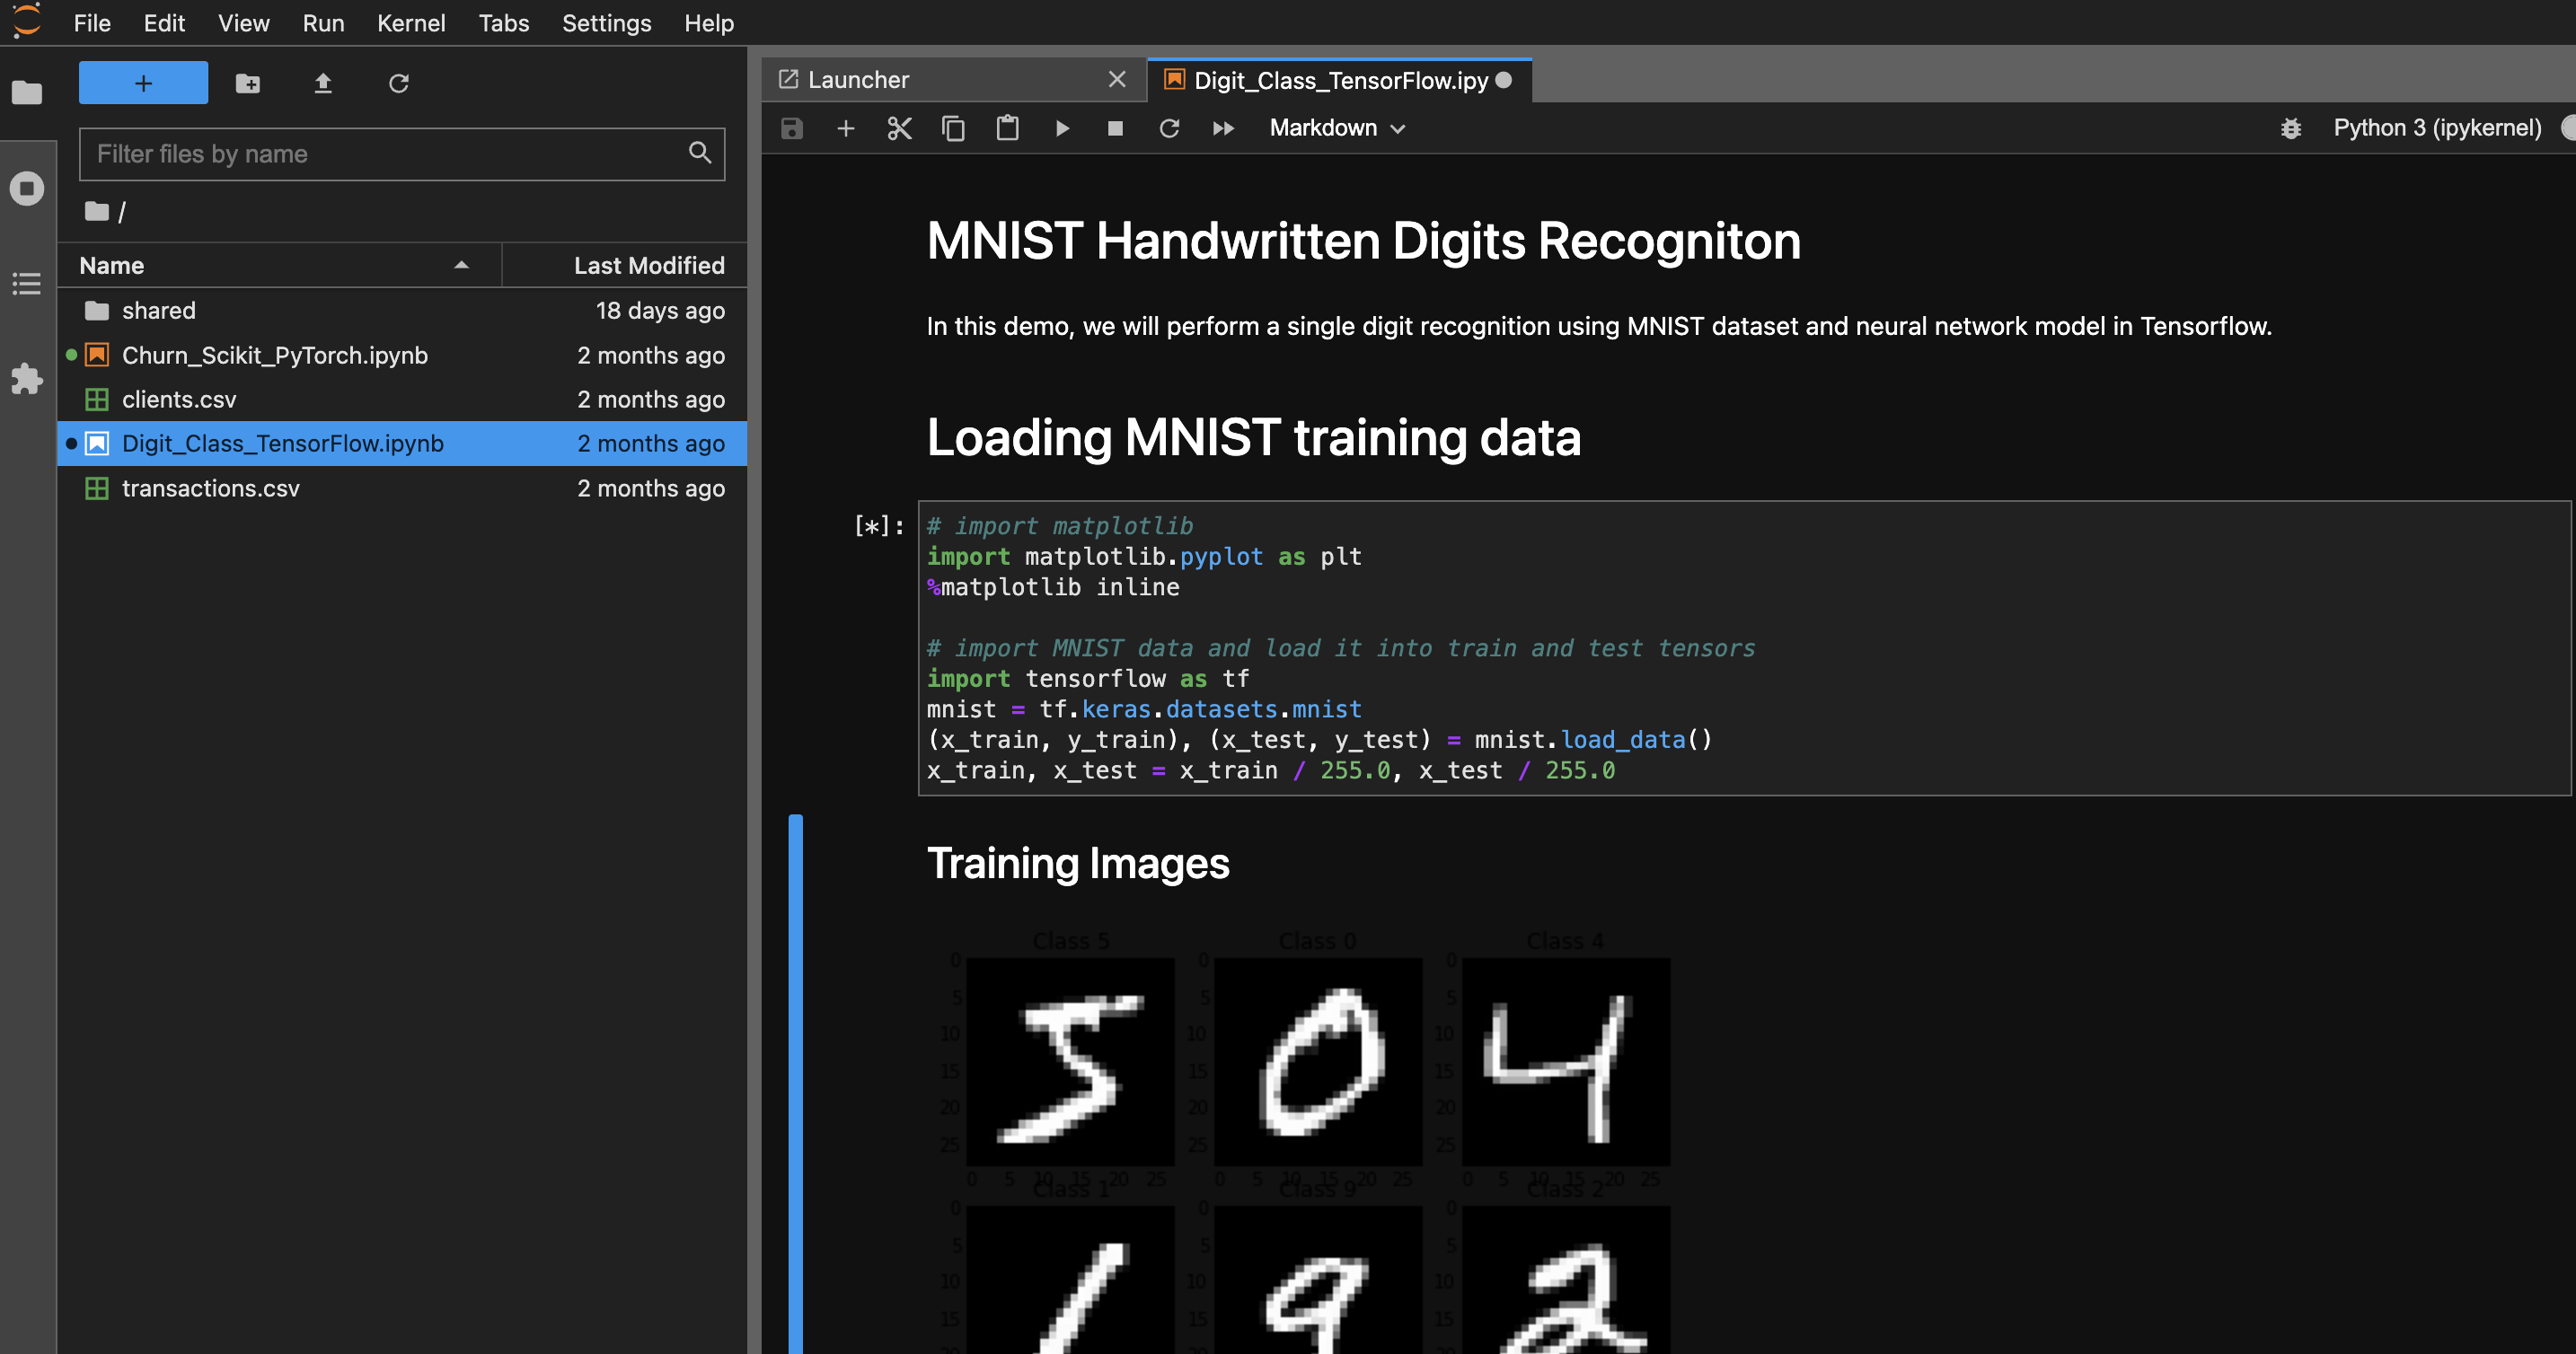
Jupyter Lab container comes with 2 demo notebooks and sample data. Once in the Jupyter Lab IDE, left side panel lists the notebooks and CSV data files. Click on each of them to open in the right side panel.
This Demo notebook runs Random Forest ML on IBM LinuxONE accessing data from CSV files. The data in customer CSV consists of 6,001 rows of customer information. The data in transaction CSV consists of 20,000 rows of transaction data. The data is transformed and joined in a Pandas DataFrame, which is used to perform exploratory analyses. A Random Forest algorithm is then used to predict customer churn.
The environment is divided into input cells labeled with ‘In [#]:’.
-
Execute the Python code in the first cell.
a. Click on the first ‘In [ ]:’
The left border will change to blue when a cell is in command mode. b. Click Run to execute the lines of Python code in the cell
-
Click and run the second cell ‘In [ ]:’.
If no error messages appear, the cell run was successful.
-
Click and run the third cell ‘In [ ]:’ etc.
Check the explanation of each Cell and The output from it. Continue stepping trhouth the notebook
This Demo notebook performs single digit recognition using MNIST dataset and neural network model in Tensorflow.
The environment is divided into input cells labeled with ‘In [#]:’.
-
Execute the Python code in the first cell.
a. Click on the first ‘In [ ]:’
The left border will change to blue when a cell is in command mode. b. Click Run to execute the lines of Python code in the cell
-
Click and run the second cell ‘In [ ]:’.
If no error messages appear, the cell run was successful.
-
Click and run the third cell ‘In [ ]:’ etc.
Check the explanation of each Cell and The output from it. Continue stepping trhouth the notebook
Both Demo notebooks contain steps to export the trained ML model into portable open format ONNX. sklearn-onnx and tf2onnz convert models in ONNX format which can be then used to compute predictions with another backend on a different platform. Such as training can be done on an x86 system and then inference on IBM LinuxONE.
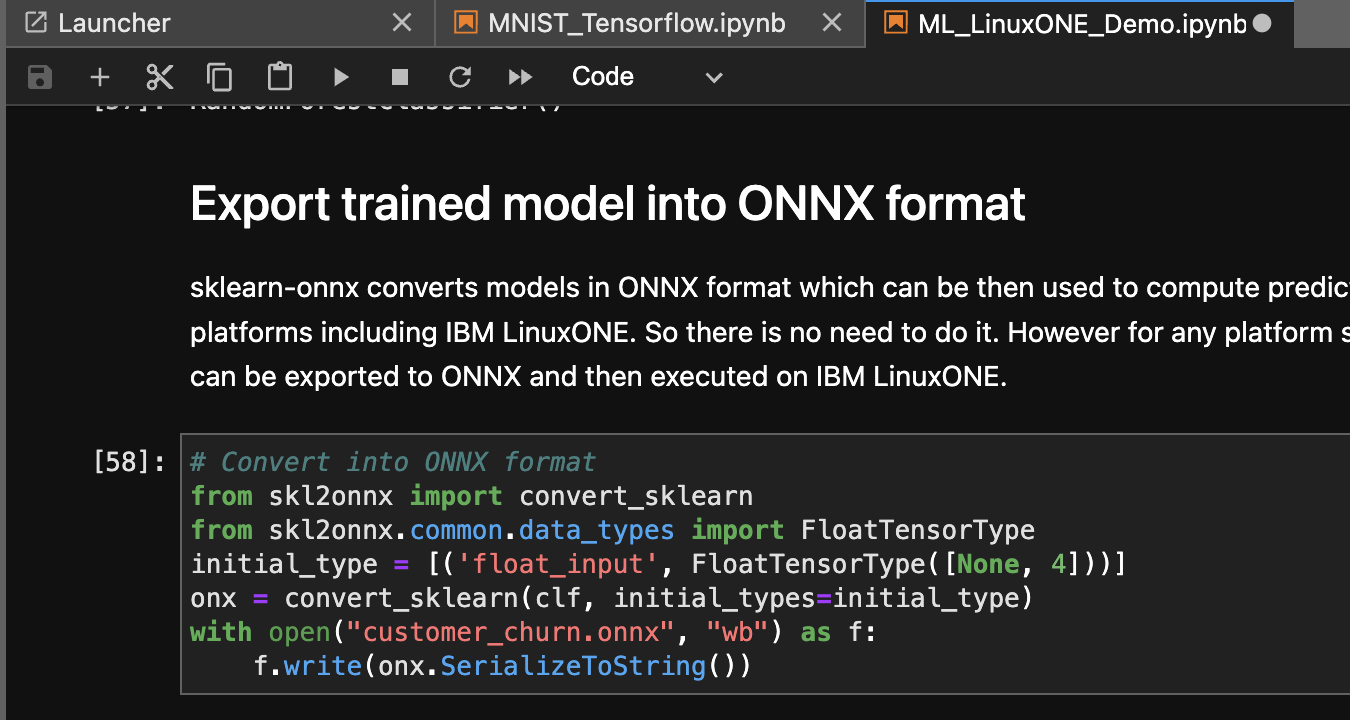
This Demo notebook performs a training and validation of a credit card fraud detection model in Keras/Tensorflow.
Refer 'Fraud_LSTM_Keras_TF.ipynb' notebook and csv dataset included in the Jupyter Lab environment.
Did you use the event code assigned for this specific event when registering for your Virtual Machine? Also, check your spam/junk folder for the activation email.
A: You need to activate your account by clicking the link on the activation email to be able to access your virtual machine
A: If a server does not respond to ping or ssh the server needs to be stopped and restarted in L1CC dashboard.
-
Log into the dashboard (same dashboard used to create the server. https://linuxone.cloud.marist.edu/#/login

-
If your server is green and active status but will not respond to ping or ssh select your server and click stop. Once status goes to SHUTOFF, select server again and click start. This will resolve the issue.

A: Follow the steps provided in the Github link shared – the documentation has detailed steps on how to get connected with Putty and ssh terminal.
e.g. docker: Got permission denied while trying to connect to the Docker daemon socket at unix:///var/run/docker.sock
After a fresh installation of docker, it configures permissions and environment. For some settings to take an effect, you need to reload the shell (exec bash) or reestablish the ssh session.
The folder is mounted from the host. Need to make sure that the user with uid 1000 has write access to it. E.g.Run this command on the Linux instance
sudo chown -R 1000:1000 /home/linux1/jupyter
    docker logs notebook
    docker rm -f notebook
    docker run …..
In Jupiter notebook, type:
    import glob
    print(glob.glob("*.csv"))
    import sys
    !{sys.executable} -m pip install tensorflow_datasets
Upload files in the Jupyter Lab Web interface. Drag&Drop is also possible. CSV files are supported. Max file size is 200MB.
https://github.com/linuxone-community-cloud/jupyter-lab-ml/blob/main/packages.txt Or in Jupiter notebook, type:
    import pkg_resources
    for i in pkg_resources.working_set:
        print(i)
You can clean up unused docker images to free up space:
    docker images -a
    docker rmi $(docker images –qa)
13. I have created the Ubuntu instance, but facing issue in opening ssh and installing docker runtime.
Make sure to follow the required steps. Re-login to ssh.
	ssh -i <your_key>.pem linux1@148.100.xx.xx
	curl -fsSL https://get.docker.com -o get-docker.sh && sudo sh get-docker.sh
	sudo usermod -aG docker $USER; newgrp docker
	sudo systemctl start docker
	exec bash   # or exit and reconnect via ssh
Use the following commands in ssh shell to validate the memory usage:
    docker stats
    free -h
Free up caches:
sudo free && sync && echo 3 > /proc/sys/vm/drop_caches && free
Restart Jupyter Kernel and Clear all outputs in the menu of Web IDE. Menu -> Kernel -> Restart Kernel and Clear Outputs of All Cells
To copy files from your laptop to the home of linuxone instance, use scp - secure shell copy.
E.g. *.csv files
scp -i sshkey.pem ./*.csv linux1@148.100.X.X:~/shared/
the files/folders in ~/shared/ (which is also /home/linux1/shared) will appear in the jupyter lab interface under "shared" folder.
Need to modify folder permissions in ssh terminal:
sudo chown linux1:linux1 /home/linux1/shared
sudo chmod a+w /home/linux1/shared
