- 실시간 차선 인식을 통한 차로이탈 방지
- 신호등, 표지판등의 객체 인식을 통한 자율주행
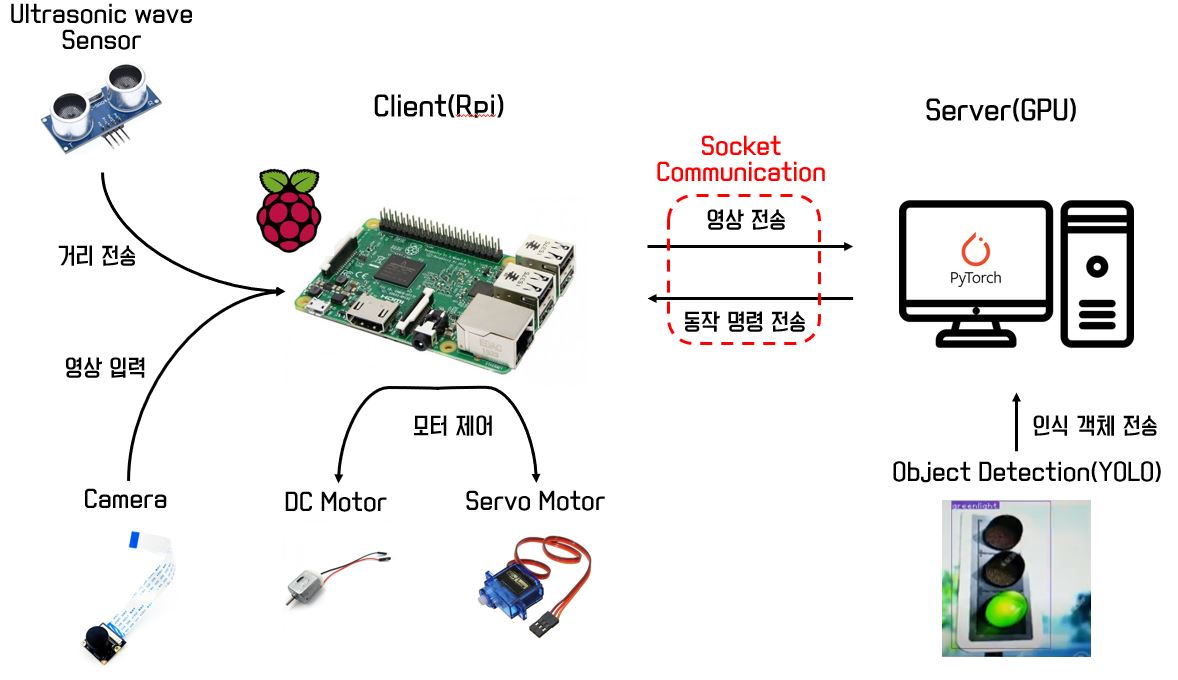
- 초음파 센서를 이용한 긴급 제동
- GPU 서버와의 실시간 소켓통신을 통한 RPi의 성능 한계 극복
-
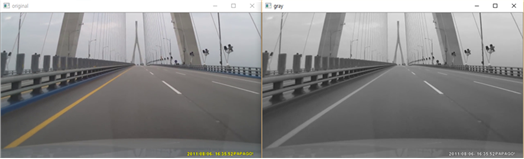
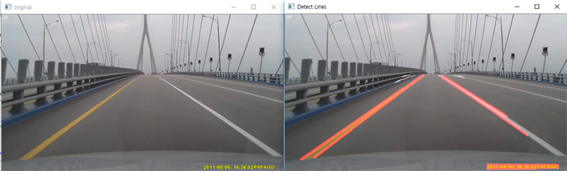
차선 인식 과정 : Gray - Canny - ROI - HoughLines - Weighted
- Gray(흑백화)
gray = cv2.cvtColor(src, cv2.COLOR_BGR2GRAY)
- Canny(모서리 검출): Canny 알고리즘 이용.
can = cv2.Canny(gray, 50, 200, None, 3)

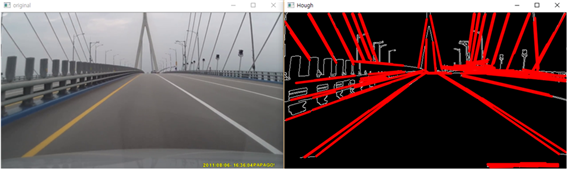
- HoughLines(직선 검출)
line_arr = cv2.HoughLinesP(masked_image, 1, np.pi / 180, 20, minLineLength=10, maxLineGap=10)
- ROI(Region of Interst, 관심 구역 설정)
rectangle = np.array([[(0, height), (120, 300), (520, 300), (640, height)]]) ##[upper_left, lower_left, upper_right, lower_right]

- Weighted(원본 영상에 합성)
mimg = cv2.addWeighted(src, 1, ccan, 1, 0)
-
차선 인식 알고리즘
def DetectLineSlope(src):
...
return mimg, degree_L, degree_R ##대표선이 그려진 영상의 프레임, 왼쪽 대표선의 기울기, 오른쪽 대표선의 기울기
- 대표선 추출: /Raspberry-Pi/line_detect.py의 DetectLineSlope(src)에 정의, 인식 되는 양 차선의 안쪽차선을 대표선으로 결정.
- 대표선의 기울기 구하기: 대표선으로 차선으로 인식되는 직선의 좌표(x1,y1,x2,y2)를 통해 왼쪽, 오른쪽 대표선의 기울기를 구함, 인식되는 차선이 없을 경우 0을 반환.
- line_detect.py(예제)의 알고리즘 흐름도

-
실습
- RPi(Rasbian)에 예제 소스코드 복제
$ git clone https://github.com/lky9620/Ta-Yo.git
- Raspberry-Pi 디렉토리로 이동
$ cd /Ta-Yo/Raspberry-Pi
- 자신의 환경에 맞게 servo.py, line_detect.py 수정 후 실행
~Ta-Yo/Raspberry-Pi$ python line_detect.py #or python3 line_detect.py
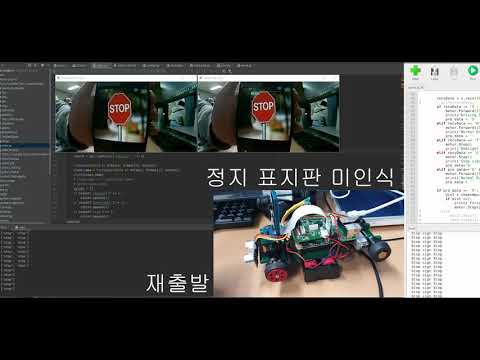
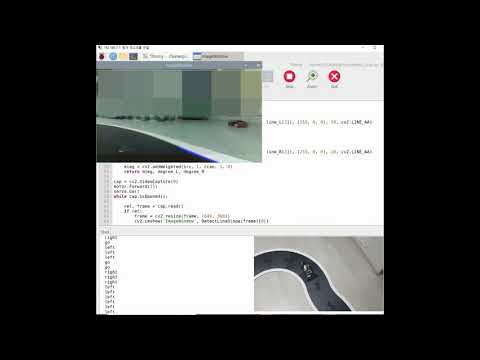
- 실습 동영상(아래 이미지 클릭 시, Youtube로 이동합니다.)
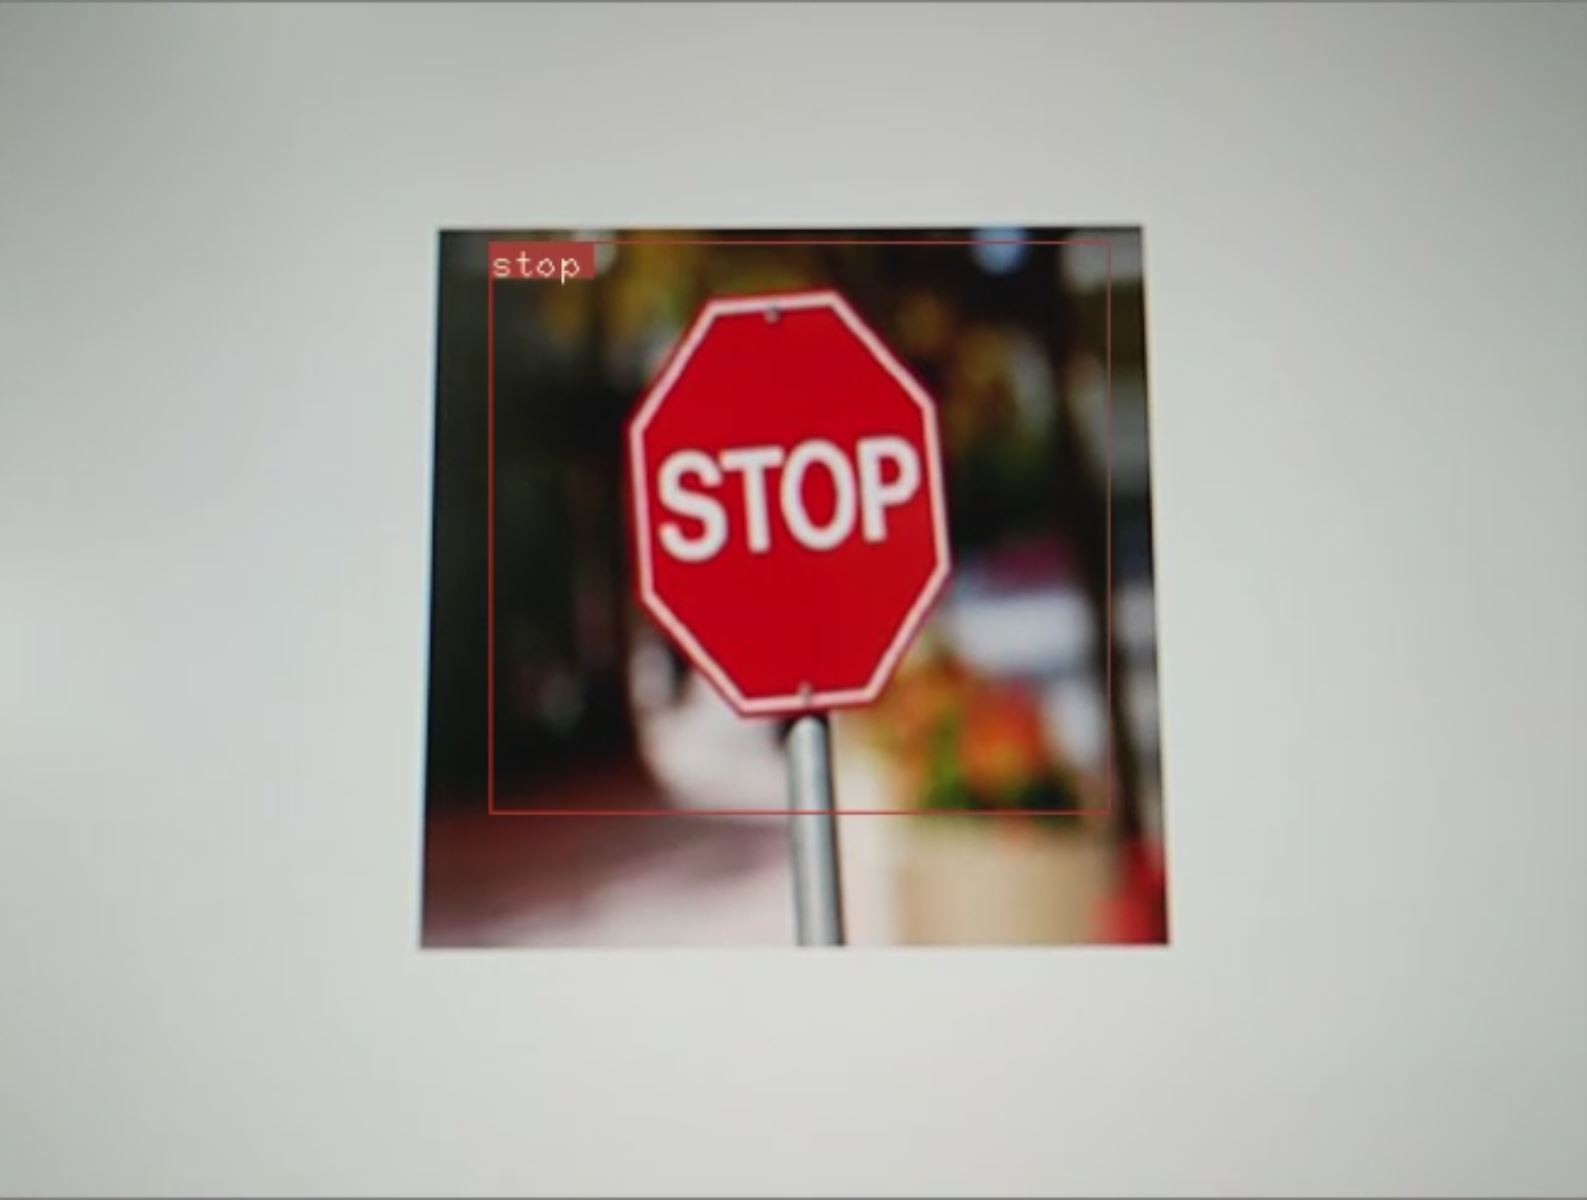
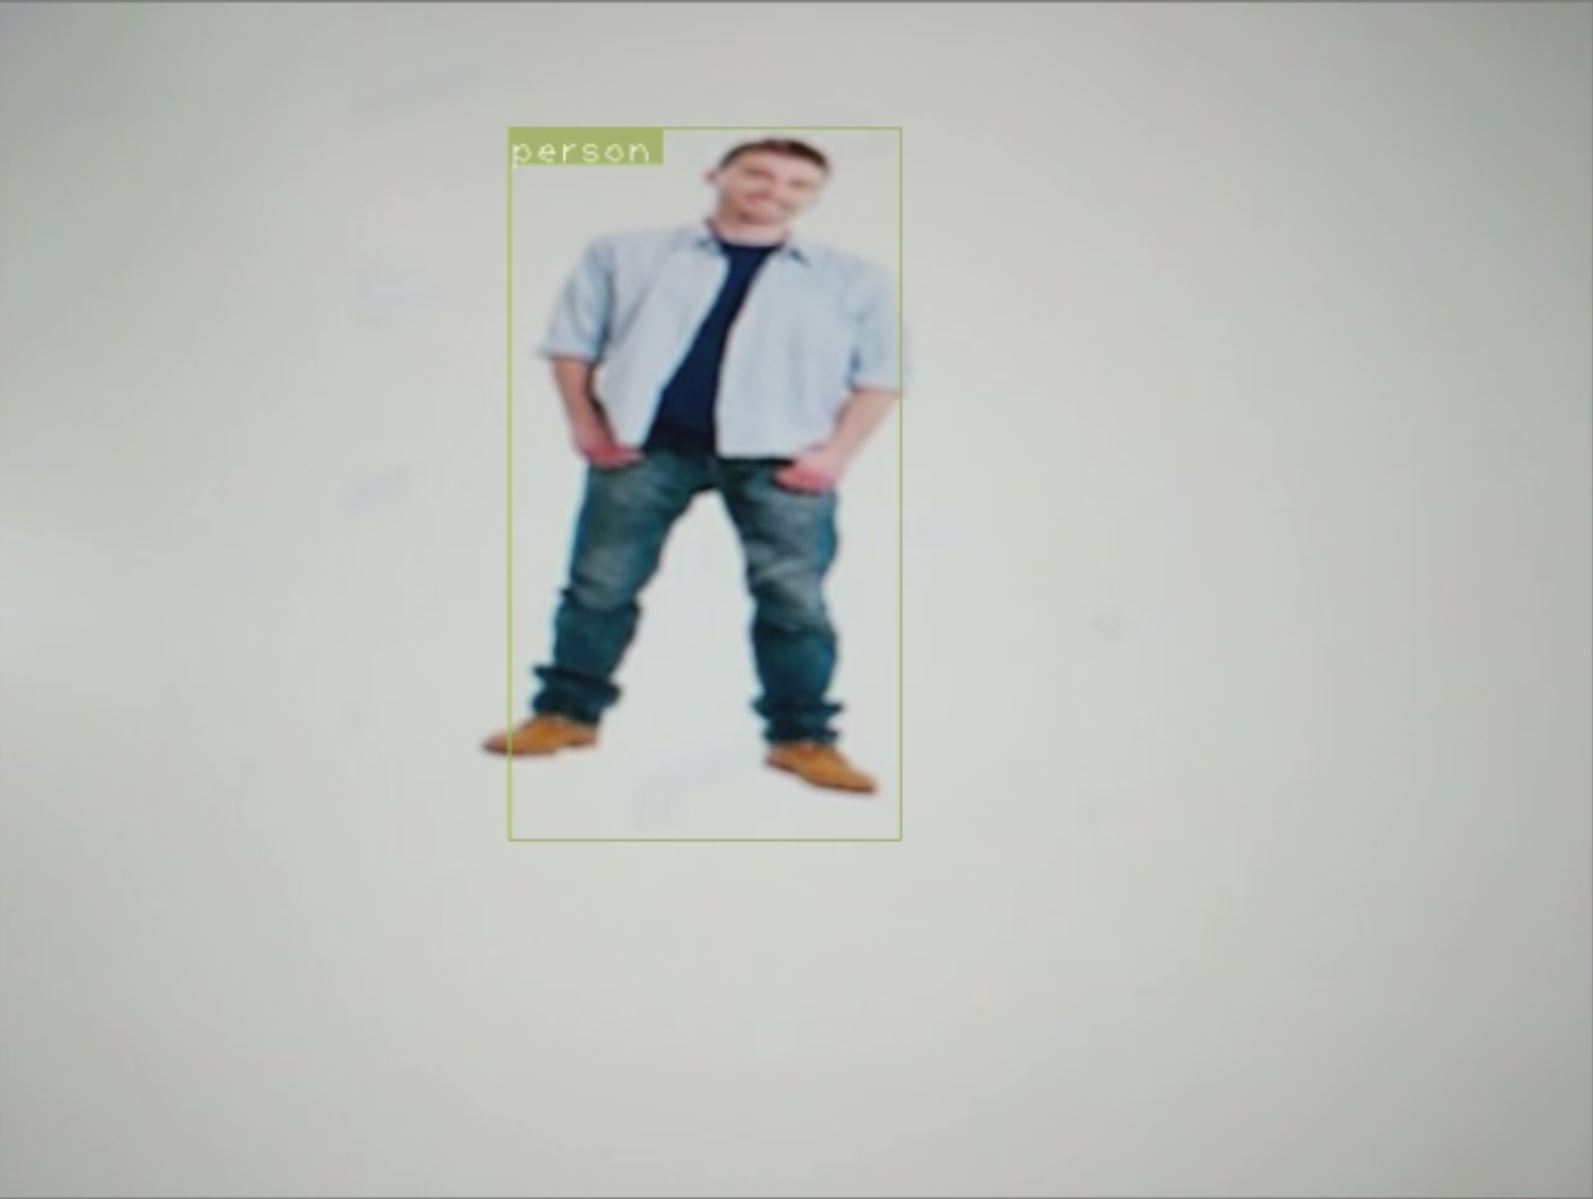
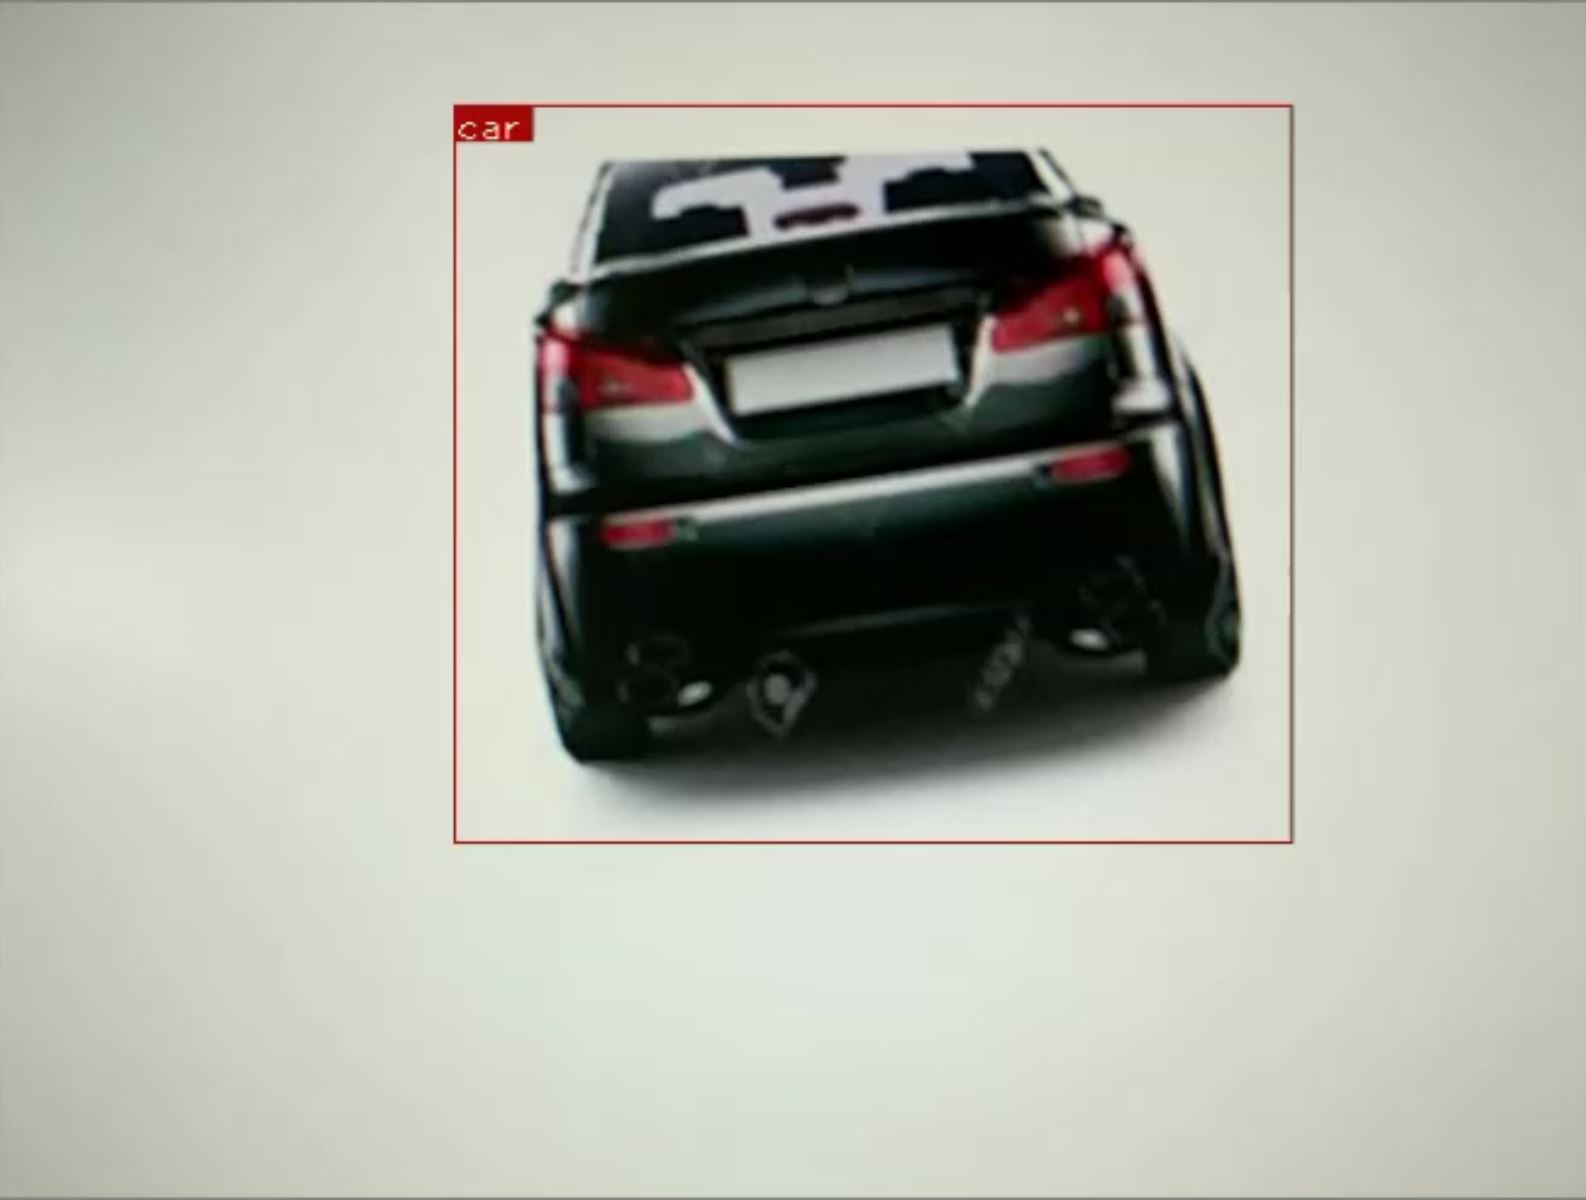
- Yolo(실시간 객체 인식)을 통해서 청색, 적색 신호등, 사람, 자동차 뒷모습, 여러 표지판 등을 미리 학습하여 가중치 모델(학습 모델) 생성
- 방법은 추후에 notebook 파일 업로드 예정
- 데이터셋은 저작권 등의 문제로 비공개
-
Raspberry-Pi의 성능을 극복하기 위해 GPU 서버(Pytorch)와 TCP 소켓통신 사용
-
In Server(GPU server(Pytorch))
- 딥 러닝 프레임워크로 pytorch 사용, GPU 서버는 CUDA 연산이 가능해야함.
- 미리 학습시켜 놓은 Yolo 모델(Weight)파일을 이용하여, 라즈베리파이가 보내주는 영상의 객체를 인식.
- 인식되는 객체에 따라 Client(Rpi)에서 수행해야 하는 일을 위험순위에 따라 리스트 자료구조에 저장 후, 위험순위가 가장 높은 행위를 전달함.
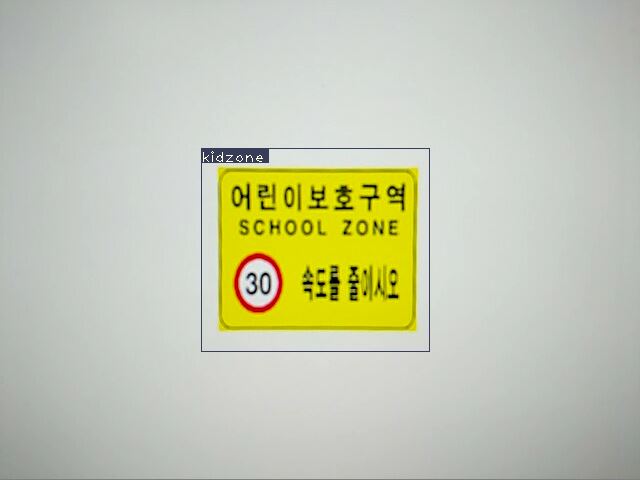
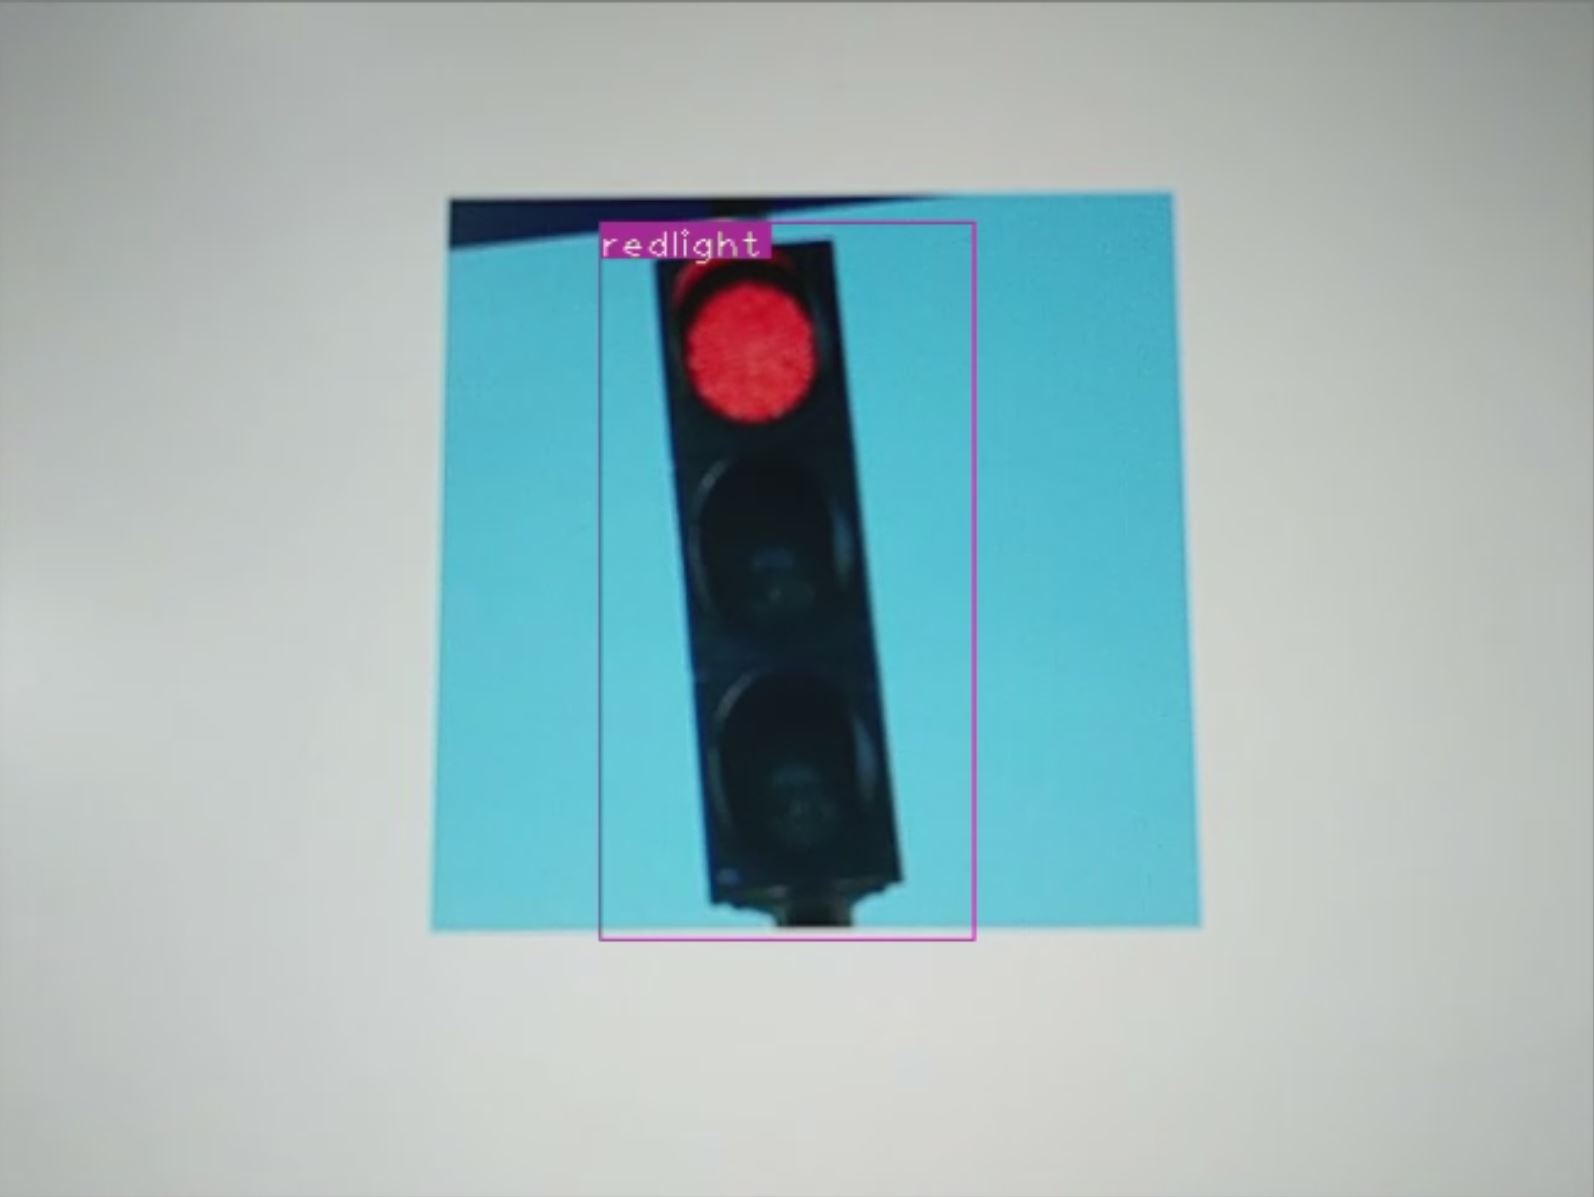
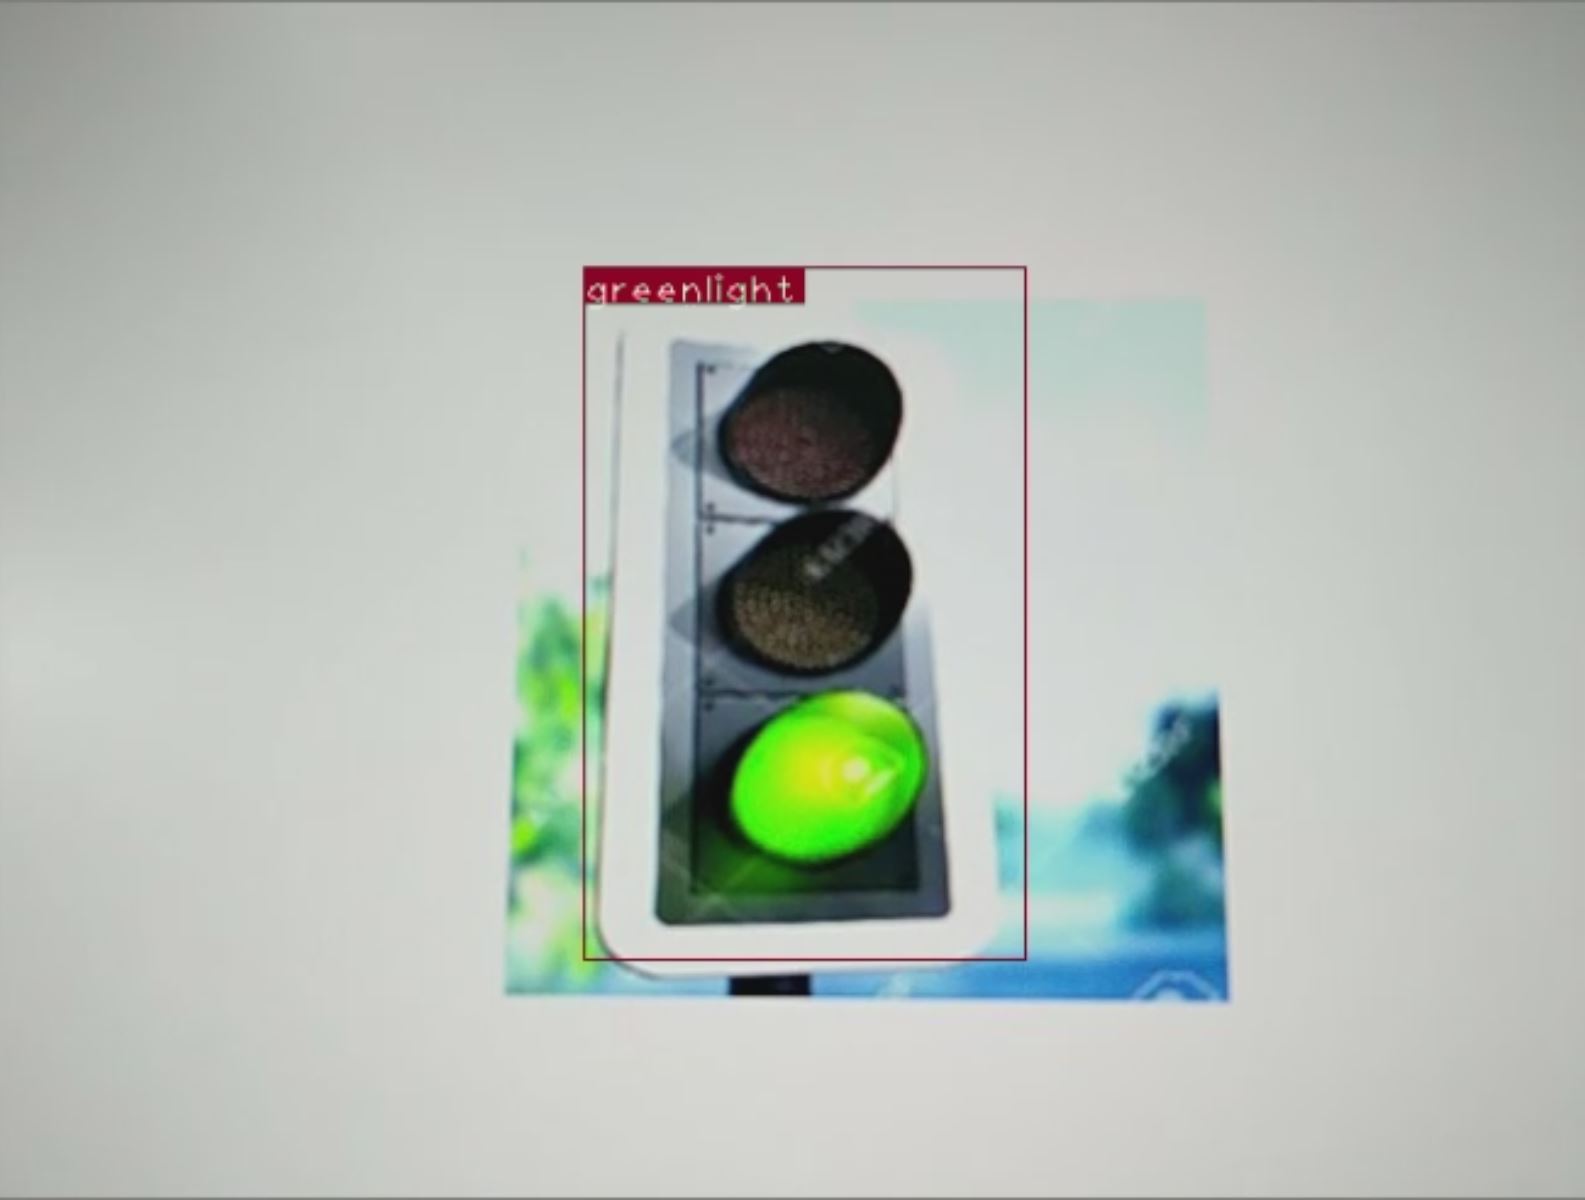
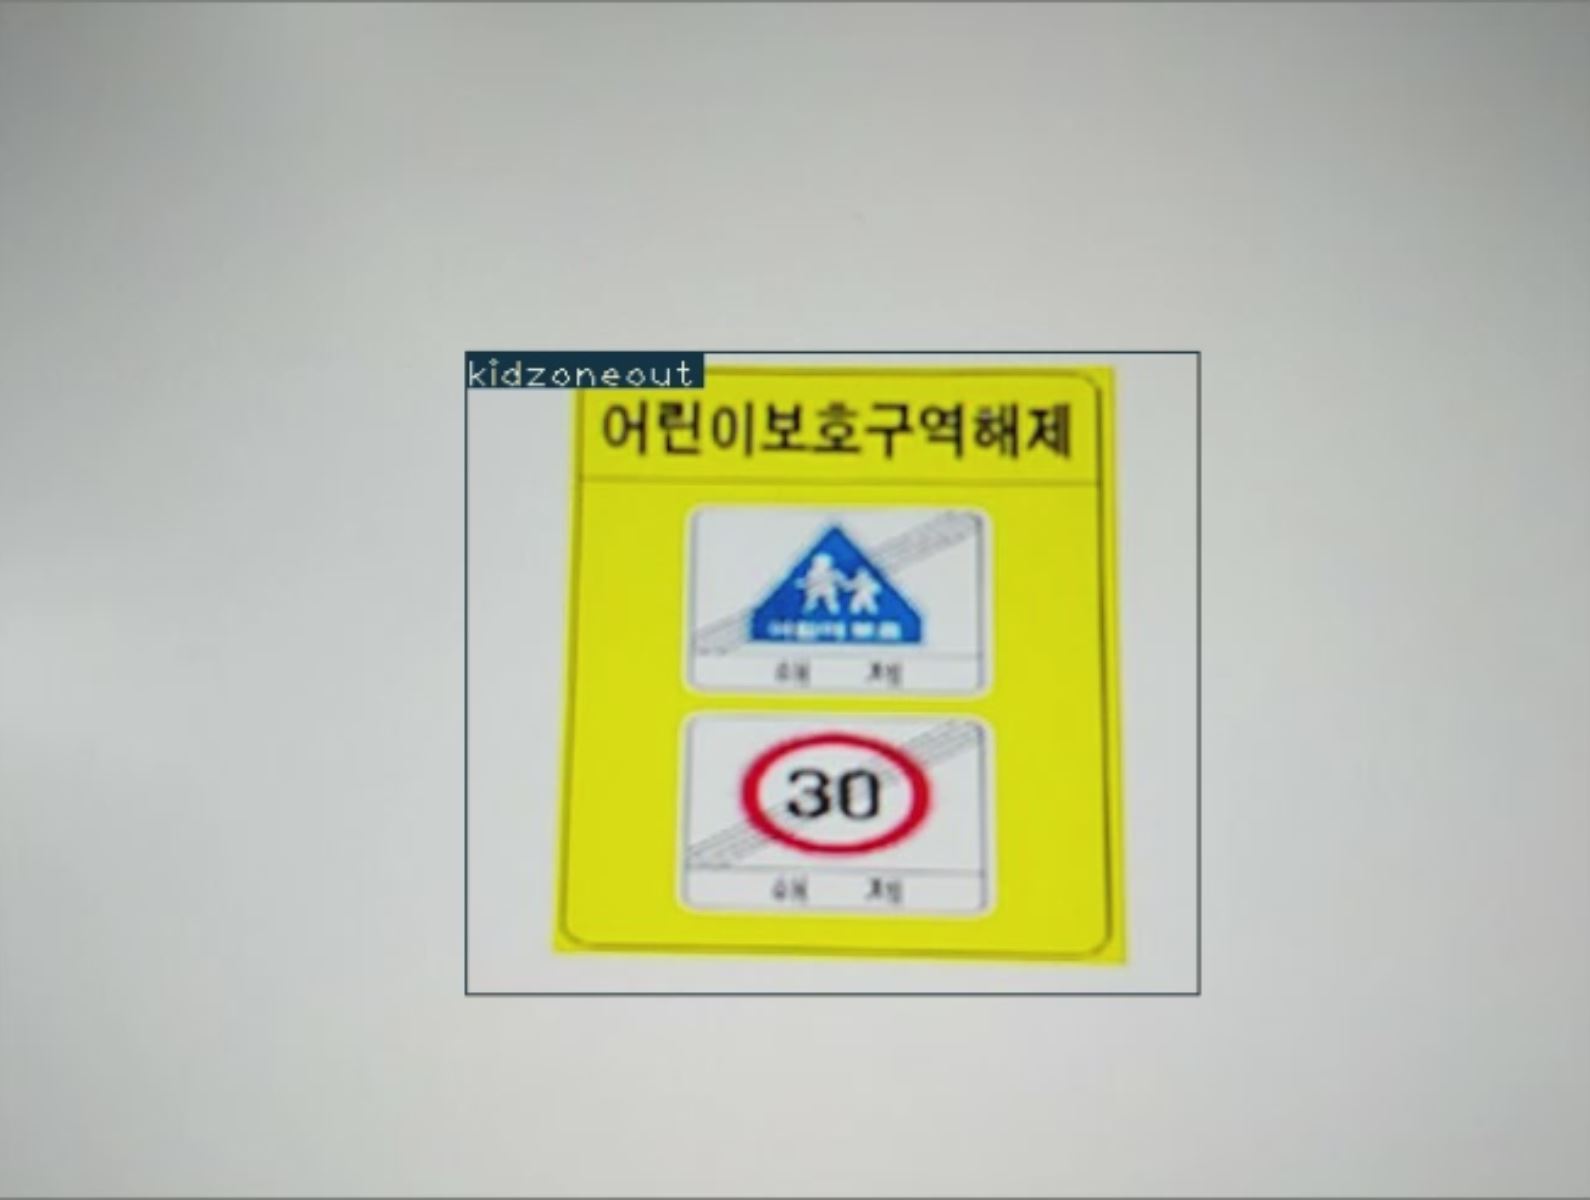
class_name = list(map(lambda x: write(x, frame)[1], output)) # 프레임마다 인식되는 객체를 리스트 자료구조로 저장.
    if class_name.count('redlight') >= 1:
      cslist.append(1)
  elif class_name.count('greenlight') >= 1:
      cslist.append(4)
  #...
  elif class_name.count('kidzone') >= 1:
      cslist.append(3)
  elif class_name.count('kidzoneout') >= 1:
      cslist.append(4)
  else:
      cslist.append(4)
def csend(direction):
  if direction == 0:
      conn.send(sendData_None.encode('utf-8'))
  elif direction == 1:
      conn.send(sendData_Stop.encode('utf-8')) ## 정지 명령 데이터
  elif direction == 2:
      conn.send(sendData_Sign.encode('utf-8')) ## 정지 표지판 명령 데이터
  elif direction == 3:
      conn.send(sendData_Slow.encode('utf-8')) ## 감속 구간 명령 데이터
  elif direction == 4:
      conn.send(sendData_Return.encode('utf-8')) ## 속도 복귀 명령 데이터
- redlight, stop(sign)에서 Client에 정지 명령
- 어린이 보호구역, 혼잡지역에서 Client에 감속 명령
- kidzoneout, greenlight에서 Client에 속도 복귀 명령
-
In Client(RPi)
- 적색 신호등에서 차량 정지 후 청색 신호등 변경 시, 이전의 속도로 재주행
elif recVData == 'T':  ## 'T' is sendData_Stop in Server
  motor.Stop()
  print('Redlight Stop')

elif recVData =='R': ## 'R' is sendData_Return in Server
  motor.Forward(speed)
  print('Normal Driving')
  pre_data = '' ## Pre Data initialize.
- 정지 표지판에서 차량 정지 후 정지표지판 미인식 시 이전의 속도로 재주행
elif recvData == 'G':
  motor.Stop()
  print('Stop sign Stop')
  pre_data='G' ## Pre Data memorize in Variable pre_data

elif pre_data=='G' and recvData =='N':  ## Pre Data is 'G' and recvData is None
  motor.Forward(25)
  print('Normal Driving')
  pre_data = ''  ## pre_data initialize
- 어린이 보호구역, 혼잡지역에서 자동차 감속, 감속구간 벗어날 시 원래의 속도로 재주행.
if recvData == 'S':
  motor.Forward(low_speed)
  print('Driving Slow')

elif recvData == 'R':
  motor.Forward(speed)
  print('Normal Driving')
- 어린이 보호구역, 혼잡지역과 같은 감속 구간 진입 시, 긴급제동 기능 활성화. 일정 거리 이내의 물체 감지 시 긴급제동.
  if pre_data == 'S': ## Variable pre_data is 'S' when enter deceleration section
   dist = choeumpa.distance()  ## Activate ultrasonic wave senor
   if dist <=threshold:
     print('Force Stop!!')
motor.Stop()- 객체 인식 실습
- In Server(GPU server(Pytorch))
- Pytorch 프레임워크가 설치되어 있고, CUDA 연산이 가능한 GPU 서버에서 수행 되어야 함.
- Server(GPU server(Pytorch))에 예제 소스코드 복제
$ git clone https://github.com/lky9620/Ta-Yo.git
- server 디렉토리로 이동
$ cd /Ta-Yo/server
- 아래 주소의 .weight, .names, .cfg 파일을 모두 해당 디렉토리에 저장 https://drive.google.com/drive/folders/1HyhbhdyAGmOdNXJiGvToS7LLb5e1TObU?usp=sharing
- server.py의 ip 및 포트번호 정의 후 server.py 실행 (ip는 빈칸이여도 무관)
HOST = '' # your IP address
PORT =  # your port number(except Well-knwon port number)
s.bind(HOST,PORT)
~/Ta-Yo/server$ python server.py #or python3 server.py
- In Client(Rpi)
- Client에 예제 소스코드 복제
$ git clone https://github.com/lky9620/Ta-Yo.git
- Raspberry-Pi 디렉토리로 이동
$ cd /Ta-Yo/Raspberry-Pi
- client.py의 ip 및 포트번호 정의 후 client.py실행
HOST = '' # your IP address
PORT =  # your port number(except Well-knwon port number)
c.connect((HOST,PORT))
~/Ta-Yo/server$ python server.py #or python3 server.py
- 객체 인식 실습 동영상(아래 이미지 클릭 시, Youtube로 이동합니다.)