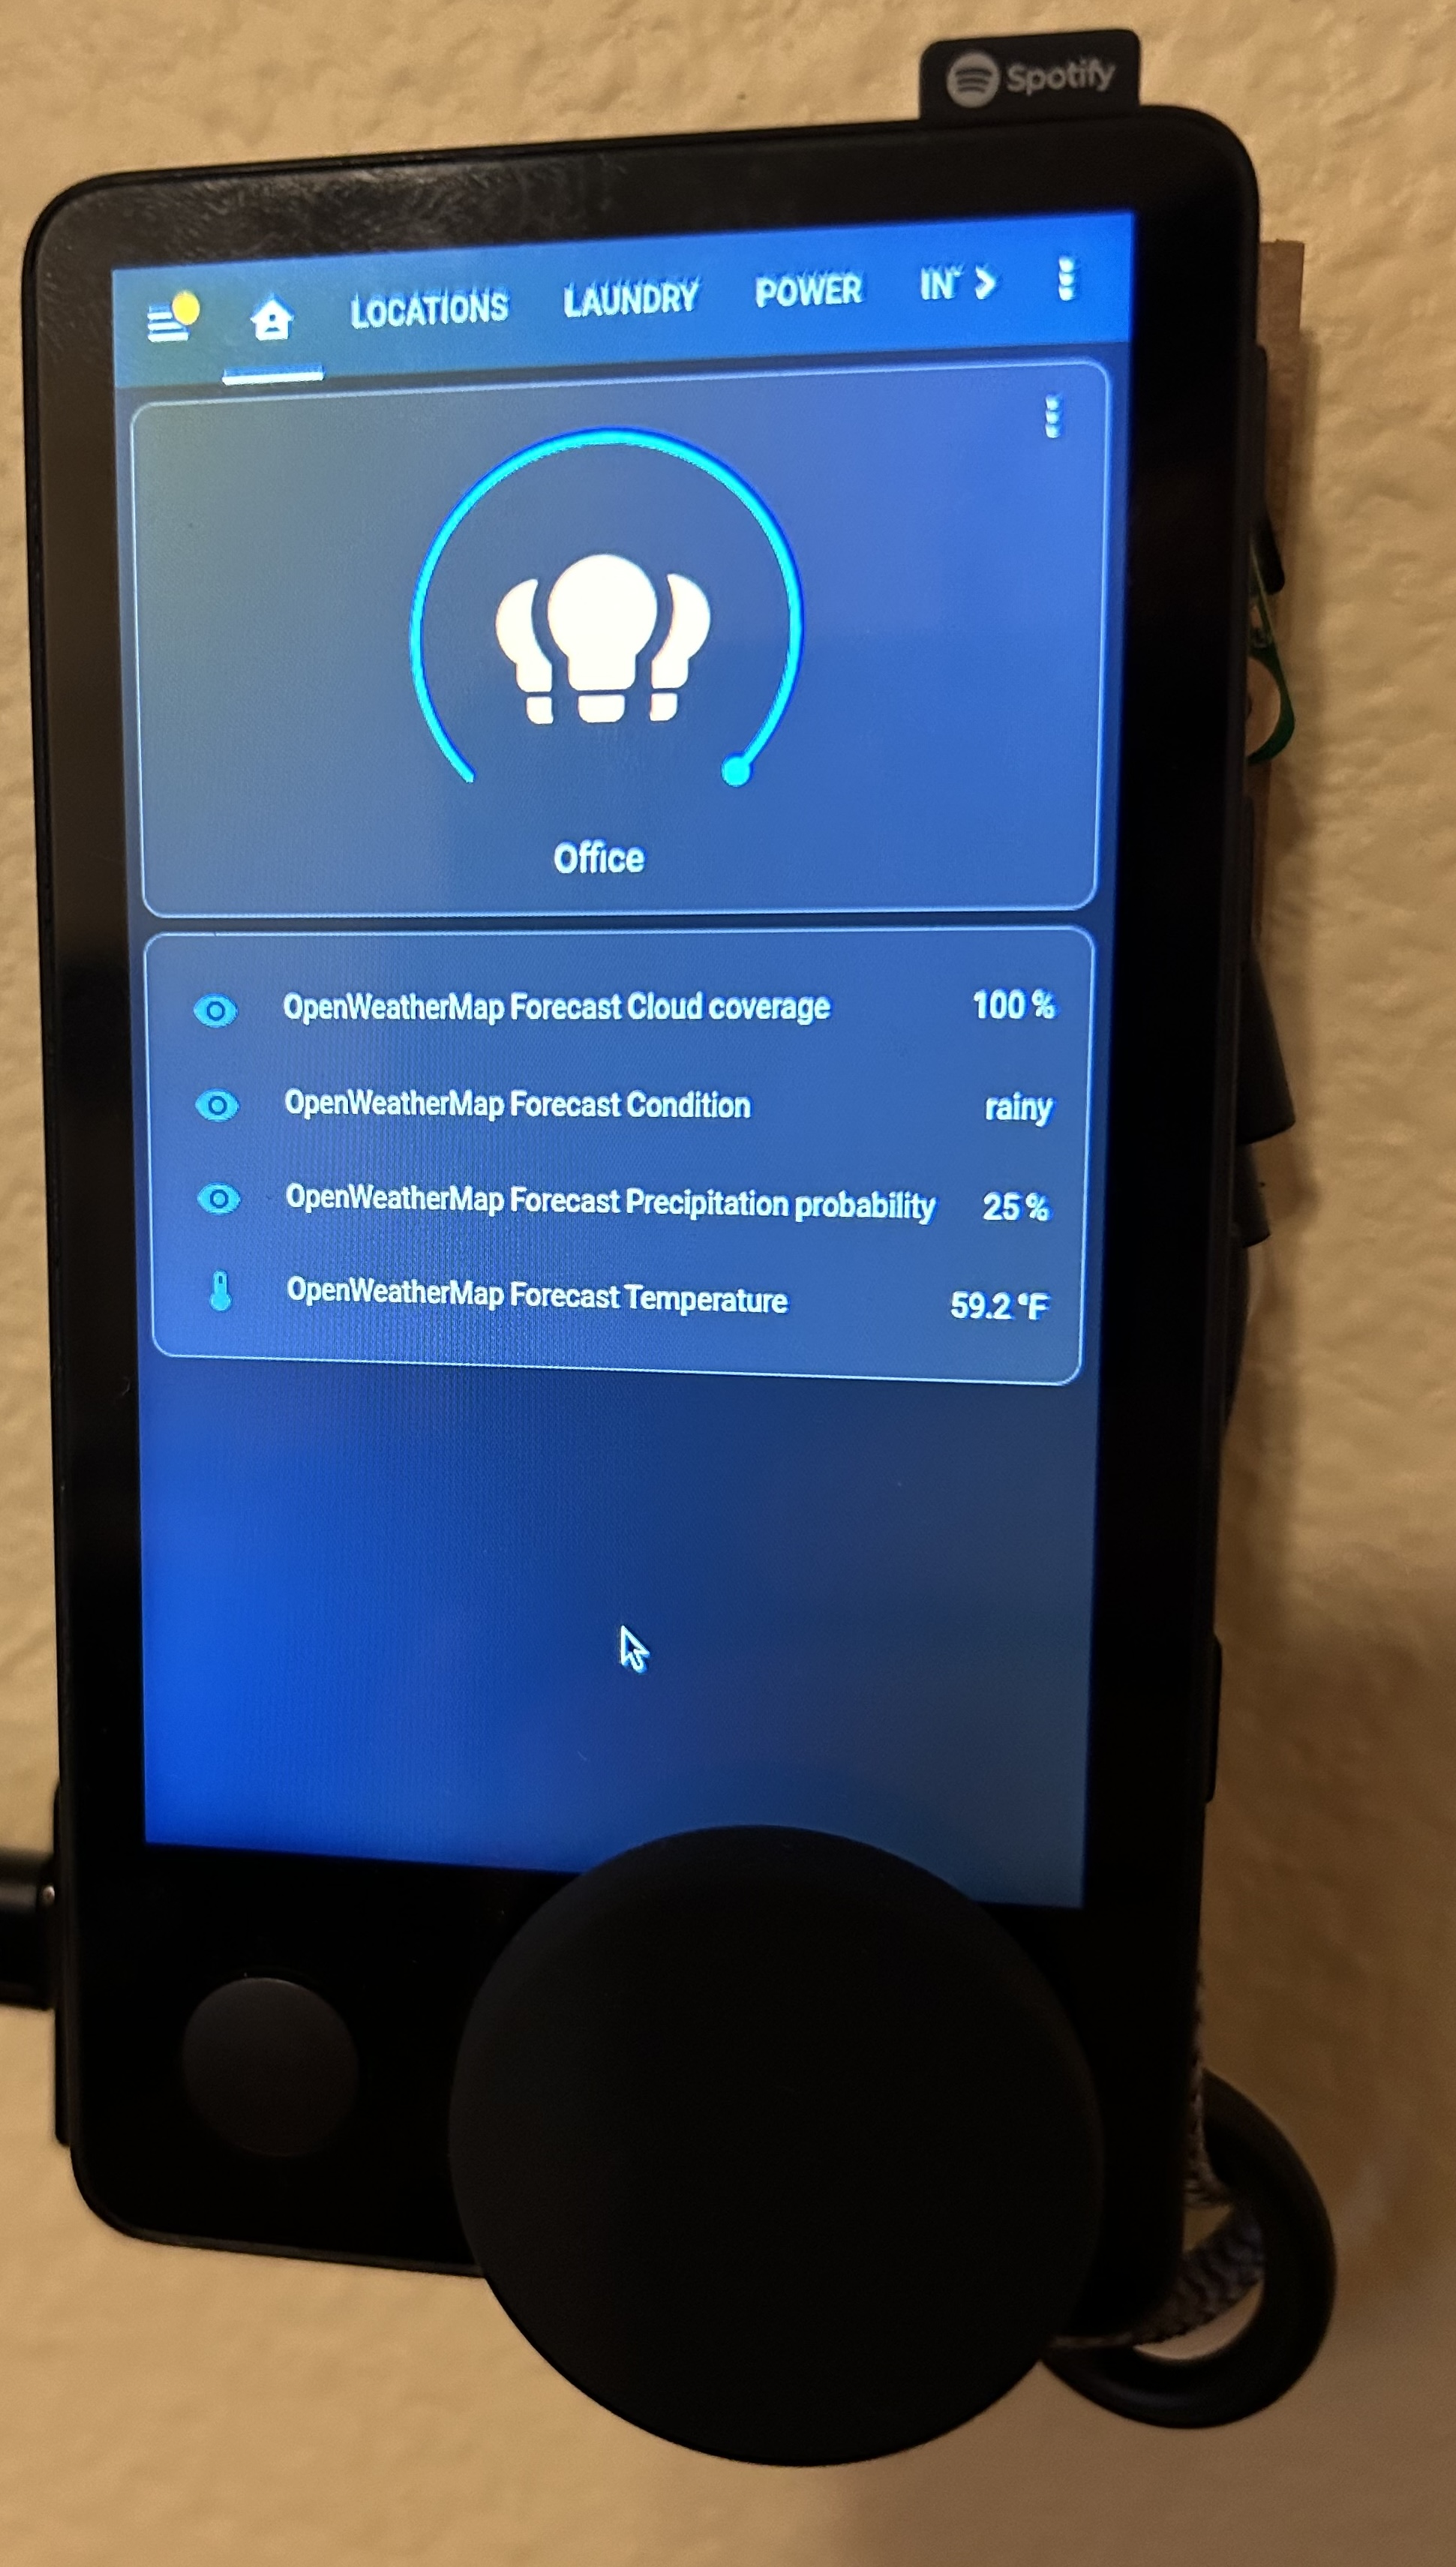
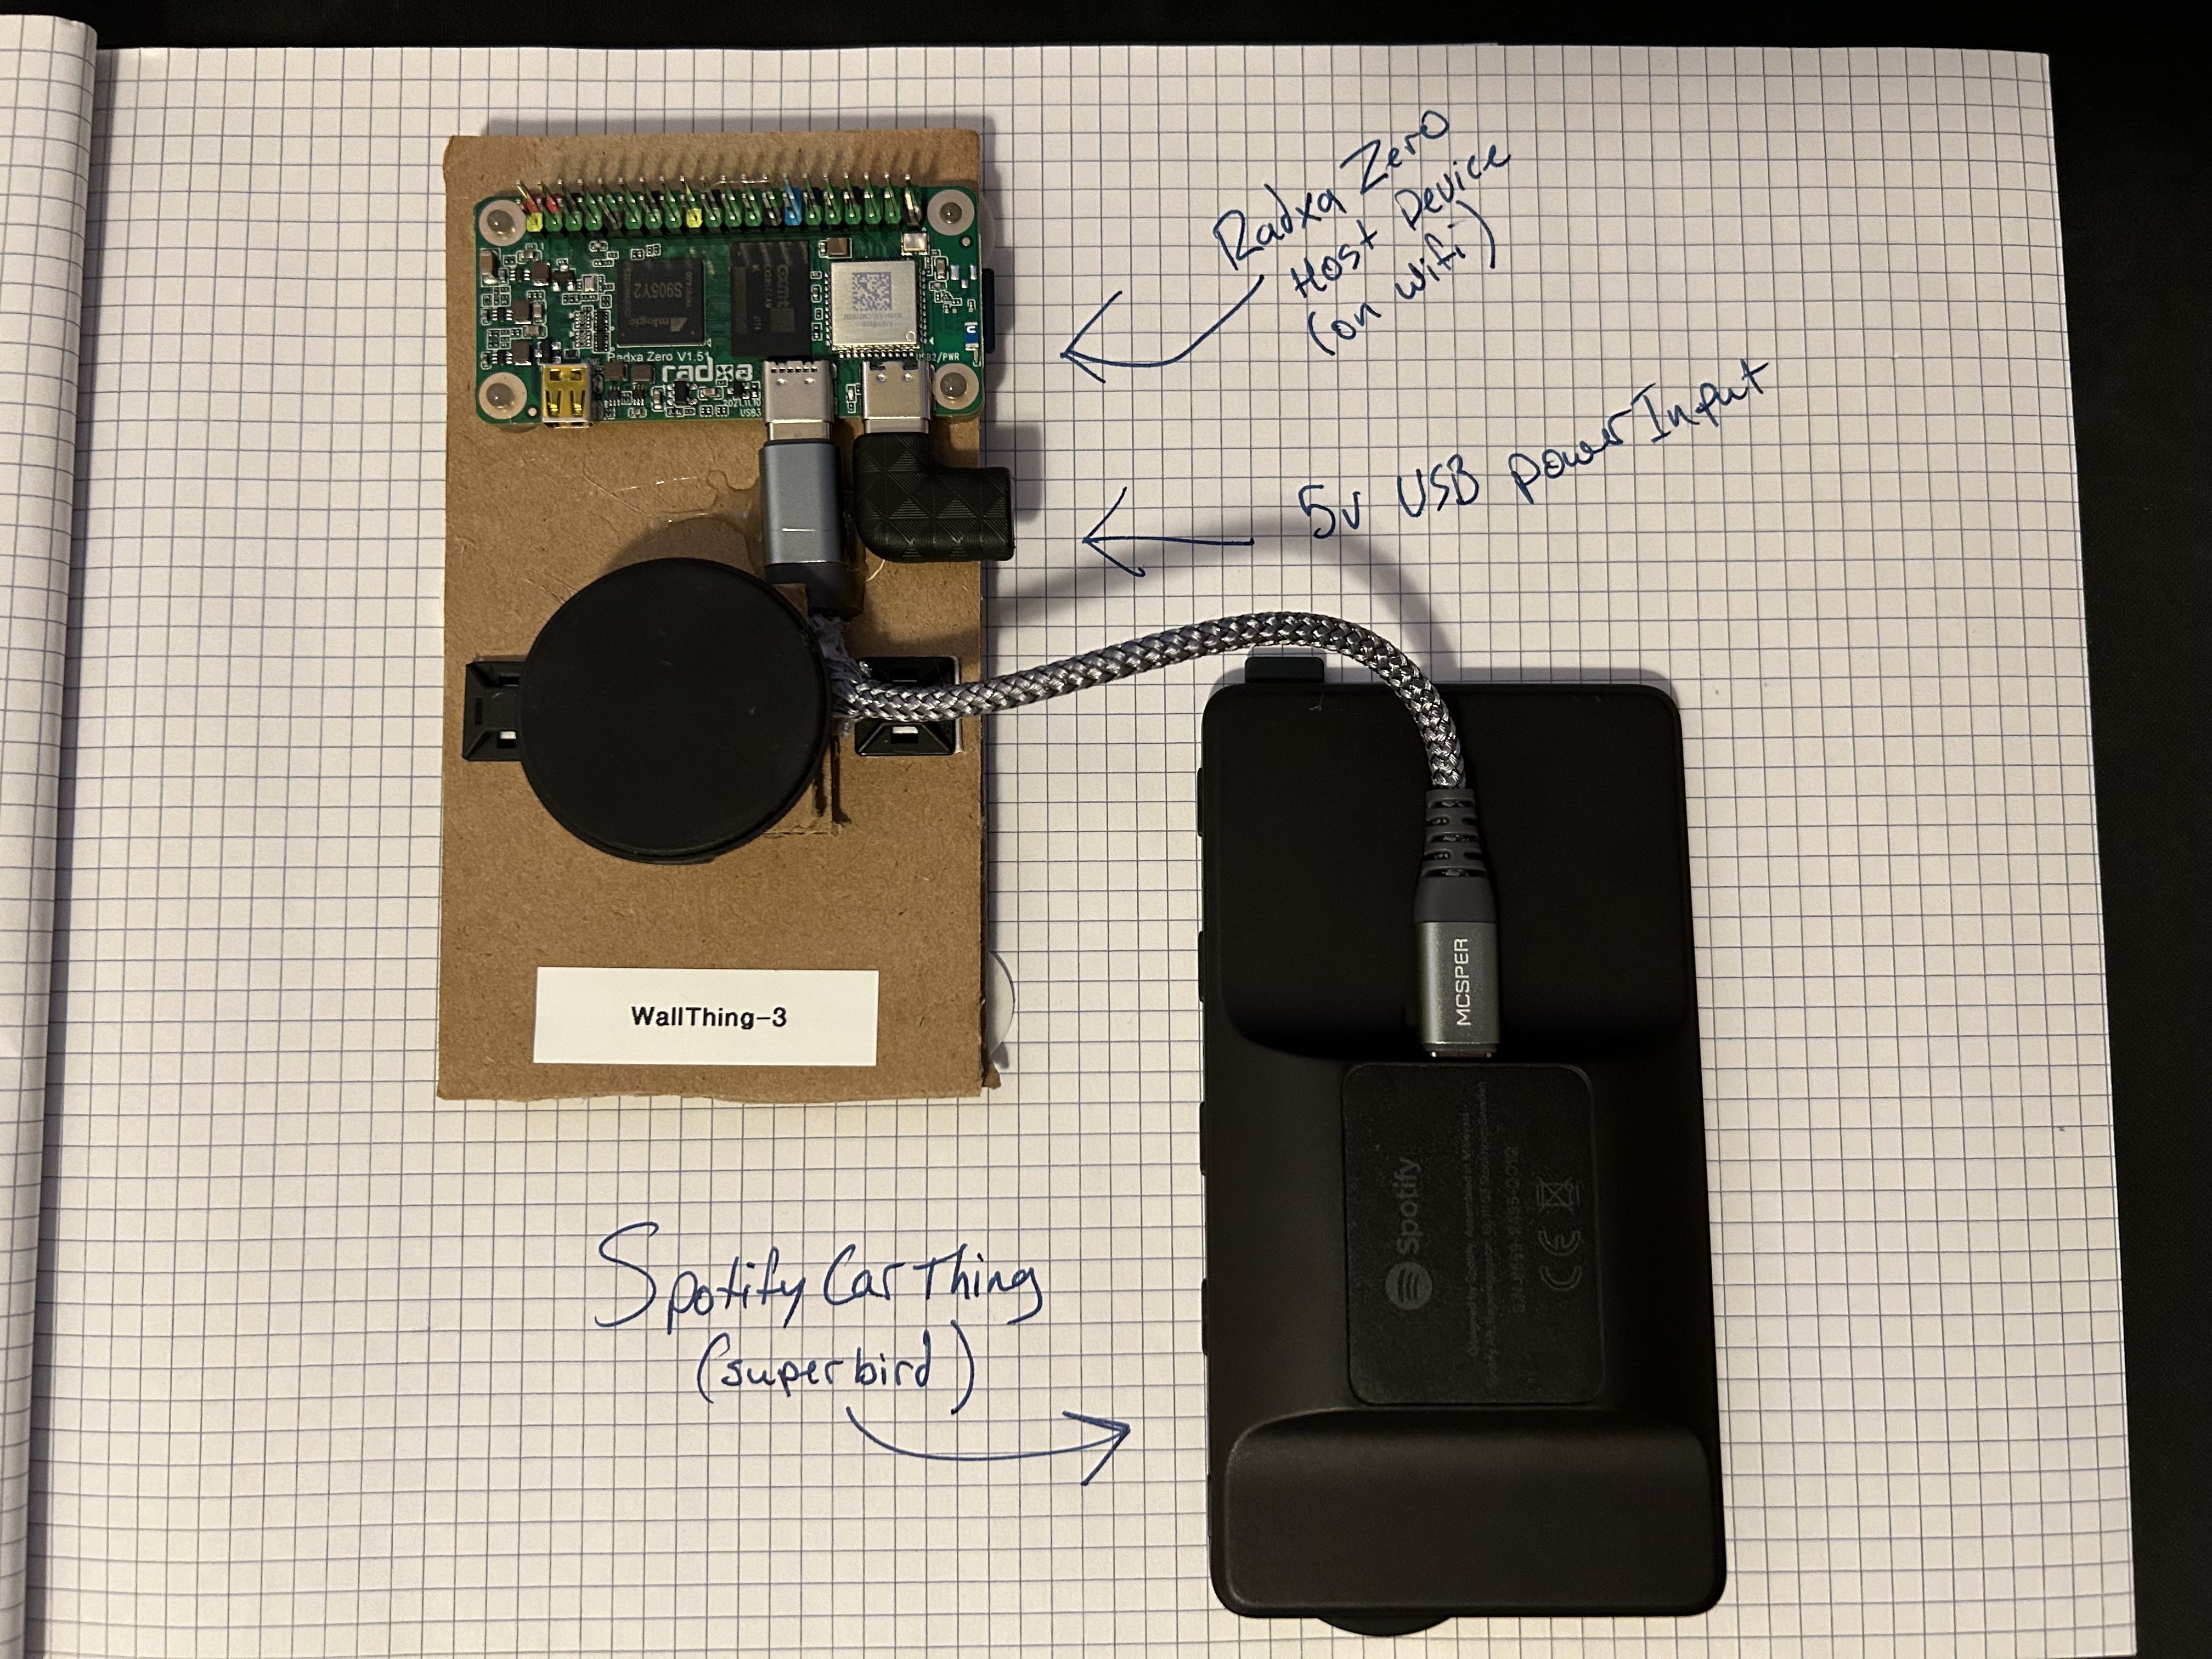
This is a prebuilt image of Debian 13 (Trixie) for the Spotify Car Thing, aka superbird. It combines the stock kernel with a debian rootfs, and launches a fullscreen Chromium kiosk. I like to use it with Home Assistant.
This image will remove the default Spotify functionality. You should definitely make a full backup before proceeding!
Default user and password are both superbird
Working:
- Debian 13 (Trixie) aarch64
- Framebuffer display working with X11, in portrait or landscape, with touch input
- Networking via USB RNDIS (requires a host device)
- Automatic blacklight on/off with display wake/sleep
- VNC and SSH (forwarded through host device)
- Chromium browser, fullscreen kiosk mode
- Buttons and dial used to control a light and recall scenes/automations/scripts on Home Assistant
- 256MB
settingspartition used for Chromium user profile
Available, but not used in this image:
- Bluetooth
- Backlight brightness control (currently fixed at 100)
- Audio (mic array, DSP)
Not working:
- Wifi
- GPU acceleration
WiFi is technically possible on this hardware, but the stock bootloaders and kernel disable it. It might be possible to cherry-pick the wifi information from the Radxa Zero device tree (practically the same SoC), but I think you would need to rebuild one or more of the bootloader stages to make it work.
GPU: the hardware has a Mali GPU, but the stock OS uses it via DirectFB QT library, and does not include necessary libraries to make it work with X11. It may be possible to grab the needed files from Radxa Zero.
After installation, you will have 3 different boot options, depending on what buttons are held:
-
Debian Mode - default, no buttons held
- bootlogo says Debian Trixie
- kernel is
boot_aroot isdata
-
Utility Mode - hold button 1
- bootlogo says Utility Mode
- kernel is
boot_aroot issystem_a - adb and already configured
- scripts to install debian
-
USB Burn Mode - hold button 4
- bootlogo says USB Burn Mode
- Spotify Car Thing
- another device to act as host, such as Radxa Zero, Rockpi S, Raspberry Pi 4, etc
- a USB cable to connect the two
- power supply for the host device
- a desktop/laptop for flashing the image to the Car Thing
- Download and extract the latest image from Releases
- Put your device in burn mode by holding buttons 1 & 4 while plugging into usb port
- avoid using a USB hub, you will have issues flashing the image
- Use the latest version of superbird-tool to flash the extracted image folder:
# root may be needed, check superbird-tool readme for platform-specific usage
# make sure your device is found
python3 superbird_tool.py --find_device
# restore the entire folder to your device
python3 superbird_tool.py --restore_device ~/Downloads/debian_v1.2_2023-12-19- Configure a host system
- Select a host device. I have tested:
- Radxa Zero with Armbian Jammy Minimal CLI
- The Armbian Bookworm release did not work with USB burn mode, but works fine as a host just for networking
- Radxa Rockpi S (with a PoE hat!), also with Armbian Jammy
- Raspberry Pi 4B, with Raspi OS Bookworm Lite
- Radxa Zero with Armbian Jammy Minimal CLI
- Copy and run
setup_host.shon the host device (as root), and reboot - Connect the Car Thing into the host device and power it up
- Select a host device. I have tested:
- ssh to the host device, and then you should be able to ssh to the Car Thing (user and password are both
superbird) :
# script added entry in /etc/hosts, use hostname "superbird" from host device
ssh superbird@superbird
# or by ip (host device is 192.168.7.1, superbird is 192.168.7.2)
ssh superbird@192.168.7.2- From another device on the same network, you should be able to ssh directly to the Car Thing using port 2022:
# where "host-device" is the hostname or ip of your host device
ssh -p 2022 superbird@host-device- Once you have ssh access to the Car Thing, edit some things:
- Probably change password
- Edit
/scripts/chromium_settings.shto change what URL to launch in the kiosk- Restart X11 and Chromium with:
sudo systemctl restart chromium.service
- Restart X11 and Chromium with:
- Edit
/scripts/buttons_settings.pyto change Home Assistant URL and add long-lived token for access- assign scenes/automations/scripts to buttons, assign a light entity to the knob
- Restart buttons script with:
sudo systemctl restart buttons.service
- Edit
/etc/X11/xorg.confto adjust screen timeout (default 10 mins), orientation (default portrait)- for landscape, un-comment lines
38and71
- for landscape, un-comment lines
- Edit
/scripts/setup_display.shand/scripts/setup_backlight.shto adjust backlight brightness (default 100)- Restart backlight script with:
sudo systemctl restart backlight.service
- Restart backlight script with:
- Change vnc password:
sudo vncpasswd /scripts/vnc_passwd- Restart vnc server with:
sudo systemctl restart vnc.service
- Restart vnc server with:
- Using your favorite VNC client, connect by VNC to the host device's address, port 5900, if you need to interact with a page (sign in)
- ?
- Profit
- using superbird-tool, use
--dump_deviceto dump a stock device into./dumps/debian_current/ - run
./build_image.sh, which will:- replace
env.txtwith switchable version (seefiles/env/env_switchable.txt) - modify
system_apartition for Utility Mode:- install usb gadget for ADB (see
files/system_a/etc/init.d/S49usbgadget) - modify
/etc/fstaband/etc/inittabto not mountdataorsettingspartitions (seefiles/system_a/etc/)
- install usb gadget for ADB (see
- format
settingspartition - format
datapartition, and:- use debootstrap to create a minimal debian root filesystem, plus a few extra packages
systemd systemd-sysv dbus kmod usbutils htop nano tree file less locales sudo dialog apt wget curl iputils-ping iputils-tracepath iputils-arping iproute2 net-tools openssh-server ntp xserver-xorg-core xserver-xorg-video-fbdev xterm xinit x11-xserver-utils shared-mime-info xserver-xorg-input-evdev libinput-bin xserver-xorg-input-libinput xinput fbset x11vnc chromium python3-minimal python3-pip- python packages from
requirements.txt
- copy
/lib/modules/4.9.113fromsystem_a - configure X11 via
/etc/X11/xorg.conf - set hostname to
superbird(configure inimage_config.sh) - add entry to
/etc/hoststo resolvehostas192.168.7.1(host device) - create regular user
superbird, password:superbird, with passwordless sudo (configure inimage_config.sh) - install scripts to
/scripts/(seefiles/data/scripts/) - install services to
/lib/systemd/system/(seefiles/data/lib/systemd/system/) - set locale to
en_US.UTF-8 - set timezone to
America/Los_Angeles - add entry to
/etc/fstabto mountsettingspartition at/config(for chromium profile) (seefiles/data/etc/fstab) - add entry to
/etc/inittabto enable serial console at 115200 baud (seefiles/data/etc/inittab) - generate new image for
logopartition usingfiles/logo/*.bmp
- use debootstrap to create a minimal debian root filesystem, plus a few extra packages
- replace
- You now have an image at
./dumps/debian_current/ready to flash to device using superbird-tool
Hint: Install apt-cacher-ng and then run ./build_image.sh --local_proxy to use locally cached packages (avoid re-downloading packages every time, much faster)
None. You definitely can mess up your device in ways that are difficult to recover. I cannot promise a bug in this script will not brick your device. By using this tool, you accept responsibility for the outcome.
I highly recommend connecting to the UART console, frederic's repo has some good pictures showing where the pads are.
Make backups.


