This repository is the official implementation of ECCV 2024 "Asymmetric Mask Scheme for Self-Supervised Real Image Denoising"
Asymmetric Mask Scheme for Self-Supervised Real Image Denoising
Xiangyu Liao*,
Tianheng Zheng,
Jiayu Zhong,
Pingping Zhang,
Chao Ren
The project depends on the following packages:
- PyTorch
- TorchVision
- OpenCV
- Loguru
- TIMM (PyTorch Image Models)
- PyTorch Lightning
- Weights & Biases (wandb)
- Rich
Before you start, make sure you have the following installed:
- Python (3.10, 3.11)
- pip (Python package installer)
-
Create a virtual environment (optional but recommended, otherwise you are likely to encounter unknown and unnecessary errors)
conda create -n myenv python=3.10
conda activate myenv
-
Upgrade pip
pip install --upgrade pip
-
Install the dependencies
pip install torch torchvision opencv-python loguru timm pytorch-lightning wandb rich
-
PyTorch Installation: Depending on your system's configuration, you might want to install PyTorch with specific CUDA versions. Check the PyTorch official website for more details.
-
OpenCV Installation: If you need specific OpenCV modules or face issues, refer to the OpenCV installation guide.
-
Weights & Biases Configuration: For using Weights & Biases (wandb), you might need to login to your account. Run
wandb loginand follow the instructions.
By following the above steps, you should have your environment set up and ready for development. If you encounter any issues, refer to the documentation of each package or seek help from the community.
-
Download Pretrained Weights:
- Navigate to this link to access the pretrained weights.
-
Save to
weightsDirectory:- Once downloaded, place the pretrained weights into the
weightsdirectory of your project like this
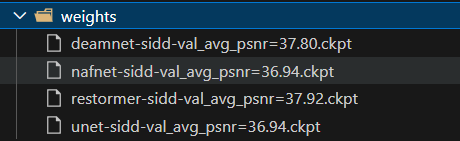 .
. - Once downloaded, place the pretrained weights into the

-
Download the SIDD Medium Dataset
- Visit the SIDD Medium Dataset website.
- Follow the instructions on the website to download the dataset.

-
Extract the Dataset
Once the download is complete, extract the contents of the dataset to a directory of your choice. For example:
zip -FF SIDD_Medium_Srgb_Parts.zip --out combined.zip
unzip combined.zip

To evaluate your models, you need to download the SIDD Validation dataset.
-
Download the Validation Files
- Visit the SIDD Dataset page.
- Download the following files:
ValidationGtBlocksSrgb.matValidationNoisyBlocksSrgb.mat
-
Organize the Validation Files
Place the downloaded files in a folder. The folder structure should be as follows:
datasets/
└── SIDD_Validation/
    ├── ValidationGtBlocksSrgb.mat
    ├── ValidationNoisyBlocksSrgb.mat
If you do not want to use the SIDD Medium dataset, you can prepare your own noisy images.
-
Organize Your Noisy Images
Place your noisy images in a folder. The folder structure should be as follows:
datasets/ └── custom_noisy_images/ ├── image1.png ├── image2.png ├── ... -
Verify the Images
Ensure that your images are in a readable format (e.g., PNG, JPEG) and that they are accessible from your script or notebook.
To facilitate fast reading, you can convert your dataset into an LMDB format using the divide_sub_image.py script.
python divide_sub_image.py --hw 512 512 --lmdb --suffix .PNG .bmp --path <Noisy PATH> --re "NOISY" --name <your_dataset_name> --output <your_output_path> --size 40 --step 256 256The lmdb folder structure should be as follows:
```
datasets/
└── lmdb_folder/
├── data.mdb
├── lock.mdb
├── medium_keys.txt
├── meta_info.pkl
└── meta_info.txt
```
To train the denoise model, you need to modify the paths in the configuration file. Open the configs/train/sidd/restormer.yaml file and update the paths as follows:
train:
  type: UnpairDataset
  dataset:
    path: `/mnt/f/datasets/SIDD/lmdb/medium_512_512_lmdb`  # Update this path
    datatype: lmdb # Update this type to "image" if your data is images
    max_len: 10000000
    crop_size: 160
    augment: True
  dataloader:
    batch_size: 4
    shuffle: true
    num_workers: 6
val:
  type: SIDD_validation
  dataset:
    sidd_val_dir: `/mnt/f/datasets/SIDD`  # Update this path
    len: 5
  dataloader:
    batch_size: 1
    shuffle: False
    num_workers: 6
more detail in codes/datasets
just run the command:
python DNE2E.py --train --config ./configs/train/sidd/restormer.yaml To validate the denoise model, you need to modify the paths in the configuration file. Open the configs/val/sidd/restormer.yaml file and update the paths as follows:
test:
  type: SIDD_validation
  dataset:
    sidd_val_dir: /mnt/f/datasets/SIDD # Update this path
    len: 1280
  dataloader:
    batch_size: 1
    shuffle: False
    num_workers: 6
more detail in codes/datasets
just run the command:
python DNE2E.py --config ./configs/val/sidd/restormer.yaml If you find this code useful for your research, please consider citing:
@inproceedings{hu2024gaussianavatar,
        title={Asymmetric Mask Scheme for Self-Supervised Real Image Denoising},
        author={Xiangyu Liao, Tianheng Zheng, Jiayu Zhong, Pingping Zhang, and Chao Ren},
        booktitle={European Conference on Computer Vision (ECCV)},
        year={2024}
}This project is built on source codes shared by AP-BSN, SpatiallyAdaptiveSSID, CVF-SID, DeamNet, Restormer, NAFNet, SCPGabNet, timm and pytorch.