| Key | Value |
|---|---|
| Environment |  |
| Services | API gateway, RDS Proxy, Lambda, Aurora |
| Integrations | Serverless Framework, SAM, AWS SDK, Cloudformation |
| Categories | Serverless, Lambda Functions, Load Testing |
| Level | Intermediate |
| Github | Repository link |
This project demonstrates the advantages of using RDS Proxy in a serverless environment, particularly when working with a relational database like RDS Aurora (PostgreSQL). The goal of this project is to showcase an end-to-end automated setup of RDS Aurora with RDS Proxy, leveraging a basic serverless architecture that includes API Gateway HTTP API and Lambda Functions.
The provided sample sets up two endpoints using the HTTP API — one that directly communicates with the RDS Aurora cluster and another that communicates via the RDS Proxy. Additionally, a load testing setup is implemented to measure the benefits of using RDS Proxy, focusing on its connection pooling and elasticity capabilities.
Before proceeding with this project, please ensure that you already have an operational RDS Aurora PostgreSQL cluster. Also, it's essential to have an RDS Proxy instance set up with forced IAM authentication enabled. If you don't have these components ready, you can refer to the steps below to deploy the RDS Aurora cluster with the RDS Proxy.
The following diagram shows the architecture that this sample application builds and deploys:
We are using the following AWS services to build our infrastructure:
- Lambda to create the serverless functions for
/proxyand/no-proxy. - API Gateway to expose the Lambda functions to the user through HTTP APIs.
- RDS as the central part of the sample application.
- Serverless Framework as our Infrastructure as Code framework to deploy the infrastructure on LocalStack.
- LocalStack Pro with the
localstackCLI. - Serverless Application Model with the samlocal installed.
- Python 3.9 installed.
- Node.js with npm package manager.
- Artillery to generate some load towards both the apis.
yqandjqfor running the deployment script.
Start LocalStack Pro with the LOCALSTACK_AUTH_TOKEN pre-configured:
export LOCALSTACK_AUTH_TOKEN=<your-auth-token>
localstack start
If you prefer running LocalStack in detached mode, you can add the
-dflag to thelocalstack startcommand, and use Docker Desktop to view the logs.
You can build and deploy the sample application on LocalStack by running our Makefile commands. Run make deploy to create the infrastructure on LocalStack. Run make stop to delete the infrastructure by stopping LocalStack.
Alternatively, here are instructions to deploy it manually step-by-step.
Note: If you have already provisioned an RDS Aurora cluster with RDS Proxy, you can skip this step and proceed with these steps instead.
This stack facilitates the seamless provisioning of an RDS Aurora PostgreSQL database, accompanied by an RDS Proxy to serve as its front-end. The entire setup will be securely deployed within a VPC, utilizing three private subnets. The essential parameters required for the next step are also provided as stack outputs, ensuring a smooth continuation of the deployment process.
samlocal build -t rds-with-proxy.yaml --use-container
samlocal deploy -t rds-with-proxy.yaml --guidedTo initiate the initial build and deployment of your application, execute the following command in your shell:
samlocal build --use-container
samlocal deploy --guidedTo create a user with no password and grant them the rds_iam role, use the following command:
python create-user.pyIf you have installed Artillery globally using npm, run the following command in your preferred command-line interface:
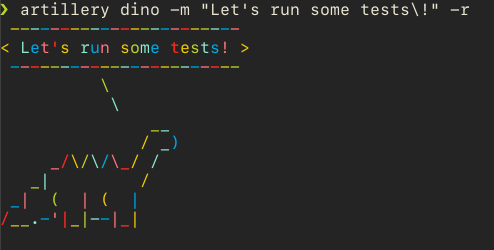
artillery dinoUpon execution, an ASCII dinosaur will be printed to the terminal. It should look something like this:
Before proceeding with load testing, it is essential to update the target attribute in the files load-no-proxy.yml and load-proxy.yml with the HTTP API endpoint you have created. You can find the endpoint as the stack output under ApiBasePath after executing the above steps.
Once the target endpoint is appropriately set, you can generate load on both APIs using the following command:
artillery run load-no-proxy.ymlartillery run load-proxy.ymlThis application sample hosts an example GitHub Action workflow that starts up LocalStack, builds the Lambda functions, and deploys the infrastructure on the runner. You can find the workflow in the .github/workflows/main.yml file. To run the workflow, you can fork this repository and push a commit to the main branch.
Users can adapt this example workflow to run in their own CI environment. LocalStack supports various CI environments, including GitHub Actions, CircleCI, Jenkins, Travis CI, and more. You can find more information about the CI integration in the LocalStack documentation.
We appreciate your interest in contributing to our project and are always looking for new ways to improve the developer experience. We welcome feedback, bug reports, and even feature ideas from the community. Please refer to the contributing file for more details on how to get started.

