Printing from React JS in Epson thermal printer using the Epson ePOS SDK for Javascript.
Printing from a web app looks pretty straightforward, just call the window.print() method, and that's it. But that approach has some drawbacks:
- You'll require to create a view of what you want to print (and/or use some printing specific CSS to achieve a proper presentation)
- It will show the user a print dialog, which the user needs to complete in order to begin the printing
- The printing will be a graphical representation of the page
- The client device must have installed the printer drivers
For many scenarios, the above is not so bad. But in a high demand environment (like in a POS application) each one is a drawback that becomes an important impact to performance and productivity:
- Requiring a printer view, could distract the user or lose the current information they're working with.
- Showing the printer dialog demands user extra actions and slows the process of getting the printing.
- Printing graphical demands more network traffic, the printing is slower and doesn't get the maximum printer speed. Raw printing is what POS printers are built for max performance.
- Requiring an installed driver on the client device, is a huge challenge for mobile users and limits application adoption.
So, the goals for this project are:
- Printing without changing what the users is looking at. Printing on background, automatically and without showing any dialog.
- Printing raw to reach the maximum printer performance and reduce network traffic.
- Don't need any installed printer driver, and use network connection to the printer, so don't need to physically connect the device to the printer.
This SDK provides a communication solution between JS and the printer, for a wide number of POS printers models. My solution is based on using this SDK.
-
Download the SDK: https://download.epson-biz.com/modules/pos/index.php?page=single_soft&cid=6679&scat=57&pcat=52
-
Unzip the SDK and copy the
epos-2.17.0.jsfile to your project under thepublicfolder. -
Reference the script As the SDK is not designed to be used on strict mode, to be included in a React app, need to be referenced on
public/index.htmlfile.
Printing to a network printer is like any other communication process, connect to the device and send the requests.
The connect function opens the connection with the printer and keeps it open for further printing.
let ePosDev = new window.epson.ePOSDevice();
ePosDevice.current = ePosDev;

ePosDev.connect(printerIPAddress, printerPort, (data) => {
  if (data === "OK") {
    ePosDev.createDevice(
      "local_printer",
      ePosDev.DEVICE_TYPE_PRINTER,
      { crypto: true, buffer: false },
      (devobj, retcode) => {
        if (retcode === "OK") {
          printer.current = devobj;
          setConnectionStatus(STATUS_CONNECTED);
        } else {
          throw retcode;
        }
      }
    );
  } else {
    throw data;
  }
});Once the connection to the printer is open, just have to send what you want to print. The print function does it:
const print = (text) => {
  let prn = printer.current;
  if (!prn) {
    alert("Not connected to printer");
    return;
  }

  prn.addText(text);
  prn.addFeedLine(5);
  prn.addCut(prn.CUT_FEED);

  prn.send();
};The SDK provides a lot of methods (addText, addFeedLine, etc.) to print and use the printer capabilities. Here you can check the available SDK methods
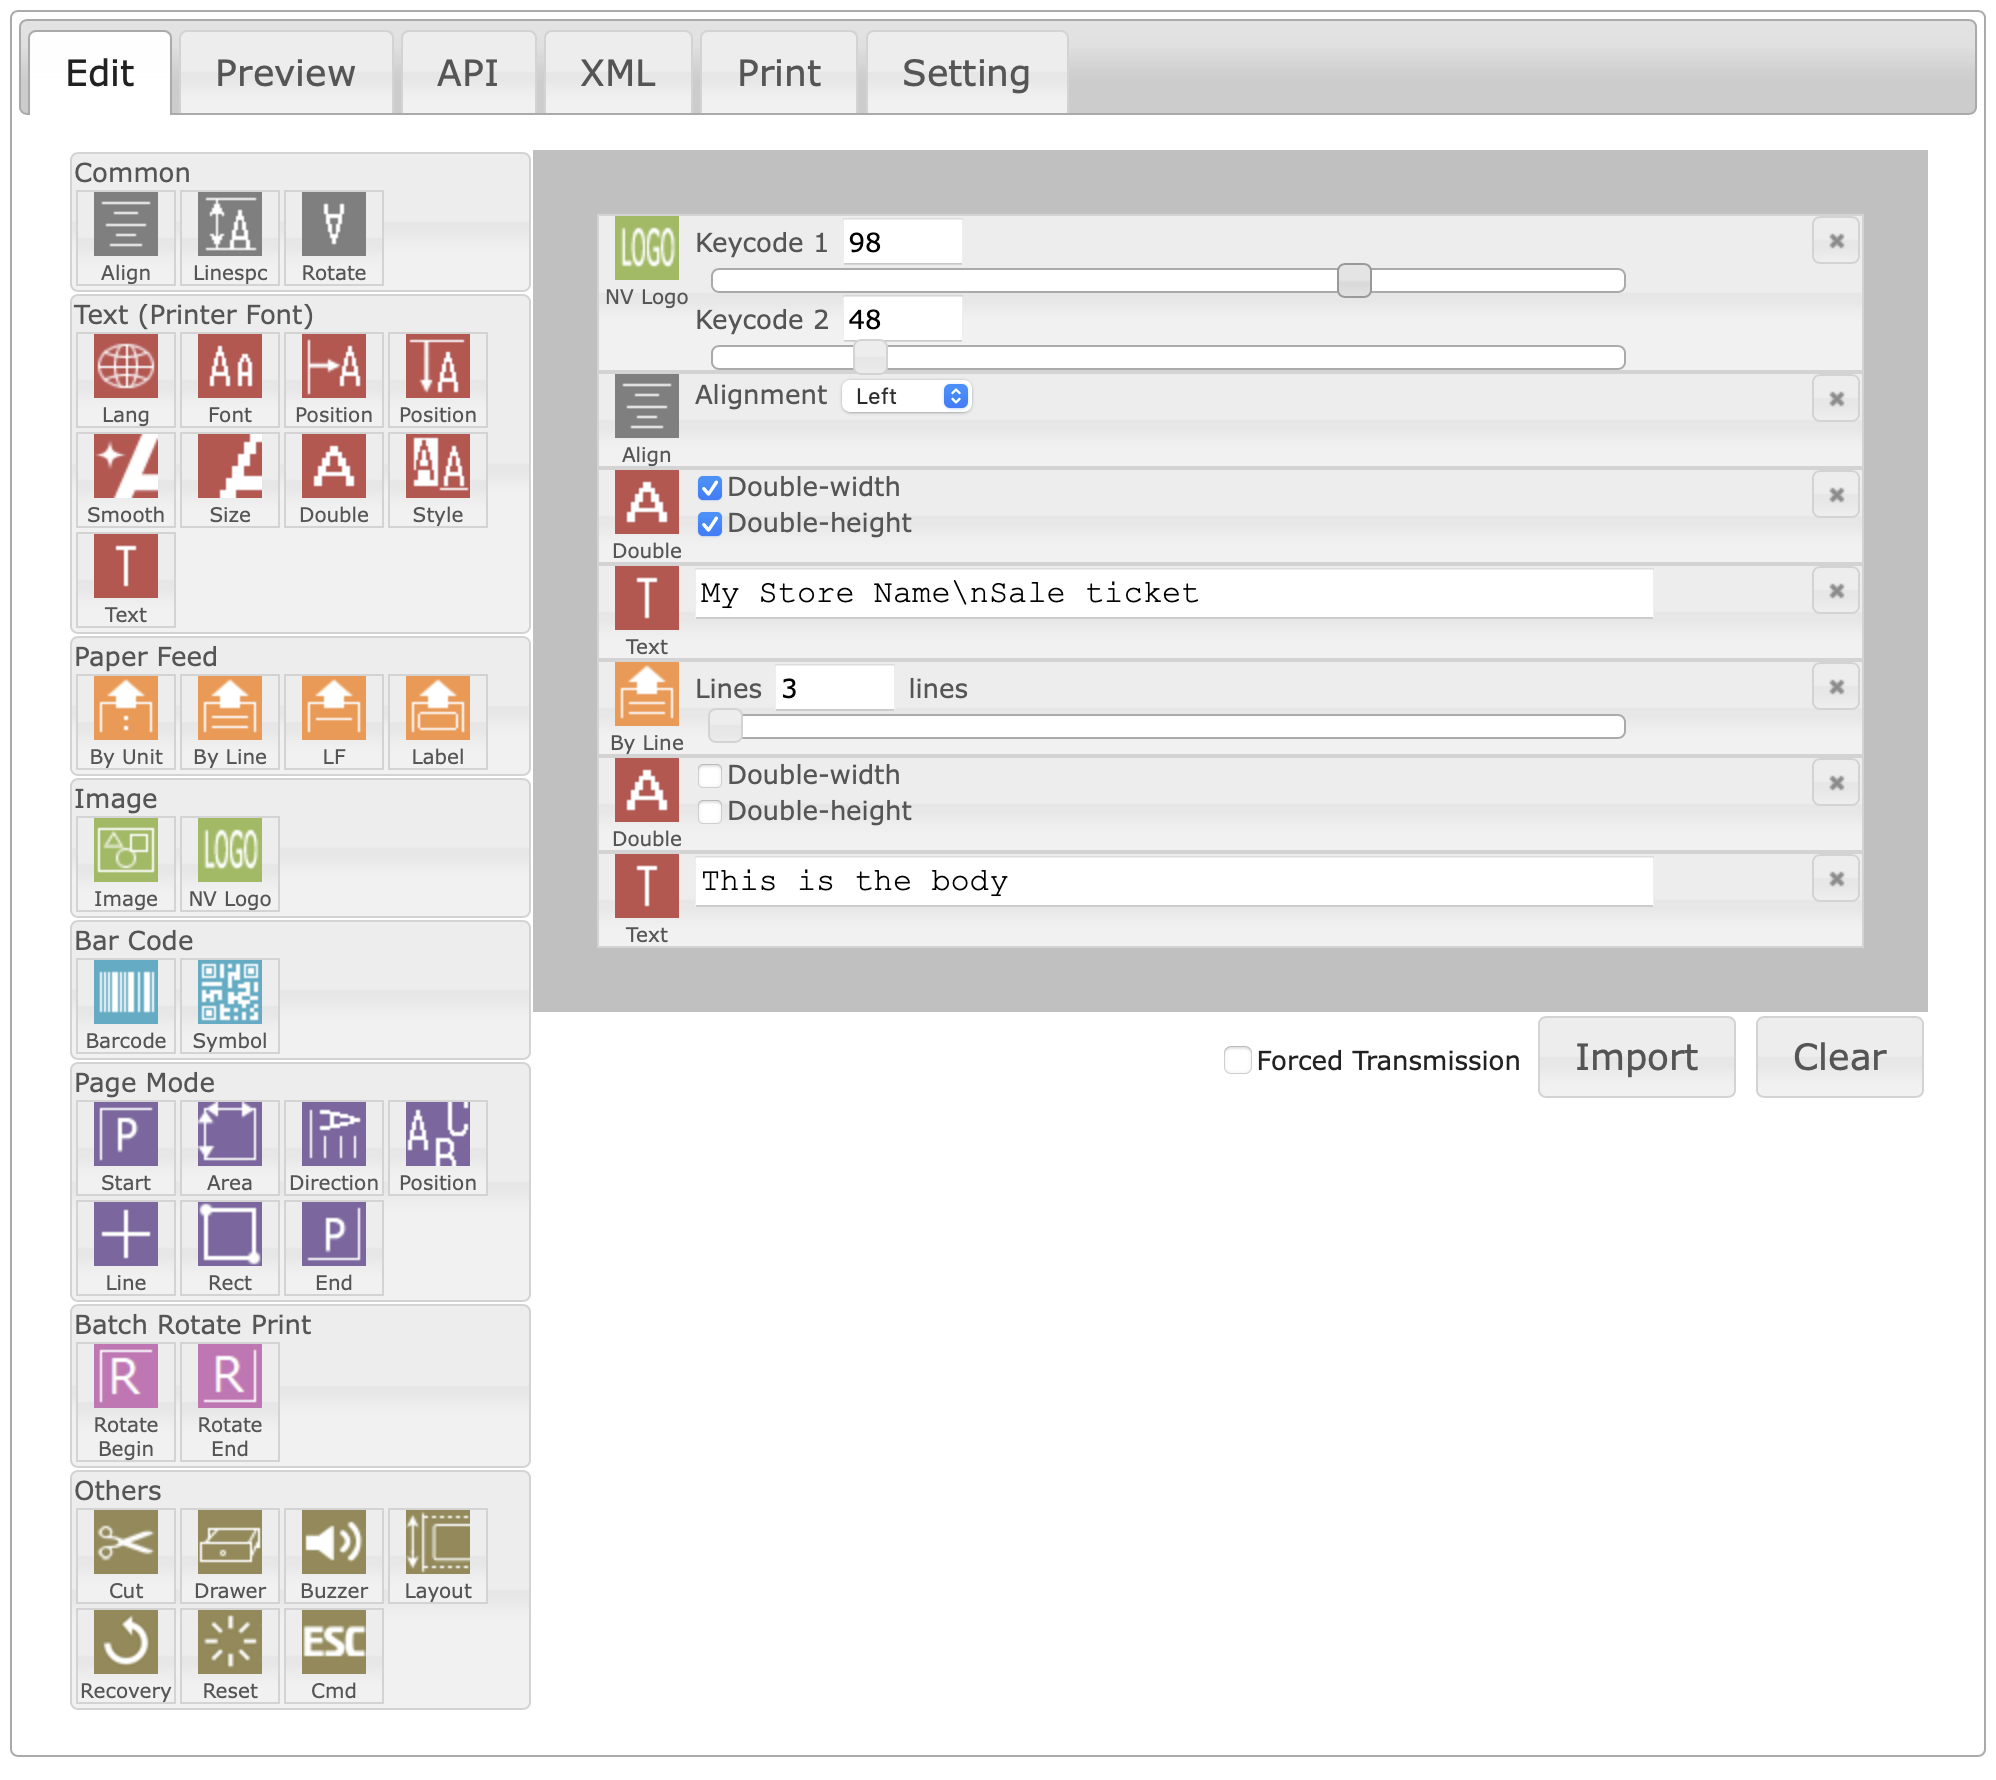
The easier way to design your ticket is using the SDK included designer. In the SDK folder just navigate to the /ReceiptDesigner/index.en.html
On the 'Edit' tab you can add commands to build your format, and on the 'API' tab you'll get the code to print the format:
You can get the code from the print() method.


