PiPhoto Sync makes your raspberry pi automatically upload photos when you insert your SD cards.
Here is a video demo of it uploading photos to OSX via ssh:
It's pretty handy if your SLR doesn't have wifi and you want to copy your photos to a server/the cloud without opening your computer. This blog post discusses it's core components.
Insert your sd card reader into the pi's usb port.
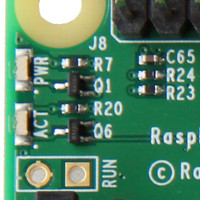
The status LED's on the pi are used for status:
The green led will start flashing as it is processed.
Once complete, the led's will indicate success of failure:
- 🟢 A solid green indicates the job was successful
- 🔴 A blinking red indicates the job failed
When you remove the sd card, the leds return to usual pi indicators.
PiPhoto lets you customize how it synchronizes your photos.
The sync_command (see below) in the config is the command that is executed when you insert your card. The simplest configuration just uses rsync to copy the files to a remote server.
I've written some notes on other setups you may like:
- Copying and Organizing over SSH
- Lightroom Classic on Mac OSX
- more to come soon.
Setup your pi, and then run
sudo ./install.sh
Create a new configuration file:
sudo cp config/piphoto.conf.example /etc/piphoto.conf
and edit it with your favorite editor.
The variables that need to be set are:
- mount_point - Where your sd card gets mounted (should match the point in the udev rules below.)
- run_as_user - The user to run the sync program as.
- sync_command - What command to run to sync the photos. (See Destinations above).
The udev rules are written to /etc/udev/rules/99-mediastorage_card_insert_run.rules during installation.
They will configure your pi to mount usb devices to /media when inserted.
If you wish to change the mount point, edit the rules file and then run:
udevadm control --reload
Note also you'll need to make the mount point correspond in piphoto.conf
The install script creates the file /etc/systemd/system/piphoto.service. It instructs the system to run phiphoto when the sd card is mounted under the pi user.
If you are using a different default user, or want to change any behavior, edit the script and then run:
systemctl daemon-reload
The install script also enables the service by default.
Logs are accessible via journalctl:
journalctl -f -u piphoto.service
You can fire the udev trigger without re-inserting the card with:
sudo udevadm trigger --action=add <device>
where <device> is your device file like /dev/sda etc.
MIT License (See LICENSE file)

