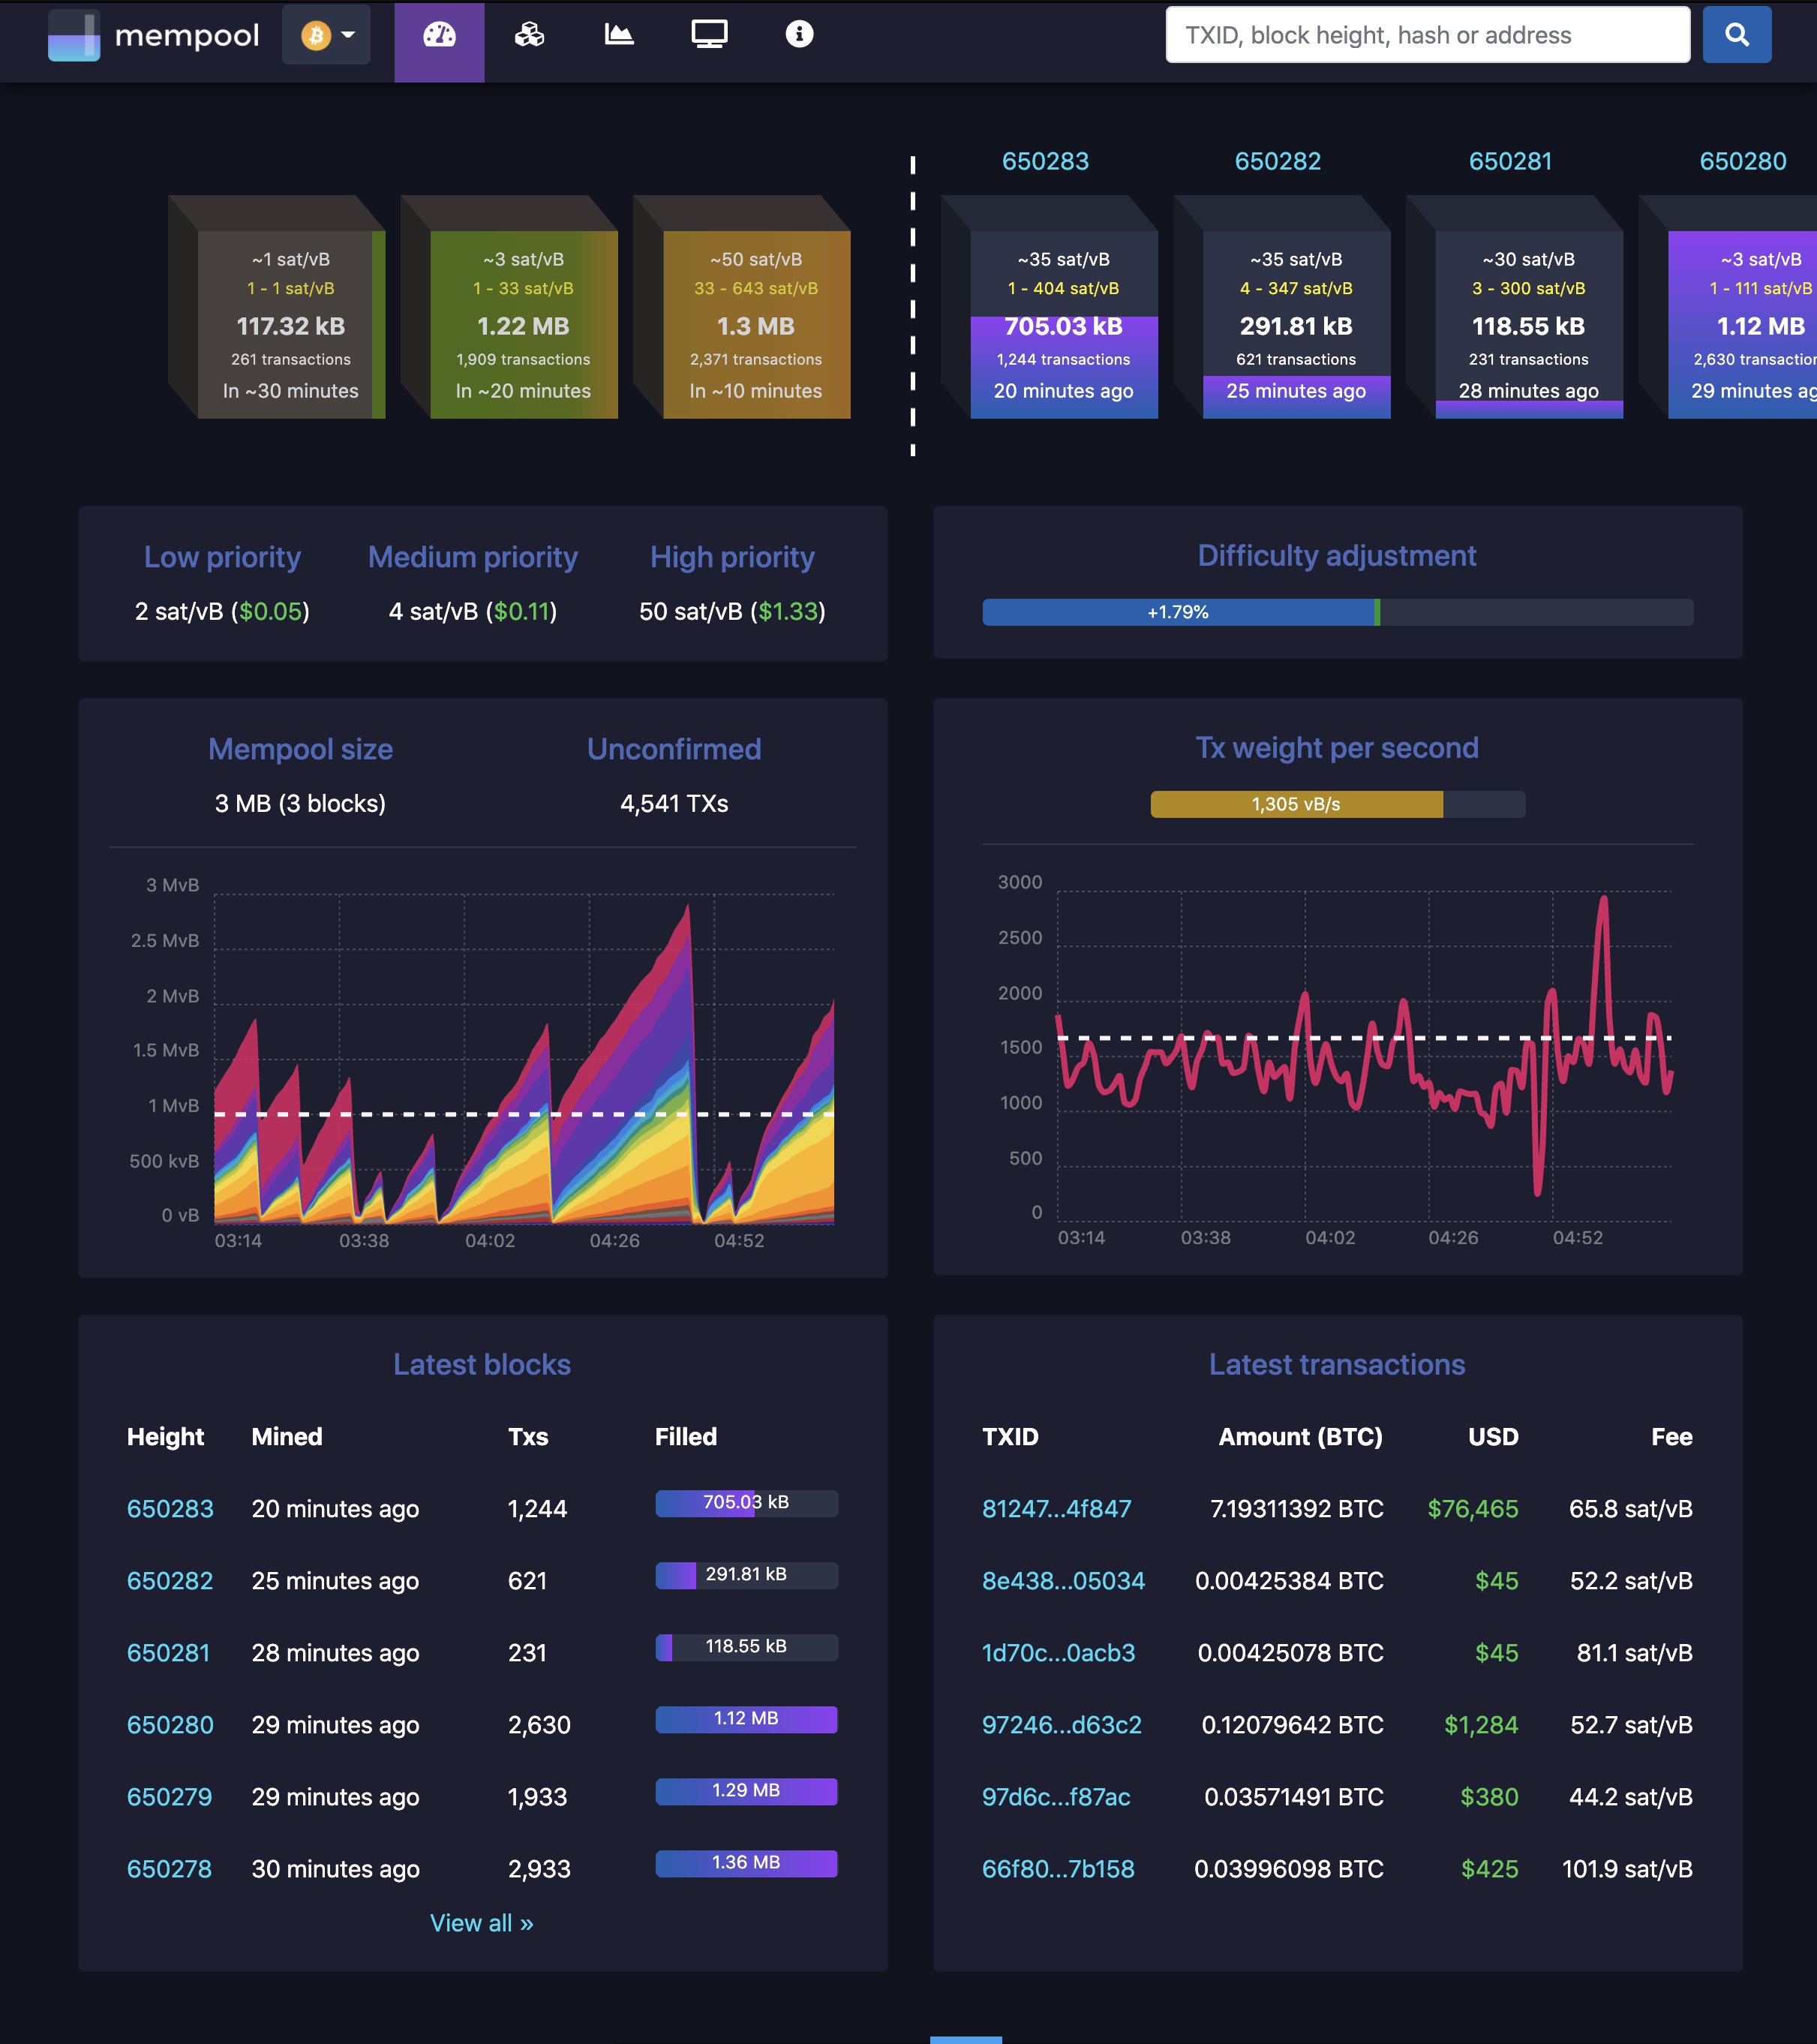
Mempool V1 features basic mempool visualization, fee estimation, and transaction tracking and can run directly off a Bitcoin Core full node on a Raspberry Pi.
Mempool V2 is the fully featured explorer running on mempool.space, but it requires a fully synced electrs backend running on powerful server hardware. Guide to install Mempool V2
Install from Docker Hub, passing your Bitcoin Core RPC credentials as environment variables:
docker pull mempool/mempool:v1.0
docker create -p 80:80 -e BITCOIN_NODE_HOST=192.168.1.102 -e BITCOIN_NODE_USER=foo -e BITCOIN_NODE_PASS=bar --name mempool mempool/mempool:v1.0
docker start mempool
docker logs mempool
You should see mempool starting up, which takes over an hour (needs 8 blocks). When it's ready, visit http://127.0.0.1/ to see your mempool.
- Bitcoin (full node required, no pruning, txindex=1)
- NodeJS (official stable LTS)
- MySQL or MariaDB (default config)
- Nginx (use supplied nginx.conf)
  git clone https://github.com/mempool-space/mempool.space
  cd mempool.space
git checkout v1.0.0 # put latest release tag hereEnable RPC and txindex in bitcoin.conf
  rpcuser=mempool
  rpcpassword=71b61986da5b03a5694d7c7d5165ece5
txindex=1Install dependencies and build code:
  # Install TypeScript Globally
  npm install -g typescript

  # Frontend
  cd frontend
  npm install
  npm run build

  # Backend
  cd ../backend/
  npm install
npm run buildIn the backend folder, make a copy of the sample config and modify it to fit your settings.
cp mempool-config.sample.json mempool-config.jsonEdit mempool-config.json to add your Bitcoin Core node RPC credentials:
  "BITCOIN_NODE_HOST": "192.168.1.5",
  "BITCOIN_NODE_PORT": 8332,
  "BITCOIN_NODE_USER": "mempool",
"BITCOIN_NODE_PASS": "71b61986da5b03a5694d7c7d5165ece5",Install MariaDB:
  # Linux
  apt-get install mariadb-server mariadb-client

  # macOS
  brew install mariadb
  brew services start mariadb
Create database and grant privileges:
  MariaDB [(none)]> drop database mempool;
  Query OK, 0 rows affected (0.00 sec)

  MariaDB [(none)]> create database mempool;
  Query OK, 1 row affected (0.00 sec)

  MariaDB [(none)]> grant all privileges on mempool.* to 'mempool' identified by 'mempool';
  Query OK, 0 rows affected (0.00 sec)
From the root folder, initialize database structure:
mysql -u mempool -p mempool < mariadb-structure.sqlCreate an initial empty cache and start the app:
  touch cache.json
  npm run start # node dist/index.js
After starting you should see:
  Server started on port 8999 :)
  New block found (#586498)! 0 of 1986 found in mempool. 1985 not found.
  New block found (#586499)! 0 of 1094 found in mempool. 1093 not found.
  New block found (#586500)! 0 of 2735 found in mempool. 2734 not found.
  New block found (#586501)! 0 of 2675 found in mempool. 2674 not found.
  New block found (#586502)! 0 of 975 found in mempool. 974 not found.
  New block found (#586503)! 0 of 2130 found in mempool. 2129 not found.
  New block found (#586504)! 0 of 2770 found in mempool. 2769 not found.
  New block found (#586505)! 0 of 2759 found in mempool. 2758 not found.
  Updating mempool
  Calculated fee for transaction 1 / 3257
  Calculated fee for transaction 2 / 3257
  Calculated fee for transaction 3 / 3257
  Calculated fee for transaction 4 / 3257
  Calculated fee for transaction 5 / 3257
  Calculated fee for transaction 6 / 3257
  Calculated fee for transaction 7 / 3257
  Calculated fee for transaction 8 / 3257
  Calculated fee for transaction 9 / 3257
You need to wait for at least 8 blocks to be mined, so please wait ~80 minutes. The backend also needs to index transactions, calculate fees, etc. When it's ready you will see output like this:
  Mempool updated in 0.189 seconds
  Updating mempool
  Mempool updated in 0.096 seconds
  Updating mempool
  Mempool updated in 0.099 seconds
  Updating mempool
  Calculated fee for transaction 1 / 10
  Calculated fee for transaction 2 / 10
  Calculated fee for transaction 3 / 10
  Calculated fee for transaction 4 / 10
  Calculated fee for transaction 5 / 10
  Calculated fee for transaction 6 / 10
  Calculated fee for transaction 7 / 10
  Calculated fee for transaction 8 / 10
  Calculated fee for transaction 9 / 10
  Calculated fee for transaction 10 / 10
  Mempool updated in 0.243 seconds
Updating mempoolSetup nginx using the supplied nginx.conf
  # install nginx and certbot
  apt-get install -y nginx python-certbot-nginx

  # replace example.com with your domain name
  certbot --nginx -d example.com

  # install the mempool configuration for nginx
  cp nginx.conf /etc/nginx/nginx.conf

  # edit the installed nginx.conf, and replace all
  # instances of example.com with your domain name
Make sure you can access https:/// in browser before proceeding
Build the frontend static HTML/CSS/JS, rsync the output into nginx folder:
  cd frontend/
  npm run build
sudo rsync -av --delete dist/mempool/ /var/www/html/In the frontend folder, make a copy of the sample config and modify it to fit your settings.
cp mempool-frontend-config.sample.json mempool-frontend-config.jsonIf everything went okay you should see the beautiful mempool 😁
If you get stuck on "loading blocks", this means the websocket can't connect. Check your nginx proxy setup, firewalls, etc. and open an issue if you need help.
