Features • Requirements • Usage • Development • About
see table of content
Add an one way synchronization from ticktick tasks and github commits to your google calendar and boost your time-tracking capabilities and productivity analysis.
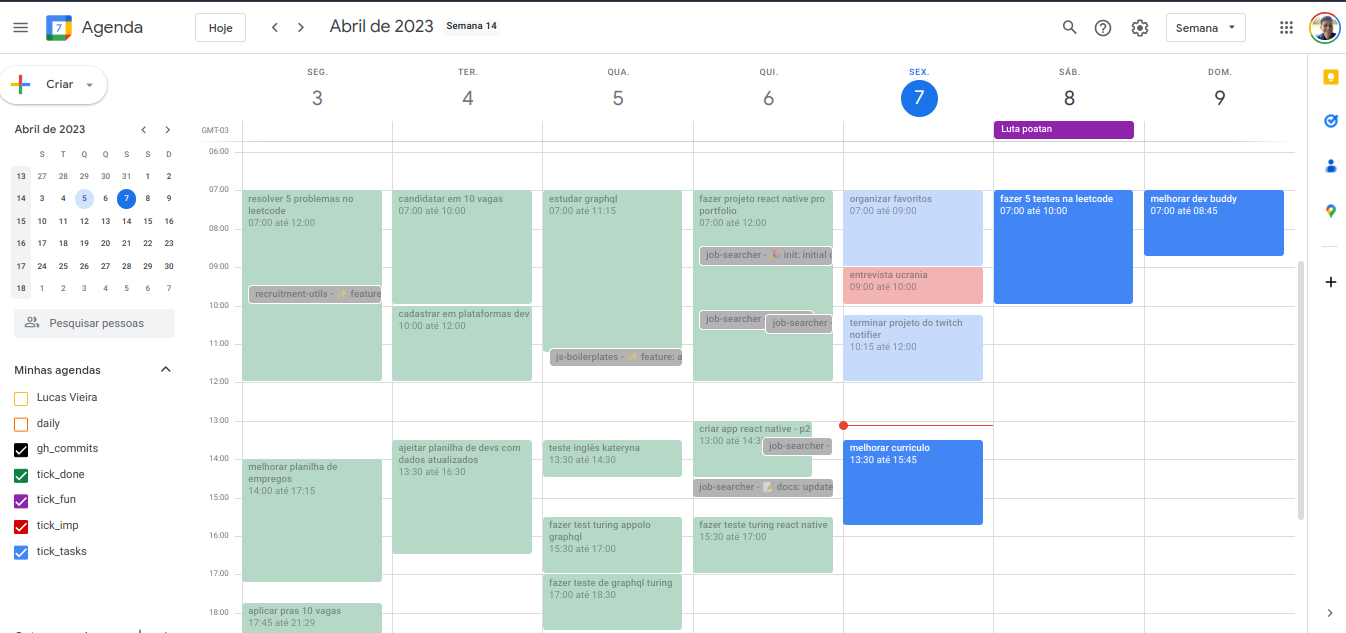
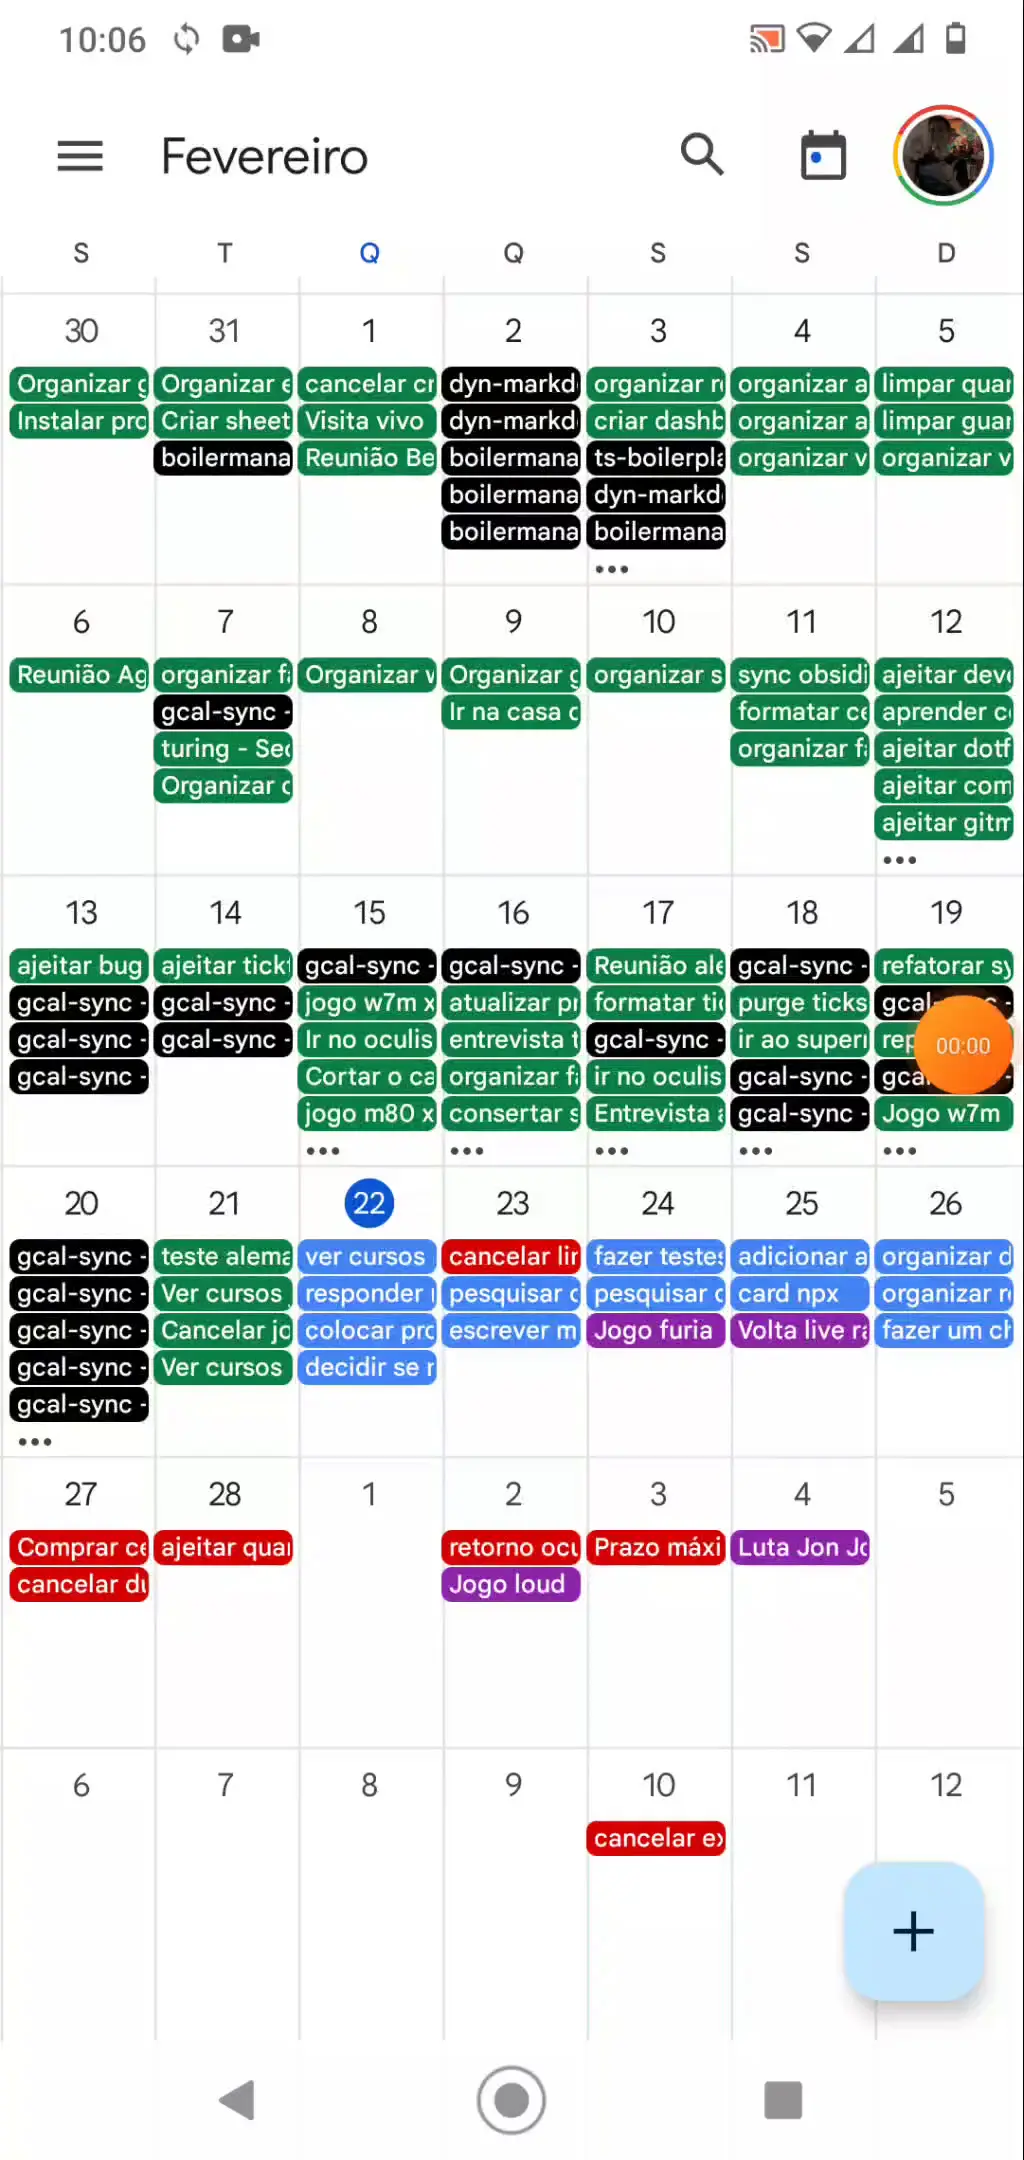
explanation of my usage on the above example
- black: my past github commits;
- green: ticktick completed tasks;
- the others collors are for ticktick tasks to do:
- red: important tasks with pre-defined datetime;
- blue: planned tasks;
- purple: not tasks (games to watch, movie release dates, etc).
This project was deeply inspired by this tool, and my main reason for creating this was to track my progress over my completed ticktick tasks, moving them to another calendar, which was not possible in the mentioned project at the time.
✔️ sync your ticktick tasks to google calendar;
✔️ sync your github commits to google calendar;
✔️ every completed task in ticktick will be moved to its corresponding completed google calendar;
✔️ updates corresponding google calendar event in case of changes in ticktick task date or name;
✔️ option to send a daily summary notification of what gcalsync has done throughout the day;
✔️ option to sync each ticktick list to a different google calendar;
✔️ option to ignore certain tasks based on tags;
✔️ you can add a url link to run the sync function manually whenever you want.
The only thing you need to use this solution is a gmail/google account.
It basically sets a function to run in google apps scripts to run at every 5 minutes, and this function is responsable for:
- sync your ticktick tasks to google calendar;
- sync your github commits to google calendar;
- send you optional emails about session. daily changes, errors and new versions.
To effectively use this project, do the following steps:
1 - setup the ticktick ics calendars
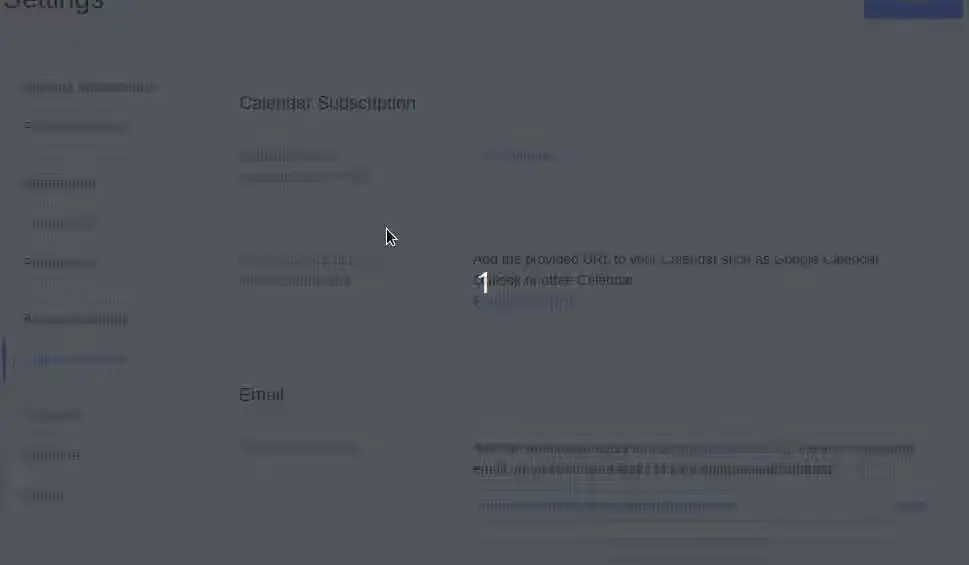
Go to this page and create as many ics calendars as you want to sync. You can create a ics calendar to sync everything, or one calendar per list.
Leave this browser tab open because you'll need the ics links in the next steps.
2 - create a Google Apps Scripts (GAS) project
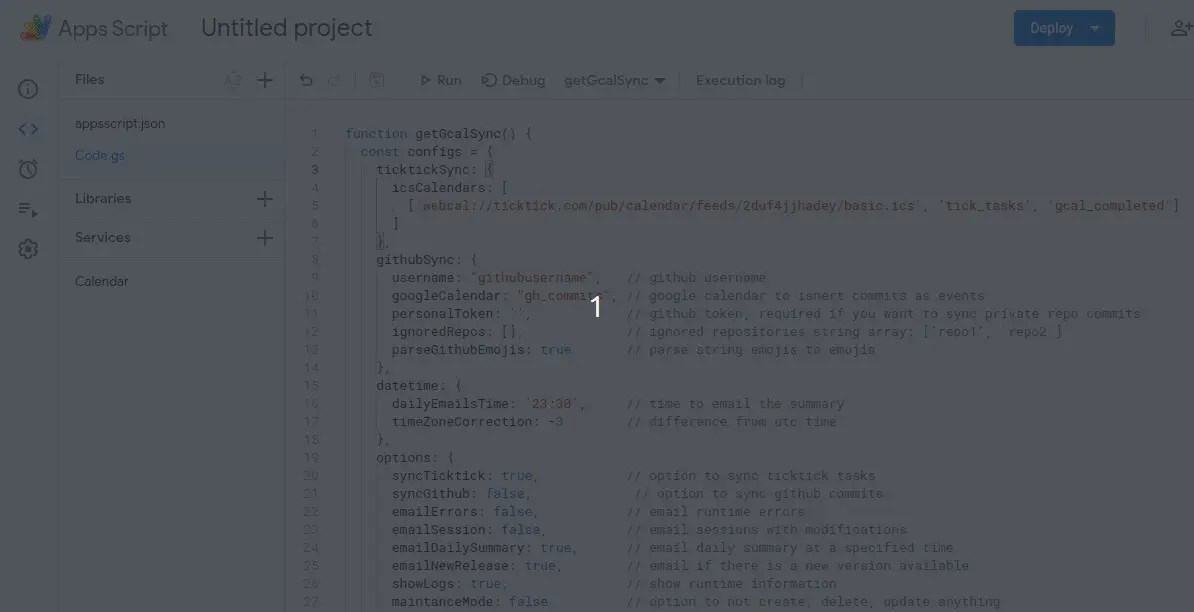
Go to the google apps script and create a new project by clicking in the button showed in the next image.
It would be a good idea to rename the project to something like "gcal-sync".
3 - setup the gcal-sync on GAS
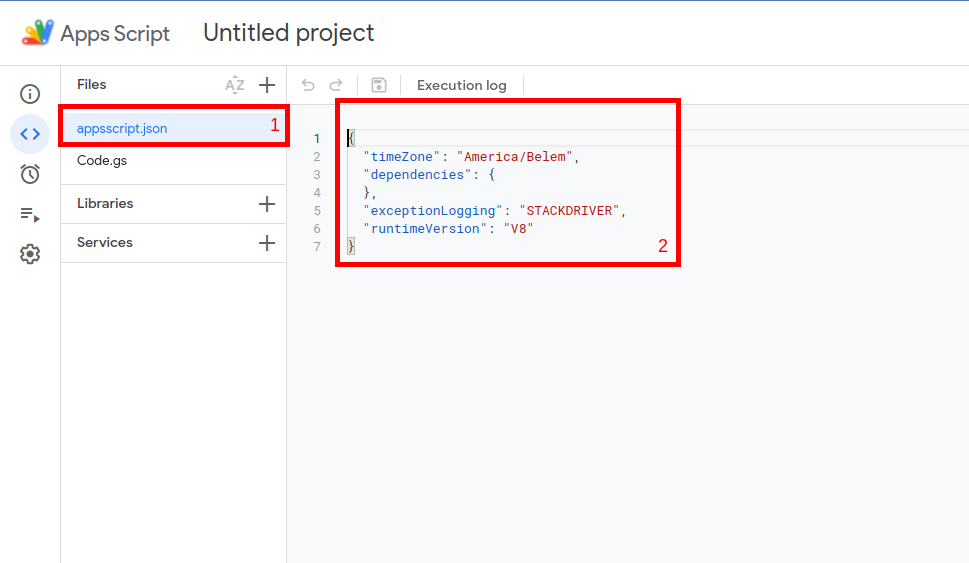
Click on the initial file, which is the rectangle-1 on the image.
Replace the initial content present in the rectangle-2 with the gcal-sync code provided bellow.
⚠️ Warning
Remember to update theconfigsobject according to your data and needs.
function getConfigs() {
  const configs = {
    settings: {
      sync_function: 'sync',                // function name to run every x minutes
      timezone_offset_correction: 0,        // hour correction to match maybe a daylight saving difference (if you want the events 1 hour "before", then put -1)
      update_frequency: 5,                  // wait time between sync checks (must be multiple of 5: 10, 15, etc)
      skip_mode: false,                     // if set to true, it will skip every sync (useful for not messing up your data if any bug occurs repeatedly)
      per_day_emails: {
        time_to_send: '22:00',              // time to email the summary
        email_daily_summary: false,         // email all the actions done in the day on the above time
        email_new_gcal_sync_release: false, // check one time per day and email when a new gcal-sync version is released on the above time
      },
      per_sync_emails: {
        email_errors: false,                // email when some error occurs
        email_session: false                // email when any item was added, updated or removed from your gcal
      }
    },
    github_sync: {
      username: 'lucasvtiradentes',         // github username
      personal_token: '',                   // github token, required if you want to sync private repo commits
      commits_configs: {
        should_sync: true,                  // controls if the github commits sync should be done
        commits_calendar: 'gh_commits',     // google calendar to insert commits as events
        ignored_repos: ['github-assets'],   // ignored repositories string array: ['repo1', 'repo2']
        parse_commit_emojis: true           // parse string emojis (:tada:) to emojis (✨)
      }
    },
    ticktick_sync: {
      should_sync: true,                    // controls if the ticktick sync should be done
      ics_calendars: [
        {
          link: 'webcal://link_A',          // all items from ticktick will be added to 'tasks' cal and, when completed, moved to 'done'
          gcal: 'tasks',
          gcal_done: 'done',
        },
        {
          link: 'webcal://link_B',          // all items from ticktick will be added to 'tasks' cal and, when completed, moved to 'done_healthy'
          gcal: 'tasks',
          gcal_done: 'done_healthy',
          tag: "HEALTHY"                    // this is a flag where we can "mark" tasks from this config to be ignored on other ics_calendars
        },
        {
          link: 'webcal://link_C',          // all items from ticktick, except the tasks marked with HEALTHY, will be added to 'tasks' cal and,  when completed, moved to 'done'
          gcal: 'tasks',
          gcal_done: 'done',
          ignoredTags: ['HEALTHY']
        }
      ]
    }
  };
  return configs
}

function getGcalSync(){

  let gcalSync;
  const configs = getConfigs()
  const useDevVersion = false

  if (useDevVersion){
    const GcalSync = getGcalSyncDev()
    gcalSync = new GcalSync(configs);
  } else {
    const version = "1.11.0"
    const gcalSyncContent = UrlFetchApp.fetch(`https://cdn.jsdelivr.net/npm/gcal-sync@1.11.0`).getContentText();
    eval(gcalSyncContent)
    gcalSync = new GcalSync(configs);
  }

  return gcalSync;
}

function install() {
  const gcalSync = getGcalSync();
  gcalSync.install();
}

function uninstall() {
  const gcalSync = getGcalSync();
  gcalSync.uninstall();
}

function sync(){
  const gcalSync = getGcalSync()

  try{
    console.log(gcalSync.sync())
  } catch(e){
    gcalSync.handleError(e)
  }
}

function doGet(reqParams) {
  const gcalSync = getGcalSync()

  const response = {
    sessionData: {},
    logs: [],
    error: null
  }

  try {
    response.sessionData = gcalSync.sync()
    response.logs = gcalSync.getSessionLogs()
  } catch (e){
    response.error = e
    gcalSync.handleError(e)
  }

  return ContentService.createTextOutput(JSON.stringify(response)).setMimeType(ContentService.MimeType.JSON)
}
if you want to change the google event color, you can choose from 12 options:
1   -> blue
2   -> green
3   -> purple
4   -> red
5   -> yellow
6   -> orange
7   -> turquoise
8   -> gray
9   -> bold blue
10  -> bold green
11  -> bold red
4 - allow the required google permissions
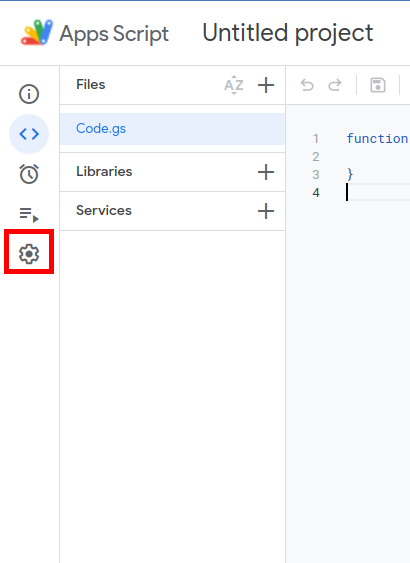
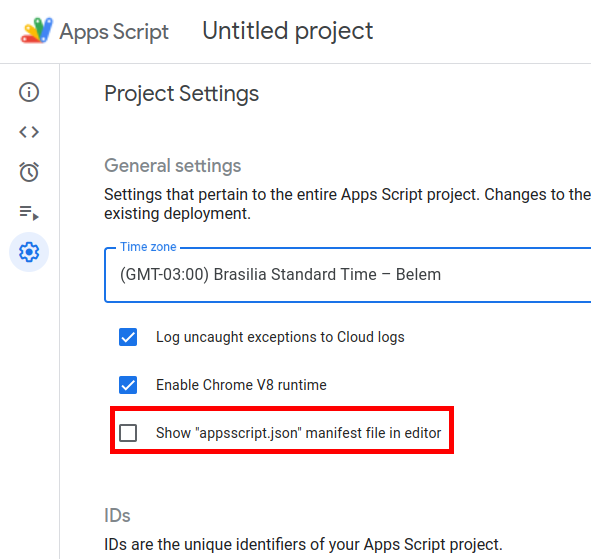
Go to the project settings by clicking on the first image rectangle. After that, check the option to show the appsscript.json in our project, a file that manages the required google api access.
Go back to the project files, and replace the content present in the appsscript.json with the following code:
{
  "timeZone": "Etc/GMT",
  "dependencies": {
    "enabledAdvancedServices": [
      {
        "userSymbol": "Calendar",
        "serviceId": "calendar",
        "version": "v3"
      }
    ]
  },
  "oauthScopes": [
    "https://www.googleapis.com/auth/script.scriptapp",
    "https://www.googleapis.com/auth/script.external_request",
    "https://www.googleapis.com/auth/calendar",
    "https://www.googleapis.com/auth/tasks",
    "https://www.googleapis.com/auth/script.send_mail",
    "https://www.googleapis.com/auth/userinfo.email"
  ],
  "exceptionLogging": "STACKDRIVER",
  "runtimeVersion": "V8",
  "webapp": {
    "executeAs": "USER_DEPLOYING",
    "access": "ANYONE_ANONYMOUS"
  }
}
6 - setup the gcal-sync to run automatically every x minutes
7 - deploy an api to manually run the sync function (optional)
- in case of deleted ticktick tasks (that means, you dont intend to do it anymore) that are in gcal, make sure to delete in gcal as well. If not, they will be moved to its corresponding completed calendar;
- it is not necessary to generate a github token in order to sync commits, it is only required if you want to sync your contributions to private repos as well;
- every update in ticktick may take 5 minutes to propagate to its ics calendars;
To update your esports-notifier instance and use the latest features, you just need to change the version number in the getGcalSync function, as it is shown bellow:
function getGcalSync(){
  // ...
  const version = "1.0.0" // update here to use the latest features
  const content = UrlFetchApp.fetch(`https://cdn.jsdelivr.net/npm/gcal-sync@${version}`).getContentText();
  // ...
}
So if your instance is running at version "1.0.0" and the latest is "3.6.1", just replace those numbers in the version variable.
It is a good practice to go to the dist folder everytime you update your instance to check if your files in GAS are the same as the new version; if they're not this may cause erros.
If you want to receive the daily emails, just go to the GAS respective project in the header dropdown menu select the uninstall function and then click on the Run button. By doing that, the GAS trigger responsable for running everyday the function will be deleted.
Instructions for development setup
To setup this project in your computer, run the following commands:
# Clone this repository
$ git clone https://github.com/lucasvtiradentes/gcal-sync

# Go into the repository
$ cd gcal-sync

# Install dependencies
$ npm install
If you want to contribute to the project, fork the project, make the necessary changes, and to test your work on google apps scripts with do this:
-
run
npm run buildin order to generate the dist files. After that, create a new GAS file (ex: dev_gcal.gs) and paste the content of gcalsync_dev on this new GAS file. -
after that, update the content of the
getGcalSyncas specified bellow:
function getGcalSync() {
  // ...
  const useDevVersion = true; // set this to true to use your gcal-sync version

  if (useDevVersion) {
    const GcalSync = getGcalSyncDev(); // your work is here
  }
  // ...
}
now you can test your work really easy on production/GAS!
This project uses the following thechnologies:
- online-ics: online tool to view the content of ICS calendars;
- gas-ics-sync: A Google Apps Script for syncing ICS/ICAL files faster than the current Google Calendar speed. This was my main inspiration;
- esports-notifier: get an daily email whenever one of your favorite eSports team has a match at day in games such as csgo, valorant and rainbow six siege;
- twitch-notifier: get email notifications when only your favorite twitch streamers go live.
This project is distributed under the terms of the MIT License Version 2.0. A complete version of the license is available in the LICENSE file in this repository. Any contribution made to this project will be licensed under the MIT License Version 2.0.
If you have any questions or suggestions you are welcome to discuss it on github issues or, if you prefer, you can reach me in my social media provided bellow.


