Twemproxy with redis
Introduction
This chart bootstraps a twemproxy cluster with multiple redis instances on a Kubernetes cluster using the Helm package manager. It uses persistent volume created with Longhorn storage class
Prerequisites
-
Kubernetes 1.20+
-
helm 3 client
Storage
In this example, we use Longhorn block storage. This storage solution from Rancher can easily be installed with the following command:
$ kubectl apply -f https://raw.githubusercontent.com/longhorn/longhorn/v1.1.0/deploy/longhorn.yamlAll the Longhorn components are created in the longhorn-system namespace. Among them the longhorn StorageClass that we could use to have a persistentVolume automatically created for each redis Pod.
Note: Longhorn is the solution selected, but any other block storage solution could be used instead (eg: Rook/Ceph, OpenEBS, ...)
Installing the Chart
Default parameters are defined in the values.yaml file, those are used when deploying the chart with the following command:
$ helm install redis .The following table lists some of the configurable parameters and their default values.
| Parameter | Description | Default |
|---|---|---|
redisImage |
redis image and tag. |
redis:6-alpine |
twemImage |
twemproxy image and tag. |
gojektech/twemproxy:0.4.1 |
twemproxy.replicaCount |
number of twemproxy replicas | 6 |
redis.replicaCount |
number of redis replicas | 4 |
If you need to change some of those parameters when installing the chart, you can:
- modify the values.yaml file or provide your own values file
- specify each parameter using the
--set key=value[,key=value]argument tohelm install
🔥 A node selector is used so the Pod deployed from that chart are shceduled on node with a given label (default to tier: redis) The following command add this default label on all the nodes but we are free to select only the one we need:
$ kubectl label node --all tier=redis
Uninstall
The chart can be deleted with the following command:
$ helm delete redisExample
List of resources
When installing the chart with the default value on DigitalOcean, we get something like the following:
$ kubectl get statefulset,deploy,pod,svc
NAME                            READY   AGE
statefulset.apps/redis-worker   4/4     2m33s

NAME                              READY   UP-TO-DATE   AVAILABLE   AGE
deployment.apps/redis-twemproxy   6/6     6            6           2m33s

NAME                                   READY   STATUS    RESTARTS   AGE
pod/redis-twemproxy-6d4db557f9-7c8c4   2/2     Running   0          2m33s
pod/redis-twemproxy-6d4db557f9-f7ncq   2/2     Running   0          2m33s
pod/redis-twemproxy-6d4db557f9-fhnmk   2/2     Running   0          2m33s
pod/redis-twemproxy-6d4db557f9-gh9xj   2/2     Running   0          2m33s
pod/redis-twemproxy-6d4db557f9-hcm6f   2/2     Running   0          2m33s
pod/redis-twemproxy-6d4db557f9-k677v   2/2     Running   0          2m33s
pod/redis-worker-0                     2/2     Running   0          2m33s
pod/redis-worker-1                     2/2     Running   0          2m33s
pod/redis-worker-2                     2/2     Running   0          2m33s
pod/redis-worker-3                     2/2     Running   0          2m33s

NAME                      TYPE           CLUSTER-IP      EXTERNAL-IP     PORT(S)          AGE
service/kubernetes        ClusterIP      10.245.0.1      <none>          443/TCP          103m
service/redis-twemproxy   LoadBalancer   10.245.226.70   68.183.255.92   6379:30926/TCP   2m33s
service/redis-worker-0    ClusterIP      10.245.18.156   <none>          6379/TCP         2m33s
service/redis-worker-1    ClusterIP      10.245.218.58   <none>          6379/TCP         2m33s
service/redis-worker-2    ClusterIP      10.245.68.197   <none>          6379/TCP         2m33s
service/redis-worker-3    ClusterIP      10.245.112.93   <none>          6379/TCP         2m33s
Load balancer exposing the twemproxy Pods
A load balancer has been automatically created on DigitalOcean infrastructure
$ redis-cli -h 68.183.255.92
68.183.255.92:6379> set hello world
OK
Storage
Longhorn volume have automatically been created
$ kubectl get pvc,pv
NAME                                        STATUS   VOLUME                                     CAPACITY   ACCESS MODES   STORAGECLASS   AGE
persistentvolumeclaim/data-redis-worker-0   Bound    pvc-23b84596-5f5f-4b91-9a51-525e4986f153   10Gi       RWO            longhorn       6m12s
persistentvolumeclaim/data-redis-worker-1   Bound    pvc-d0461687-bda5-4a94-8f5d-4aa8488056e8   10Gi       RWO            longhorn       6m12s
persistentvolumeclaim/data-redis-worker-2   Bound    pvc-76e2bfd2-ec2a-437e-a2ae-3e01f396cd40   10Gi       RWO            longhorn       6m12s
persistentvolumeclaim/data-redis-worker-3   Bound    pvc-3d779808-6c88-469f-875d-8f64fb2fcde5   10Gi       RWO            longhorn       6m12s

NAME                                                        CAPACITY   ACCESS MODES   RECLAIM POLICY   STATUS   CLAIM                         STORAGECLASS   REASON   AGE
persistentvolume/pvc-23b84596-5f5f-4b91-9a51-525e4986f153   10Gi       RWO            Delete           Bound    default/data-redis-worker-0   longhorn                6m4s
persistentvolume/pvc-3d779808-6c88-469f-875d-8f64fb2fcde5   10Gi       RWO            Delete           Bound    default/data-redis-worker-3   longhorn                6m4s
persistentvolume/pvc-76e2bfd2-ec2a-437e-a2ae-3e01f396cd40   10Gi       RWO            Delete           Bound    default/data-redis-worker-2   longhorn                6m2s
persistentvolume/pvc-d0461687-bda5-4a94-8f5d-4aa8488056e8   10Gi       RWO            Delete           Bound    default/data-redis-worker-1   longhorn                6m2s
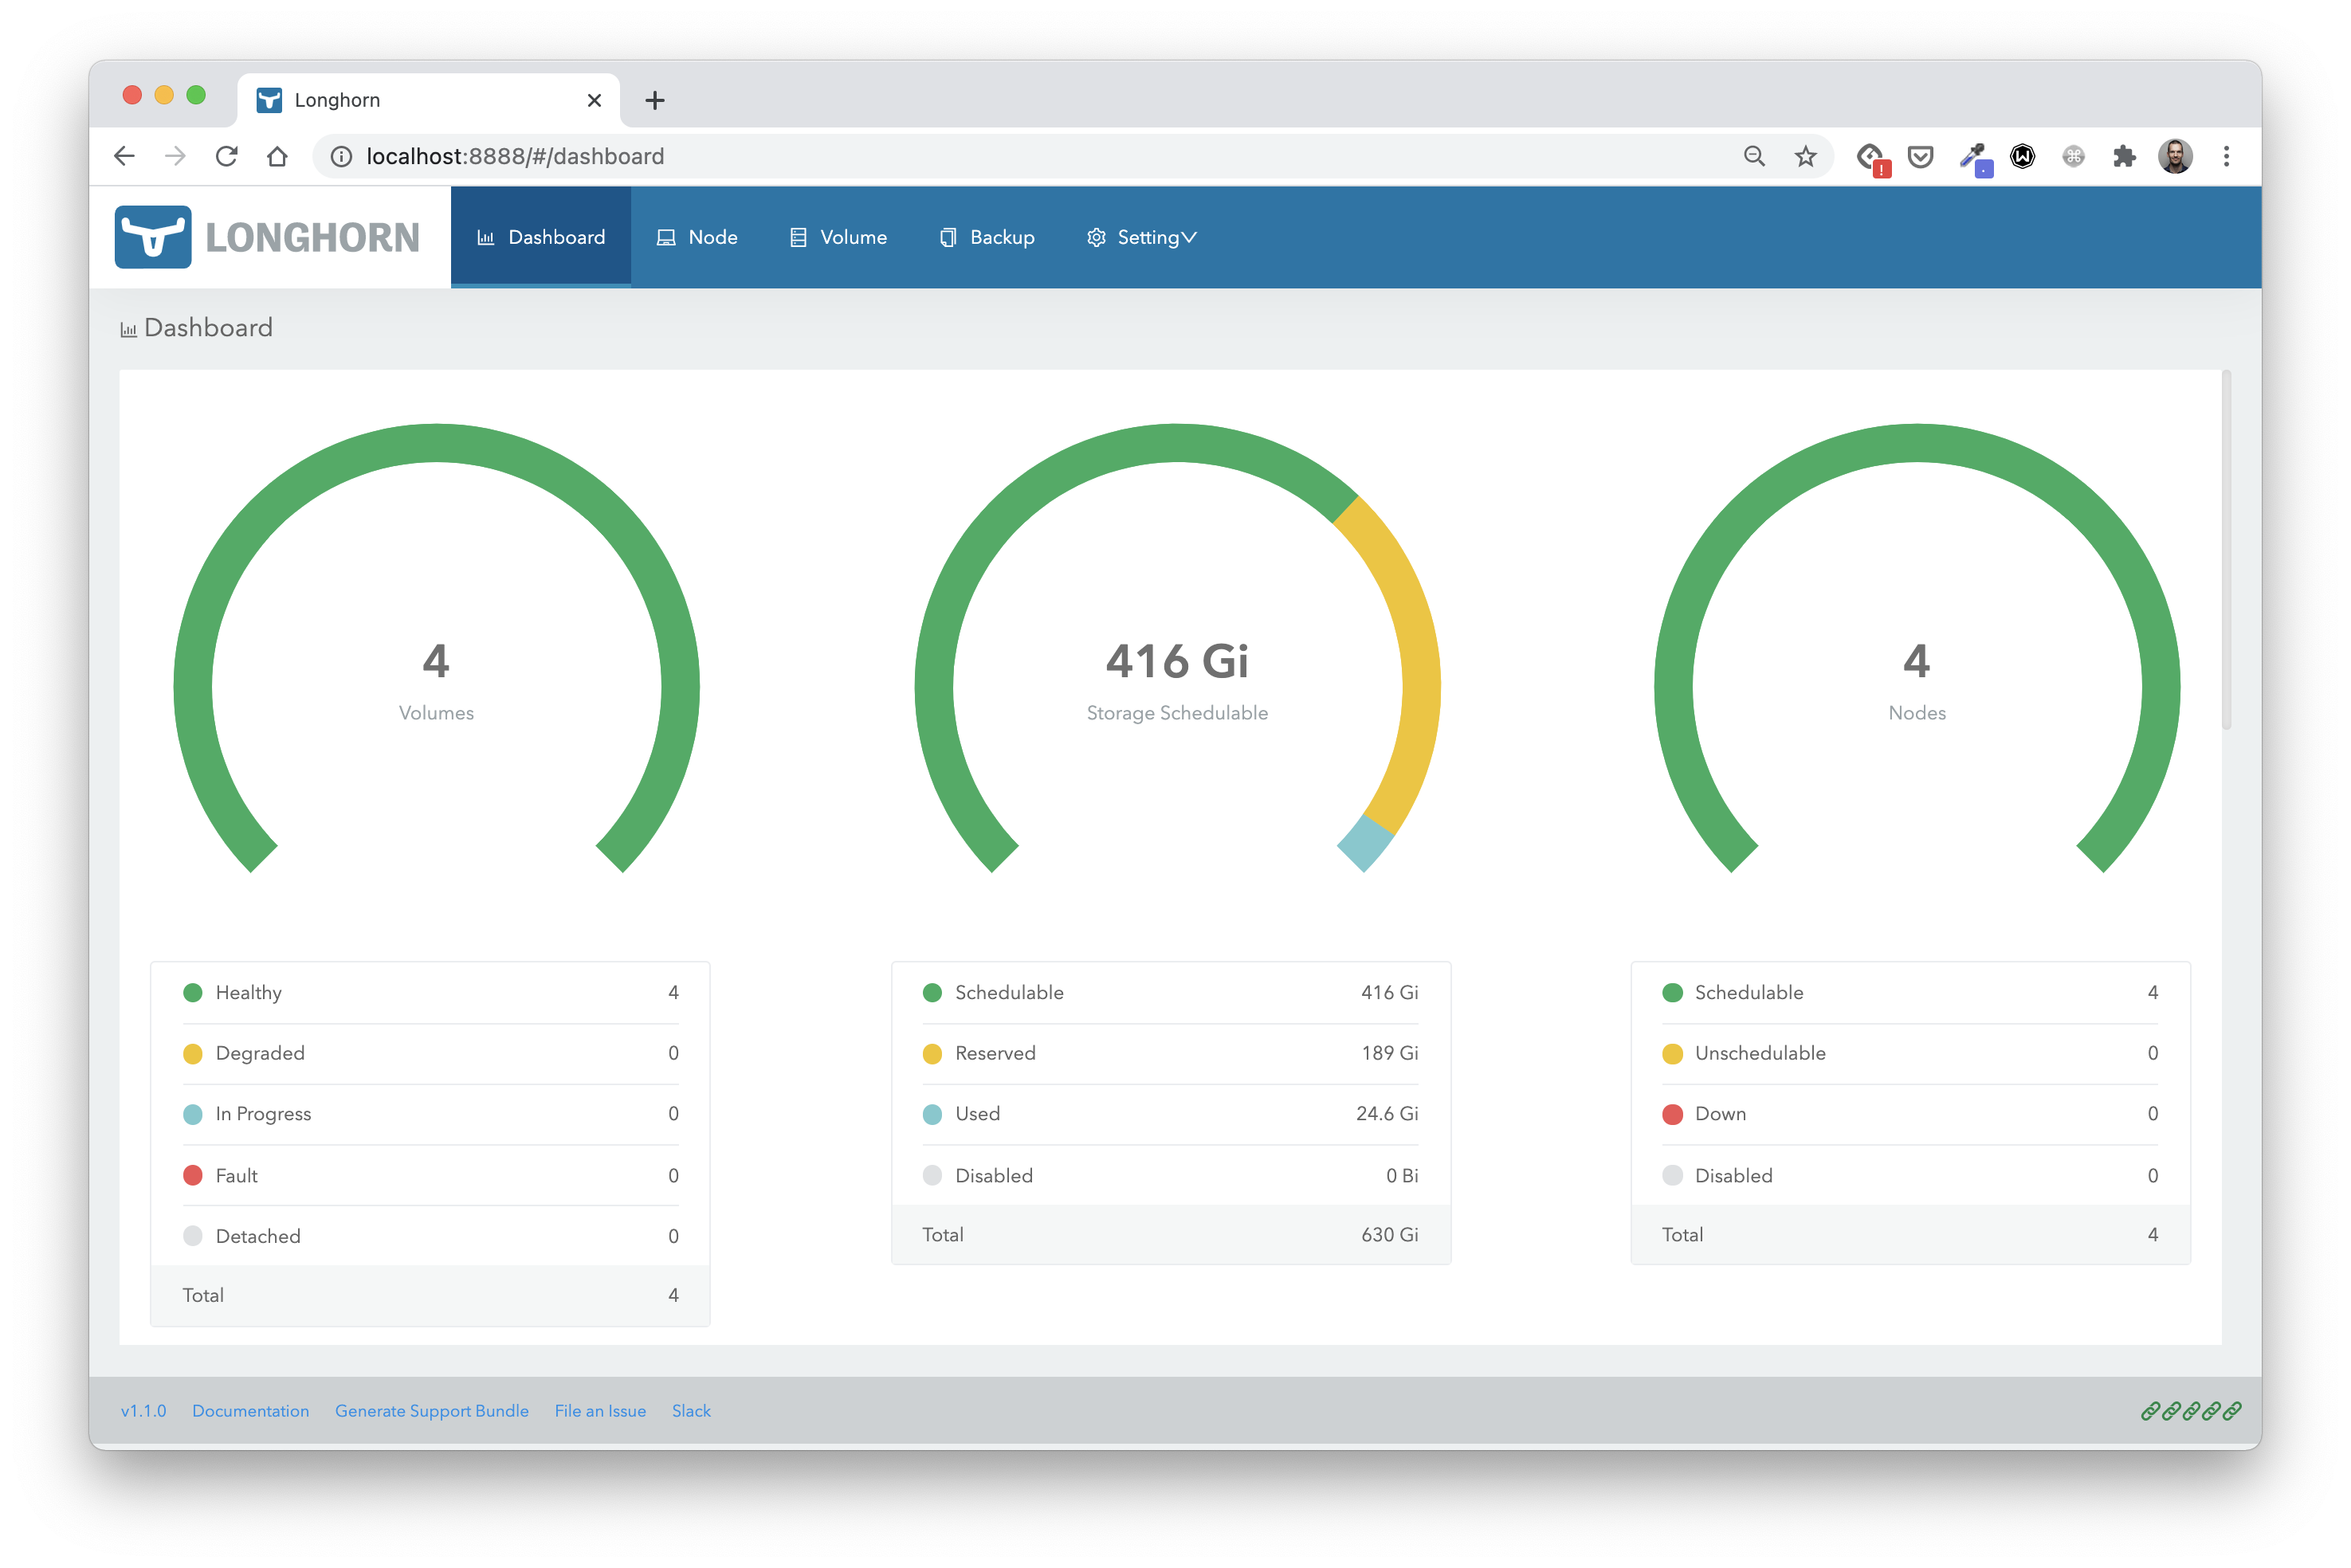
Using a port-forward on the longhorn-frontend service, we can access Longhorn's web UI:
$ kubectl port-forward -n longhorn-system svc longhorn-frontend 8888:80
A volume has been created for each redis Pod.
