This boilerplate demonstrates how developers can implement a single-page application on the Telegram Mini Apps platform using the following technologies:
This boilerplate was created using pnpm. Therefore, it is required to use it for this project as well.
If you have just cloned this template, you should install the project dependencies using the command:
pnpm iThis project contains the following scripts:
dev. Runs the application in development mode.build. Builds the application for production.lint. Runs eslint to ensure the code quality meets the required standards.deploy. Deploys the application to GitHub Pages.
To run a script, use the pnpm run command:
pnpm run {script}
# Example: pnpm run buildThis boilerplate uses the TON Connect project to showcase how developers could integrate TON cryptocurrency-related functionality.
The TON Connect manifest used in this boilerplate is located in the public folder along with all
publicly available static files. Don't forget
to configure this file according to your
project information.
This boilerplate uses GitHub Pages as the way to host the application externally. GitHub Pages provides a CDN which will let your users receive the application rapidly. Alternatively, you could use such services as Heroku or Vercel.
To simplify the process of deployment, this boilerplate contains already
written GitHub workflow to deploy the project automatically in case, some
content was pushed to the master branch.
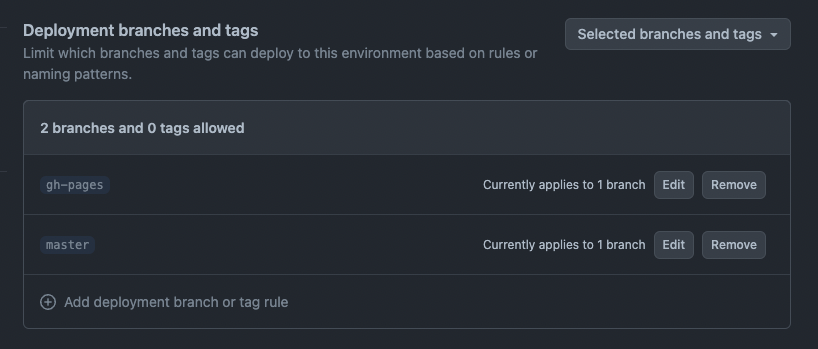
To let this workflow work properly, it is required create a new environment (or edit the existing one) in the GitHub
repository Settings with the name github-pages. Then, add the master branch to the list of deployment branches.
Environments settings could be find using this URL: https://github.com/{username}/{repository}/settings/environments
In case, you don't want to do it automatically, or you don't use GitHub as the project codebase, just remove the
.github directory.
Alternatively, developers are able to configure the automatic deployment using GitHub web interface. To use it,
follow the link: https://github.com/{username}/{repository}/settings/pages.
This boilerplate uses the gh-pages tool, which allows deploying your application right from your PC.
Before running the deployment process, ensure that you have done the following:
- Replaced the
homepagevalue inpackage.json. The GitHub Pages deploy tool uses this value to determine the related GitHub project. - Replaced the
basevalue invite.config.tsand have set it to the name of your GitHub repository. Vite will use this value when creating paths to static assets.
For instance, if your GitHub username is telegram-mini-apps and the repository name
is is-awesome, the value in the homepage field should be the following:
{
    "homepage": "https://telegram-mini-apps.github.io/is-awesome"
}
And vite.config.ts should have this content:
export default defineConfig({
    base: '/is-awesome/',
    // ...
});
You can find more information on configuring the deployment in the gh-pages
docs.
Before deploying the application, make sure that you've built it and going to deploy the fresh static files:
pnpm run buildThen, run the deployment process, using the deploy script:
pnpm run deployAfter the deployment completed successfully, visit the page with data according to your username and repository name. Here is the page link example using the data mentioned above: https://telegram-mini-apps.github.io/is-awesome
