Staging area for instructions how to do federated testing for Kubernetes
Hi! This is a temporary place for me to put some notes on how to run Kubernetes e2e tests on your own machine(s) and then make the test results you get uploaded to https://testgrid.k8s.io, the dashboard that the community uses to check the health of the project.
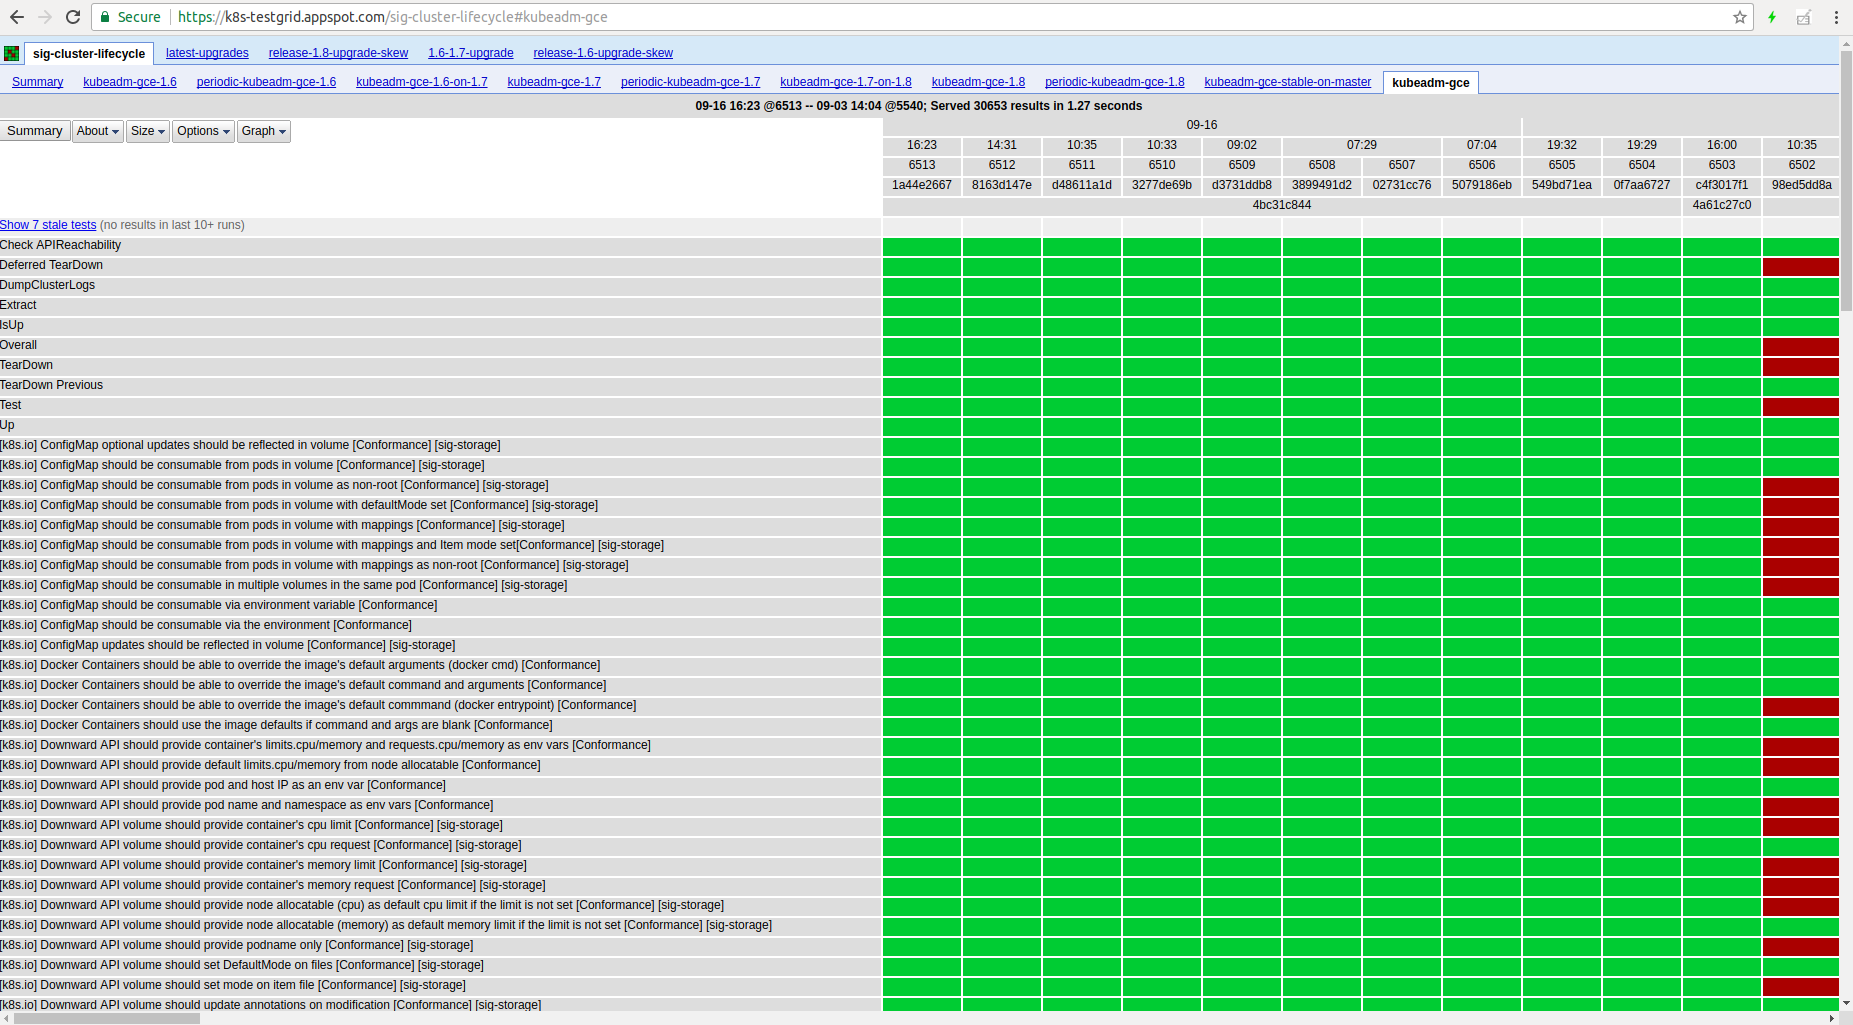
Testgrid, shown above, aggregates all the Kubernetes e2e test results in one place, under different dashboards. An example of what one job's test history is visualized as is here:
Most of the testing-related code lives in https://github.com/kubernetes/test-infra The tricks I'm about to show here should be upstreamed there eventually as well.
Note: This is a demo and a Proof-of-Concept, not an exhaustive guide to federated testing and all its features.
What is federated testing?
Most of the e2e jobs and suites run on Google's infrastructure (GCE), basically Google is paying for the most of the Kubernetes community's automated test results.
If you want your own results to be shown there, but don't wanna bake a lot of logic into the test-infra upstream repository, then federated testing is the way to go. For instance, code for how to run e2e tests on your Raspberry Pis in your hallway shouldn't go into that repo ;)
So what can you do?
Well, here is a short overview.
Create a GCS bucket of choice
For this example, I've created https://console.cloud.google.com/storage/browser/kubernetes-multiarch-e2e-results as I'm interested in running federated e2e tests on various platforms, like ARM 32- and 64-bit, ppc64le, etc.
You will upload all your test results to this bucket, and the testgrid will then query the results from here.
Create subdirectories for different job configurations
Let's say you want to run one job that runs a lot of upgrade tests and want to call this my-upgrade-suite.
And to have full coverage for your solution, you also want to test downgrades: my-downgrade-suite.
The directory structure looks like this:
 - gs://your-bucket-here
   - logs/
     - my-upgrade-suite/
       - 1/
       - 2/
       - ...
       - 123456/
       - latest.txt 	<- a file that tells anyone what the latest run is: "123456"
     - my-downgrade-suite/
       - 1/
       - 2/
       - ...
       - 654321/
       - latest.txt 	<- a file that tells anyone what the latest run is: "654321"
That's it! Go ahead and create gs://your-bucket-here/logs/my-upgrade-suite and gs://your-bucket-here/logs/my-downgrade-suite
as the initial step.
Create a ServiceAccount for the uploader
Go to https://console.cloud.google.com/iam-admin/serviceaccounts/project in order to create a new ServiceAccount to use for the code that uploads the test results to the GCS bucket.
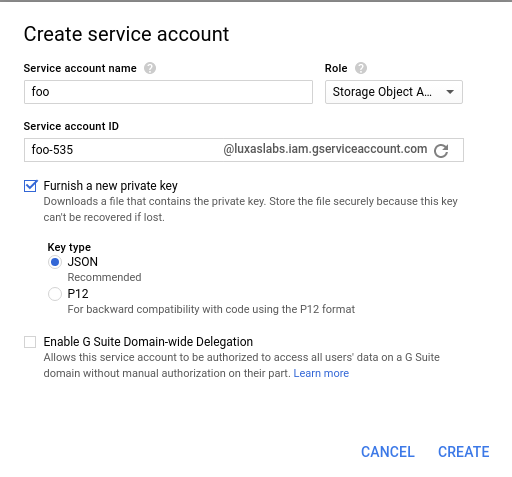
Click on "Create Service Account" and specify a name of choice. Select the "Storage -> Storage Object Admin" role for this ServiceAccount and select "Furnish a new private key"
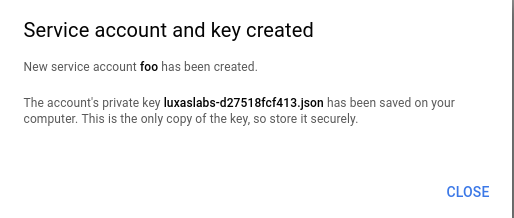
When clicking the "Create" button, you will see that a JSON file was automatically downloaded to your computer. This is the only place where your Service Account is created, so store and distribute it carefully.
Install gsutil and set up access control for the bucket
Then go to the machine(s) you want to be able to push results to GCS and install gsutil:
export CLOUD_SDK_REPO="cloud-sdk-$(lsb_release -c -s)"
echo "deb http://packages.cloud.google.com/apt $CLOUD_SDK_REPO main" | sudo tee -a /etc/apt/sources.list.d/google-cloud-sdk.list
curl https://packages.cloud.google.com/apt/doc/apt-key.gpg | sudo apt-key add -
sudo apt-get update && sudo apt-get install google-cloud-sdk
Assuming the JSON file containing your ServiceAccount is named sa.json, you make gsutil use that Service Account by executing this command:
gcloud auth activate-service-account --key-file sa.jsonThen you can set up proper access control for the bucket.
It has to be publicly readable in order for consumers to be able to browse your test results
You can achieve that with this command:
gsutil acl ch -u All:R gs://your-bucket-hereOverall testing flow
For the purposes of this demo, these scripts create a local kubeadm cluster when new builds are noticed in the
official Kubernetes CI GCS repos.
The overall flow will look like this:
- Wait for a new CI build to appear in
dl.k8s.io/ci-cross/latest.txt - Create the
gs://${GCS_BUCKET}/logs/${JOB_SUITE}/${JOB_NUMBER}/started.jsonfile that tells everyone that this job is running - Download all the new binaries from
dl.k8s.io/ci-cross/${VERSION}/bin/linux/${ARCH}/ - Run
kubeadm initand install a pod network solution using Weave Net - Build a Docker image locally containing the
kubectlande2e.testbinaries required for running tests - Submit a
"batch/v1".Jobto the Kubernetes cluster. This Job will run the e2e results inside of the cluster- Note: You can edit the
-ginkgo.focusflag by editing thescripts/e2e-job.yamlfile
- Note: You can edit the
- Wait for the in-cluster e2e job to complete
- Upload the test results and other artifacts to
gs://${GCS_BUCKET}/logs/${JOB_SUITE}/${JOB_NUMBER}/, and also create thefinished.jsonfile - Repeat
You can perform all this with some simple proof-of-concept bash scripts I've created. First, clone this repo:
git clone https://github.com/luxas/k8s-federated-testing
The rest of this guide will assume you're inside of the k8s-federated-testing directory created.
Install kubeadm (if you don't already have it)
For convenience, there is a scripts/install-kubeadm.sh script that performs the steps outlined in the
official kubeadm docs.
This assumes you're running Ubuntu 16.04+
scripts/install-kubeadm.shStart running e2e tests
There is a script that will do everything described above for you in a really easy manner.
Just execute this command, replacing your-bucket-here and my-upgrade-suite with the real values:
scripts/run-federated-tests.sh your-bucket-here my-upgrade-suiteOptional env variables here are:
ARCH: The architecture of the host machine. Defaults toamd64POD_CIDR: The subnet for the pods to use. Defaults to10.32.0.0/16, if10.0.0.0/8is already used, you may set this to172.30.0.0/16for instance
After all the tests have been executed, you should be able to see the results here:
https://console.cloud.google.com/storage/browser/your-bucket-here/logs/my-upgrade-suite
Real example: https://console.cloud.google.com/storage/browser/kubernetes-multiarch-e2e-results/logs/kubeadm-luxas-packet-arm64/
Wrapping up!
That's it! Now you can submit a PR similar to mine
Basically, you need to edit buckets.yaml and testgrid/config/config.yaml in the test-infra repo to tell the testgrid to
pull and view your test results as well. It might take a couple of minutes for your test results to show up.
Have fun!
License
MIT


