This repository contains the final project for the MLOps Zoomcamp course provided by DataTalks.Club (Cohort 2024). The project consists of a Machine Learning Pipeline with Experiment Tracking, Workflow Orchestration, Model Deployment and Monitoring.
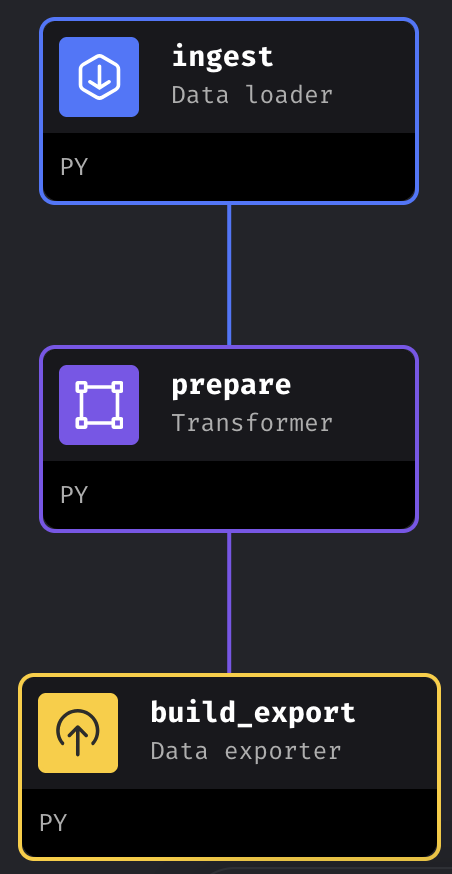
For the Mlops_zoomcamp final project, i choose to implement a simple solution to forecast weather temperature. The main goal is to apply all the skills learnt from the course. So, the emphasis will not be made on the model and the accuracy. We use the data provided by Environment Canada's weather data https://climate.weather.gc.ca/. We only focus on the weather stations of the province of Ontario (canada). There is a jupyter notebook (Extract_station_data.ipynb) explaining how to extract the data related to a station (eg. station id, station name). There is also a python script (download_stations_id.py) to download the station data for all canadian provinces and save them in the folder data/stations/. The notebook Data_Extraction_and_Cleaning.ipynb shows how to download weather data for a given station.
| Name | Scope |
|---|---|
| Jupyter Notebook | Exploratory data analysis |
| Docker | Application containerization |
| Docker-Compose | Multi-container Docker applications definition and running |
| Mage.ai | Workflow orchestration and pipeline notebooks |
| MLFlow | Experiment tracking and model registry |
| PostgreSQL RDS | MLFLow backend entity storage and Terraform backend |
| Flask | Web server |
| EvidentlyAI | ML models evaluation and monitoring |
| pytest | Python unit testing suite |
| pylint | Python static code analysis |
| black | Python code formatting |
| isort | Python import sorting |
| Pre-Commit Hooks | Code issue identification before submission |
| GitHub Actions | CI/CD pipelines |
We only used two features namely Date/Time (LST) and stationID and the goal is to predict Temp (°C).
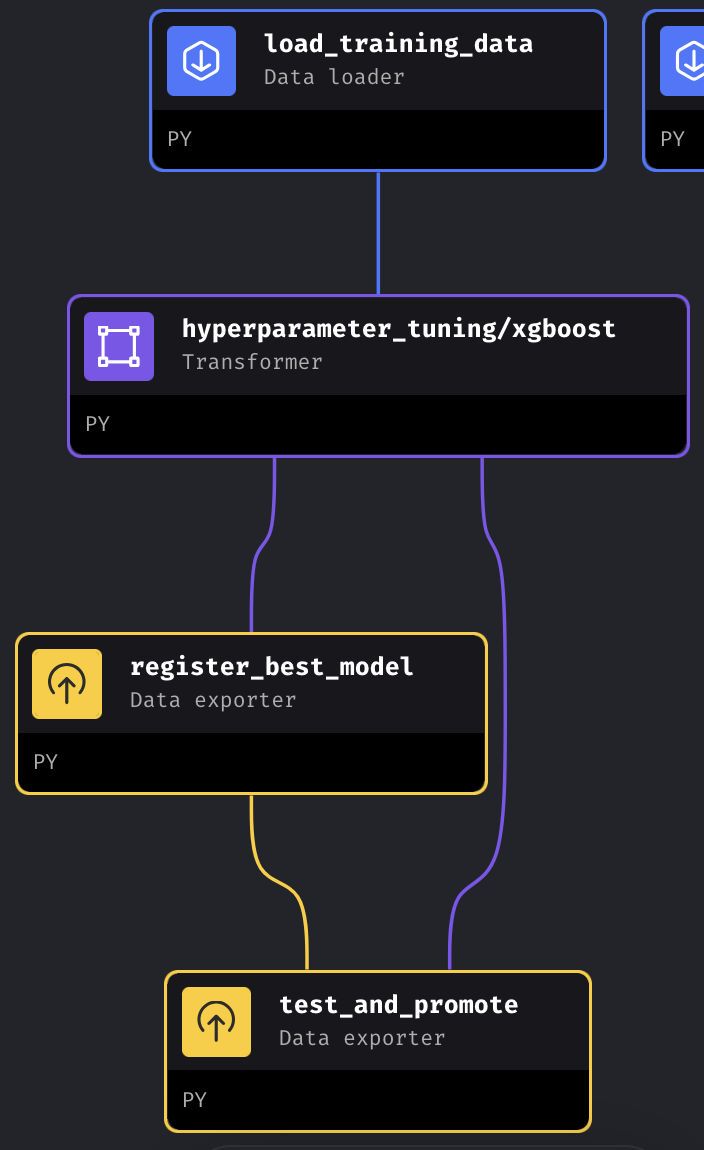
We used Xgboost as regression model. We track the experiment with mlfow and register the model having the best score. In the test_and_promote block, we compared the registred model with the previous and promote it to production stage if it is the best model.
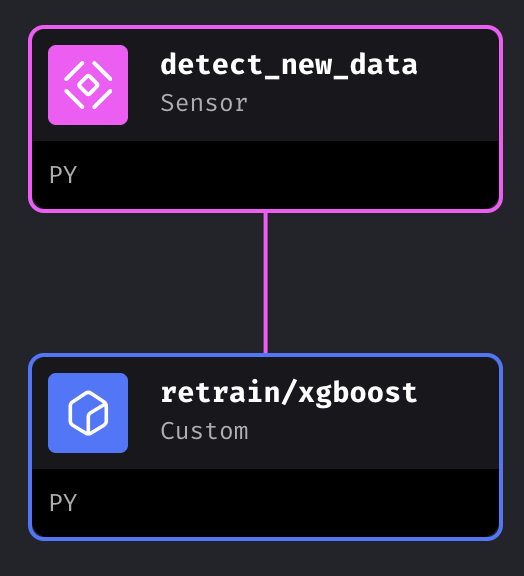
When a new data is available in the system, we run evidently to check any "Column Drift" or "Dataset Drift". When a drift is observed, we retraining the model with the old and new data.
We orchestrate our pipelines with Mage.ai
We choose a web service based on flask to deploy our model. Firstly, the code will fetch the model available in mlflow production stage and make a prediction. We containerize the code with docker and it can be deploy on AWS ECS by running in the terminal the following command: cd model_web_service followed by make scratch_deploy.
Note
We don't use the s3 as backend for terraform for the web service deployment. So the terraform state file will be stored locally
We make for the web service:
- unit test and integration test
- pylint, black and isort were used to enhance code quality
- make file is written to automatically run the code and deploy it.
- pre-commit is also used
For the ocherstration in mage:
- In the terminal of mage we run pylint, black and isort were used to enhance code quality.
- make file is written to automatically run the code and deploy it.
- CI/CD is written.
Before anything:
-
change the name of
dev.envin the main folder and inmodel_web_service/integration-tests/by.env. In these files, change the values of the environment variables after the comment# ======= To change ========. -
Put your
AWS_SECRETindev.secretand change the filename to.secret. -
Remove the
_from the name of the file._docker_password.txtand write in the file your docker password.
- Set up mlflow server on Aws EC2 by following this instruction with S3 bucket as artifact storage and RDS postgres as backend.
You can set up mlflow locally by:
- installing first mlflow:
pip install mlfloworconda install -c conda-forge mlflow. - running
mlflow ui --backend-store-uri sqlite:///mlflow.db - Change in the file
temperature_prediction/utils/logging.py:
DEFAULT_TRACKING_URIset tohttp://127.0.0.1:5000
-
In the main project directory, run
make run-localto launch Mage. -
You can leave the data present in
data/Training/old/and run thetraining pipeline. You can also delete these data and start from scratch by running thedata preparationpipeline following by thetraining pipeline. For the ochestration, i suggest to follow my setting:- run the
data preparationpipeline eah day at any hour of your choice - run the
retrainpipeline 30 min after the time you set for thedata preparationpipeline.
- run the
-
In the terminal
cd model_web_serviceandmake run-localto launch the web-service. -
To get a new prediction run:
curl --header "Content-Type: application/json" \
  --request POST \
  --data '{"Station ID": 50840, "Date/Time (LST)": "2024-08-09 23:00:00"}' \
http://localhost:9696/predict`-
Set up mlflow server on Aws EC2 by following this instruction with S3 bucket as artifact storage and RDS postgres as backend.
-
In the main project directory, run
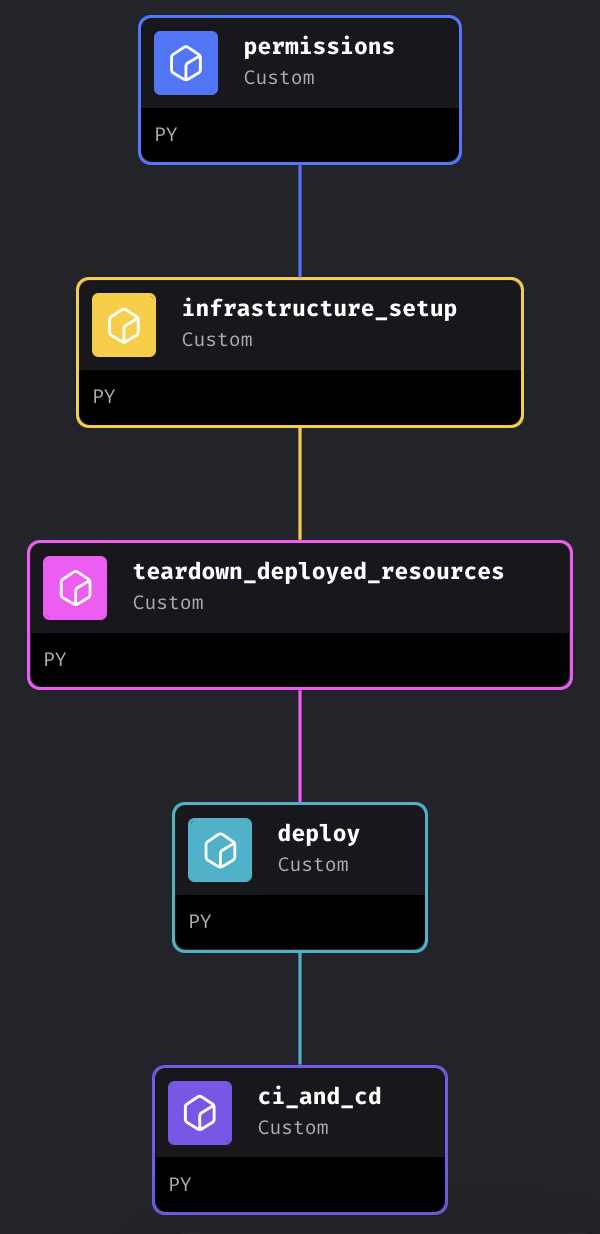
make run-localto launch Mage and run the pipelinedeploying_to_production. This will create two usersMageDeployerandMageContinuousIntegrationDeployer. The first will have the grants to deploy Mage the second one will be used in CI/CD configuration. Running the pipeline will deploy mage on aws ECS but it will not contain your project. By committing the project on github it'll run the github actions and put the new image Aws ECR. Normally, all the pipelines should be there.
Warning
Unfortunately, the pipelines don't appear in the mage (for me). But we can clone the repository in the control version panel.
Another way of publishing Mage, is to run the block permissions of the pipeline deploying_to_production. It will create the user MageDeployer. Use its credentials in the .env and .secret and then run make scratch_deploy. Use the load balancer DNS given to load mage.
-
To deploy the web service, in the terminal, cd in
cd model_web_serviceand runmake scratch_deploy. -
To get a new prediction run:
curl --header "Content-Type: application/json" \
  --request POST \
  --data '{"Station ID": 50840, "Date/Time (LST)": "2024-08-09 23:00:00"}' \
  http://the_balancer_output/predict`
Warning
Be sure to give the requiered policy to s3 bucket (for mlflow artifact and Terraform state.)
-
Run unit test on each block and each pipeline used in Mage.
-
Run integration test for the code in Mage
-
Do the CI/CD for the web_service. Improve the CI/CD of mage so that the pipelines will automatically appear.
-
Build a streamlit client for an easy interaction
-
Use Graphana and Promotheus to visualize and keep track of the metrics provided by evidently.


