Current Unreal Engine version: 5.1.0
TouchEngine allows the use of TouchDesigner components in Unreal Engine. The plugin currently supports Custom Parameters, CHOP input/output, TOP input/output and DAT input/output.
TouchEngine requires an installed version of TouchDesigner. TouchEngine does not work with Non-Commercial licenses. We recommend using the latest official version of TouchDesigner: download link.
This repository is covering the TouchEngine For UE Plugin, for samples and samples documentation of the TouchEngine For UE Plugin, follow this link.
Go to the directory with the .uproject for the project you would like to install the plugin for.
If your project does not already have a Plugins folder, create a folder called Plugins within that directory.
Place the TouchEngine folder into the Plugins folder.
After you’ve followed these steps, to be sure that you’ve installed the plugin correctly, do the following:
- Open the project in Unreal Engine
- Under Edit -> Plugins, select the “Project” category from the list on the left.
This should show TouchEngine along any other custom plugins you’ve installed. Make sure the Enabled check box is checked, and you’ve successfully installed the plugin.
Note: You should now restart Unreal Engine for the plugin changes to take effect.
Once you installed and enabled the TouchEngine For UE plugin in your project, the easiest way to get started is by creating a new TouchEngine Actor.
To do so, go to the content browser and right-click any empty space, then click the Blueprint Class item as in the following sceenshot.
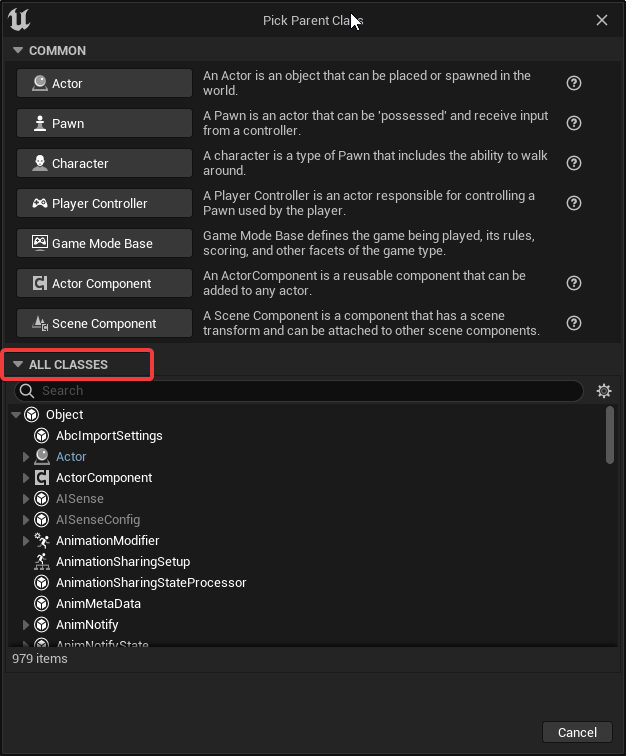
You then want to click on the "All classes" dropdown to show every additional blueprint classes you can add to your project.
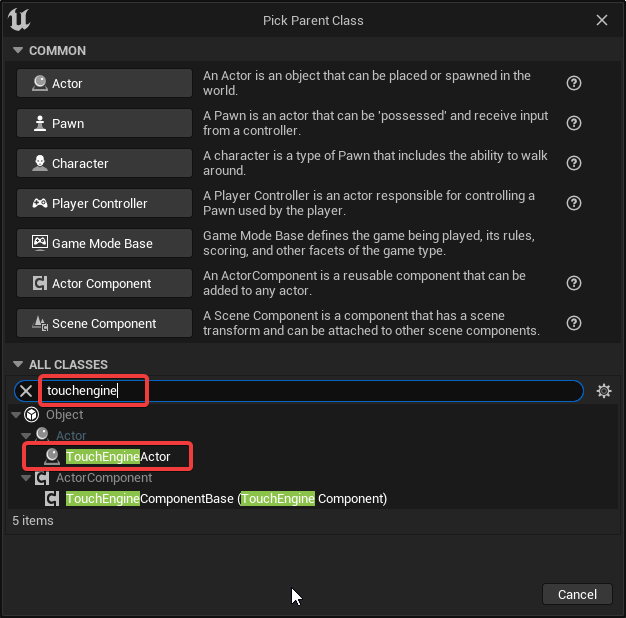
Use the search menu and type touchengine to show the TouchEngine Actor class.
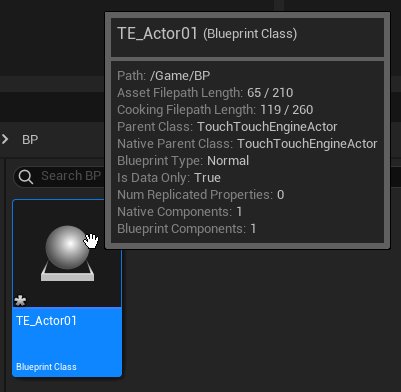
You can now click on it an this will be added to your content browser as a new actor. You should name it carefully: we suggest to prefix with TE or TouchEngine in its name as a reminder that it is a TouchEngine Actor.
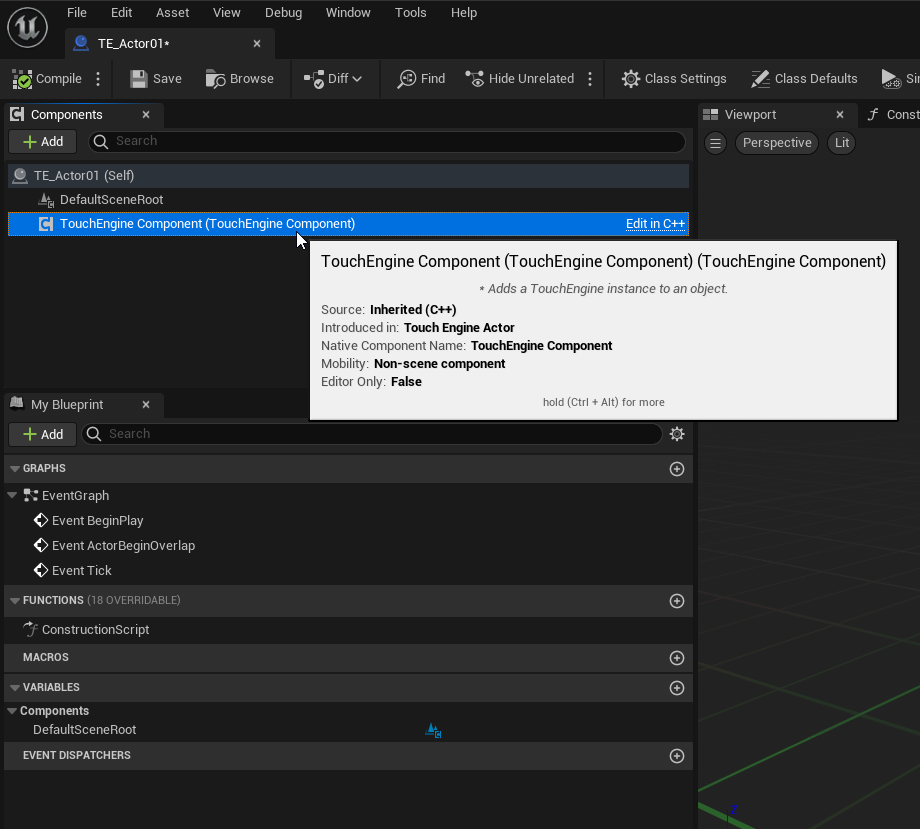
You can now double click it and start to customize everything to your needs. It is already setup with a TouchEngine Component and ready for use.
This is the best and easiest path to follow and the recommended approach.
The file that you’ll need to be able to implement a project designed in TouchDesigner into an Unreal Engine project is a .tox file. To generate one of these from a TouchDesigner project, first open the project in TouchDesigner.
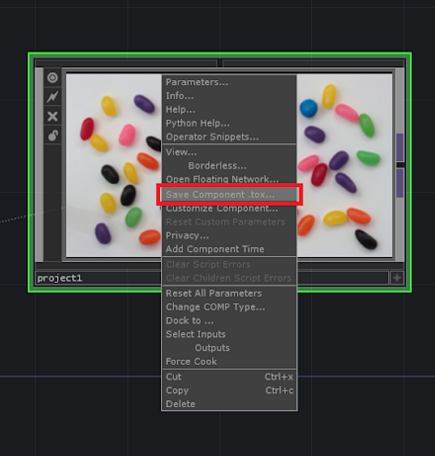
Navigate to the network containing the component you want to turn into a .tox file. Right-click on the component and select “Save Component .tox…”. Save the file inside the UE project’s “Content” folder. We usually create a new folder named "tox" or "tox files" in which we place them.
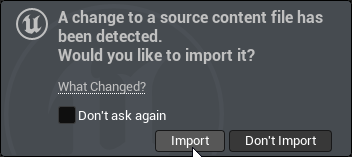
Unreal will then prompt you to import a new file. Hit import and Unreal will generate a new .uasset.
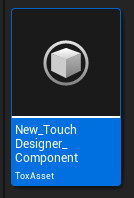
You should now see a new ToxAsset in your content browser.
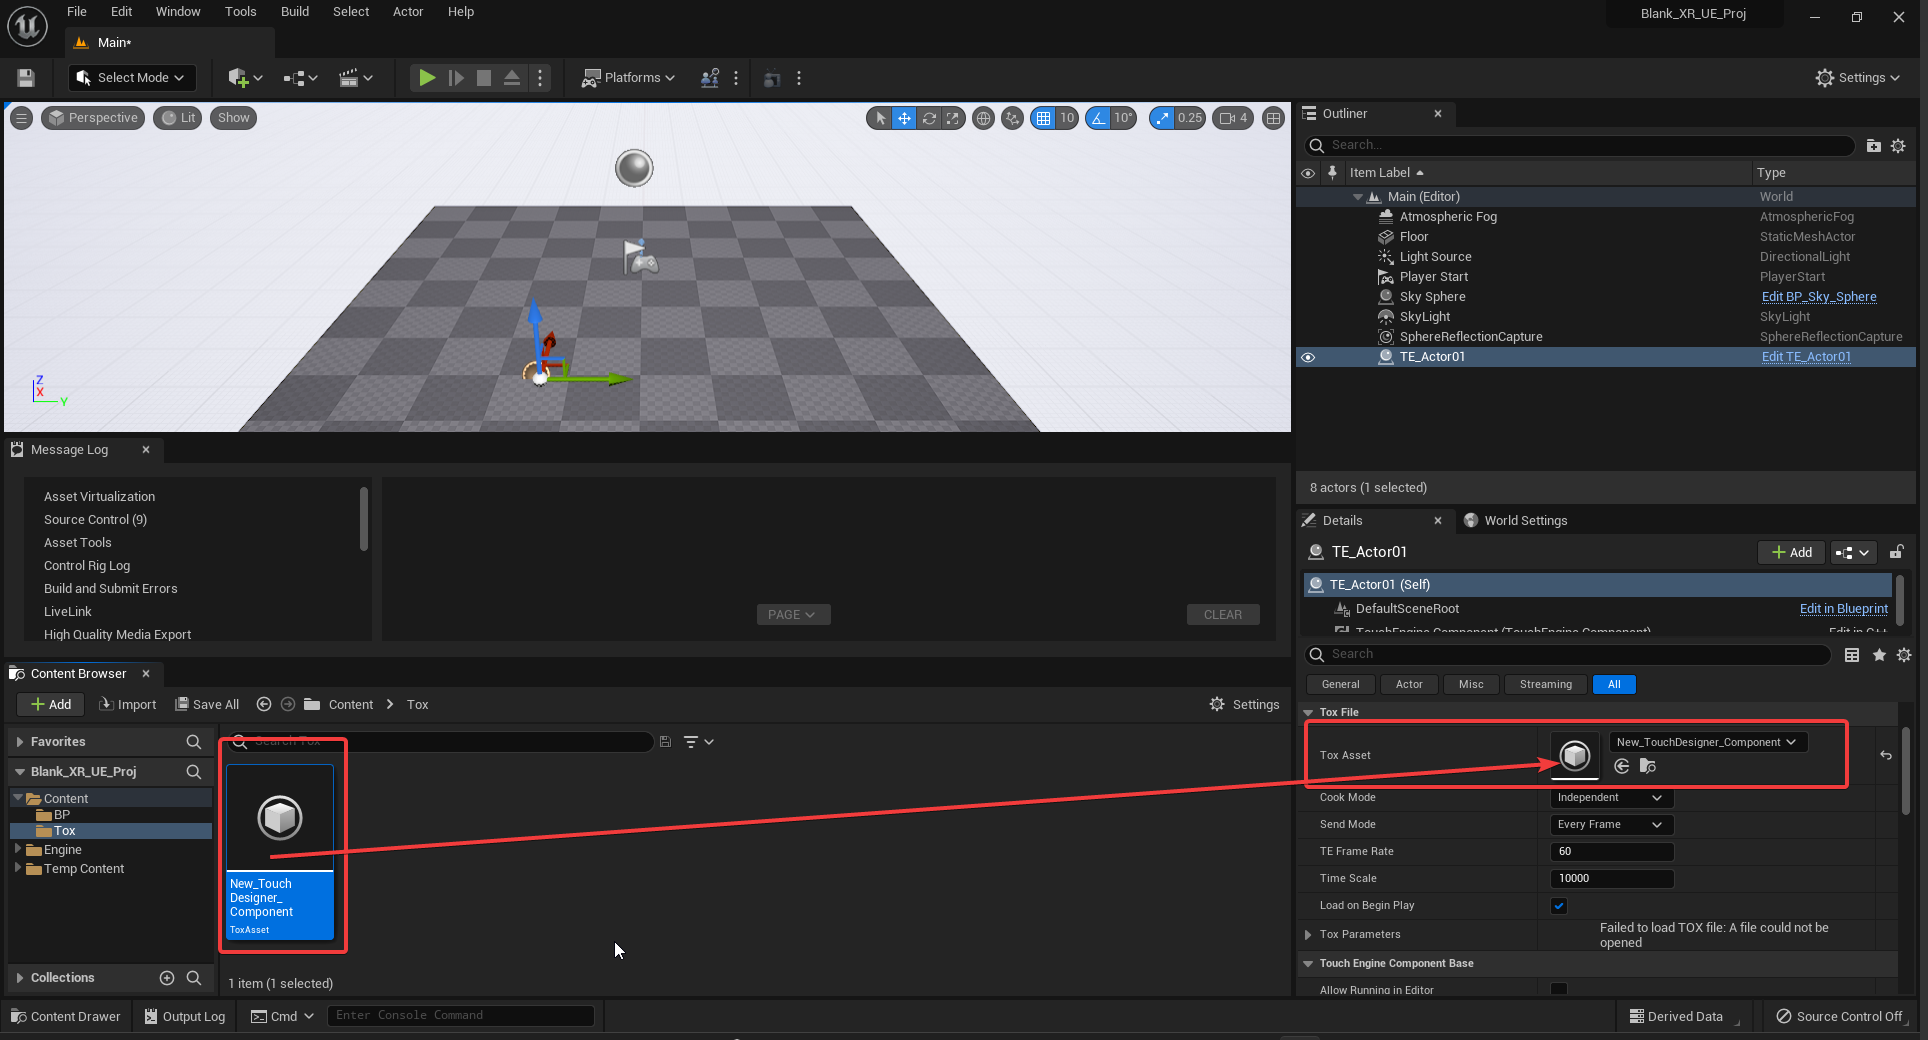
You can use this new ToxAsset with a drag n drop to the details panel Tox Panel property of an existing TouchEngine Actor. An alternative is to select if from the dropdown menu of the Tox Asset property of the TouchEngine Actor.
Currently, the standalone TouchEngine Component (when it is not already part of a TouchEngine Actor) can only be added directly to C++ classes. In order to get the component on a Blueprint class, you'll need to derive that class from a C++ class with the component setup in it.
If you're creating a new Actor object, parent it to a C++ class with a TouchEngine Compoment added.
For adding the component to an existing Actor, you're going to need to either add a TouchEngine Component into the base C++ class or reparent the Blueprint. Note that reparenting can cause issues and data loss. We do not advise reparenting Pawns or Characters as they are not base Actors.
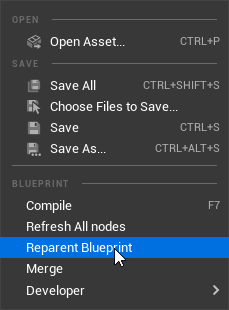
To reparent an existing blueprint actor, open the blueprint you want the component added to, select "File" at the top, and select "Reparent Blueprint".
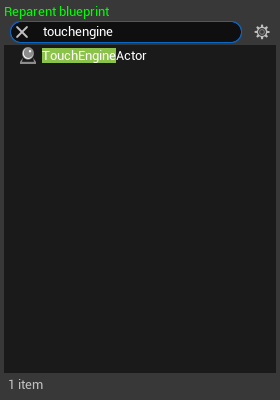
If you don't have a C++ class with a TouchEngine Component, select "TouchEngineActor" from the dialog that pops up. This is the default Actor class with the TouchEngine Compoment attached.
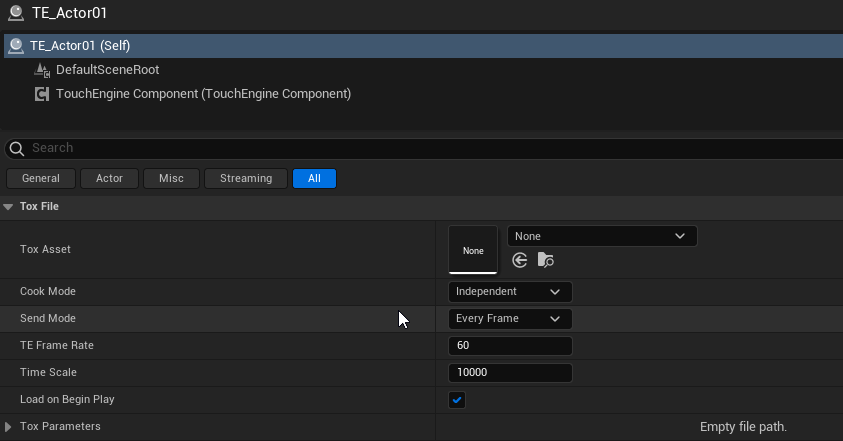
Once you do this, you should see the TouchEngine Component appear in the Blueprint's "Components" panel.
All properties related to the TouchEngine Component will now also be visible in your blueprint details panel.
Note that, creating a TouchEngine Component from the content browser and adding it to an actor (through Add or by drag n drop) doesn't change the parent class of your Actor blueprint. This will still be an Actor blueprint with limited features compared to the TouchEngine Actor and is not an alternative solution to reparenting.
When in the blueprint editor with a TouchEngine Component, with the TouchEngine Component selected (Components pane, on the left), you will see in Details panel on the right in the list of events various events that can be used in the current blueprint and related to the TouchEngine Component.
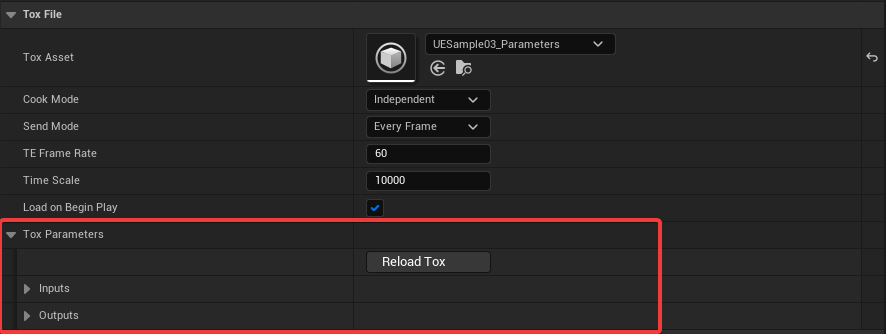
Find in the details panel of your blueprint all the parameters, inputs, outputs exposed by the TouchDesigner .tox you are loading.
The list in the details panel, in the "Tox Parameters" drop down section will contain all parameters of the .tox you are using as well as Inputs and Outputs but now as "Unreal properties".
TouchEngine Inputs will be modifiable in the panel, but TouchEngine Outputs variables will not be.
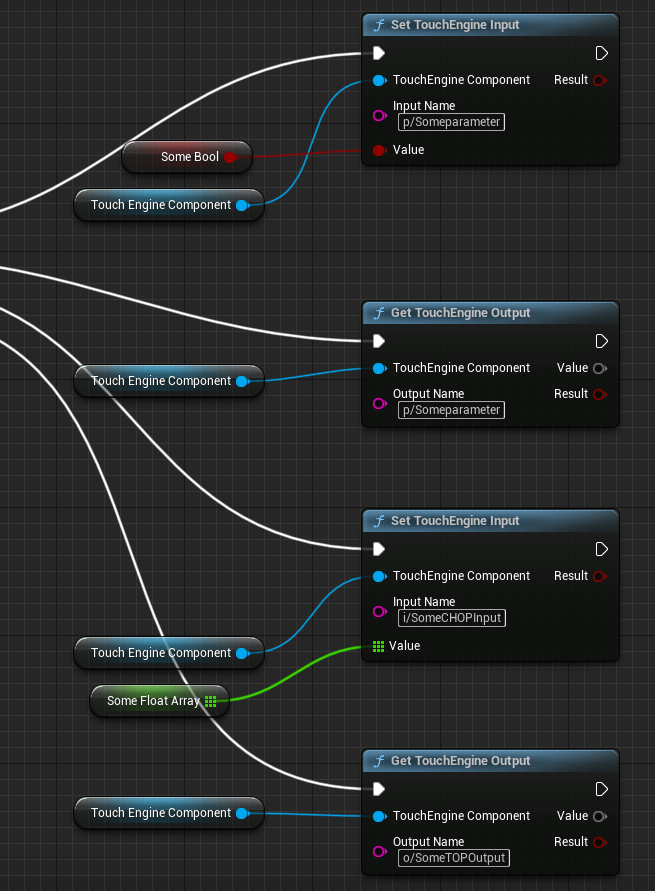
Hovering over the display name for each will show the identifier. It is the path needed to get / set Inputs / Outputs while in the blueprint editor and pass (or get) changes to (or from) the TouchEngine Component.
At the moment, to get or set custom parameters loading in the TouchEngine, you need to prefix the Input or Output Name pin values with p/
In a similar fashion, inputs should be prefixed by i/ and outputs with o/
See the basic setup in the following screenshot.
Note: In future releases, the prefix will not be needed and new nodes designed specifically for parameters will be available.
If you are looking for a complete sample on how to get / set every type of TouchEngine Parameters or inputs / ouputs operator families currently supported, please have a look at the Sample 03 of out TouchEngine-UE-Sample repository. The .tox being used in that sample is acting as pass through.
For setting up TouchEngine variables with the Level Sequencer, add a variable corresponding to the TouchEngine variable to the Blueprint holding it, and set it with either "Get TouchEngine Input Latest Value" if the variable is an input or "Get TouchEngine Output" if it's an output variable.
Make sure the variable added to the Blueprint has the values "Exposed to Cinematics" and "Instance Editiable" checked to be available in the Level Sequencer.
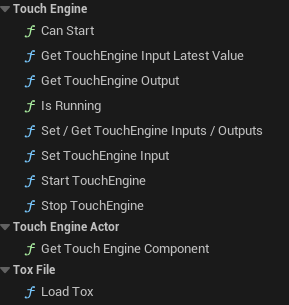
- Set TouchEngine Input: sets the value of an input parameter
- Get TouchEngine Input Current Value: gets the current value of an input parameter
- Get TouchEngine Output: gets the value of an output parameter
- IsRunning: returns whether or not the instance is currently running.
- Start TouchEngine: creates the TE Instance, will call ToxLoaded or ToxFailedLoad callbacks depending on the result
- Stop TouchEngine: destroys the TE Instance
- ReloadTox: does nothing at runtime, reloads stored parameters for UI use
There is no TOPs specific methods at the moment. TouchEngine TOPs are treated as UE Texture2D values.
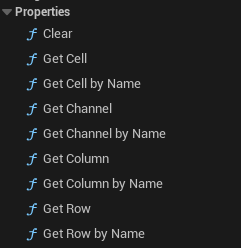
- Get Channel: returns a float array of the channel at channel index
- Get Channel by Name: same as get channel, but gets the value by name instead of by index
- Clear: empties the CHOP struct
- Get Cell: returns FString of value at index row, col
- Get Row: returns a FString array of the row at index row
- Get Column: returns a FString array of the column at index col
- Get Cell by Name: same as get cell, but uses the first cell of the row and column as their names
- Get Row by Name: same as get row, but uses the first cell of the row as its name
- Get Column by Name: same as get column, but uses the first cell of the column as its name
- n/a
This repository is covering the TouchEngine For UE Plugin, for samples and samples documentation of the TouchEngine For UE Plugin, follow this link.
The C++ Documentation is available at the following link: README_CPP.md

