That's a simple solution to start APIs in nodejs if you don't want to download all dependencies every time when you start some new project.
You can implement any architecture on this template and it already comes with prettier, jest, eslint, docker and suport for circleci if you wanna implement CI/CD in that platform.
The template comes by default with some basic commands, for example:
(to know more about husky: https://typicode.github.io/husky/#/)
$ yarn build
$ yarn prepare
$ yarn start
(to know more about nodemon: https://nodemon.io/)
$ yarn dev
$ yarn test
(know more in: https://jestjs.io/docs/cli)
$ yarn test:watch
$ yarn test:coverage
(know more in: https://docs.docker.com/get-started/ and https://docs.docker.com/compose/gettingstarted/)
$ docker-compose up
universities-monitor
├─ .circleci
│  └─ config.yml
├─ .editorconfig
├─ .eslintignore
├─ .eslintrc.json
├─ .gitignore
├─ .prettierrc.json
├─ Dockerfile
├─ README.md
├─ docker-compose.yml
├─ jest.config.js
├─ nodemon.json
├─ package.json
├─ src
│  ├─ config
│  │  ├─ environment-consts.ts
│  │  └─ swagger.json
│  ├─ controllers
│  │  ├─ handlers
│  │  │  └─ handlers.ts
│  │  ├─ university-controller.ts
│  │  └─ user-controller.ts
│  ├─ factories
│  │  ├─ controller-factories.ts
│  │  ├─ middlewares-factory.ts
│  │  └─ service-factories.ts
│  ├─ index.ts
│  ├─ infra
│  │  ├─ errors
│  │  │  └─ erros.ts
│  │  └─ reposiroties
│  │     ├─ interfaces
│  │     │  └─ repository-interfaces.ts
│  │     ├─ university-repository.ts
│  │     └─ user-repository.ts
│  ├─ middlewares
│  │  └─ authentication-middlewares.ts
│  ├─ routes.ts
│  └─ services
│     ├─ adapters
│     │  └─ adapters.ts
│     ├─ encryption-services.ts
│     ├─ schedule-services.ts
│     ├─ university-services.ts
│     └─ user-services.ts
├─ tests
│  ├─ config
│  │  ├─ mocks
│  │  └─ teste-config
│  └─ infra
├─ tsconfig-build.json
├─ tsconfig.json
├─ yarn-error.log
└─ yarn.lock
If you wanna tests endpoints you have get the authentication token. To get token may start application and access the address YOUR_LOCALHOST:ENV_FILE_PORT/api. After see swagger home page, access users tags and create an new user.
Then, make login with your username and password
Logged, copy the user token provided via http response
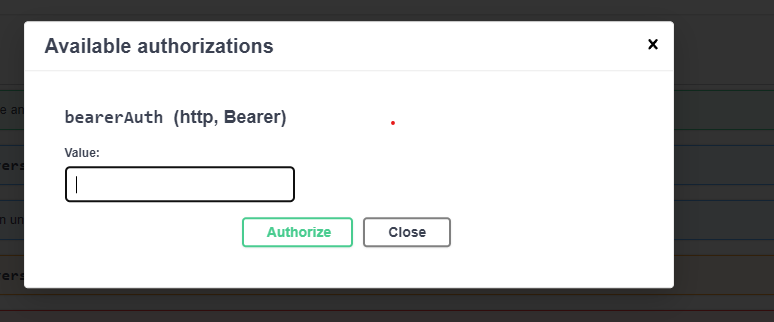
Now, go to the authorization botton at the top of swagger home page.
And paste your authorization token into blank field, then click in authoriza
Now you're authenticated and you can test all application endpoints.

