Basic RESTful CRUD app using ASP.NET Core 3.1 MVC and Entity Framework Core DB First Approach
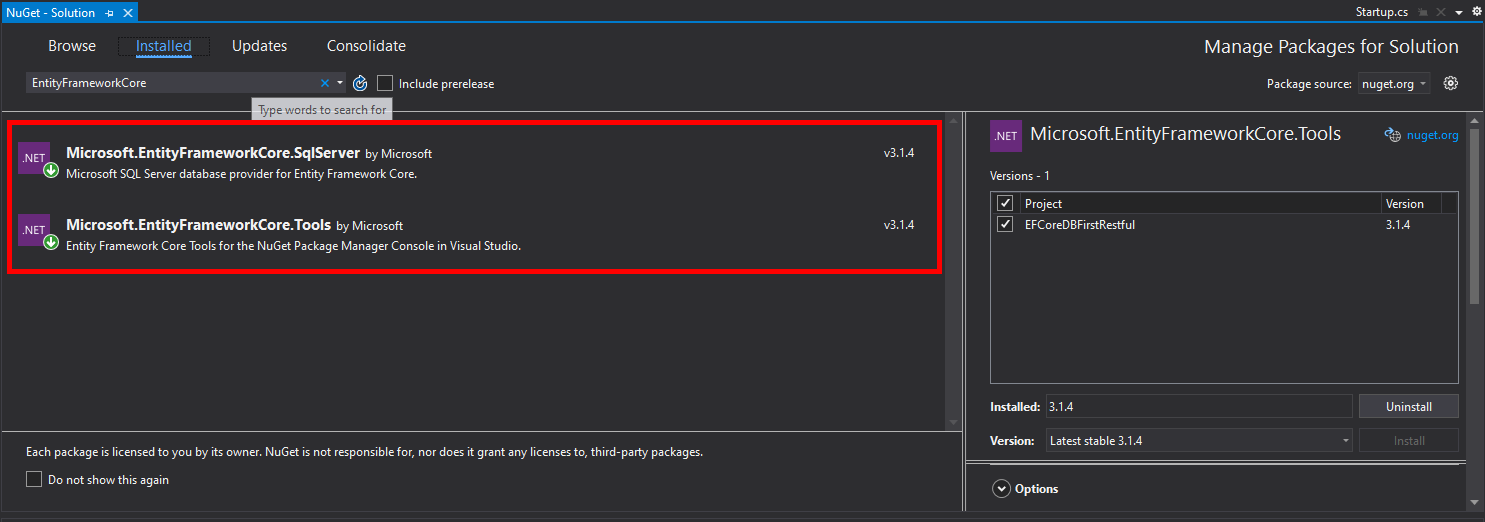
- First, you need to have Microsoft.EntityFrameworkCore.Tools to have access to the Scaffold-DbContext command.
- You also need to install a database provider for the database you are using. For this project, I'm using Microsoft SQL Server Express so I needed to have the Microsoft.EntityFrameworkCore.SqlServer data provide. These packages can be installed via the Nuget Package Manager
-
Once you've installed the necessary packages, you now have access to the Scaffold-DbContext command in the Package Manager Console. See the documentation on Scaffold-DbContext here. Here is another tutorial link on the usage of Scaffold DbContext.
-
To use the Scaffold-DbContext command, you also need to know the connection string for your database. The Scaffold-DbContext has two positional arguments - the connection string and the database provider (for this case, the database provider used is Microsoft.EntityFrameworkCore.SqlServer). The code below shows an example on how to use the Scaffold-DbContext in the Package Manager Console. The -OutputDir command sets the directory where the model files will be put in. In this case, it's placed under the Models folder.
-
Example usage of Scaffold-DbContext. In this example, we are generating models for all of the tables in the selected database by default and the output directory is set to Models via the -OutputDir optional argument. In this example, we are also using the -UseDatabaseNames option so that the generated table and column names in our models match exactly as what appears in the database. Another option that we are using here is the -Context option which specifies the name of the DbContext class to generate. So after running this scaffold, we should have an EmployeeContext.cs DbContext class inside our Models folder.
Scaffold-DbContext "Data Source=LAPTOP-VRPV043O\SQLEXPRESS;Initial Catalog=testEFCore;Integrated Security=True;Connect Timeout=30;Encrypt=False;TrustServerCertificate=False;ApplicationIntent=ReadWrite;MultiSubnetFailover=False;" Microsoft.EntityFrameworkCore.SqlServer -OutputDir Models -UseDatabaseNames -Context "EmployeeContext"
-
In this example, we are only generating a model for the Skills table using the -Tables optional argument
Scaffold-DbContext "Data Source=LAPTOP-VRPV043O\SQLEXPRESS;Initial Catalog=testEFCore;Integrated Security=True;Connect Timeout=30;Encrypt=False;TrustServerCertificate=False;ApplicationIntent=ReadWrite;MultiSubnetFailover=False;" Microsoft.EntityFrameworkCore.SqlServer -OutputDir Models -UseDatabaseNames -Context "EmployeeContext" -Tables "Skills"
-
If for example, you've already run the Scaffold-DbContext and you want to add another table to the models, you can use the -Force option to overwrite the existing DbContext. Note that you should add the previous tables already generated before in the -Tables option.
Scaffold-DbContext "Data Source=LAPTOP-VRPV043O\SQLEXPRESS;Initial Catalog=testEFCore;Integrated Security=True;Connect Timeout=30;Encrypt=False;TrustServerCertificate=False;ApplicationIntent=ReadWrite;MultiSubnetFailover=False;" Microsoft.EntityFrameworkCore.SqlServer -OutputDir Models -UseDatabaseNames -Context "EmployeeContext" -Tables "Skills","Employees" -Force
-
-
Add the following in your Startup.cs
-
Add this in Startup.ConfigureServices() method
ConnectionString = Configuration.GetConnectionString("testDB");
services.AddDbContext<EmployeeContext>(options => options.UseSqlServer(ConnectionString));
-
Add a static ConnectionString property. This is used to pass the ConnectionString to the DbContext.
private static string ConnectionString { get; set; }
-
Add a getter method for the ConnectionString property.
public static string GetConnectionString()
{
  return ConnectionString;
}
-
-
In the DbContext file (in this project, it's EmployeeContext class), change the OnConfiguring method to use the ConnectionString from startup.cs
optionsBuilder.UseSqlServer(Startup.GetConnectionString());
- HTTP PUT and DELETE are available by default in ASP.NET Core MVC unlike in ASP.NET MVC 5.
- See this link on the setup of the Startup.cs for REST APIs in ASP.NET Core
- When deleting a skill resource, update also the employees with that skill (i.e. set to null value)
