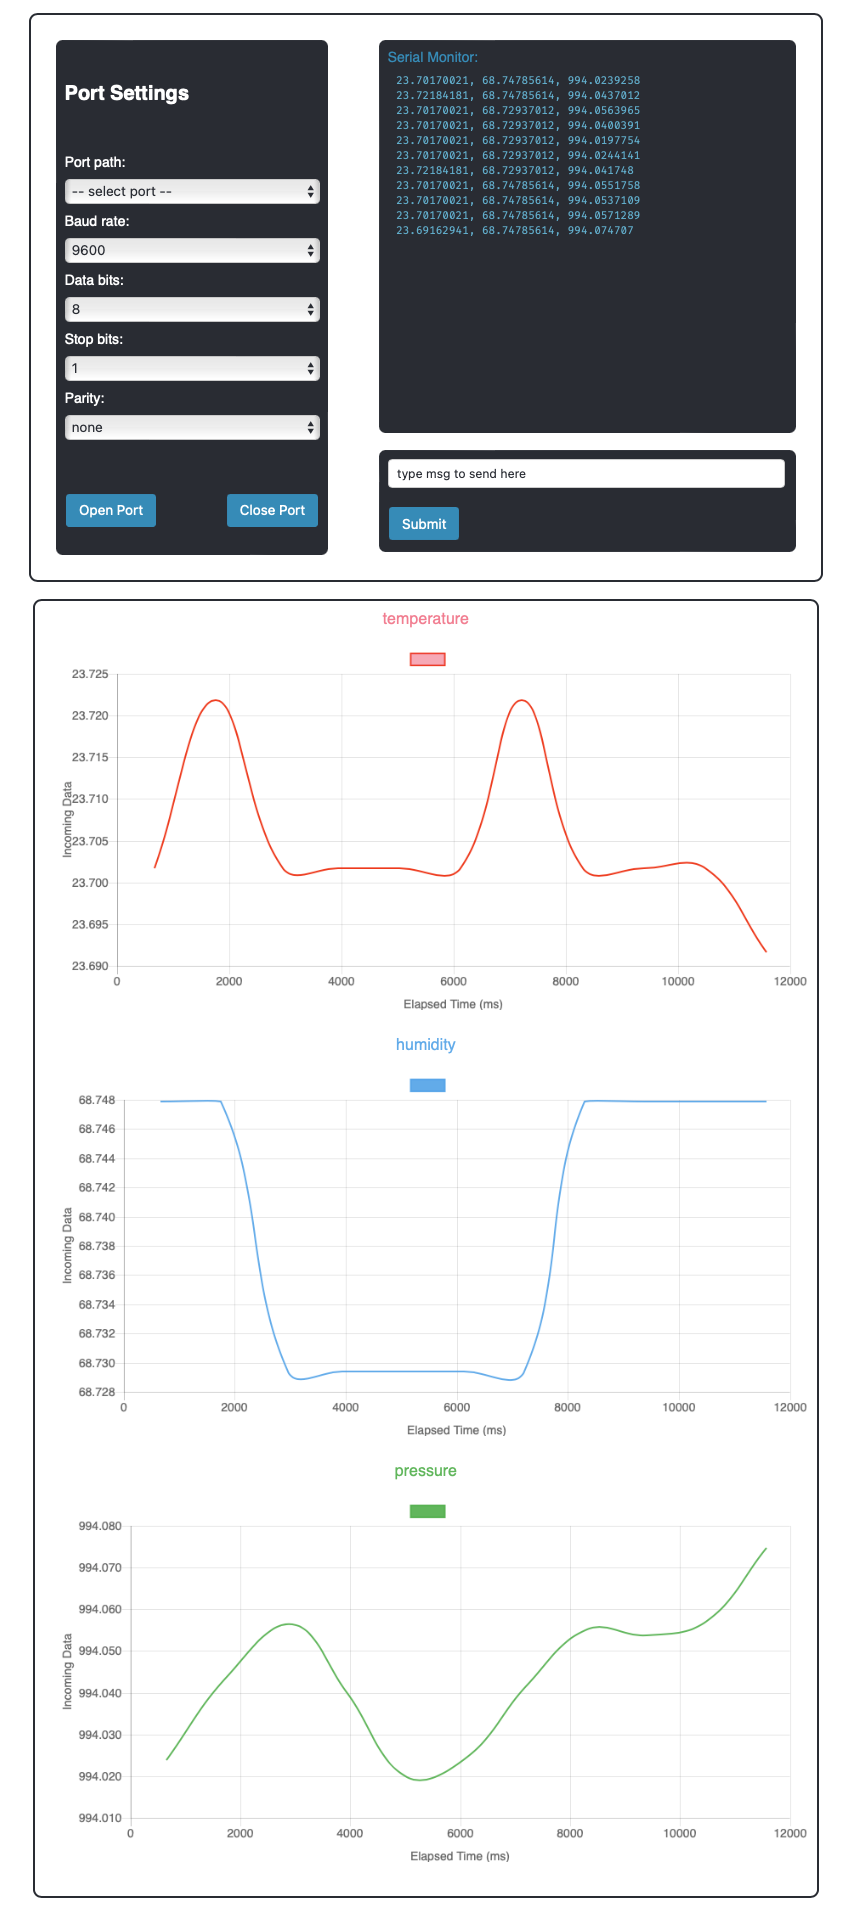
This project is a Node.js application for communicating with serial ports and visializing incoming JSON data. It is particularly useful for anyone working with microcontrollers like the Arduino to read data from a serial port, parse it, visualize it using a line chart can be very useful for monitoring and analyzing data in real-time. Users can select various serial port properties, such as baud rate, data bits, stop bits, and parity, and see incoming data on a line chart and a terminal window.
- List available serial ports - identifies device connected names.
- Easy select and config serial port connection(baud rate, data bits, stop bits, parity).
- Open/Close the serial port connection.
- Parse incoming JSON data.
- Integrated Serial Monitor
- Ability to type and send data via serial.
- Visiualize incoming data on up to 3 charts.
- Automatic labeling of charts based on received JSON keys.
Before running the application, make sure you have the following prerequisites installed on your system:
- Node.js (version 14 or above)
- NPM (Node Package Manager)
This project uses the following dependencies:
- Express: A web framework for Node.js
- Socket.IO: A library for real-time web applications
- erialPort: A library for serial port communication
- Chart.js: A JavaScript library for creating charts and graphs
-
Clone the repository:
git clone https://github.com/manokel01/serial-monitor-node-ajax.git
-
CNavigate to the project directory:
cd serial-monitor-node-ajax -
Install the dependencies:
npm install
- Connect you microcontroller to the serial port.
- Make sure it sends up to 3 values in single JSON per line.
- Start the application:
node app.js
- Open your web browser and visit http://localhost:3000.
- Select the desired serial port from the dropdown menu.
- Configure the serial port properties (baud rate, data bits, stop bits, parity).
- Click the "Open Port" button to establish a connection with the selected serial port.
- Once the port is opened, you will see the received data displayed in real-time on the webpage.
- To close the port connection, click the "Close Port" button.
Contributions to the SerialPort Communication Web App are welcome! If you find any bugs or have suggestions for improvements, please open an issue or submit a pull request.
This project is licensed under the MIT License.
- Express - Fast, unopinionated, minimalist web framework for Node.js
- SerialPort - Node.js package for serial port communication
- Socket.IO - Real-time bidirectional event-based communication library
