Larissa Krakora, Ash Collins, Logan Manthey
Table of Contents
- ECE434 Sound Project
 |
|---|
| Project Overview |
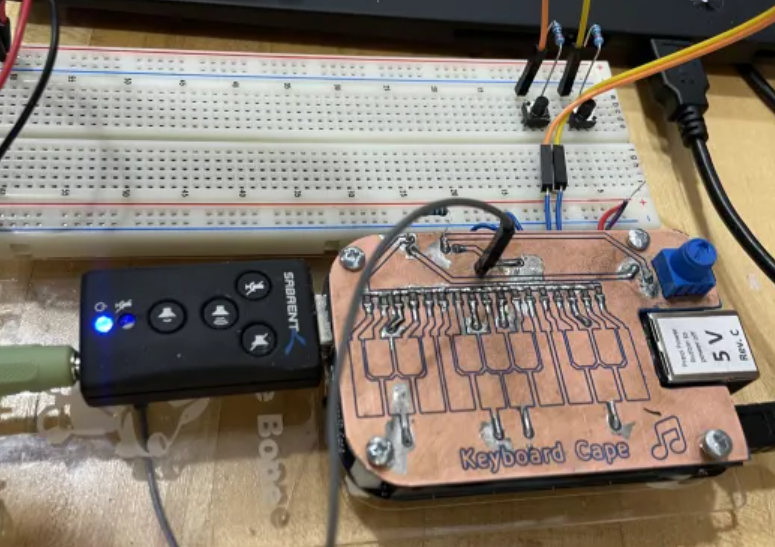
This project is centered around making a digital synth using a custom designed keyboard cape. The inspiration for this project came from the Stylophone, an analog synth which used a stylus keyboard. Our project currently has capability to play songs, navigate songs, take and play user input, record and play back user input, and has two octaves for that "manual mode". We also have a simple UI via Flask for the controls, and the display of the title of the current song. We wanted to add audio visualisation on an LCD, but we were barely even able to get anything to display on the LCD. We gave that up as we sunk too many hours into it and would rather add new features. Our project has many different capabilities related to sound.
- Most of our product is standard wires, pots, switch buttons, etc. except for our custom "Keyboard Cape"
- Our cape acts as a voltage divider, allowing us to read in analog values of voltage to differentiate between notes
Hackster IO Link: https://www.hackster.io/larissa3/sound-project-77327a
ELinux Page Link: https://elinux.org/ECE434_Project_-_Sound_Project
- Read-only GitHub: https://github.com/manthelt/ECE434FinalProject
- Clone the repo
- Run sudo ./install.sh
- Run sudo ./setup.sh
- Move .asoundrc to your home directory
- Use aplay -l to find out which card your USB Audio device is setup as
- Change pcm "hw:0,0" -> pcm "hw:[card #],0" and card 0 -> card [card #] in ~/.asoundrc
- Custom PCB schematic in 'Schematic and PCB'
- USB Surround Sound Adapter: https://sabrent.com/products/usb-sbcv
- Run ./recordServerNew.py
- Visit https://localhost:8081
- Play a variety of songs
- Backward, pause/play, and skip functionalities
- "Manual mode" that allows the user to play their own sequence of notes
- Record a sequence of notes and play them back
Here is a video that shows our project in operation.
- Input from buttons > navigate through songs > display via Flask
- Input from cape while in manual mode > play various notes
- Manual mode is navigated to the same way other songs are > input only taken in during manual mode > other songs do not play during manual mode
This section decribes the hardware portion of the project and which parts and designs were used.
- 17 1206 Resistor of Varying Sizes
  -  [Resistor List for Note Values](#resistor-list-for-note-values)
- 1 Potenimeter
- 2 2 Pin Male Connectors
- 1 1 Pin Male Connector
Note for the connectors I used large ones that I cut down to size
This section decribes the keyboard section of the hardware and it's theory of operation
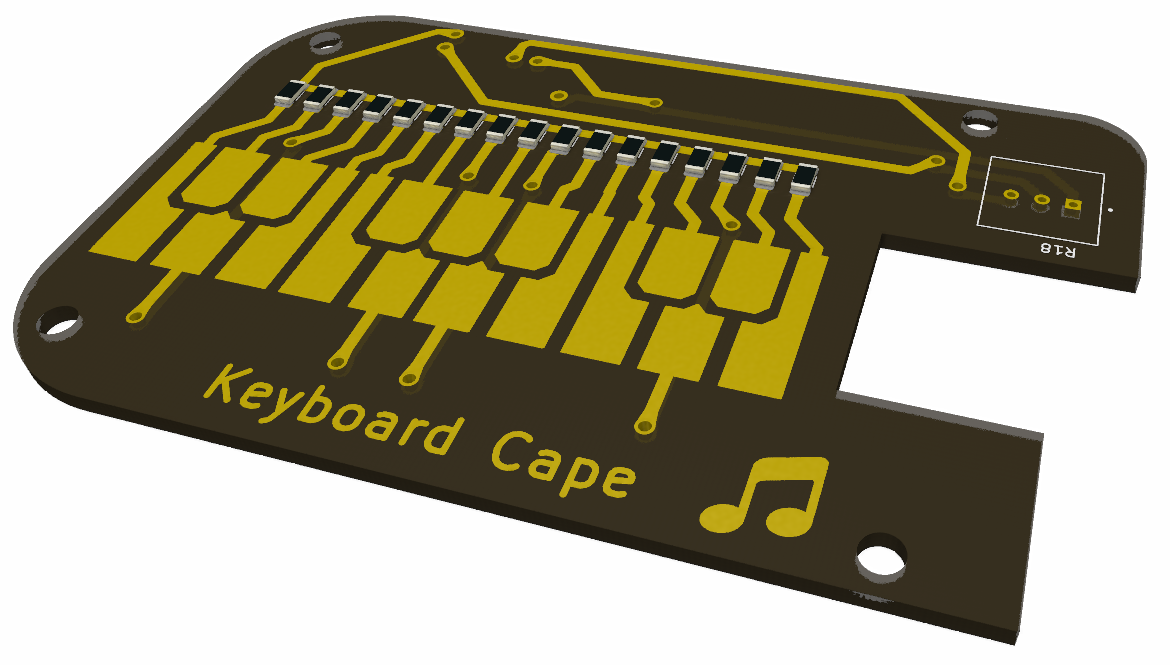 |
|---|
| Beagle Bone Keyboard Cape Render |
In short this keyboard acts as a form of potentiometer where connecting the 1.8 volt line to the different nets allows a different value to be read by the analog input as there is a different resistor connected to each one of the note nets.
The keyboard cape was designed using KiCAD EDA software. KiCAD is an open source easy to use EDA software that allowed us to quickly design and then print out a PCB prototype on campus using the CNC mill. If we were going to redesign this for real manufacture we would add more headers to make it more stable. We would also add a spot for a pull down resistor to the board itself.
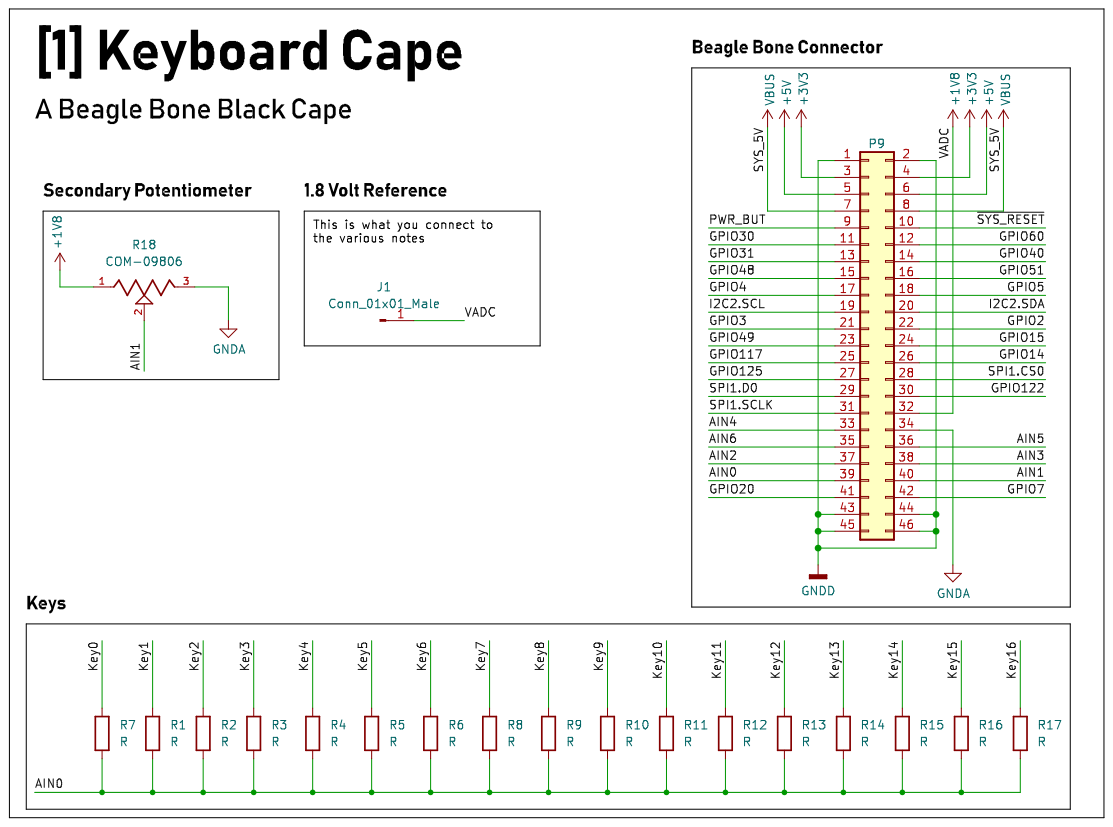 |
|---|
| Beagle Bone Keyboard Cape Schematic View |
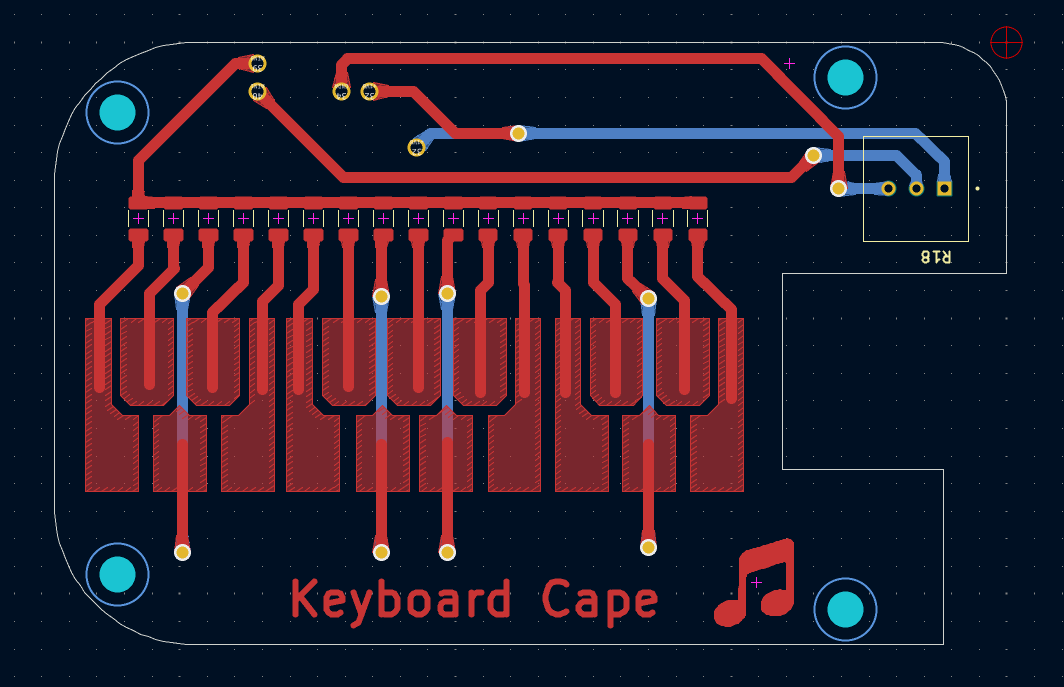 |
|---|
| Beagle Bone Keyboard Cape PCB View |
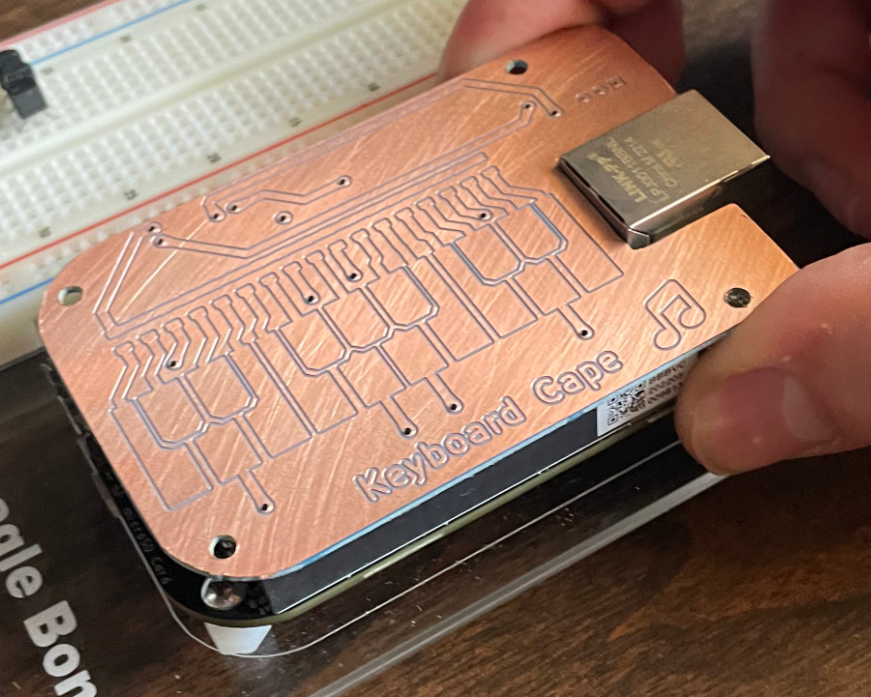 |
|---|
| Beagle Bone Keyboard Cape Inital CNC Print |
These values were chosen to allow for a somewhat even distrubtion of values which will translate to a even distrubtion of values. We then added a pull down resistor to allow for a even larger distributing of notes.
Note  Ohm
0     47000
1     33000
2     22000
3     15000
4     10000
5     6800
6     4700
7     3300
8     2200
9     1500
10    1000
11    680
12    470
13    330
14    220
15    150
16    100
17    0
In addition to the keyboard acting as a potentiometer there is also a normal potentiometer that can act as a volume control or however you would like to program it. That potentiometer is located here.
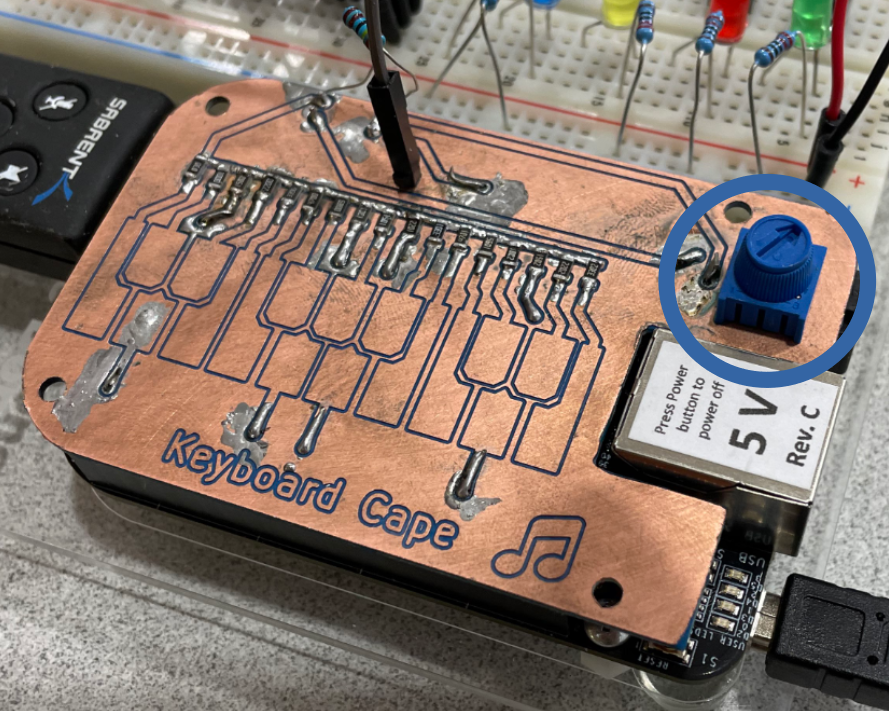 |
|---|
| Beagle Bone Keyboard Cape Inital Print |
- Analog input via /sys/bus/iio
- Button input via gpio
- While in manual mode, user hits the keys with connected wire
- Software reads in analog voltage input via /sys/bus/iio
- That analog voltage value corresponds to a frequency that is then played
- User hits keys
- Notes are read in via /sys/bus/iio
- Durations are determined based on the time the user started playing the note and when they stopped
- Take in input from potentiometer
- Use that value as a boolean to determine offset for array index of frequencies
- Buttons on Flask navigate to new page to control navigation through songs
-
PCB Design and Solder Logan
-
Sound Generation and USB Audio Logan, Ash, Larissa
-
LCD Visualization (not working - dropped) Ash, Larissa
-
Flask Ash, Larissa
-
Documentation Logan, Ash, Larissa
Future Additions - More features on the Flask App - More Synth Options and possbile Digital Signal Processing - Possible Second Pot Features - Pitch Bend - Wave Adjustment (Example: Sin Wave to Sawtooth to Square) - Being able to play over background songs and beats - This would let you solo with the keyboard over tunes like free bird - Adding a loop for recording playback would be able to allow for more intense soloing - LCD Screen - We attempted to get the LCD screen to work with the bone but this proved to be very difficult especially with a UI if we had LCD working with it we could make it into a smaller self contained package - Hardware - Adding buttons to the cape - Making the cape more stable on the bone - Printing the PCB at a PCB House
Overall our group thinks our project was a success. Our approach of making something simple and adding features to it proved to be very useful and allowed us to pivot as needed. This also allowed us to always have something to demo at every stage of our project. We also thought the interactive nature of the project made this a really fun project to demo.
Above in future work shows a few different features that we would like to add to the project.