Author: Rahat Khanna
Twitter: http://twitter.com/mappmechanic
LinkedIn: http://linkedin.com/in/rahatkh
My Book on Ionic - https://www.amazon.com/Getting-Started-Ionic-Rahat-Khanna/dp/1784390577
A Repository to help you learn Ionic in a very easy and Practical way with lots of examples.
- Setting Up Ionic Environment
- Developing HelloWorld App
- Tabs & States in Ionic App
- Multi Step Form & Validations
- Cordova Maps Geolocation Plugin
- Cordova Device Motion Plugin
- Gestures & Touch Events
- Expense Manager with Pouch DB (Offline Data & Sync Example)
- Integrating with Paypal Payment Gateway
We need to install all the dependencies and then use the Ionic CLI to initiate a new project.
Requirements for Setup:
- Install NodeJS & GIT
- Check if npm path is working correctly by the following command
npm -v
- Install Ionic CLI and Cordova CLI with npm using the following command
npm install -g ionic cordova
- Check if Ionic has been installed correctly using following command
ionic -v
Execute the ionic create command on your CommandPrompt(Windows) & Terminal(MAC OS)
ionic start -i com.ionic.helloworld ./hello blank
Now, you have to go inside the hello folder using following command.
cd hello
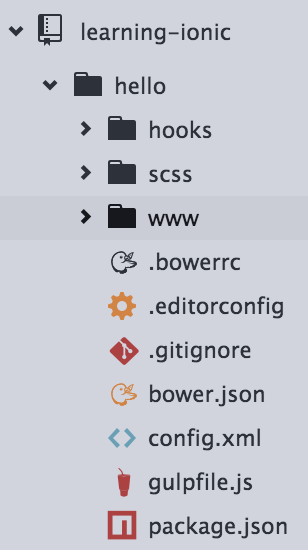
The folder structure of our Ionic app started with blank template is as given below:
From the command prompt or terminal, please run the following command:
npm install
From the command prompt or terminal, please run the following command:
npm install
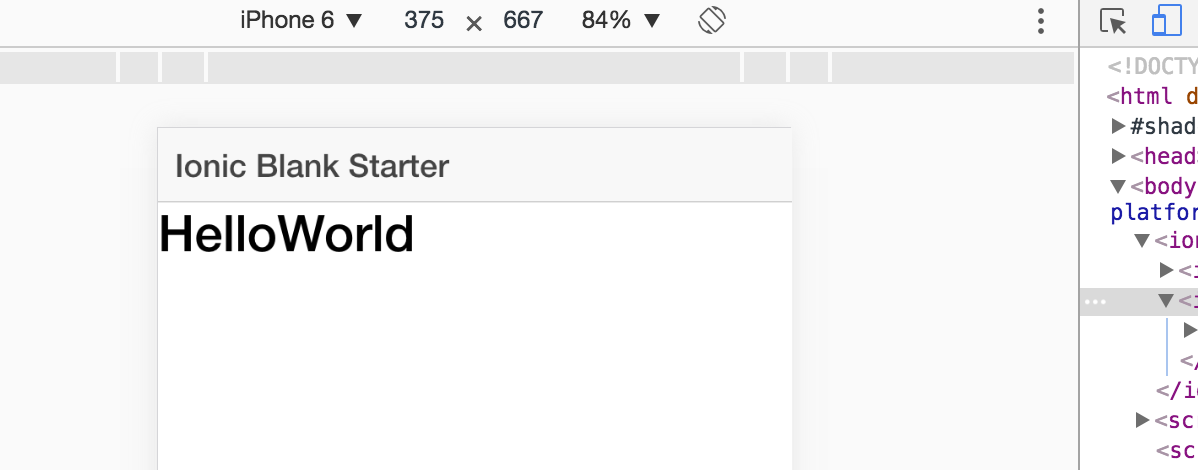
We will use the ionic serve command to run a local web-server to see the output of our app
ionic serve
Now we will be able to see the HelloWorld App example using a browser. We can use Chrome Devtools to open it in any device size.
First we will change the name of our app to learningIonic. We need to make changes in 2 files for this.
-
In index.html, change the value assigned to ng-app directive:
...<body ng-app="learningIonic">... -
In app.js, change the value passed to create the root module:
...angular.module('learningIonic',['ionic'])...
Now, we will be adding states for our application. The states represent different routes and sub-routes which any user can access in your application. In our app, we will have a home which will be the landing state and then one view for list of examples and the third one for the author.
We have to create a new .config([function(){...}]) block in our app.js to define app level states. Please copy the below given code and paste it into your app.js file.
.config(function($stateProvider, $urlRouterProvider) {
  $stateProvider
  // setup an abstract state for the tabs directive
    .state('tab', {
    url: '/tab',
    abstract: true,
    templateUrl: 'templates/tabs.html'
  })
  // Each tab has its own nav history stack:
  .state('tab.home', {
    url: '/home',
    views: {
      'tab-home': {
        templateUrl: 'js/home/tab-home.html',
        controller: 'HomeCtrl'
      }
    }
  })
  .state('tab.examples', {
      url: '/examples',
      views: {
        'tab-examples': {
          templateUrl: 'js/examples/tab-examples.html',
          controller: 'ExamplesCtrl'
        }
      }
    })
  .state('tab.author', {
    url: '/author',
    views: {
      'tab-author': {
        templateUrl: 'js/author/tab-author.html',
        controller: 'AuthorCtrl'
      }
    }
  });
  // if none of the above states are matched, use this as the fallback
  $urlRouterProvider.otherwise('/tab/home');
});Please add the following code in folder www/templates/tabs.html file to put tabs in our app:
<ion-tabs class="tabs-icon-top tabs-color-active-positive">

  <!-- Home Tab -->
  <ion-tab title="Home" icon-off="ion-ios-home-outline" icon-on="ion-ios-home" href="#/tab/home">
    <ion-nav-view name="tab-home"></ion-nav-view>
  </ion-tab>

  <!-- Examples Tab -->
  <ion-tab title="Examples" icon-off="ion-ios-list-outline" icon-on="ion-ios-list" href="#/tab/examples">
    <ion-nav-view name="tab-examples"></ion-nav-view>
  </ion-tab>

  <!-- Author Tab -->
  <ion-tab title="Author" icon-off="ion-ios-person-outline" icon-on="ion-ios-person" href="#/tab/author">
    <ion-nav-view name="tab-author"></ion-nav-view>
  </ion-tab>
</ion-tabs>
For each view/feature, we should create a new folder that will hold its services/factories, controllers, module definitions and any directives it would use.
Firstly, we will create a new folder home for home view and then create two files in it homeCtrl.js and tab-home.html.
Please paste the following code and put in homeCtrl.js file:
angular.module('home',[])

.controller('HomeCtrl',['$scope',function($scope) {
	$scope.welcomeTitle = 'Welcome to the LearningIonic demos app';
	$scope.welcomeMessage = 'We will be creating small demos on variety of topics and then integrate them into this app.';
}]);
Please paste the following code and put in tab-home.html file:
<ion-view view-title="Home">
  <ion-content class="padding">
	<h3>{{welcomeTitle}}</h3>
	<p>
    	{{ welcomeMessage }}
	</p>
	<p>
		Lorem ipsum dolor sit amet, consectetur adipiscing elit. Curabitur tincidunt magna ac molestie aliquet. Class aptent taciti sociosqu ad litora torquent per conubia nostra, per inceptos himenaeos. Morbi at viverra dui. Sed malesuada ex ac ex convallis, vitae ornare nisl suscipit. Proin non laoreet elit. Sed mollis sem a urna tristique tempus. In sed quam id nisl tristique tempor. Phasellus id enim quis leo rutrum pulvinar in ut ipsum. In aliquet, velit a mattis aliquet, risus felis ultricies sapien, nec iaculis enim augue quis lorem. Aliquam sollicitudin, purus eget placerat mollis, orci dolor finibus libero, vestibulum aliquam ex sapien id enim. Nullam ut ex ut leo congue dignissim.
	</p>
  </ion-content>
</ion-view>
In index.html, add the following dependencies after app.js script injection.
<script src="js/home/HomeCtrl.js"></script>
Also,replace the contents of the body tag with the following code:
<ion-nav-bar class="bar-positive">
  <ion-nav-back-button>
  </ion-nav-back-button>
</ion-nav-bar>
<ion-nav-view>
</ion-nav-view>
Also, one last thing that we need to inject home module as a dependency to our root module in app.js file:
angular.module('learningIonic', ['ionic','home']
Run the command ionic serve to see the output of only home.
Now, we will create a new folder for examples and create 3 files in it - examplesCtrl.js, examplesModule.js and tab-examples.html.
Please put the following code in examplesModule.js:
angular.module('examples',[])
.run([function(){}])
.config([function(){}]);
Please put the following code in examplesCtrl.js:
angular.module('examples')

.controller('ExamplesCtrl',['$scope',function($scope) {
	$scope.examples = [
		{
			name:'Example 1',
			descr:'Description about the first example, what would be demoed in this.',
			icon:'ion-beaker'
		}
	]
}]);
Please put the following code in tab-examples.html:
<ion-view view-title="Examples">
  <ion-content class="">
	<ion-list>
		<ion-item class="item-icon-left item-icon-right" ng-repeat="example in examples track by index">
			 <i class="icon {{example.icon}}"></i>
			{{example.name}}
			<i class="icon ion-chevron-right"></i>
		</ion-item>
	</ion-list>
  </ion-content>
</ion-view>
In index.html, add the following dependencies after homeCtrl.js script injection.
<script src="js/examples/examplesModule.js"></script>
<script src="js/examples/examplesCtrl.js"></script>
Also, one last thing that we need to inject home module as a dependency to our root module in app.js file:
angular.module('learningIonic', ['ionic','home','examples']
Run the command ionic serve to see the output of examples view by clicking on examples tab on bottom tab bar.
Now, we will create a new folder for author and create 3 files in it - authorCtrl.js, authorModule.js and tab-author.html.
Please put the following code in authorModule.js:
angular.module('author',[])
.run([function(){}])
.config([function(){}]);
Please put the following code in authorCtrl.js:
angular.module('author')

.controller('AuthorCtrl',['$scope',function($scope) {
	$scope.authorInfo = {
		name: 'Rahat Khanna',
		alias: 'mappmechanic',
		bio: ' Kickass Front End Consultant building Awe Inspiring Responsive UI for Multiple Form Factors ',
		twitter: '@mappmechanic',
		linkedIn: 'https://linkedin.com/in/rahatkh'
	}
}]);
Please put the following code in tab-author.html:
<ion-view view-title="Author">
  <ion-content class="card">
	<ion-list>
		<ion-item class="item-divider">	Name </ion-item>
		<ion-item> {{ authorInfo.name }} </ion-item>
		<ion-item class="item-divider"> Alias </ion-item>
		<ion-item> {{ authorInfo.alias }} </ion-item>
		<ion-item class="item-divider"> Bio </ion-item>
		<ion-item class="item-text-wrap"> {{ authorInfo.bio }} </ion-item>
		<ion-item class="item-divider"> Twitter Handle </ion-item>
		<ion-item> {{ authorInfo.twitter }} </ion-item>
		<ion-item class="item-divider"> LinkedIn Profile </ion-item>
		<ion-item> {{ authorInfo.linkedIn }} </ion-item>
	</ion-list>
  </ion-content>
</ion-view>
In index.html, add the following dependencies after homeCtrl.js script injection.
<script src="js/author/authorModule.js"></script>
<script src="js/author/authorCtrl.js"></script>
Also, one last thing that we need to inject home module as a dependency to our root module in app.js file:
angular.module('learningIonic', ['ionic','home','examples','author']
Run the command ionic serve to see the output of author view by clicking on author tab on bottom tab bar.
In this example we will create a small module to render multi step dynamic form which will be driven using a JSON object. We will mention the type of question/input and then have some properties defined to render it. We will record the responses in the same object and extract them in the last. We will implement 2 types of validation - CSS based and FormController/NgModelController based.
We have to make new folder named survey in our examples folder. We will make nested feature folders now.
Now we have to create a new file surveyModule.js inside survey folder to declare a new module named survey with the following code:
	angular.module('survey',[])

	.run([function(){

	}])

	.config([function(){

	}])
Also, create 2 new blank files surveyCtrl.js and surveyTemplate.html.
Now, firstly we have to create a new route for our survey example.
In the config block of the module definition present in file examplesModule.js, please replace the config block with the following code:
.config(['$stateProvider',function($stateProvider){
	$stateProvider
	.state('tab.survey', {
      url: '/examples/survey',
      views: {
        'tab-examples': {
          templateUrl: 'js/examples/survey/surveyTemplate.html',
          controller: 'SurveyCtrl'
        }
      }
    })
}])
Also, in examplesCtrl.js, modify the first element of examples array to match the following code:
$scope.examples = [
	{
		name:'Survey Example',
		descr:'It contains an example of Multi Step Forms with validation.',
		icon:'ion-ios-paper',
		link:'tab.survey'
	}
]
Now, we have to inject all dependencies in index.html after all other script tags injections.
<!-- Survey Example Module -->
<script src="js/examples/survey/surveyModule.js"></script>
<script src="js/examples/survey/surveyCtrl.js"></script>
<script src="js/examples/survey/questionDirective.js"></script>
Now, we will be adding code in surveyTemplate.html and surveyCtrl.js to implement the multi step form rendering.
Now, we should add the following code to surveyTemplate.html:
<ion-view view-title="Multi Step Survey">
  <ion-content class="">

	<div ng-if="survey.steps.length > 1 && currentActiveStep > -1" class="list card">
		<div class="button-bar bar-dark">
  		  <a ng-repeat="step in survey.steps"
			ng-click="goToStep($index)"
			ng-class="{'button':true,'active':step.active}">
			  Step {{$index+1}}
		  </a>
  		</div>
	</div>
	<div ng-if="step.active" ng-repeat="step in survey.steps" class="list card">
		<div class="item item-divider">
			{{step.title}}
		</div>
		<form name="step{{$index+1}}">
			<ion-item ng-repeat="question in step.questions track by $index">
				<question
					type="{{question.type}}"
					options="question.options"
					response="question.response"
					no="{{index+1}}">
				</question>
			</ion-item>
		</form>
	</div>
	<div ng-if="currentActiveStep === -1" class="list card">
		<div ng-repeat="step in responses" class="list">
			<div class="item item-divider">{{step.step}}</div>
			<div ng-repeat="response in step.responses" class="item">
				{{response.question}} - {{response.response}}
			</div>
		</div>
	</div>
	<div ng-if="currentActiveStep > -1" class="padding">
		<div ng-if="!lastStepActive" class="button button-block button-balanced" ng-click="continue()"> Continue </div>
 		<div ng-if="lastStepActive" class="button button-block button-assertive" ng-click="submit()"> Submit </div>
	</div>
  </ion-content>
</ion-view>
Now, we should add the following code to surveyCtrl.js:
angular.module('survey')

.controller('SurveyCtrl',['$scope','$ionicScrollDelegate',function($scope,$ionicScrollDelegate) {
	$scope.survey = {
		steps:[
				{
				title:'Trainer Feedback',
				active:true,
				questions:[
							{
								type:"text-input",
								options:{
									label:"Trainer Name",
									placeholder:"Enter Name of Trainer",
									style:"item-stacked-label"
								}
							},
							{
								type:"singlechoice",
								options:{
									question:"What is the level of this Tutorial?",
									choices:["Good","Very Good","Excellent","Out of this world!"]
								}
							},
							{
								type:"range",
								options:{
									question:"Give Rating out of 1 to 10 for Trainer",
									max:10,
									min:1
								},
								response:{
									value:10
								}
							}
					]
				},
				{
				title:'Content Feedback',
				active:false,
				questions:[
							{
								type:"text-input",
								options:{
									label:"Topic Name",
									placeholder:"Enter the Topic for the Session",
									style:"item-stacked-label"
								}
							},
							{
								type:"multichoice",
								options:{
									question:"What all you covered?",
									choices:[
										{selected:false,display:"Theory"},
										{selected:false,display:"Code Demos"},
										{selected:false,display:"HandsOn Coding"}
									],
									style:"item-stacked-label"
								}
							},
							{
								type:"singlechoice",
								options:{
									question:"How was the content organized?",
									choices:["Covered Everything","Good Coverage","Ok Content","Very Bad Content"]
								}
							}
					]
				}
			]
		}
	$scope.lastStepActive = false;
	$scope.currentActiveStep = 0;
	$scope.responses = [];
	$scope.goToStep = function(index){
		for(var i=0;i<$scope.survey.steps.length;i++)
		{
			$scope.survey.steps[i].active = i === index ? true : false;
		}
		$scope.lastStepActive = (index === $scope.survey.steps.length -1) ? true : false;
		$scope.currentActiveStep = index;
	}

	$scope.continue = function(){
		$scope.goToStep($scope.currentActiveStep+1);
		$ionicScrollDelegate.scrollTop();
	}

	$scope.submit = function(){
		$scope.goToStep(-1);
		$scope.responses = $scope.survey.steps.map(function(step,stepIndex){
			var questionResponses = step.questions.map(function(question,quesIndex){
				var respObj = {
					question: 'Question'+(quesIndex+1),
					response:question.response.value
				}
				return respObj;
			});
			return {
				step:'Step'+(stepIndex+1),
				responses:questionResponses
			}
		});
		$ionicScrollDelegate.scrollTop();gm
	}
}]);Now, we have to create a new directive for rendering all question types. Please create one file questionDirective.js and put the following code there:
angular.module('survey')

.directive('question',[function(){
	return {
		scope:{
			type:'@',
			options:'=',
			response:'=',
			no:'@'
		},
		link:function($scope,$element,$attrs){
		},
		restrict:'E',
		templateUrl:'js/examples/survey/questionTemplate.html',
		controller:questionCtrl
	}
}]);

function questionCtrl($scope){
	if(!$scope.response){
		$scope.response = {
			value:'',
			timeTaken:0
		}
	}

	$scope.updateChoice = function(index){
		var selectedChoices = $scope.options.choices.filter(function(choice){
			return choice.selected === true;
		});
		selectedChoices = selectedChoices.map(function(choice){ return choice.display });
		$scope.response.value = selectedChoices;
	}
}

questionCtrl.$inject = ['$scope'];
Now, we will create the template for it as a new file questionTemplate.html:
<div class="question">
	<div ng-switch="type">
		<div ng-switch-when="text-input">
			<div class="list">
			  <label class="item item-input {{options.style}}">
				  <ng-form name="QuestionForm">
				    <span class="input-label">
						{{options.label}}
					</span>
				    <input type="text" name="InputElement" placeholder="{{options.placeholder}}" required ng-model="response.value">
					<span class="error-message"
					ng-show="QuestionForm.InputElement.$touched && QuestionForm.InputElement.$error.required">
						*It is a required field.
					</span>
				  </ng-form>
			  </label>
			</div>
		</div>
		<div ng-switch-when="singlechoice">
			<ion-list>
				<div class="item item-divider">
					{{ options.question }}
				</div>
				<ion-radio
					ng-repeat="choice in options.choices track by $index"
					ng-model="response.value"
					ng-value="choice">
					{{choice}}
				</ion-radio>
			</ion-list>
		</div>
		<div ng-switch-when="multichoice">
			<ion-list>
				<div class="item item-divider">
					{{ options.question }}
				</div>
				<ion-checkbox
					ng-repeat="choice in options.choices track by $index"
					ng-model="choice.selected"
					ng-change="updateChoice($index)">
					{{choice.display}}
				</ion-checkbox>
			</ion-list>
		</div>
		<div ng-switch-when="range">
			<div class="item item-divider">
				{{options.question}}
			</div>
			<div class="item range range-balanced">
	            <i class="icon ion-ios-bolt-outline"></i>
	            	<input type="range" name="volume" min="{{options.min}}" max="{{options.max}}" ng-model="response.value">
	            <i class="icon ion-ios-bolt"></i>
				{{response.value}}
        	</div>
		</div>
	</div>
</div>
Now we will implement code for validations and error messages. We can notify the user about the validation errors in two ways:
- Using CSS, angular automatically adds css classes to invalid forms. Add the following css in css/style.css file.
input.ng-touched.ng-invalid{
	border:1px solid red;
	background:#FBEFF2;
}
- We can also use FormController & NgModelController to check special flags on the controller instance for any input element.
Add the following directive to surveyModule.js file:
.directive("errorMessage", function() {
    return {
        restrict: 'E',
        transclude: true,
        replace: true,
        scope:{
            name: '@',
            error: '@'
        },
        template: '<div><p ng-show="$parent.{{name}}.$dirty">Dirty</p><p ng-show="$parent.{{name}}.$error.{{error}}"><span ng-transclude></span></p></div>'
    };
});In Ionic, we can use native device plugins of Cordova using a special library called ngCordova which encapsulates all cordova calls in Angular services which can be called easily in Ionic.
We have to add ngCordova library to our Ionic project.
Either download the ngCordova library using github or install it using bower with following command from inside hello folder:
bower install ngCordova --save
Now, we have to include the reference of ngCordova file in our index.html just before cordova.js script injection.
<script src="lib/ngCordova/dist/ng-cordova.js"></script>
Also, we have to inject 'ngCordova' dependency into the DI list for our root module in app.js file:
angular.module('learningIonic', ['ionic','home','examples','author','ngCordova'])
We will be adding the new cordova plugin for sending email and then use its ngCordova method to send the survey response JSON as email.
In order to add a cordova plugin, type following command in command prompt:
cordova plugin add https://github.com/katzer/cordova-plugin-email-composer.git
We have to now, add the functionality in surveyCtrl.js file:
$scope.sendEmail = function(){
	$cordovaEmailComposer.isAvailable().then(function() {
		var email = {
			 to: 'yehtechnologies@gmail.com',
			 cc: 'rahat.khanna@yahoo.co.in',
			 bcc: ['rahat.khanna@flipkart.com'],
			 attachments: [],
			 subject: 'Survey Result',
			 body: document.getElementById('surveyResponse').innerHTML,
			 isHtml: true
		   };

		  $cordovaEmailComposer.open(email).then(null, function () {
			// user cancelled email
		  });
	}, function () {
	   // not available
	   alert('Email Composer is not available in your device.');
	});
}
Also, add the dependency $cordovaEmailComposer to the SurveyCtrl definition.
We will also place a Send Email button on Survey Response view, to send the response as email:
<div id="surveyResponse" ng-if="currentActiveStep === -1" class="list card">
	<div ng-repeat="step in responses" class="list">
		<div class="item item-divider">{{step.step}}</div>
		<div ng-repeat="response in step.responses" class="item">
			{{response.question}} - {{response.response}}
		</div>
	</div>
	<div class="item">
		<div class="button button-block button-assertive"
			ng-click="sendEmail()"> Send as Email
		</div>
	</div>
</div>
We will now develop an example to use Google Maps & Cordova Geolocation plugin to draw a map and mark your current position on the map if GPS is enabled.
We have to add plugin using the following command in the command prompt:
cordova plugin add cordova-plugin-geolocation
We have to make new folder named map in our examples folder. We will make nested feature folders now.
Now we have to create a new file mapModule.js inside map folder to declare a new module named map with the following code:
	angular.module('map',[])

	.run([function(){

	}])

	.config([function(){

	}])
Also, create 2 new blank files mapCtrl.js and mapTemplate.html.
Now, firstly we have to create a new route for our map example.
In the config block of the module definition present in file examplesModule.js, please replace the config block with the following code:
.config(['$stateProvider',function($stateProvider){
	$stateProvider
	.state('tab.map', {
      url: '/examples/map',
      views: {
        'tab-examples': {
          templateUrl: 'js/examples/map/mapTemplate.html',
          controller: 'MapCtrl'
        }
      }
    })
}])
Also, in examplesCtrl.js, modify the first element of examples array to match the following code:
$scope.examples = [
	{
		name:'Map Example',
		descr:'It contains an example of Google Maps showing your location.',
		icon:'ion-location',
		link:'tab.map'
	}
]
Now, we have to inject all dependencies in index.html after all other script tags injections.
<!-- Map Example Module -->
<script src="js/examples/map/mapModule.js"></script>
<script src="js/examples/map/mapCtrl.js"></script>
In App.js, also we have to inject map as a dependency:
angular.module('learningIonic', ['ionic','home','examples','author','ngCordova','map'])
Now, we should add the following code to mapCtrl.js:
angular.module('map')

.controller('MapCtrl',['$scope','$ionicPlatform','$cordovaGeolocation',function($scope,$ionicPlatform,$cordovaGeolocation) {
	var options = {timeout: 10000, enableHighAccuracy: true};

 	$ionicPlatform.ready(function(){
		$cordovaGeolocation.getCurrentPosition(options).then(function(position){

  	    var latLng = new google.maps.LatLng(position.coords.latitude, position.coords.longitude);

  	    var mapOptions = {
  	      center: latLng,
  	      zoom: 15,
  	      mapTypeId: google.maps.MapTypeId.ROADMAP
  	    };

  	    $scope.map = new google.maps.Map(document.getElementById("map"), mapOptions);
		var marker = new google.maps.Marker({
	      position: latLng,
	      map: $scope.map,
	    });
  	  }, function(error){
  	    console.log("Could not get location");
  	  });
	});
}]);
Now, we will update the following code in mapTemplate.html:
<ion-view view-title="Map Current Position">
  <ion-content class="">
		<div id="map">
		</div>
  </ion-content>
</ion-view>
We will now develop an example to use Accelerometer sensor of our app with Cordova Device Motion plugin to detect changes in acceleration of our device.
We have to add plugin using the following command in the command prompt:
cordova plugin add cordova-plugin-device-motion
We have to make new folder named accelerometer in our examples folder. We will make nested feature folders now.
Now we have to create a new file accelerometerModule.js inside accelerometer folder to declare a new module named accelerometer with the following code:
	angular.module('accelerometer',[])

	.run([function(){

	}])

	.config([function(){

	}])
Also, create 2 new blank files accelerometerCtrl.js and accelerometerTemplate.html.
Now, firstly we have to create a new route for our accelerometer example.
In the config block of the module definition present in file accelerometerModule.js, please replace the config block with the following code:
.config(['$stateProvider',function($stateProvider){
	$stateProvider
	.state('tab.accelerometer', {
      url: '/examples/accelerometer',
      views: {
        'tab-examples': {
          templateUrl: 'js/examples/accelerometer/accelerometerTemplate.html',
          controller: 'AccelerometerCtrl'
        }
      }
    })
}])
Also, in examplesCtrl.js, add new element into examples array to match the following code:
$scope.examples = [
	...
	{
		name:'Accelerometer Example',
		descr:'It contains an example of detecting Accelerometer changes.',
		icon:'ion-ios-speedometer',
		link:'tab.accelerometer'
	}
]
Now, we have to inject all dependencies in index.html after all other script tags injections.
<!-- Accelerometer Example Module -->
<script src="js/examples/accelerometer/accelerometerModule.js"></script>
<script src="js/examples/accelerometer/accelerometerCtrl.js"></script>
In App.js, also we have to inject accelerometer as a dependency:
angular.module('learningIonic', ['ionic','home','examples','author','ngCordova','map','accelerometer'])
Now, we should add the following code to accelerometerCtrl.js:
angular.module('accelerometer')

.controller('AccelerometerCtrl',['$scope','$ionicPlatform','$cordovaDeviceMotion',
	function($scope,$ionicPlatform,$cordovaDeviceMotion) {
		$scope.dataPoints = [];
		$scope.frequency = 500;
		var accelerationWatch;

		$scope.init = function(){
			$scope.startAccelerationWatch($scope.frequency);
		}

		$scope.startAccelerationWatch = function(newFrequency){
			$ionicPlatform.ready(function(){
				accelerationWatch = $cordovaDeviceMotion.watchAcceleration({
					frequency:newFrequency
				});
			});

			accelerationWatch.then(null,function(error){
				alert('An error occurred');
				alert(JSON.stringify(error));
			},function(result){
				$scope.dataPoints.unshift(result);
			});
		}

		$scope.updateFrequency = function(){
			$scope.stopWatching();
			$scope.startAccelerationWatch($scope.frequency);
		}

		$scope.stopWatching = function(){
			if(accelerationWatch){
				accelerationWatch.clearWatch();
			}
		}

}]);
Now, we will update the following code in accelerometerTemplate.html:
<ion-view view-title="Accelerometer">
  <ion-content class="">
		<ion-list>
			<ion-item class="item-divider">
				Select Frequency (in milliseconds)
			</ion-item>
			<ion-item>
				<input type="range" max="60000" min="1000" ng-model="frequency"> {{ frequency }}
			</ion-item>
			<ion-item>
				<div class="button button-block button-assertive"
					ng-click="updateFrequency()"> Update
				</div>
			</ion-item>
			<ion-item>
				<div class="button button-block button-primary"
					ng-click="stopWatching()"> Stop Watching
				</div>
			</ion-item>
			<ion-item ng-repeat="datapoint in dataPoints">
				x : {{ datapoint.x }} <br>
				y : {{ datapoint.y }} <br>
				z : {{ datapoint.z }}
			</ion-item>
		</ion-list>
  </ion-content>
</ion-view>
We will now develop an example to show all the abstract touch and gesture events available in Ionic Framework. There are two ways to invoke these events, one is by using the directive and other is by registering an event handler on the $ionicGesture service.
We have to make new folder named gestures in our examples folder. We will make nested feature folders now as per previous features.
Now we have to create a new file gesturesModule.js inside gestures folder to declare a new module named gestures with the below given code. Also this time, we will declare the state for this view in the config block of this module itself:
angular.module('gestures',[])

.run([function(){

}])

.config(['$stateProvider',function($stateProvider){
	$stateProvider
	.state('tab.gestures', {
	  url: '/examples/gestures',
	  views: {
		'tab-examples': {
		  templateUrl: 'js/examples/gestures/gesturesTemplate.html',
		  controller: 'GesturesCtrl'
		}
	  }
  });
}])
Also, create 2 new blank files gesturesCtrl.js and gesturesTemplate.html.
Now, firstly we have to create a new route for our accelerometer example.
Also, in examplesCtrl.js, add new element into examples array to match the following code:
$scope.examples = [
	...
	{
		name:'Gestures Example',
		descr:'It contains an example of using gestures and touch events.',
		icon:'ion-android-hand',
		link:'tab.gestures'
	}
]
Now, we have to inject all dependencies in index.html after all other script tags injections.
<!-- Gestures Example Module -->
<script src="js/examples/gestures/gesturesModule.js"></script>
<script src="js/examples/gestures/gesturesCtrl.js"></script>
In App.js, also we have to inject gestures as a dependency:
angular.module('learningIonic', ['ionic','home','examples','author','ngCordova','map','accelerometer','gestures'])
Now, we should add the following code to gesturesCtrl.js:
angular.module('gestures')

.controller('GesturesCtrl',['$scope','$ionicGesture',
	function($scope,$ionicGesture) {
		$scope.gesture = {
			used: ''
		};

		$scope.onGesture = function(gesture,event) {
			$scope.gesture.used = gesture;
			console.log(gesture);
		}

  		var element = angular.element(document.querySelector('#content'));

		$ionicGesture.on('tap', function(e){
			$scope.$apply(function() {
				console.log('Tap');
				$scope.gesture.used = 'Tap';
			});
		}, element);
}]);
Now, we will update the following code in gesturesTemplate.html:
<ion-view view-title="Gestures">
	<ion-content class="padding"
				  id="content"
				  on-swipe-up="onGesture('Swipe Up')"
				  on-swipe-right="onGesture('Swipe Right')"
				  on-swipe-down="onGesture('Swipe Down')"
				  on-swipe-left="onGesture('Swipe Left')"
				  on-hold="onGesture('Hold')"
				  on-double-tap="onGesture('Double-Tap',$event)"
				  scroll="false">

		 <h2 style="text-align: center;">Use any touch gesture on this page</h2>
		 <h2 style="text-align: center;">Used touch gesture: {{gesture.used}}</h2>
	</ion-content>
</ion-view>
We will now develop an example to integrate to Paypal Payment Gateway.
We have to make new folder named paypal in our examples folder. We will make nested feature folders now.
Now we have to create a new file paypalModule.js inside accelerometer folder to declare a new module named paypal with the following code:
angular.module('paypal',[])

.run([function(){

}])

.config([function(){

  });
}])
Also, create 2 new blank files paypalCtrl.js and paypalTemplate.html.
Now, firstly we have to create a new route for our paypal example.
In the config block of the module definition present in file paypalModule.js, please replace the config block with the following code:
.config(['$stateProvider',function($stateProvider){
	$stateProvider
	.state('tab.paypal', {
	  url: '/examples/paypal',
	  views: {
		'tab-examples': {
		  templateUrl: 'js/examples/paypal/paypalTemplate.html',
		  controller: 'PaypalCtrl'
		}
	  }
  });
}])Also, in examplesCtrl.js, add new element into examples array to match the following code:
$scope.examples = [
	...
	{
		name:'Paypal Integration',
		descr:'It contains an example of integrating with paypal to process a payment.',
		icon:'ion-bag',
		link:'tab.paypal'
	}
]
Now, we have to inject all dependencies in index.html after all other script tags injections.
<!-- Paypal Example Module -->
<script type="text/javascript" src="js/paypal-mobile-js-helper.js"></script>
<script src="js/examples/paypal/paypalModule.js"></script>
<script src="js/examples/paypal/paypalCtrl.js"></script>
<script src="js/examples/paypal/paypalService.js"></script>
In App.js, also we have to inject expenses as a dependency:
angular.module('learningIonic', ['ionic','home','examples','author','ngCordova','map','accelerometer','expenses','paypal'])
Now you have to add 2 Plugins from the following commands:
cordova plugin add com.paypal.cordova.mobilesdk
cordova plugin add card.io.cordova.mobilesdk
Add the contents for the file paypalCtrl.js:
angular.module('paypal')

.controller('PaypalCtrl',['$scope','PaypalService',
	function($scope,PaypalService) {
	PaypalService.initPaymentUI();
	$scope.paymentDone = false;

	$scope.buyNow = function(){
		var paymentObj = {
			subtotal:"50.00",
			shipping:"5.00",
			tax:"5.00",
			total:"60.00",
			currency:"USD",
			productName:"iPhone 6s 16GB",
			description:"Online Purchase"
		}
		PaypalService.initiatePayment(paymentObj);
	}
}]);Add the contents for the file paypalService.js:
angular.module('paypal')

.factory('PaypalService',['$ionicPlatform',function($ionicPlatform){
	var serviceObj = {
		initPaymentUI: function() {
	    var clientIDs = {
	      "PayPalEnvironmentProduction": "YOUR_PRODUCTION_CLIENT_ID",
	      "PayPalEnvironmentSandbox": "AYnm7ubmkTjfla26ud0cHAdW-FdVdT4797tm1Qu23MevCbuch9zfiXJiVvosqASbPGKZ-uZxlAJCYj-A"
	    };
		$ionicPlatform.ready(function(){
	    	PayPalMobile.init(clientIDs, serviceObj.onPayPalMobileInit);
		});
	  },
	  onSuccesfulPayment: function(payment) {
	    console.log("payment success: " + JSON.stringify(payment, null, 4));
	  },
	  onAuthorizationCallback: function(authorization) {
	    console.log("authorization: " + JSON.stringify(authorization, null, 4));
	  },
	  createPayment: function(paymentObj) {
	    // for simplicity use predefined amount
	    var paymentDetails = new PayPalPaymentDetails(paymentObj.subtotal, paymentObj.shipping, paymentObj.tax);
	    var payment = new PayPalPayment(paymentObj.total, paymentObj.currency, paymentObj.productName, paymentObj.description,paymentDetails);
	    return payment;
	  },
	  configuration: function() {
	    // for more options see `paypal-mobile-js-helper.js`
	    var config = new PayPalConfiguration({
	      merchantName: "My test shop",
	      merchantPrivacyPolicyURL: "https://mytestshop.com/policy",
	      merchantUserAgreementURL: "https://mytestshop.com/agreement"
	    });
	    return config;
	  },
	  initiatePayment: function(paymentObj) {
	      PayPalMobile.renderSinglePaymentUI(serviceObj.createPayment(paymentObj), serviceObj.onSuccesfulPayment,
	        serviceObj.onUserCanceled);
	  },
	  onPayPalMobileInit: function() {
	    // must be called
	    // use PayPalEnvironmentNoNetwork mode to get look and feel of the flow
	    PayPalMobile.prepareToRender("PayPalEnvironmentNoNetwork", serviceObj.configuration(),
	      serviceObj.onPrepareRender);
	  },
	  onUserCanceled: function(result) {
	    console.log(result);
	  }
  }

  return serviceObj;
}]);Add the contents for the file paypalTemplate.html:
<ion-view view-title="Paypal Integration">
	<ion-content scroll="false">
		<ion-list>
			<ion-item class="item item-thumbnail-left">
			      <img src="https://www.arktis.de/media/image/thumbnail/iphone-6-huelle-transparent_800x800.jpg">
			      <h2>iPhone 6s</h2>
			      <p>Price <strong>$ 50</strong></p>
				  <button class="button button-small button-assertive"  ng-click="buyNow()">
					  <i class="icon ion-ios-bolt energized"></i> Instant Buy
				  </button>
			</ion-item>
		</ion-list>
	</ion-content>
</ion-view>
We will now develop an example to have offline data storage and sync it with server when it is online. We will be using the PouchDB and CouchDB for this.
We have to make new folder named expenses in our examples folder. We will make nested feature folders now.
Now we have to create a new file expensesModule.js inside accelerometer folder to declare a new module named expenses with the following code:
angular.module('expenses',[])

.run([function(){

}])

.config([function(){

  });
}])
Also, create 2 new blank files expensesCtrl.js and expensesTemplate.html.
Now, firstly we have to create a new route for our expenses example.
In the config block of the module definition present in file expensesModule.js, please replace the config block with the following code:
.config(['$stateProvider',function($stateProvider){
	$stateProvider
	.state('tab.expenses', {
	  url: '/examples/expenses',
	  views: {
		'tab-examples': {
		  templateUrl: 'js/examples/expenses/expensesTemplate.html',
		  controller: 'ExpensesCtrl'
		}
	  }
  });
}])Also, in examplesCtrl.js, add new element into examples array to match the following code:
$scope.examples = [
	...
	{
		name:'Expenses(PouchDB) Example',
		descr:'It contains an example of noting down expenses using PouchDB.',
		icon:'ion-social-usd',
		link:'tab.expenses'
	}
]
Now, we have to inject all dependencies in index.html after all other script tags injections.
<!-- Expenses Example Module -->
<script src="js/examples/expenses/expensesModule.js"></script>
<script src="js/examples/expenses/expensesCtrl.js"></script>
In App.js, also we have to inject expenses as a dependency:
angular.module('learningIonic', ['ionic','home','examples','author','ngCordova','map','accelerometer','expenses'])
We will add code to the new file created expensesTemplate.html:
<ion-view view-title="Expenses">
	<ion-nav-buttons side="secondary">
      <button class="button button-energized" ng-click="addExpenseModal()">
        Add Expense
      </button>
	  <button class="button button-icon icon ion-ios-minus-outline"
	  	ng-click="toggleDeleteIcons()">
	  </button>
    </ion-nav-buttons>
	<ion-content>
		<ion-list can-swipe="canSwipe" show-delete="showDelete">
			<ion-item class="item-divider" ng-if="expenseList.length === 0">
				There are no expenses made. You are RICH !
			</ion-item>
			<ion-item
			ng-repeat="expense in expenseList track by $index">
				{{expense.detail}}
 				<span class="badge badge-assertive">RM {{expense.amount}}</span>
				<ion-option-button class="button-royal"
                       ng-click="editExpense(expense)">
			      Edit
			    </ion-option-button>
				<ion-delete-button class="ion-minus-circled"
                       ng-click="items.splice($index, 1)">
    			</ion-delete-button>
			</ion-item>
		</ion-list>
	</ion-content>
</ion-view>
We also require to create a new file called addExpenseTpl.html as it will contain a modal which we will call on press of add expense button:
<ion-modal-view>
    <ion-header-bar  class="bar-balanced">
        <h1 class="title">Add Expense</h1>
		<button class="button button-clear button-primary"    ng-click="modal.hide()">Cancel</button>
    </ion-header-bar>
    <ion-content>
        <div class="list">
            <label class="item item-input">
                <input type="text" ng-model="newExpense.detail" placeholder="Expense">
            </label>
            <label class="item item-input">
                <input type="number" ng-model="newExpense.amount"      placeholder="Amount">
            </label>
            <button ng-click="addNewExpense()" class="button button-full     button-positive">
                Add Expense
            </button>
        </div>
    </ion-content>
</ion-modal-view>
Now, we will add the following code in the new file created expensesCtrl.js:
angular.module('expenses')

.controller('ExpensesCtrl',['$scope','$ionicModal',
	function($scope,$ionicModal) {
		var localDb,remoteDb;
		initCtrl();

		function initCtrl(){
			localDb = new PouchDB('myexpenses');
			remoteDb = new PouchDB('http://localhost:5984/myexpenses');
			$scope.expenseList = [];
			$scope.newExpense = {};
			$scope.canSwipe = true;
			$scope.showDelete = false;
			initializeModal();
			fetchExistingExpenses(localDb);
			// Unidirectional Sync Possibilities
				// localDb.replicate.to(remoteDb);
				// localDb.replicate.from(remoteDb);
			syncDbs();
			remoteDb.changes({live: true, since: 'now'}).on('change', function (change) {
			  // change.deleted is a property to detect if a change is for deletion of a document
			  fetchExistingExpenses(remoteDb);
			}).on('error', console.log.bind(console));
		}

		function initializeModal(){
			$ionicModal.fromTemplateUrl('js/examples/expenses/addExpenseTpl.html', {
				scope: $scope,
				animation: 'slide-in-up'
			}).then(function(modal) {
				$scope.modal = modal;
			});
		}

		function fetchExistingExpenses(db){
			$scope.expenseList = [];
			db.allDocs({
			    include_docs: true
			}).then(function (result) {
			    for(var i=0;i<result.rows.length;i++){
			        var obj = {
			            "_id": result.rows[i].doc.id,
			            "detail": result.rows[i].doc.detail,
			            "amount": result.rows[i].doc.amount
			        }
			        $scope.expenseList.push(obj);
			        $scope.$apply();
			    }
			})
			.catch(function (err) {
			    console.log(err);
			});
		}

		function syncDbs(){
			// Initialize Sync
			localDb.sync(remoteDb).on('complete', function () {
			  // yay, we're in sync!
			}).on('error', function (err) {
			  // boo, we hit an error!
			});
		}

		$scope.toggleDeleteIcons = function(){
			$scope.showDelete = !$scope.showDelete;
		}

		$scope.addExpenseModal = function(){
			$scope.modal.show();
		}

		$scope.$on('$destroy', function() {
		    $scope.modal.remove();
		});

		$scope.addNewExpense = function(){
			var timestamp = String(new Date().getTime());

			var newExpense = {
		        "_id": timestamp,
		        "detail": $scope.newExpense.detail,
		        "amount": $scope.newExpense.amount
			};

			localDb.put(newExpense).then(function (response) {
			    $scope.expenseList.push(newExpense);   // Add to items array
			    $scope.modal.hide();      // Close the modal
			}).catch(function (err) {
			    console.log(err);
			});
		};
}]);