A demo app project made with Flutter by mrverdant13.
This app shows your favorites GitHub repositories. You can search for other repos, preview them, and star or unstar them.
| Android | iOS | Web | Linux | Windows | MacOS | |
|---|---|---|---|---|---|---|
| Native flavors | ✔️ | 📌 | ➖ | ➖ | ➖ | ➖ |
| Different app icon per flavor | ✔️ | 📌 | 🔍 | 🔍 | 🔍 | 🔍 |
| Different app splash per flavor | ✔️ | 📌 | 🔍 | 🔍 | 🔍 | 🔍 |
| Different app splash per dark/light theme | ✔️ | 🔍 | 🔍 | 🔍 | 🔍 | 🔍 |
| App signing pre-configuration | ✔️ | 🔍 | 🔍 | 🔍 | 🔍 | 🔍 |
| Internationalization | ✔️ | 📌 | 🔍 | 🔍 | 🔍 | 🔍 |
| Tag | Description |
|---|---|
| ✔️ | Implemented |
| 📌 | Not implemented (yet) |
| ➖ | Not applicable |
| 🔍 | Under investigation |
- Flutter-level flavors by using different entry points per flavor.
- Conditional features implementation based on the selected build flavor and a given config file.
- Modular and composable logger with the lumberdash package, which can be easily integrated with Firebase Analytics or Sentry.
- CI/CD:
- GitHub Actions:
- Code formatting
- Code analysis (considering info and warning level issues as fatal)
- Unit testing (randomizing tests execution)
- 100% coverage check (ignoring generated files)
- GitHub Actions:
- GitHub issue templates.
- GitHub pull request template.
- Strong lint rules with the lint package.
- IDE launch setup:
- Visual Studio Code
- Secure app configuration based on a bundled config file (looking for a safer method 🔍).
- Directional dependency injection independent of the widgets tree with riverpod.
- Raw OAuth flow implementation with GitHub specifications.
- ETag-based data caching for basic offline mode support.
- REST API server integration.
- GraphQL server integration.
-
Flutter 2 to build and test the project.
You could follow the official docs about installation.
-
A GitHub OAuth App to provide auth functionality.
You could check the official docs about GitHub OAuth apps creation considering the following parameters:
- Homepage URL:
http://localhost:8080 - Authorization callback URL:
http://localhost:3000/callback
NOTE: The client ID and a client secret are necessary.
- Homepage URL:
- Chocolatey on Windows to install and use
lcovutils. - remove_from_coverage package to ignore generated files in coverage info.
This project uses a YAML file as config data provider and it should be placed inside the assets/config/ folder.
Its name should be app_config.<env_tag>.yaml, where <env_tag> should be replaced by dev, stg or prod according to your desired flavor.
The schema of this config file should be as described below:
# GitHub auth config data.
githubAuthConfig:
  # GitHub app client identifier.
  clientId: client_id
  # GitHub app client secret.
  clientSecret: client_secret
For easy setup, you can take the assets/config/app_config.sample.yaml sample file.
This project supports 3 Flutter-level flavors that can be used directly with the launch configuration in Visual Studio Code or by executing one of the following commands:
# Development
$ flutter run --target lib/main_dev.dart

# Staging
$ flutter run --target lib/main_stg.dart

# Production
$ flutter run --target lib/main_prod.dart
Note 1: The target path separator (
\or/) might change according to the OS.
Note 2: Each flavor use a config file to setup some elements. You should make sure that this file exists.
This project supports 3 native flavors (Android only) that can be used directly with the launch configuration in Visual Studio Code or by executing one of the following commands:
# Development
$ flutter run --flavor dev --target lib/main_dev.dart

# Staging
$ flutter run --flavor stg --target lib/main_stg.dart

# Production
$ flutter run --flavor prod --target lib/main_prod.dart
Note 1: The target path separator (
\or/) might change according to the OS.
Note 2: Each flavor use a config file to setup some elements. You should make sure that this file exists.
Follow these steps on Visual Studio Code:
-
Open the
Run and Debugview.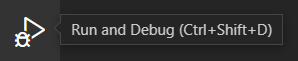
-
Select the flavor you want to use and then click the
Playicon or press theF5key to start debugging.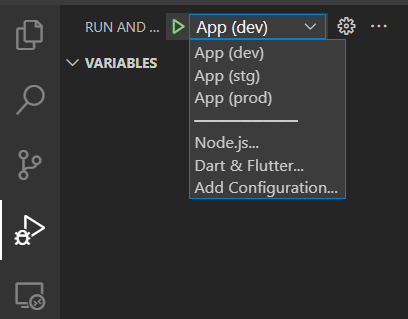


This project relies on flutter_localizations and follows the official internationalization guide for Flutter.
-
To add a new localizable string, open the
app_<locale ID>.arbfile at thelib/l10n/arb/folder.{ "@@locale": "<locale ID>", ··· "<valueKey>": "<value>", "@<valueKey>": { "description": "<description>" }, ··· } -
Then add a new key, value and description
{ "@@locale": "<locale ID>", ··· "<valueKey>": "<value>", "@<valueKey>": { "description": "<description>" }, ··· "<newValueKey>": "<new value>", "@<newValueKey>": { "description": "<new value description>" } } -
Use the new string
import 'package:<app_package_name>/l10n/l10n.dart';

···

  @override
  Widget build(BuildContext context) {
    final l10n = context.l10n;
    return Text(l10n.<newValueKey>);
  }

···
-
For each supported locale, add a new ARB file in
lib/l10n/arb.├── lib │ ├── l10n │ │ ├── arb │ │ │ ├── app_<locale ID>.arb │ │ │ └── app_<new locale ID>.arb -
Add the translated strings to each
.arbfile:app_<locale ID>.arb{ "@@locale": "<locale ID>", ··· "<valueKey>": "<value for locale ID>", "@<valueKey>": { "description": "<description for locale ID>", }, ··· }app_<new locale ID>.arb{ "@@locale": "<new locale ID>", ··· "<valueKey>": "<value for new locale ID>", "@<valueKey>": { "description": "<description for new locale ID>" }, ··· }
For more complex needs, you could check the following resources:
-
To run all unit and widget tests, execute the following command:
$ flutter test -x ci-only --coverage -r expanded --test-randomize-ordering-seed randomNote: The
-x ci-onlyexcludes tests tagged asci-only, which indicated that they should be run on CI/CD envs only. -
To remove generated files from coverage info, install the remove_from_coverage package and run one of the following commands:
# If pub global scripts are on your path
$ remove_from_coverage -f coverage/lcov.info -r "\.freezed\.dart$","\.g\.dart$","\.gr\.dart$"

# Otherwise (might change depending on pub setup)
$ pub global run remove_from_coverage:remove_from_coverage -f coverage/lcov.info -r "\.freezed\.dart$","\.g\.dart$","\.gr\.dart$"
-
To generate coverage report within the
coveragefolder, run one of the following commands set according to your OS:# Linux/MacOS # Generate coverage report $ genhtml coverage/lcov.info -o coverage/html/ # Windows # Install `lcov` utils (Chocolatey is prerequisite) $ choco install lcov # Generate coverage report (might change depending on Chocolatey setup) $ perl C:\ProgramData\chocolatey\lib\lcov\tools\bin\genhtml -o coverage\html coverage\lcov.info
-
To open the generated coverage report follow your preferred method:
-
4.a. Run one of the following commands according to your OS:
# Linux/MacOS
$ open coverage/html/index.html

# Windows
$ start coverage/html/index.html
Now, within the launched browser window, the test coverage per folder, file and even file content can be reviewed.
-
4.b. Follow these steps on Visual Studio Code:
-
Download the Coverage Gutters VSC extension.
-
Start watching the coverage info with the
Coverage Gutters: WatchVSC command. -
Navigate throw your files. You will see visual indicators highlighting covered parts with green and uncovered parts with red (as long as you use the default extension configuration but this behavior can be changed).
-
-
Submit a new issue report if you find any bug or have any suggestion.