A lightweight Lightning Network web payment tool for LND. It uses Alex Bosworth's ln-service to communicate with LND both localy and remotely.
Install lnd-pay on your server:
git clone https://github.com/mariodian/lnd-pay.git
cd lnd-pay
npm install
node server.js
The basic setup requires you to send one ajax request to api/v0/invoices to create an invoice and then open websocket to listen for status changes.
The minimum code would look like this:
$.ajax({
  method: "POST",
  url: 'http://localhost/api/v0/invoices',
  dataType: "json",
  data: {
      tokens: 100, // send 100 sat
      description: 'Test payment' // not required
  },
  success: function(res) {
    const paymentRequest = res.request;

    let con = new WebSocket('ws://127.0.0.1:1337/ws');

    con.onopen = function () {
      // Send invoice ID to server so it only checks for particular invoice status
      if (invoiceID) {
        con.send(invoiceID)
      } else {
        con.close();
      }
    };

    con.onmessage = function (message) {
      const json = JSON.parse(message.data);

      if (json.is_confirmed) {
        // Invoice paid
        // Change status to paid in UI
      } else {
        // Invoice not paid
      }
    };
  }
});
If you'd like to use LND Pay frontend in your React project please go to lnd-pay-react.
I've created a javascript plugin for easy communication with the backend right from your website.
It's built with jQuery, Bootstrap, Font Awesome and kjua (QR code library).
A minimum HTML template would look like this:
<!doctype html>
<html lang="en">
<head>
  <meta charset="utf-8">
  <link href="css/lndpay.css" rel="stylesheet">
  <link href="css/bootstrap-4.3.1.min.css" rel="stylesheet">
  <link href="css/fontawesome.min.css" rel="stylesheet">
  <script type="text/javascript" src="js/jquery-3.4.1.min.js"></script>
  <script type="text/javascript" src="js/lndpay.jquery.js"></script>
  <script type="text/javascript" src="js/kjua-0.6.0.min.js"></script>
</head>

<script>
$(document).ready(function(){
  $('#lnd-pay').lndPay({
    apiURL: 'http://localhost:11338/api/v0',
    wsURL: 'ws://127.0.0.1:11337/ws'
  });
});
</script>

<body>
  <div id="lnd-pay"></div>
</body>

</html>
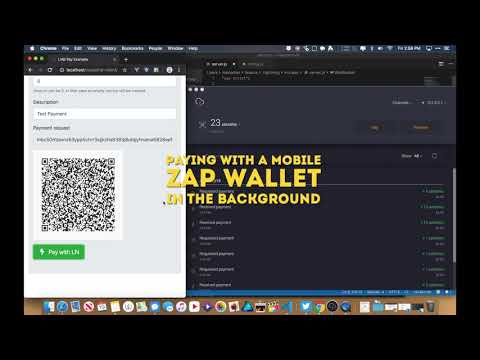
By default an UI is created for you. The design is very similar to yalls.org.

If you do NOT want to display a payment QR code, remove kjua and lndpay.css from the HTML header.
{
  apiURL: null,           // API URL prefix to create invoice
  wsURL: null,            // WebSocket url
  amount: null,           // Invoice amount
  description: '',        // Invoice description
  expire: 60,             // Invoice expires in X minutes
  namespace: 'lndpay',    // HTML lass namespace
  buildUI: true,          // Build UI
  onCreateInvoice: null,  // Callback when invoice get created (overwrites default)
  onPaid: null            // Callback on successful payment (overwrites default)
 }
You can also use your own UI by setting buildUI to false:
$('#lnd-pay').lndPay({
  ...
  ...
  buildUI: false
});
Make sure to follow this basic HTML template:
<div id="lnd-pay">
  <input id="lndpay-amount" type="text">
  <input id="lndpay-description" type="text">
  <input id="lndpay-pay_req" readonly type="text" >
  <a href="#" id="lndpay-pay">Pay</a>
  <div id="lndpay-qr" class="qr-wrapper"></div>
</div>
You can set up custom HTML ID namespaces:
$('#lnd-pay').lndPay({
  ...
  ...
  namespace: 'custom'
});
You would then have to set HTML elements like this: id="custom-amount".
If you build your own UI, you don't have to load Bootstrap.
You can also add custom callbacks.
When used with a custom UI it overrides the default behaviour. It extends the behaviour of the default UI on the hand.
$('#lnd-pay').lndPay({
  ...,
  ...,
  // Invoice created callback
  onCreateInvoice: function(obj, res) {
    // Display payment request in anyway you want.

    // To be notified about payment status via websocket you'll have to call openWebsocket
    obj.openWebSocket(res.id);
  },
  // Invoice paid callback
  onPaid: function(res) {
    // Display a message about successful payment.
    // If you don't call this callback a default message will be displayed.
  },
});
Please have a look at an example folder to see the full working code.
If you like what I do, feel free to support me.