IoT logger is an IoT architecture for gathering informations about IoT sensors. It is based on RabbitMQ queues and works with Nuclio.
From the RabbitMQ home page:
RabbitMQ is the most widely deployed open source message broker.
From the Nuclio home page:
Nuclio is an open source and managed serverless platform used to minimize development and maintenance overhead and automate the deployment of data-science based applications
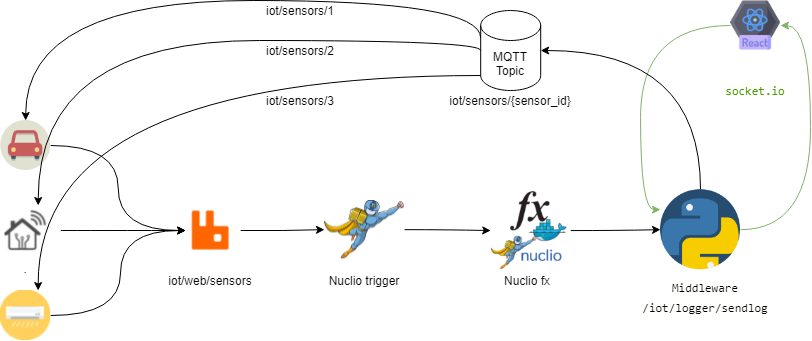
The architecture is composed by some sensors that send informations about their status on a queue (iot/web/sensors). When a new message is incoming on this queue a nuclio function is triggered. This function send an HTTP request to a middleware written in python (http://<service_url>:<service_port>/iot/logger/sendlog).
The middleware is in communication with a UI web based made in React.js by a socket-io connection.
With this GUI we can read the status of all sensors connected and we can change their status. When we send a message from GUI to middleware this message will be send on another queue (iot/sensor/{sensor_id}).
Each sensor is connected to their queue by own sensor_id.
The project is composed of 5 parts
- RabbitMQ
- Nuclio
- front-end (React.js)
- middleware (Python)
- IoT sensors (Python)
You can install this components one by one with dockerfile, or you can use a docker-compose.yml file provided.
First of all clone the project and follow the instructions below
git clone https://github.com/mariomamo/iot-project
Before starting you need to modify some configurations files.
1️⃣ Change IP address in front-end web app
Go to \iot-logger\iot-front-end\compiled and edit index.html file. You can find a div with "root" id, you need to change the IP address in url property with yours.
<div id="root" url="http://<INSERT_YOUR_LOCAL_IP_ADDRESS_HERE>" port="5000"></div>If you want you can change also the port, but it is useless, you can map this port on another port of docker.
2️⃣ Change the IP addresses in application.yaml inside python files
Go to iot-logger\iot-logger and edit application.yml file.
You have to write your local IP address in topic_url property.
name: 'IoT-Logger'
socket_io_port: 5000
receive_topic_name: 'sensors/logs'
send_topic_name: 'iot/sensors'
topic_url: '192.168.1.59'
rest_port: 4444socket_io_port also
rest_port is the port used for REST API.
Go to iot-logger\iot-sensors and edit application.yml file.
sensors:
  - chat_id: "1"
    name: 'Car'
    sensor_type: "car"
    image: 'https://upload.wikimedia.org/wikipedia/commons/thumb/6/65/Circle-icons-car.svg/1200px-Circle-icons-car.svg.png'
    receive_topic_name: 'iot/sensors'
    send_topic_name: 'iot/web/sensors'
    topic_url: '192.168.1.59'
  - chat_id: "2"
    name: 'My house'
    sensor_type: "home"
    image: 'https://media.istockphoto.com/vectors/smart-home-vector-icon-with-airwaves-isolated-on-white-background-vector-id1186712143?k=6&m=1186712143&s=170667a&w=0&h=zZoIDzrMKXkUERFYeuSnYhiuSxZ22IcXT0RPIanZxG0='
    receive_topic_name: 'iot/sensors'
    send_topic_name: 'iot/web/sensors'
    topic_url: '192.168.1.59'
  - chat_id: "3"
    name: 'Bed room air conditioner'
    sensor_type: "air-conditioner"
    image: 'https://encrypted-tbn0.gstatic.com/images?q=tbn:ANd9GcRfe3ft1wqiQUu1Kra38EezbmQTljHkFPSPzA&usqp=CAU'
    receive_topic_name: 'iot/sensors'
    send_topic_name: 'iot/web/sensors'
    topic_url: '192.168.1.59'
You can simply add a new sensor adding a new element in the sensors array. You just have to add the required informations. Actually there are only three types of sensors supported
- car
- home
- air-conditioner
Other sensor types will be ignored.
Also in this case you need to change the current IP in topic_url with yours. Each sensor can have different topic_url.
you just have to type these commands
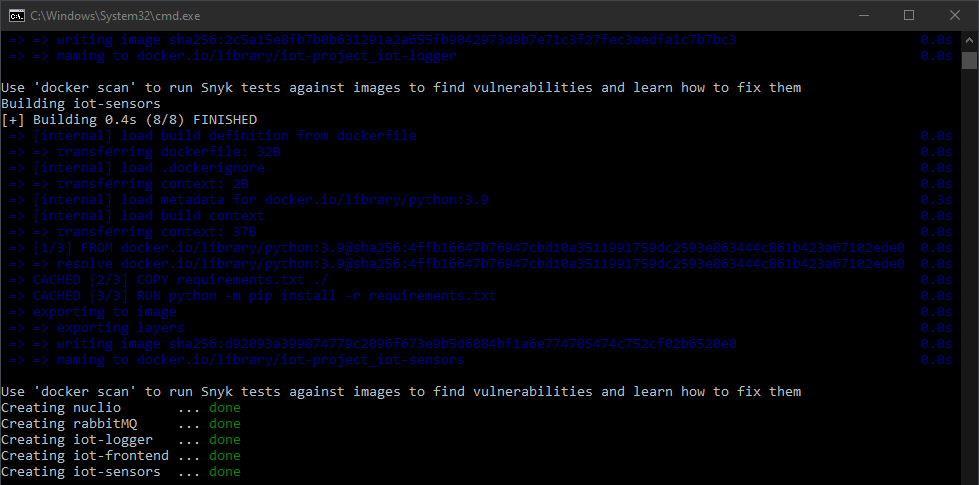
docker-compose up --build -d
- build: rebuild images if they are already builded before
- d: execute in background. When the docker-compose will setted up you will not see the docker logs console
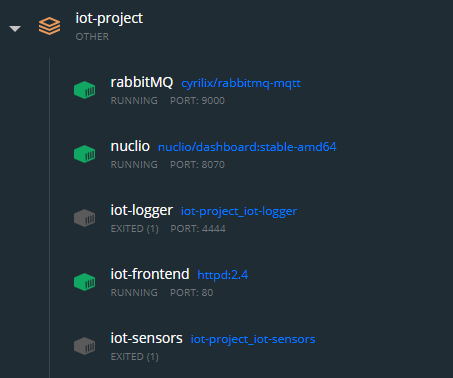
After this operation some containers (iot-logger and iot-logger) can fail. This is because rabbitMQ container is not ready. You can simply avoid this by restarting failing containers.
You can skip the next section if you have run docker-compose.
In some cases you need to deploy only some parts of this projects for load balancing or availability purpose. So you can also use dockerfile instead of docker-compose.
Open your terminal and copy/paste this line
docker run -p 9000:15672 -p 1883:1883 -p 5672:5672 -d --name rabbitMQ cyrilix/rabbitmq-mqtt✔️ It is also available for ARM processors
docker run -p 9000:15672 -p 1883:1883 -p 5672:5672 -d --name rabbitMQ arm32v7/rabbitmqOpen your terminal and copy/paste this line
docker run -p 8070:8070 -v /var/run/docker.sock:/var/run/docker.sock -v /tmp:/tmp -d --name nuclio nuclio/dashboard:stable-amd64❌ It is not available for ARM processors
Go to iot-logger folder
:warning: Check the directory where you are :warning:
cd iot-loggerBuild the image
docker build -t iot-logger .Run container
docker run -v <path_where_you_cloned_project>\iot-logger\iot-logger:/logger -dp 5000:5000 -dp 4444:4444 --name iot-logger -it iot-loggerGo to iot-sensors folder
:warning: Check the directory where you are :warning:
cd iot-sensorsBuild the image
docker build -t iot-sensors .
Run container
docker run -v <path_where_you_cloned_project>\iot-logger\iot-sensors:/sensors -d --name iot-sensors -it iot-sensors
Go to iot-front-end folder
:warning: Check the directory where you are :warning:
cd iot-front-endIn questo caso non abbiamo bisogno di un dockerfile Run docker
docker run -v <path_where_you_cloned_project>\iot-logger\iot-front-end\compiled:/usr/local/apache2/htdocs/ -e TZ=Europe/Rome -dp 80:80 --name iot-frontend httpd:2.4Once you have installed the project you need to configure it.
Go to iot-logger/nuclio-function/loggerconsumer.yaml and write your local ip address at line 17
triggers:
    MyMQTTTriggher:
      class: ""
      kind: rabbit-mq
      url: "amqp://guest:guest@<INSERT_YOUR_LOCAL_IP_ADDRESS_HERE>:5672"
      attributes:
        exchangeName: "\"\""
        queueName: iot/web/sensors
        topics:
          - '""'
Open Nuclio control panel, create a new project and import the function you have just modified. In the next window you should change the existing IP addres at line 25 with yours.
response = requests.get("http://<INSERT_YOUR_LOCAL_IP_ADDRESS_HERE>:4444/iot/logger/sendlog", headers=headers, json=payload)Now you can deploy your function. When your function has been deployed go to IoT logger webapp and restart iot-logger container. When iot-logger will be restarted it will send some information to the iot-logger and you will se these informations on the webapp. Now you can send commands to devices and you can read their responses.
Enjoy :)
Every time you restart nuclio you need to re-deploy nuclio function
The images in this repository were taken from flaticon.com


