AWS Systems Manager Distributor is a feature that you can use to securely store and distribute software packages, such as software agents, in your accounts. Distributor integrates with existing Systems Manager features to simplify and scale the package distribution, installation, and update process.
These instructions will walk you through how to use AWS Systems Manager Distributor to deploy the Trend Micro Deep Security Agent. We will assume you have a version of Deep Security Manager running and it is accessible to the instances running in AWS. If not, you can deploy the Deep Security Manager using our quick start on the AWS Marketplace.
This will create an AWS IAM Instance Profile for the EC2 instances that we want to deploy the Deep Security Agent on. We will use a CloudFormation Template to create the instance profile, along with two SSM Parameters for the Deep Security Manager Hostname. The CFT must be deployed in the same region as your instances because the SSM Parameters and Distributor are regional entities.
EC2 Instances -- Instances you want to install the agent on. See Support Operating Systems for SSM.
AWS CLI -- this is normally installed by default on most Windows and Amazon Linux AMIs
Systems Manager Agent -- latest version -- This is installed by default on most Windows and Amazon Linux AMIs but you will need to upgrade to the latest version to ensure compatibility
-
Clone repo: https://github.com/marykay25/SSM

-
Click Create Stack.
-
Click Choose File.

- Select the file dsm_ssm.template from the repo.

-
Click Next.
-
Enter DSMSSM for the Stack Name.
-
To fill out the template, reference the DSM deployment script by logging into your DSM, then clicking on Support at the top right and then select Deployment Scripts.
- DSMActivation, enter the Activation URL from the DSM deployment script including the dsm prefix and trailing "/"
- DSMManage, enter in the DSM Manager URL from deployment script including the https prefix and port
- TenantID, Required only for DSaaS or Multi-Tenant Deployments, otherwise leave NON
- Token, Required only for DSaaS or Multi-Tenant Deployments, otherwise leave NONE

-
Click Next.
-
Enter Name under Key and DSM SSM under Value.

-
Click Next.


- Check the box next to: I acknowledge that AWS CloudFormation might create IAM resources with custom names.

- Click Create.

- Wait for the CloudFormation to complete.
-
Go to the EC2 Console.
-
Select the instance you want to add to IAM Role.

-
Select EC2SSMInstanceProfile.

-
Click Apply.
-
Repeat for any other additional instances.

-
Go to the S3 Console: https://console.aws.amazon.com/s3/
-
Select a bucket or create a new one.
-
Click the bucket name.
-
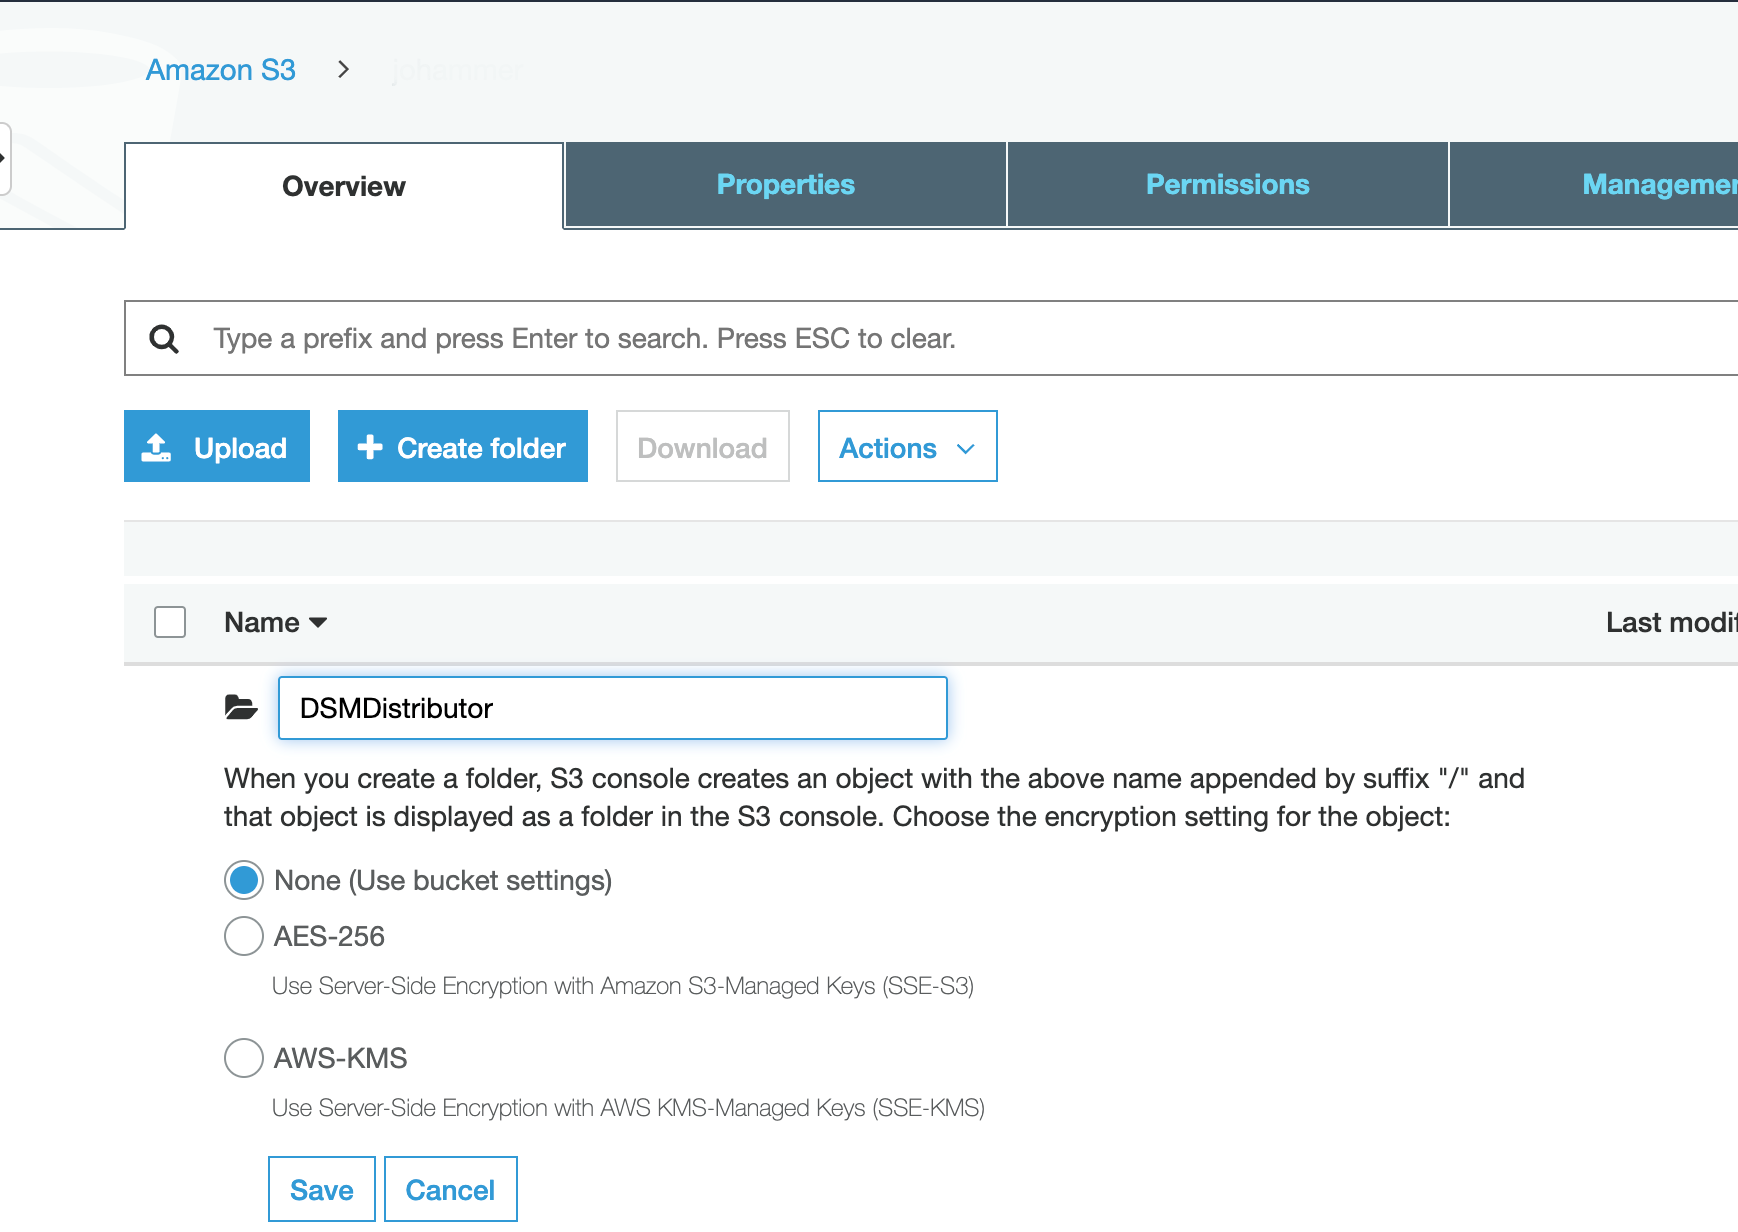
Click Create folder. Name the folder DSMDistributor.
-
Click Save.
-
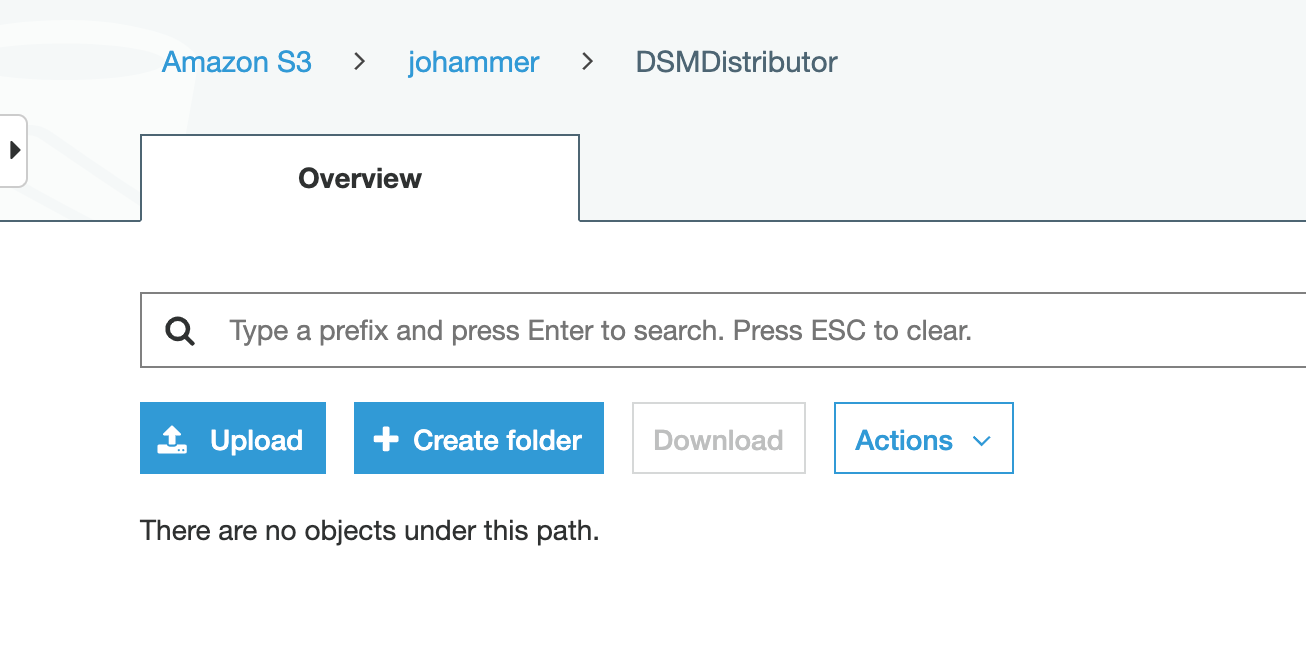
Go into the folder DSMDistributor.
-
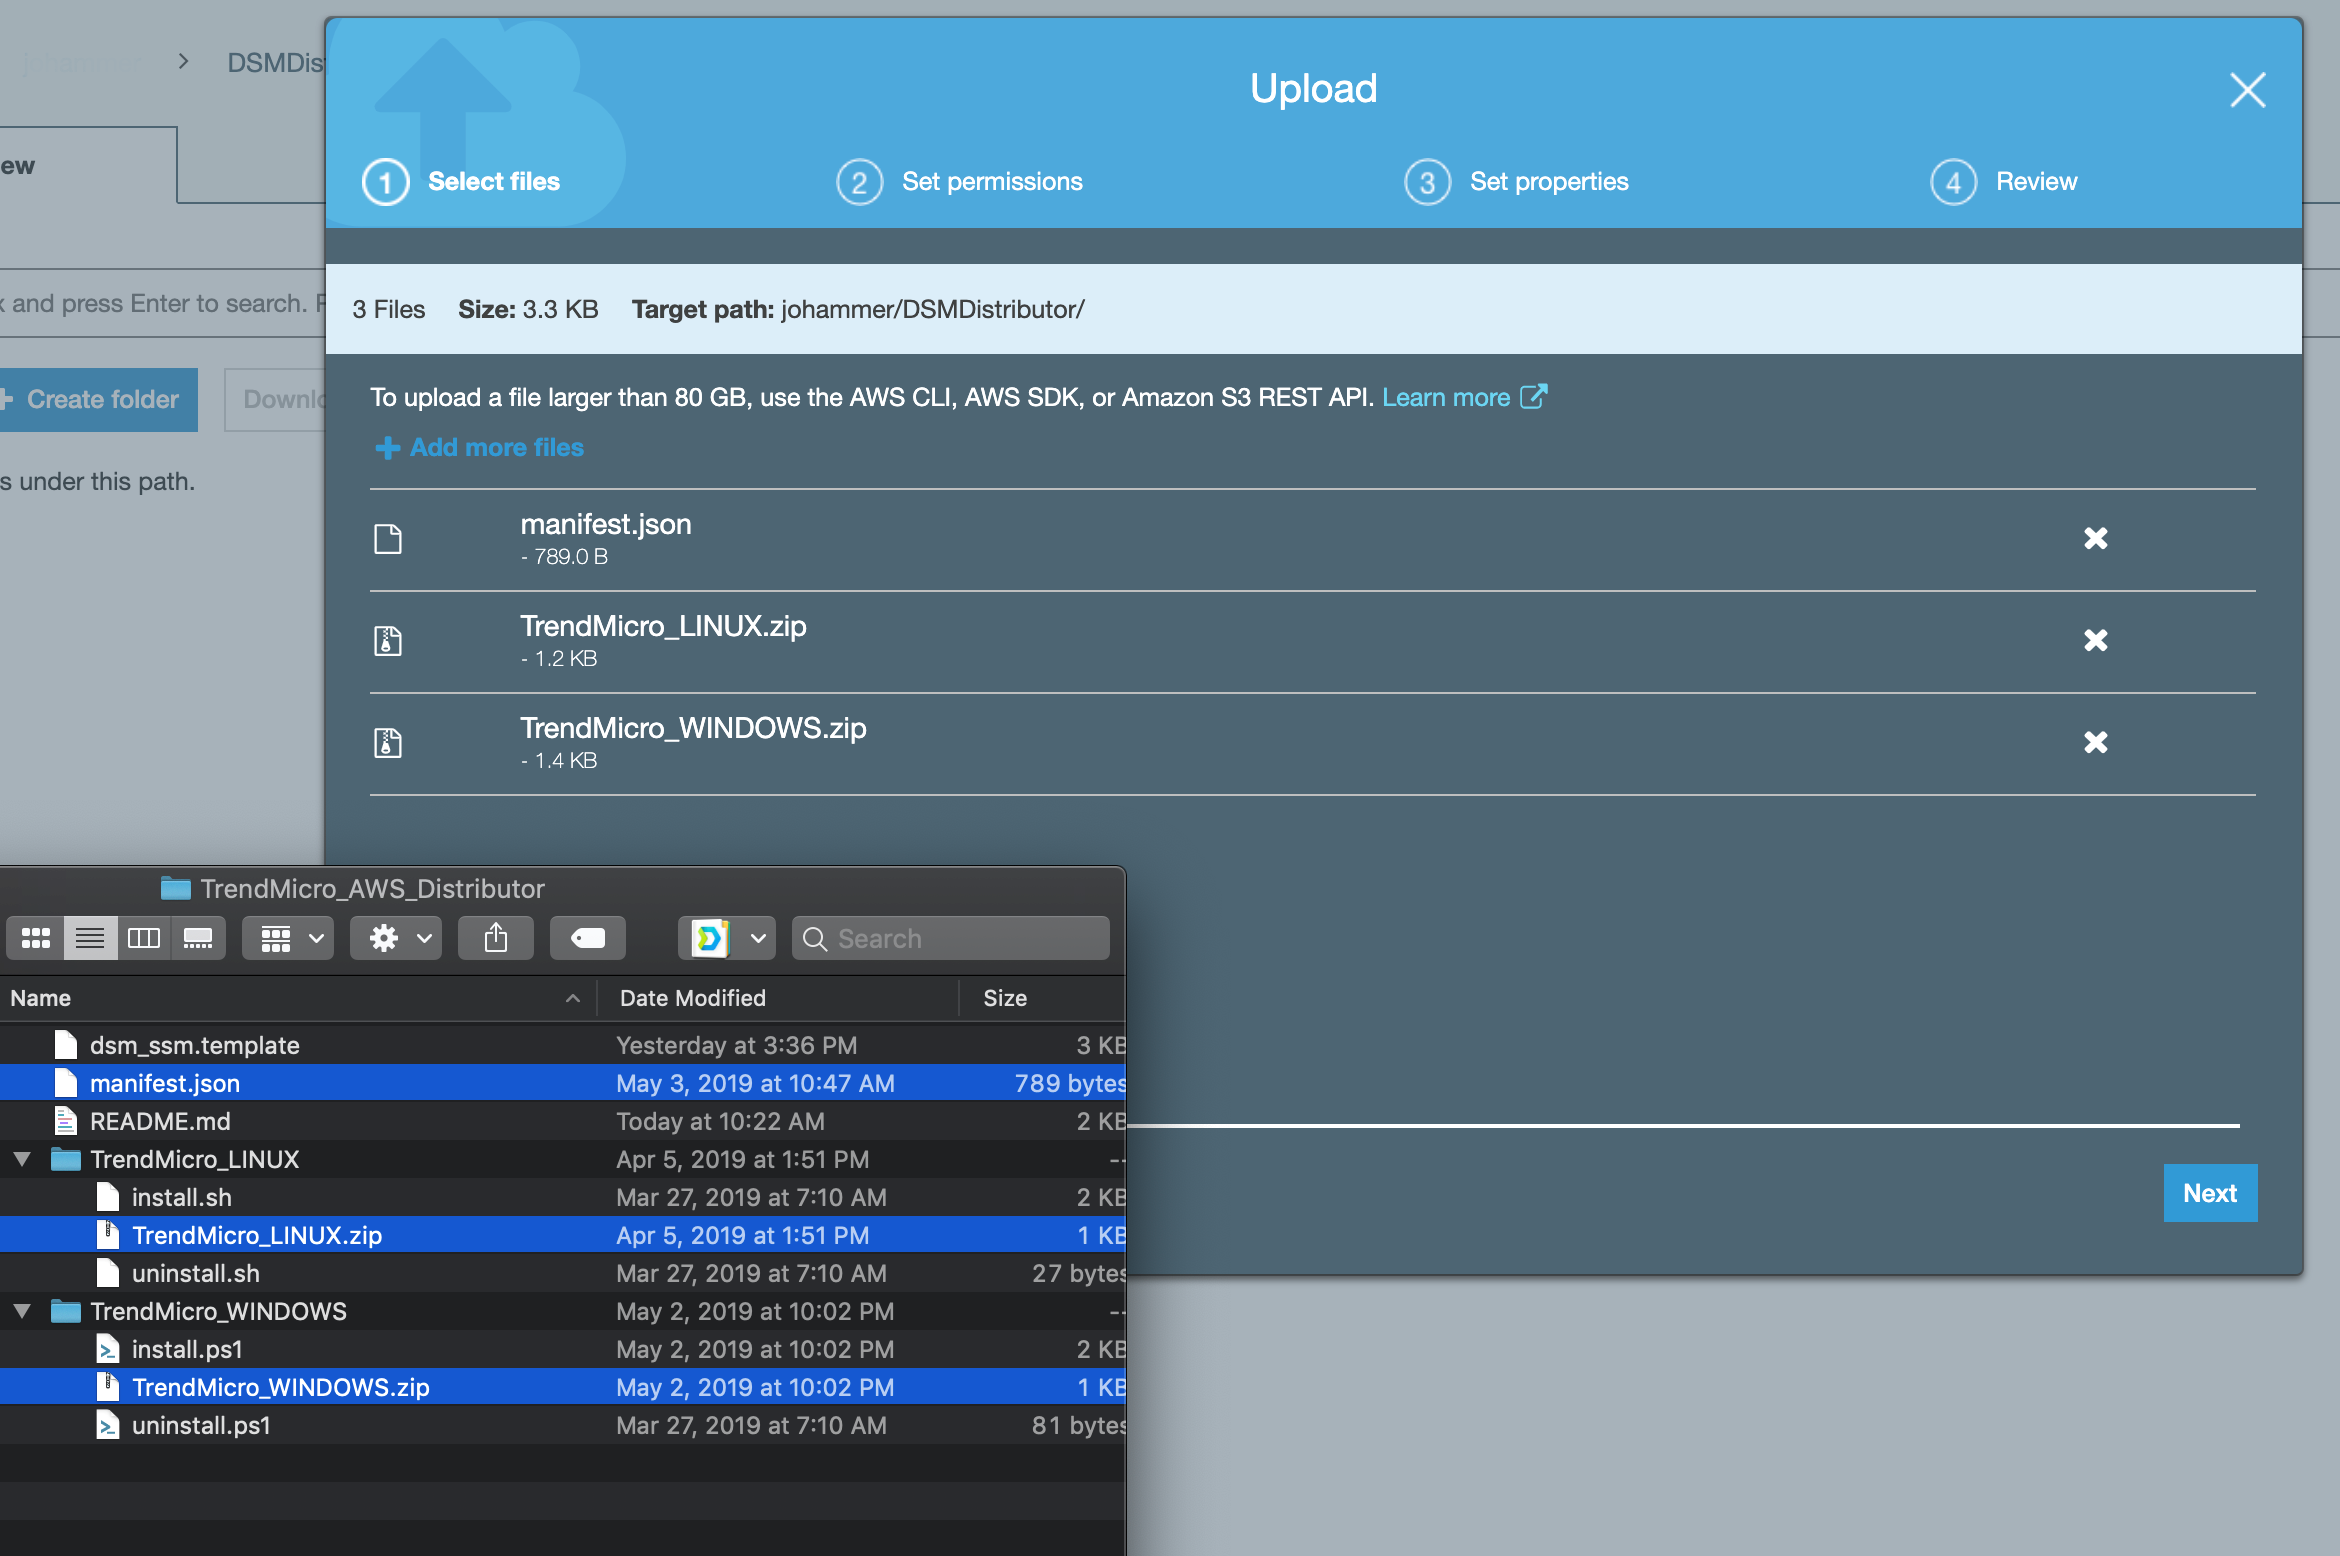
Click Upload. Add the manifest.json, TrendMicro_Windows.zip, and TrendMicro_Linux.zip.
-
Click Upload.


-
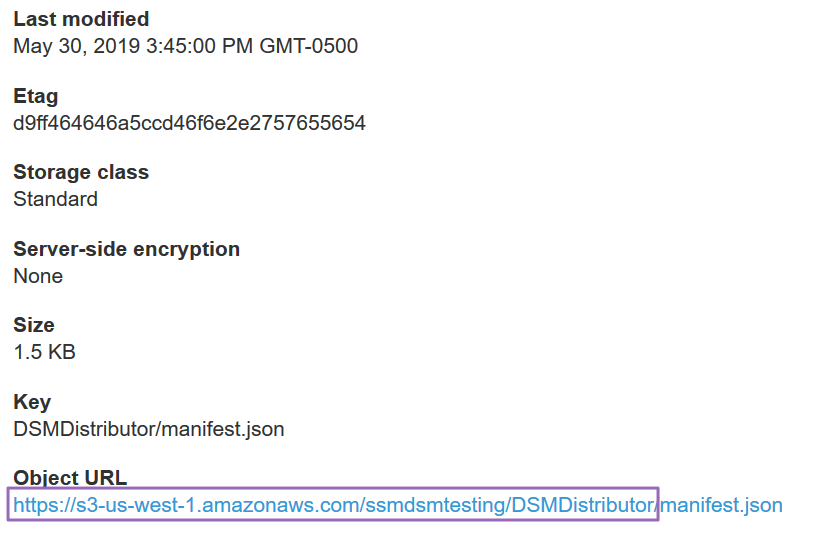
Now click the manifest.json file and copy the link under Object URL up to the last '/'.
-
Go to System Manager: https://console.aws.amazon.com/systems-manager/


-
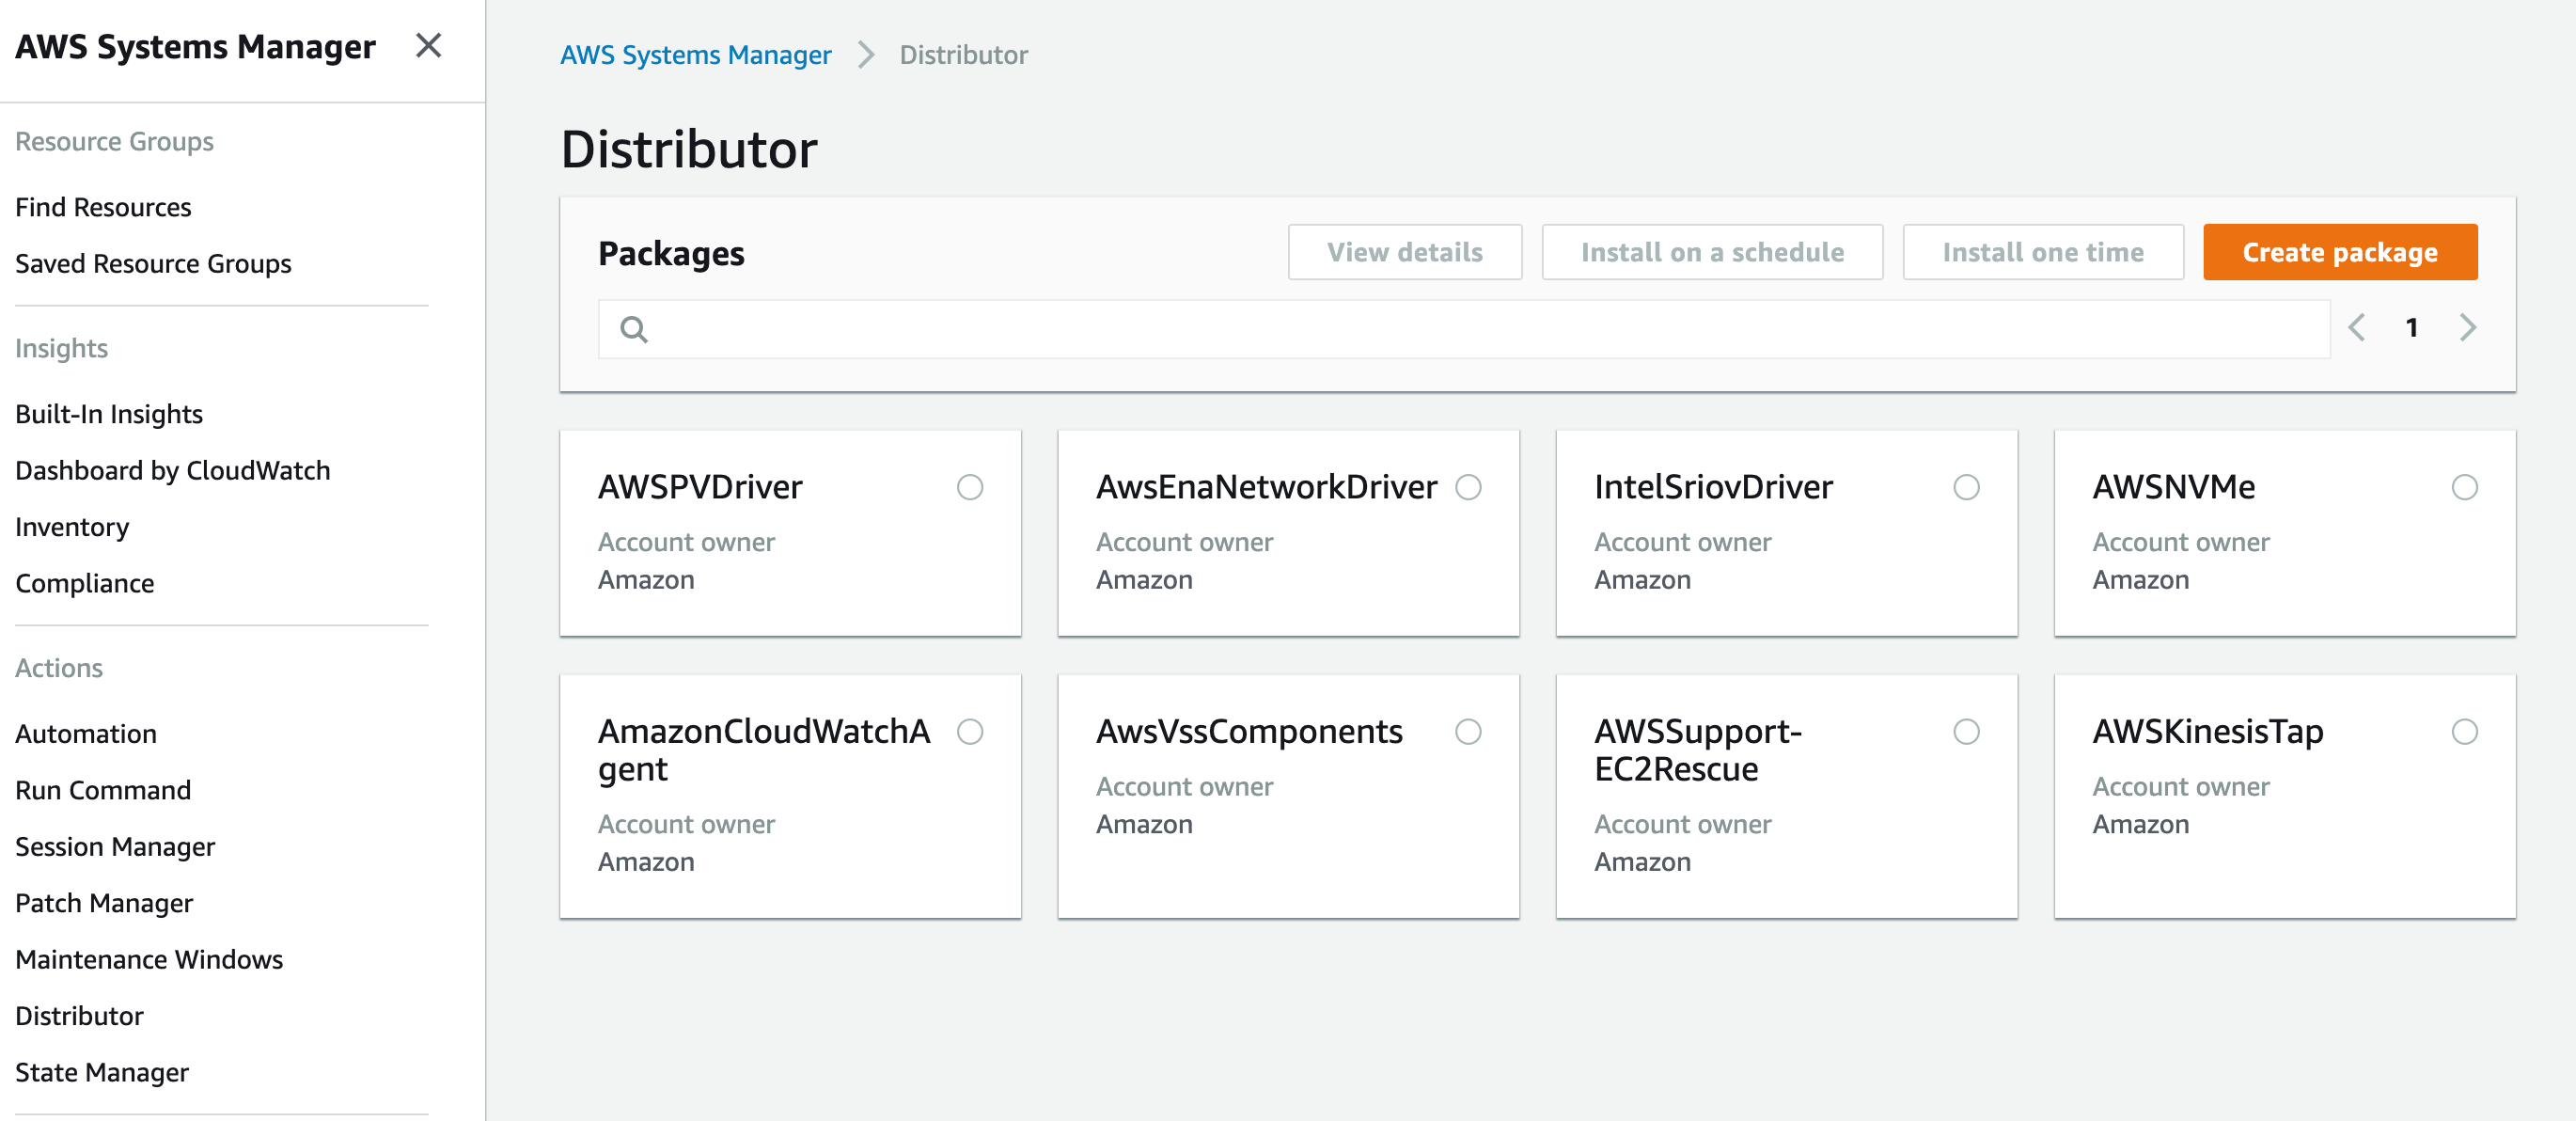
Click Distributor.
-
Click Create Package.
-
Enter a Name.
-
Enter a Version name.
-
Paste the URL from step 10 into S3 Bucket Location.
-
Select Extract from package.


- Click Create Package.

-
Wait a minute.
-
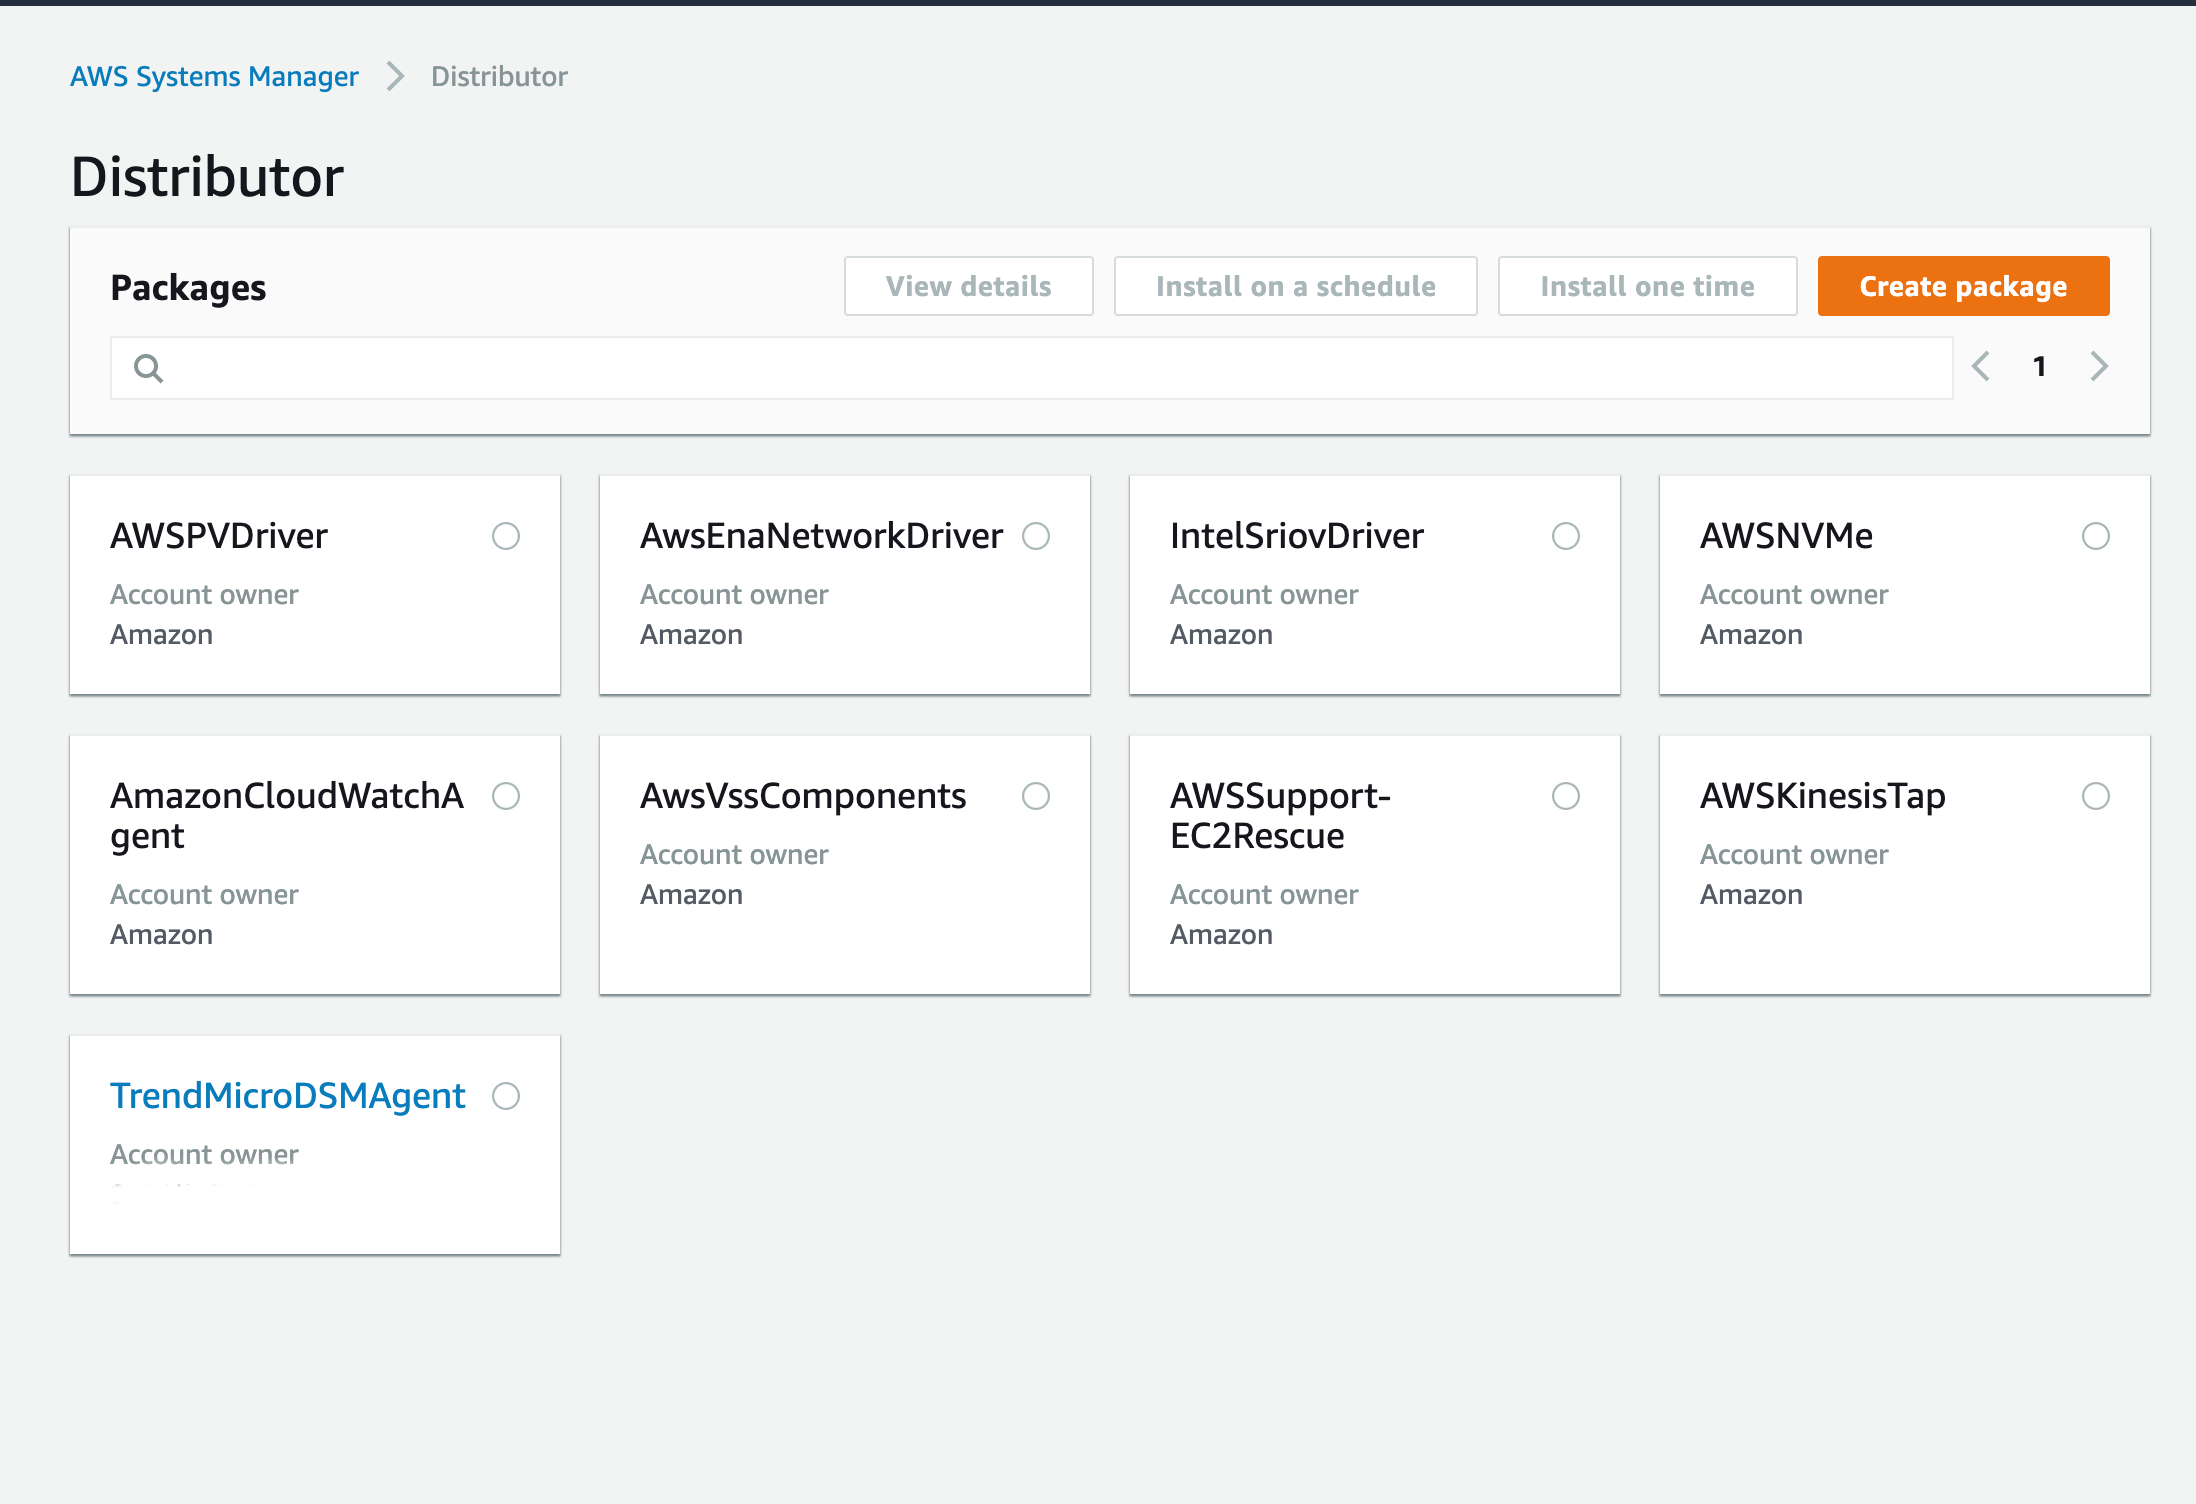
On the left side, click Distributor.
-
Click TrendMicroDSMAgent or the name you gave for the package.


- Click Install one time.

-
Scroll down to Targets.
-
Select some Target Instances to install the agent onto.
- The shortest collection interval is every 30 minutes, but can be longer. For more information: https://docs.aws.amazon.com/systems-manager/latest/userguide/systems-manager-inventory.html

-
Scroll to Output options.
-
Uncheck Enable writing to an S3 bucket.

- Click Run.

- After a few minutes, the command will succeed.

- Now you can log into the Deep Security Manager console to see the new instances.
