
Micro Soldering Station
Transform a cheap USB soldering iron in a powerfull Active tip Soldering Station.
With almost no thermal capacity this station regulates the tip's temperature instantaneously. Solder larger thermal mass with ease, it's magic.
fiy: Active Soldering irons cost a lot of money
The cheapest Micro soldering Station ever:


Youtube


Features
- Cheap & easy build under 10$
- Temperature controled (PID)
- Memories
- Micro soldering tip
- Serial command interface
- Ploter (outputs usefull data)
- Great User Interface with output power Bargraph
- UI Sounds, with temperature reached warning.
- Open Source Arduino based
- Firmware Updates
- 3D Printed Case
- Wake up from standby iron pickup detection (by temperature sensing)
Materials
- 1x Arduino Uno
- 1x Nokia LCD Module
- 1x USB Soldering Iron
- 1x Thermistor 100k 3950
- 1x 4 wire wire cable(usb cable works)
- 1x 5mm Led
- 2x 1k resistor
- 1x 4,7k resitor
- 1x 10n Capacitor
- Kapton tape 10-20mm
- 1x N MosFet (or use the Iron's pcb one)
- 1x rocker switch
- 10 x small screws 2.5x5mm large head
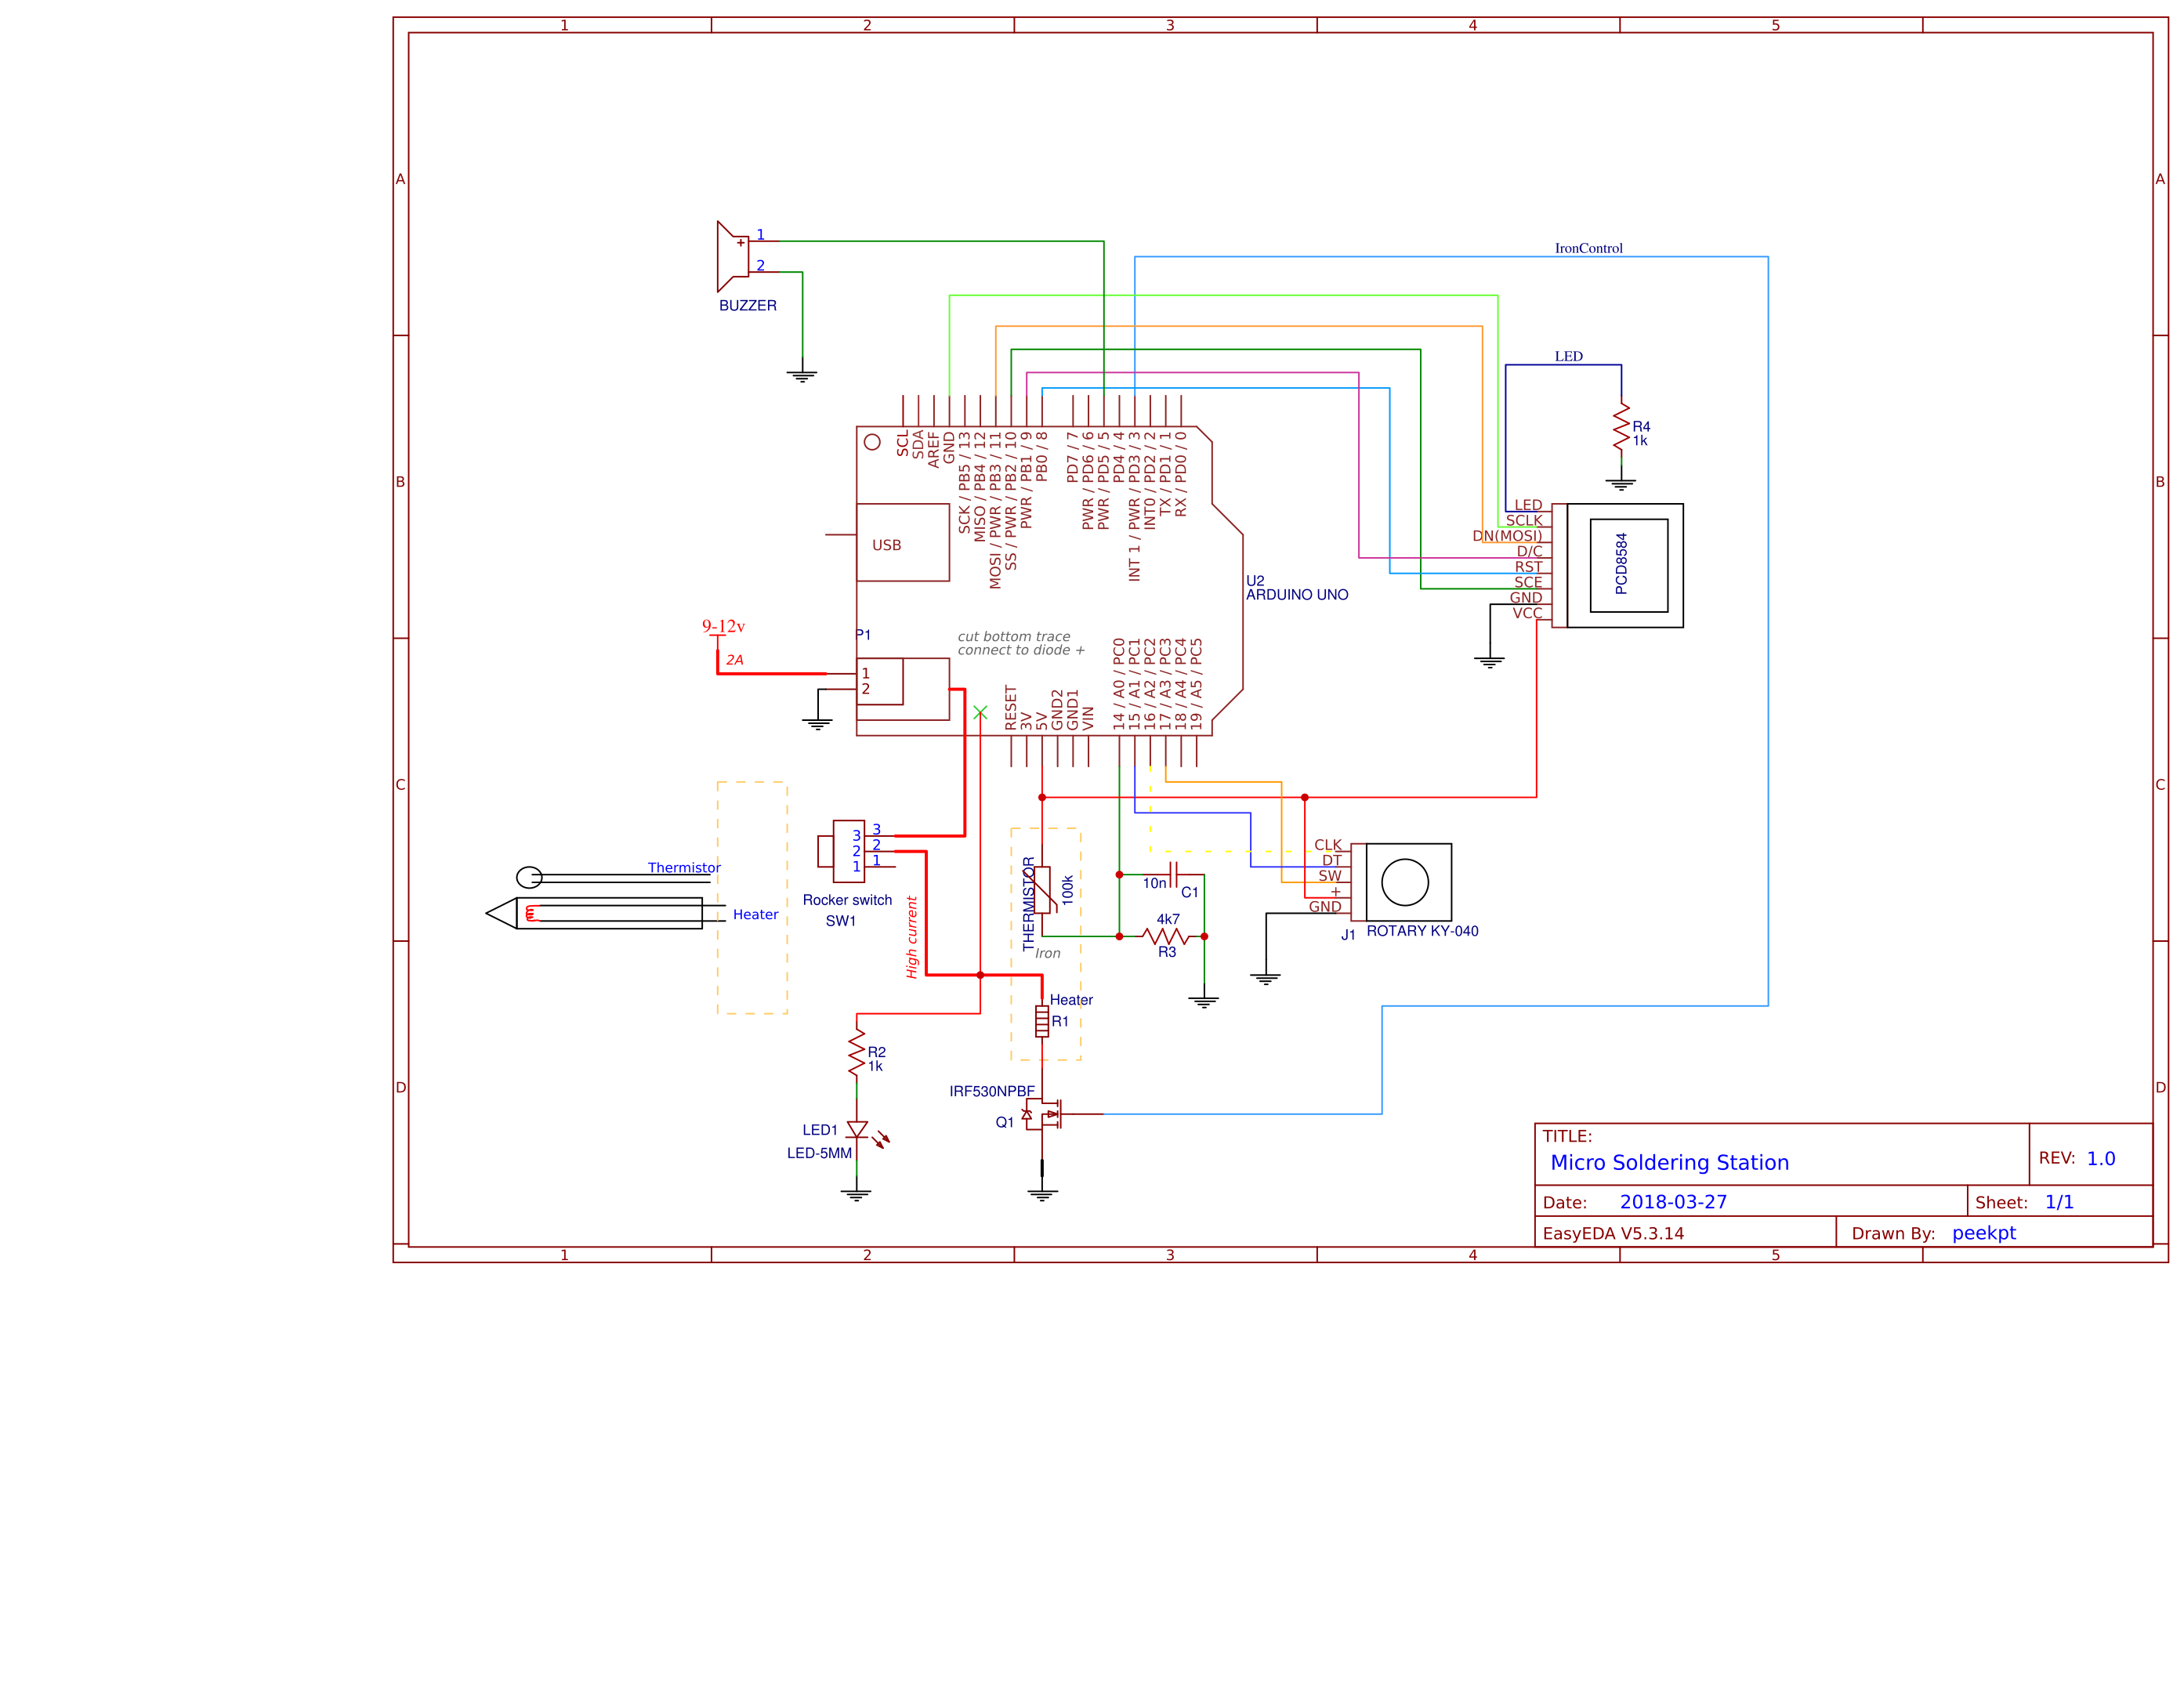
Schematic
Soldering Tip Diagram

UNO R3 CH340 Power Hack

Cut Power the trace underneath the PCB and connect a rocker switch in series.
Fritzing

Remove the pcb from the soldering iron and grab a cable with 4 wires (2 for thermistor, 2 for the heater). Poke an hole in the side of the iron's case, near the yellow nut, to pass the 2 wires and solder them to the thermistor. Use kapton tape to isolate the thermistor pins and to fix the thermistor's glass tip to the iron end with some kapton turns. The other 2 wires connect to the heater and the led with a resistor in series. (watch the polarity of the led) Remove the ball bearing and connect the led in the hole, break the spring post from the other side of the case.
User Interface Screenshots

Operation
main view
- < > temp up down
- [click] cycle memories
- [click & hold] store mem mode
- [double click] settings mode
stand by mode
- [click] leave standby mode
store mem
- < > select memory to store
- [click] store
settings mode submenus
- < > navigate submenus
- [click] edit submenu
edit submenu
- < > change value up down
- [click] exit submenu
ChangeLog
2018-4-11
- interfance feedback sounds, you can disable on settings
- temperature reached beep
2018-4-9
- improved automatic pickup detection (must be more improved in the future)
- you can now choose the type of wake up from standby between manual (by clicking) or automatic (by temperature)
Parts & Modules
100k thermistor (3950):

Arduino Uno R3 ch340:

Rotary Encoder:

USB Soldering Iron:

LCD:

Switch:
