Temperature & Humidity Station
We will build a room temperature and humidity sensing station using
- ESP32 or ESP8266 board
- Temp/Hum sensor dht22
Video tutorial
The following series can help learn about esp boards and MicroPython. We are loosely following it, so make sure to keep reading while/after watching.
https://www.youtube.com/watch?v=w15-EQASP_Y https://www.youtube.com/watch?v=_vcQTyLU1WY&t=738s
Note: In this tutorial, a raspberry Pi is used to connect to the board, but you can use a computer running Ubuntu.
Warning: Make sure your USB cable is able to send data and power.This tutorial will not work otherwise.
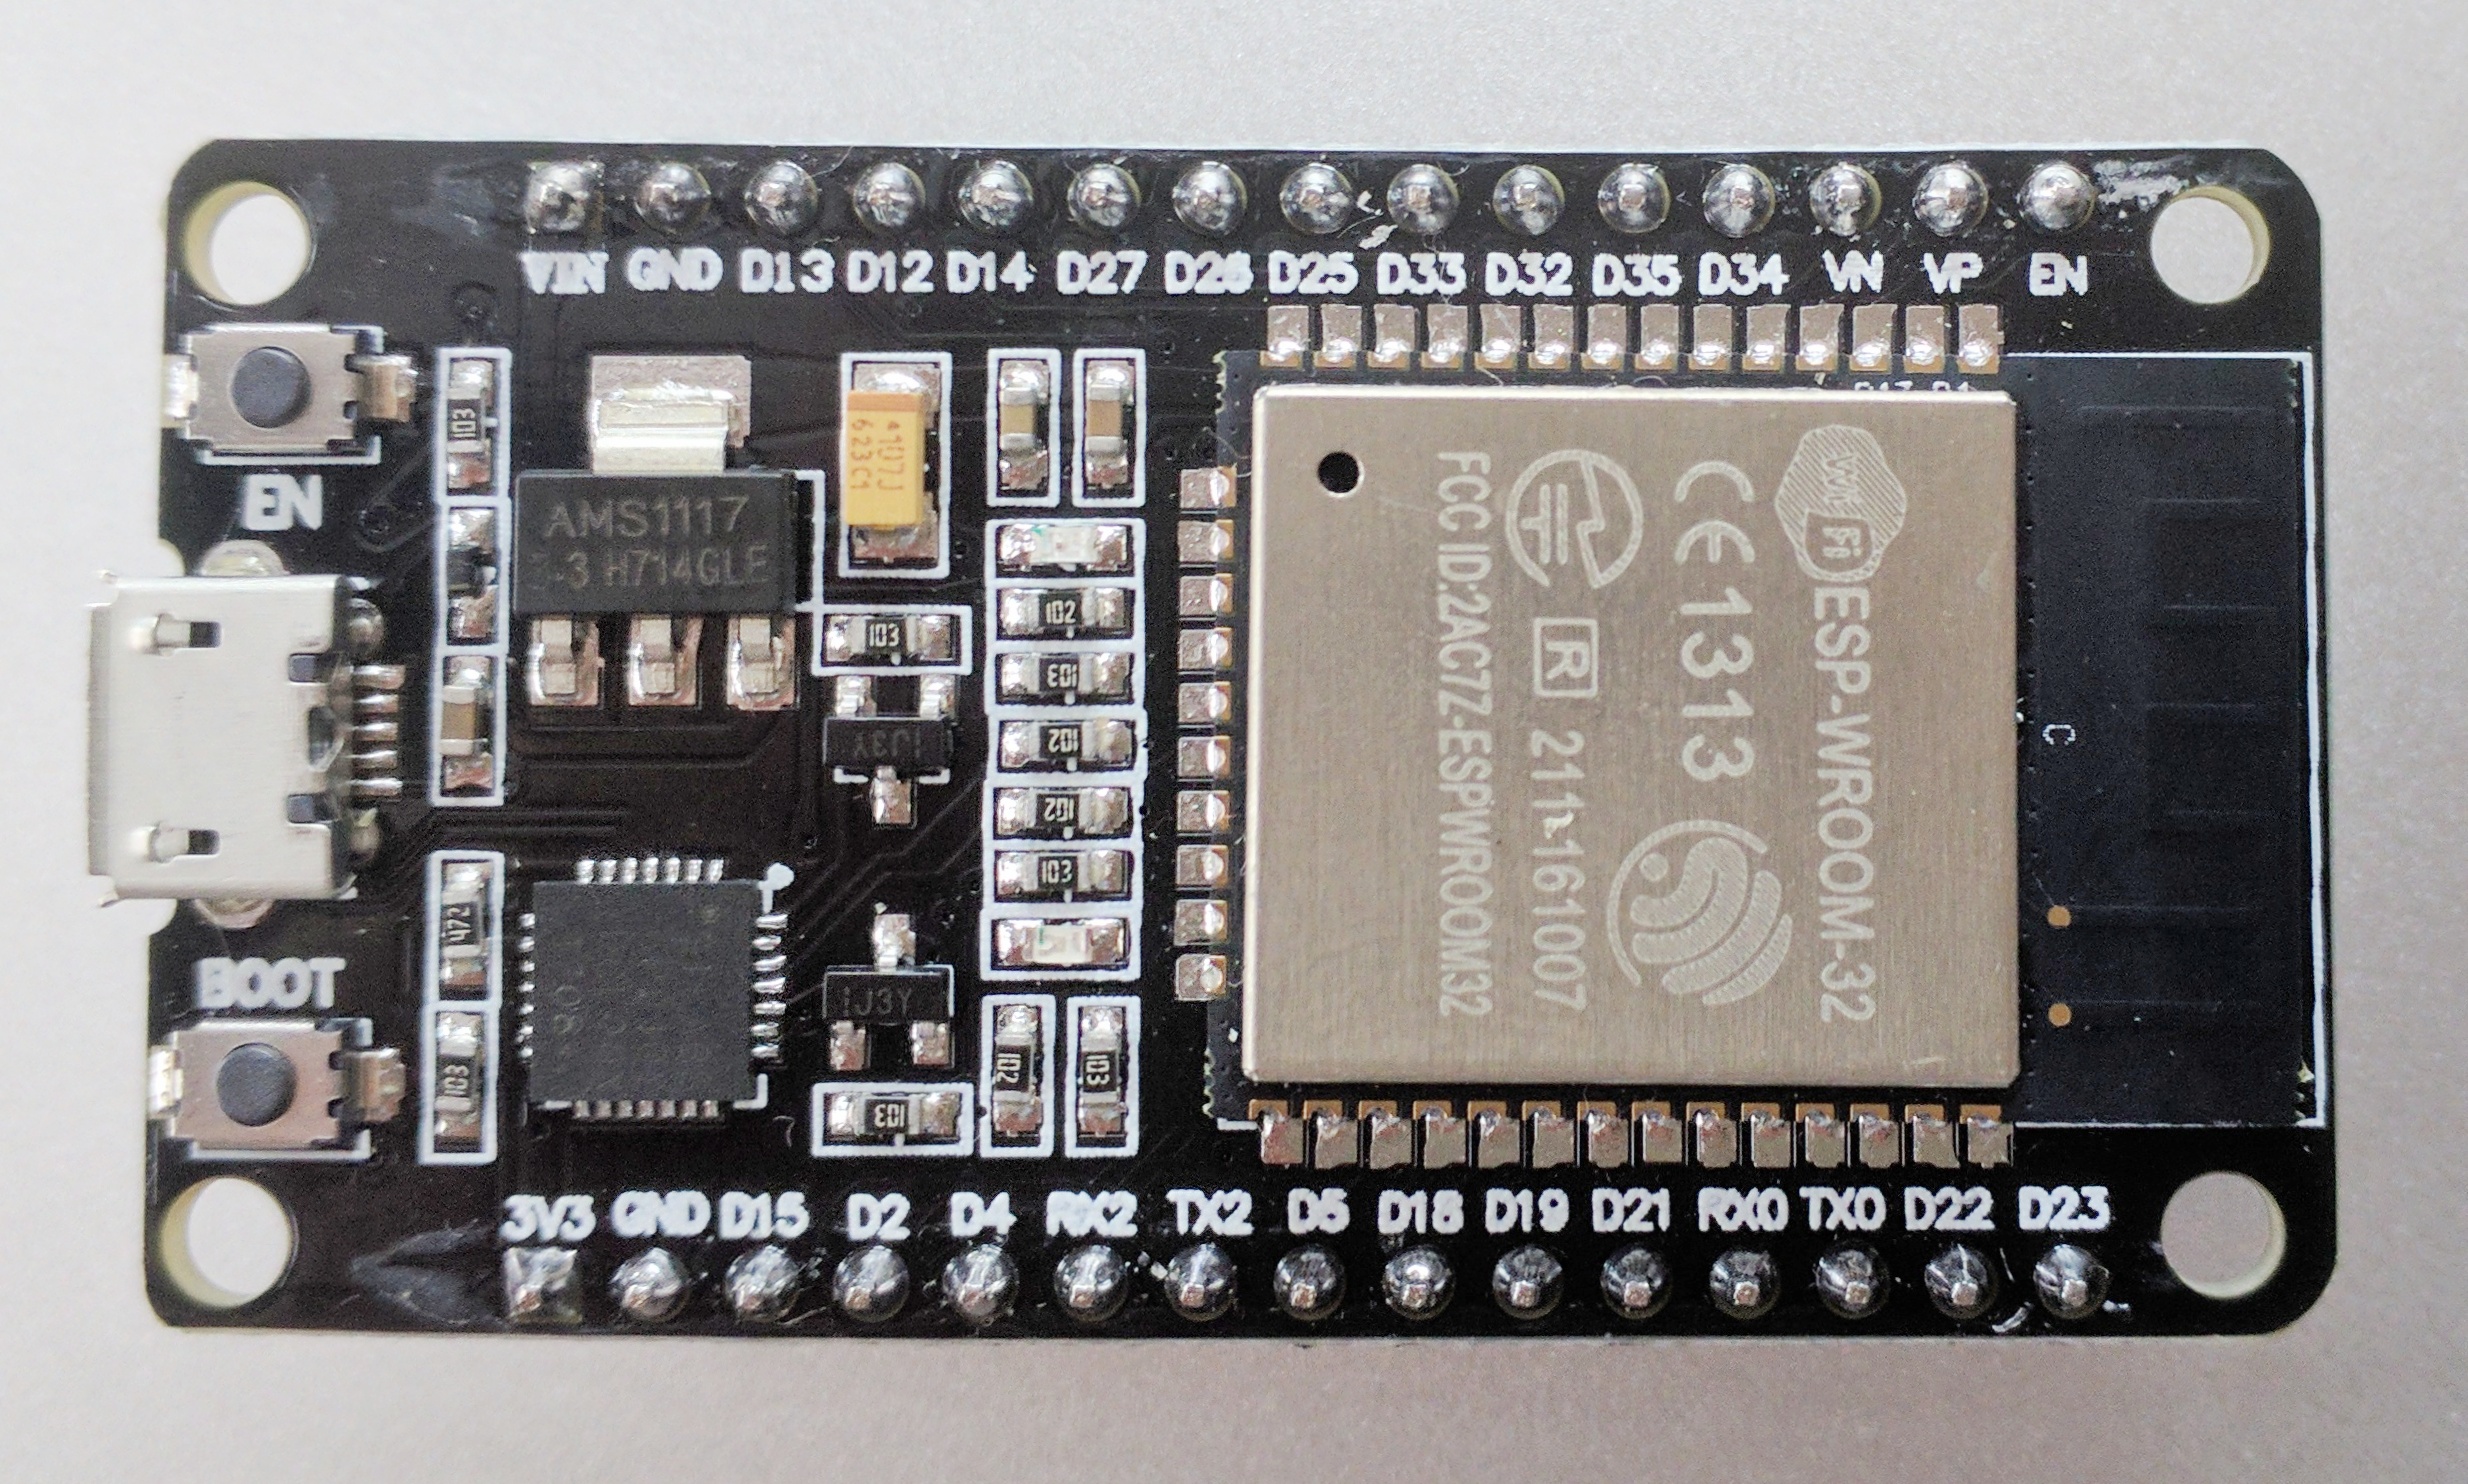
We are using this ESP32. The DHT22 is connected to D5, which is GPIO 5. Change the code accordingly if you are using another pin.
Follow the tutorial steps on the video links.
If you are familiar with the boards, you can skip up to minute 4, where you are prompted to install esptool.
Install esptool
sudo pip3 install esptool
Find the board
dmesg | grep ttyUSB
Weird errors might appear, for example:
[12405.961052] usb 1-2: cp210x converter now attached to ttyUSB0
[80242.274097] cp210x ttyUSB0: failed set request 0x7 status: -19
[80242.274204] cp210x ttyUSB0: failed set request 0x12 status: -19
[80242.274226] cp210x ttyUSB0: failed set request 0x0 status: -19
[80242.274797] cp210x ttyUSB0: cp210x converter now disconnected from ttyUSB0
Before trying anything else, make sure your cable is good for data and power
Flash ESP memory
For ESP32 you run directly:
esptool.py --port /dev/ttyUSB0 flash_id
This will be the console output
esptool.py v2.8
Serial port /dev/ttyUSB0
Connecting.....
Detecting chip type... ESP32
Chip is ESP32D0WDQ6 (revision 1)
Features: WiFi, BT, Dual Core, 240MHz, VRef calibration in efuse, Coding Scheme None
Crystal is 40MHz
MAC: fc:f5:c4:0f:68:68
Uploading stub...
Running stub...
Stub running...
Manufacturer: 20
Device: 4016
Detected flash size: 4MB
Hard resetting via RTS pin...
Download and write micropython into the board
Go to https://micropython.org/download/esp32/
At the moment of writing this tutorial, the latest stable version was esp32-idf3-20191220-v1.12.bin and stored in the Downloads folder.
Flash that into the ESP32
esptool.py --chip esp32 --port /dev/ttyUSB0 --baud 460800 write_flash -z 0x1000 "Downloads/esp32-idf3-20191220-v1.12.bin"
It will take a few moments and the console output will end with:
...
Wrote 1247280 bytes (787794 compressed) at 0x00001000 in 18.5 seconds (effective 537.9 kbit/s)...
Hash of data verified.

Leaving...
Hard resetting via RTS pin...
Note that if you are using an ESP8226, your command will be slightly different. See the documentation
You will need to first download the stable version of micropython (In this tutorial the version was downloaded to Downloads/esp8266-20191220-v1.12.bin)
And later flashed to the board with:
esptool.py --port /dev/ttyUSB0 write_flash 0x000000 "Downloads/esp8266-20191220-v1.12.bin"
rshell into the board
If you don't have rshell you can install with:
sudo pip3 install rshell
Assuming your device is on ttyUSB0 (check dmesg | grep ttyUSB) you can connect using rshell.
rshell --buffer-size=30 -p /dev/ttyUSB0
You can check the board with the boards command.
/home/matias> boards
pyboard @ /dev/ttyUSB0 connected Epoch: 2000 Dirs: /boot.py /pyboard/boot.py
You can check you have repl access to micropython. Press Ctrl+X to exit.
/home/matias> repl
Entering REPL. Use Control-X to exit.
>
MicroPython v1.12 on 2019-12-20; ESP32 module with ESP32
Type "help()" for more information.
>>>
>>>
Make sure the settings are OK
This repo provides a settings.json. That's a template for the different settings that need to be completed for this program to work. Most important fields will be:
- WiFi ssid and password
- mqqt server values (using Adafruit for
adafruit_io_publish.py) - sleep time between samples in seconds
Transfer the contents of the repo
cd temp_sensor/esp32 # or temp_sensor/esp8226
cp -r * /pyboard
Check everything is OK
/home/matias/temp_sensor/esp32> ls /pyboard
adafruit_io_publish.py dht_publish.py         settings.json
boot.py                simple_mqtt.py
Usage
Once you configured everything (after reboot), you will no longer be able to connect through rshell. The console will throw errors after this.
...
Trying to connect to REPL . connected
Testing if ubinascii.unhexlify exists ...
This is fine, remember, you explicitly asked on the boot to publish directly and sleep for n seconds. The boot.py is running and you are not going to be able to connect.
But you can check adafruit io for the feed of temperature humidity.
Erase flash and restart
If something went wrong, or need to setup the device again, just erase the flash memory and repeat the process.
esptool.py --port /dev/ttyUSB0 erase_flash
esptool.py --chip esp32 --port /dev/ttyUSB0 --baud 460800 write_flash -z 0x1000 "Downloads/esp32-idf3-20191220-v1.12.bin"
rshell --buffer-size=30 -p /dev/ttyUSB0
