Terminal User Interface for InvenTree, built with Textual. Project maintained on GitHub.
InvenTree TUI can be install via PyPi using the command pipx install inventree-tui. Using pipx rather than pip installs the application in its own virtual environment, ensuring that the dependencies of different applications do not conflict with it.
Once installed, launch the TUI using the command inventree-tui or by running the library module as a script (python -m inventree-tui). You will have to configure the required environment variables first (see below).
To run inventree-tui, you must set the following environment variables: INVENTREE_API_HOST, INVENTREE_API_TOKEN
You can also set these in a file named .env:
# .env file
INVENTREE_API_HOST=https://example.com/
INVENTREE_API_TOKEN=inv-xxxxxxxxxxxxxxxxxxxxxxxxxxxxxxxxxxxxxxxx-xxxxxxxx
Once this file has been created or you have manually set your environment variables, you can run simply Inventree TUI with the command inventree-tui.
For finer control over the configuration, and for enabling certain features such as sound and TTS, you should run Inventree TUI using a YAML configuration file.
To create a YAML file with the default Inventree TUI configuration, run the command inventree-tui generate-config. This will create a file called config.yaml. Open this file in your favourite editor and modify it. If you still want to load your API Host and API Key from the .env file, you should remove the inventree_api_host and inventree_api_token lines. Settings loaded from the YAML file take precedence over environment variables.
One the YAML file has been created and modified, you can run Inventree TUI using the configuration with the command inventree-tui app -c config.yaml.
After installation, InvenTree TUI is launched using the command inventree-tui. The app can be navigated using either the mouse or keyboard. The keyboard navigation controls are as follows:
tab: Focus next itemshift + tab: Focus previous itemarrow keys: Change selectionenter: Activatedelete: Remove item from list
The app is composed of several tabs, each with a specific function.
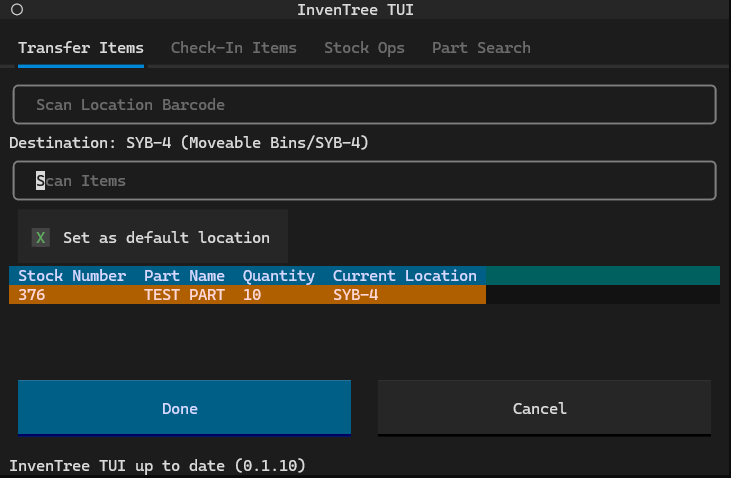
This tab is used for transferring stock items to a different location. First, scan the destination location barcode. Next, scan the barcodes of the items you wish to transfer to this location. If you accidentally scan the wrong item, you can remove it from the list using the delete key. Once you are done scanning items, hit the Done button and the items will be tranferred to the destination location.
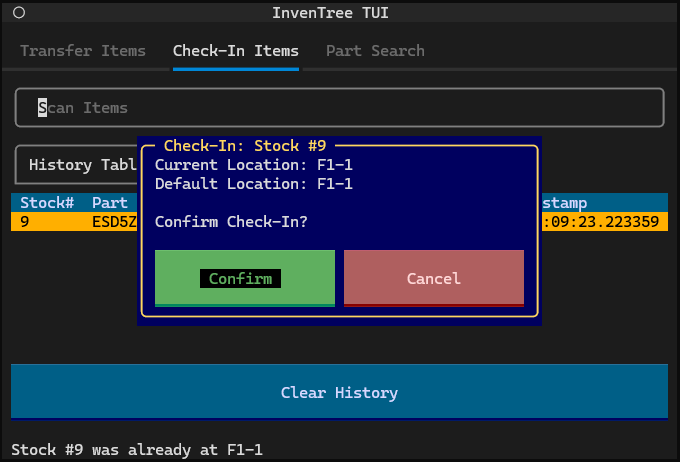
This tab is used for transferring stock items to their default locations. Simply scan an item barcode and confirm the transfer with the pop-up dialog. A history of checked-in items is kept for convient reference, and can be cleared using the Clear History button.
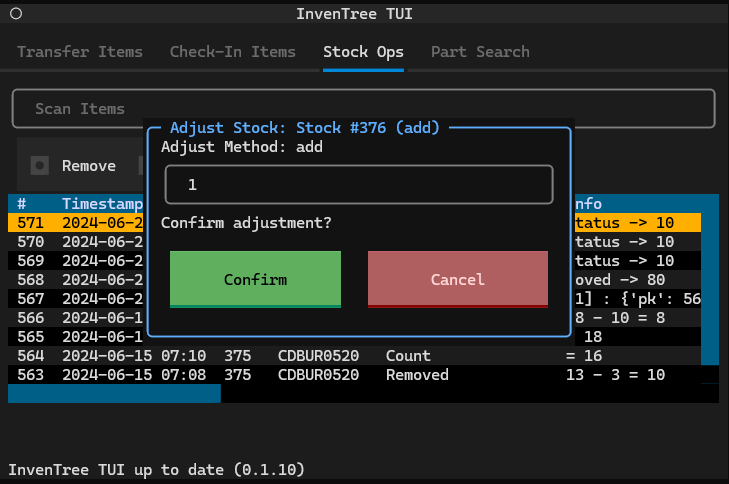
The Stock Ops (Stock Operations) tab is used for making stock adjustments. The available methods are add, remove, and count. The table on this tab shows your stock tracking history.
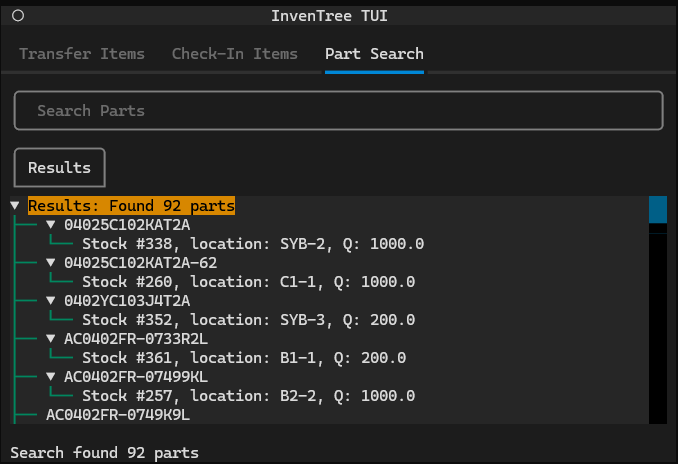
This tab is used for searching the inventory for parts. Each part in the results can be expanded using the Enter key, which will then fetch and display the relevant stock items and their locations and quantities. The first few parts in the results are expanded automatically.


