In this React Native tutorial you'll learn how to build native apps based on the hugely popular React JavaScript library.
What makes React Native different from other frameworks such as PhoneGap (Apache Cordova) or Appcelerator Titanium, that use JavaScript to create iOS apps?
- (Unlike PhoneGap) with React Native your code may be written in JavaScript but the app's UI is fully native. It doesn't have the drawbacks typically associated with a hybrid HTML5 app.
- Additionally (unlike Titanium), React introduces a novel, radical and highly functional approach to constructing user interfaces. Your UI is simply a function of the current app state.
React Native brings the React paradigm to mobile app development. It's goal isn't to write the code once and run it on any platform. The goal is to learn-once (the React way) and write-anywhere. An important distinction to make.
The community has even added tools such as Expo and Create React Native App to help you quickly build React Native apps without having to touch Xcode or Android Studio!
While you can write React Native apps for iOS and Android, this tutorial only covers Android. You can also check out our tutorial focused on React Native for iOS.
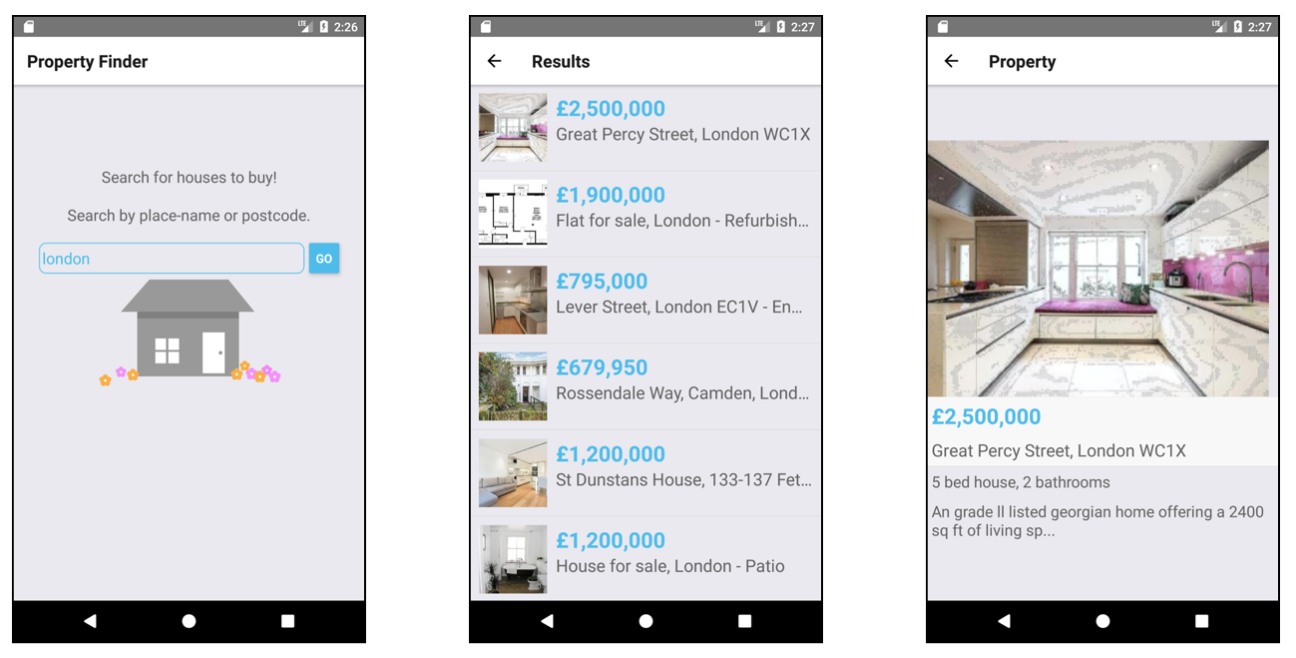
The tutorial takes you through the process of building an Android app for searching UK property listings:
Don't worry if you've never written any JavaScript or used the CSS-like properties you'll see. This tutorial will guide you through every step and provide resources where you can learn more.
Ready to get going? Read on!
Note: We also have an iOS version of this tutorial that you may be interested in.
Getting Started
Node and Java Development Kit
React Native uses Node.js, a JavaScript runtime, to build your JavaScript code. React Native also requires a recent version of the Java SE Development Kit (JDK) to run on Android. Follow the instructions for your system to make sure you install the required versions.
MacOS
First install Homebrew using the instructions on the Homebrew website. Then install Node.js by executing the following in Terminal:
brew install node
Next, use homebrew to install watchman, a file watcher from Facebook:
brew install watchman
This is used by React Native to figure out when your code changes and rebuild accordingly. It's like having Android Studio do a build each time you save your file.
Finally, download and install JDK 8 or newer if needed.
Windows
First install Chocolatey using the instructions on the Chocolatey website.
Install Node.js if you don't have it or have a version older than 4. Run the following command as Administrator (Right-click on Command Prompt and select "Run as Administrator"):
choco install -y nodejs.install
Python is needed to run the React Native build scripts. Run the following command as Administrator if you don't have Python 2:
choco install -y python2
Run the following command as Administrator if you don't have a JDK or have a version older than 8:
choco install -y jdk8
Linux
Install Node.js by following the installation instructions for your Linux distribution. You will want to install Node.js version 6 or newer.
Finally, download and install JDK 8 or newer if needed.
React Native CLI
Use Node Package Manager (or npm) to install the React Native Command Line Interface (CLI) tool. In your terminal (Terminal or Command Prompt or shell) type:
npm install -g react-native-cli
npm fetches the CLI tool and installs it globally; npm is similar in function to JCenter and is packaged with Node.js.
Next, install Yarn using the instructions on the Yarn website. Yarn is a fast npm client.
Android Development Environment
Set up your Android development environment, if haven't done so. Make sure you can successfully run an Android app on an emulator.
React Native requires Android 6.0 (Marshmallow). In Android Studio, go to Tools\Android\SDK Manager. Select SDK Platforms and check Show Package Details. Make sure that the following items are checked:
- Google APIs, Android 23
- Android SDK Platform 23
- Intel x86 Atom_64 System Image
- Google APIs Intel x86 Atom_64 System Image

Next, select SDK Tools and check Show Package Details. Expand Android SDK Build-Tools and make sure 23.0.1 is selected.
Finally, tap Apply to install your selections.
When the Android components are finished installing, create a new emulator running SDK Platform 23.
Create the Starter App
Navigate to the folder where you would like to develop your app and run the following in your terminal:
react-native init PropertyFinder
This uses the CLI tool to create a starter project containing everything you need to build and run a React Native app.
In a terminal, run:
cd PropertyFinder
In the created folders and files you will find a few items of note:
- node_modules is a folder which contains the React Native framework
- index.js is the entry point created by the CLI tool
- App.js is the skeletal app created by the CLI tool
- android is a folder containing an Android project and the code required to bootstrap your application
- ios is a folder containing iOS-related code, which you won't be touching in this tutorial.
Start your Android emulator running SDK 23 if it isn't running.
Run the following command in a terminal:
react-native run-android
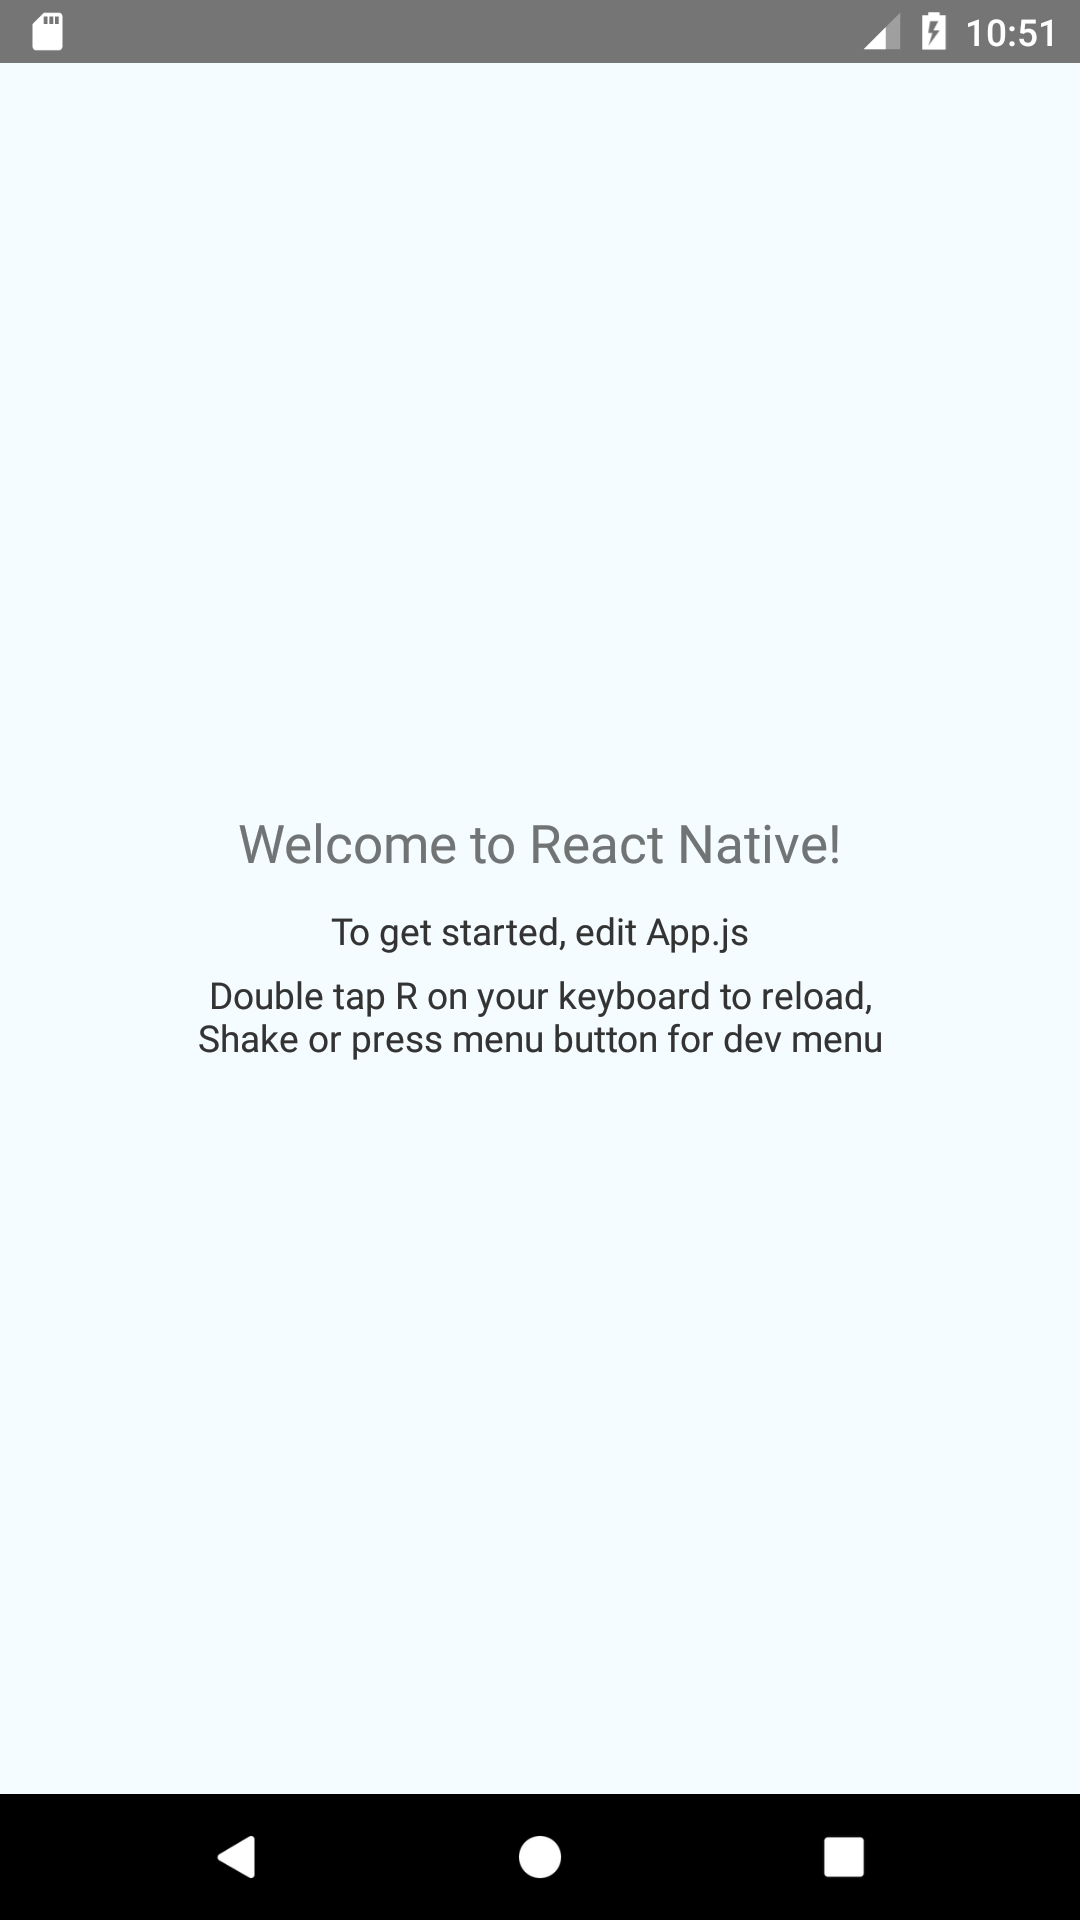
The emulator will display the following:
If you receive an error related to "SDK location not found", then perform the following steps:
- Go to the
android/directory of your react-native project - Create a file called local.properties with this line:
sdk.dir = {PATH TO ANDROID SDK}
For example, on macOS, the SDK path will look something like /Users/USERNAME/Library/Android/sdk.
You might also have noticed that a terminal window has popped up, displaying something like this:
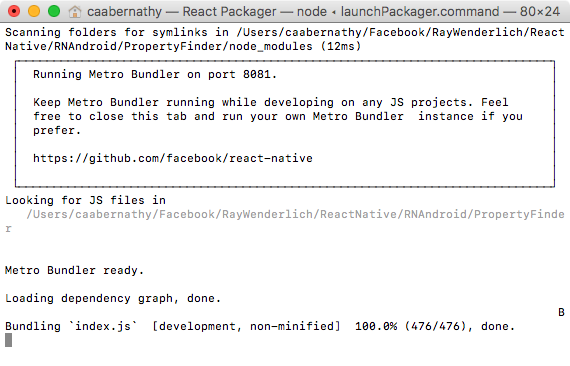
This is Metro Bundler, the React Native JavaScript bundler running under Node.js. You'll find out what it does shortly.
Don't close the terminal window; just keep it running in the background. If you do close it by mistake, simply run the following in terminal:
react-native start
Note: You'll be mostly writing JavaScript code for this React Native tutorial so no need to use Android Studio as your editor. I use Sublime Text, which is a cheap and versatile editor, but Atom, Brackets or any other lightweight editor will do the job.
React Native Basics
In this section, you'll learn React Native basics as you begin working on PropertyFinder.
Open App.js in your text editor of choice and take a look at the structure of the code in the file:
import React, { Component } from 'react'; // 1
import {Platform, StyleSheet, Text, View} from 'react-native';

const instructions = Platform.select({ ... }); // 2

type Props = {};
export default class App extends Component<Props> { ... } // 3

const styles = StyleSheet.create({ ... }); // 4
Let's go through the code step-by-step:
- Imports the required modules.
- Sets up a platform-specific display message.
- Defines the component that represents the UI.
- Creates a style object that controls the component's layout and appearance.
Take a closer look at this import statement:
import React, { Component } from 'react';This uses the ECMAScript 6 (ES6) import syntax to load the react module and assign it to a variable called React. This is roughly equivalent to importing libraries in Android. It also uses what's called a destructuring assignment to bring in the Component object. Destructuring lets you extract multiple object properties and assign them to variables using a single statement.
Note: For more information about ES6 modules I'd recommend reading this blog post by Dr. Axel Rauschmayer.
ES6 is a much nicer way to write JavaScript, supporting features like default parameters, classes, arrow functions, and destructuring assignments. Not all browsers support ES6. React Native uses a tool called Babel to automatically translate modern JavaScript into compatible legacy JavaScript where necessary.
Back to App.js, check out the class definition:
export default class App extends Component
This defines a class which extends a React Component. The export default class modifier makes the class "public", allowing it to be used in other files.
Open index.js and take a look at the entry point file:
import {AppRegistry} from 'react-native';
import App from './App';
import {name as appName} from './app.json';

AppRegistry.registerComponent(appName, () => App);
This registers the imported component that serves as the app's entry point.
It's time to start building your app.
In App.js, add the following at the top of the file, just before the import statements:
'use strict';This enables Strict Mode, which adds improved error handling and disables some less-than-ideal JavaScript language features. In simple terms, it makes JavaScript better!
Inside the App class replace render() with the following:
render() {
  return React.createElement(Text, {style: styles.description}, "Search for houses to buy!");
}
App extends React.Component, the basic building block of the React UI. Components contain immutable properties, mutable state variables and expose a method for rendering. Your current application is quite simple and only requires a render method.
React Native components are not Android view classes; instead they are a lightweight equivalent. The framework takes care of transforming the tree of React components into the required native UI.
Next, replace the const styles statement with the following:
const styles = StyleSheet.create({
  description: {
    fontSize: 18,
    textAlign: 'center',
    color: '#656565',
    marginTop: 65,
  },
});
This defines a single style that you've applied to the description text. If you've done any web development before, you'll probably recognize those property names. The React Native StyleSheet class used to style the application UI is similar to the Cascading Style Sheets (CSS) used on the Web.
Then, get rid of the instructions assignment code block as you no longer need it.
Save your changes to App.js and return to the emulator. Double tap R on your keyboard, and you'll see your fledgling property search app starting to take shape:

That's a JavaScript application running in the emulator, rendering a native UI, without a browser in sight!
Still don't trust me? :] Verify it for yourself: within Android Studio, select Tools\Android\Layout Inspector. Then check Show All Proceses, select com.propertyfinder and tap OK to inspect the view hierarchy:
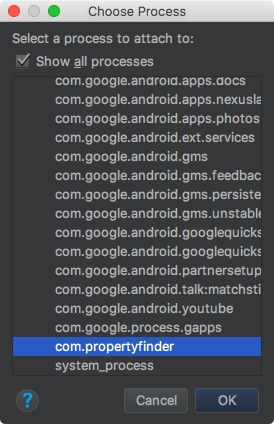
You will see no WebView instances anywhere! Your text is being displayed in a view called ReactTextView:
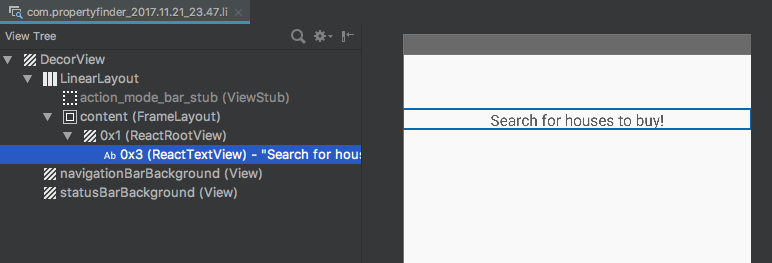
But what is that? Go to the project file finder and enter ReactTextView.java in the prompt. Select the result matching this file to view the source code. Notice ReactTextView inherits directly from TextView. Neat!
Curious as to how it all works? Take a quick look at MainActivity.java and MainApplication.java which you can find in android/app/src/main/java/com/propertyfinder.
MainApplication sets up a ReactNativeHost which in turn creates a ReactInstanceManager. The instance manager handles the communication between JavaScript and native Android.
MainActivity extends ReactActivity which creates a ReactRootView when launched. ReactRootView uses the instance manager to start the JavaScript application. It also renders the App component to set the Activity's content view.
The terminal window that was opened when you ran this application started a packager and server that allows your JavaScript code to be fetched, by default on port 8081. For example:
http://localhost:8081/index.bundle?platform=android
Open this URL in your browser; you'll see the JavaScript code for your app. You can find your "Search for houses to buy!" description code embedded among the React Native framework.
When your app starts, this code is loaded and executed by the JavaScriptCore library. In the case of your application, it loads the App component, then constructs the native Android view.
Using JSX
Your current application uses React.createElement to construct the simple UI for your application, which React turns into the native equivalent. While your JavaScript code is perfectly readable in its present form, a more complex UI with nested elements would rapidly become quite a mess.
Make sure the app is still running, then return to your text editor to edit App.js. Modify the body of render to be the following:
return <Text style={styles.description}>Search for houses to buy! (Again)</Text>;This is JSX, or JavaScript syntax extension, which mixes HTML-like syntax directly in your JavaScript code; if you're already a web developer, this should feel rather familiar. You'll use JSX throughout this article.
Save your changes to App.js and return to the emulator. Tap R twice, and you'll see your application refresh to display the updated message:

Re-running a React Native application is really as simple as refreshing a web browser! :] Note that this will only reflect changes made to your JavaScript files -- native code or resource changes will require you to restart the packager.
You can even skip having to refresh the app by enabling live reload. Press Cmd+mfor Mac or Ctrl+m for Windows/Linux in the emulator then select Enable Live Reload:

In App.js, modify the render method's body to the following:
return <Text style={styles.description}>Search for houses to buy!</Text>;Save your changes. Note that the emulator automatically refreshes to reflect your changes:

Adding Navigation
React Navigation is a community effort led by Facebook and Expo to provide an easy-to-use navigation solution for React Native apps. It's a JavaScript implementation which means that it works across iOS and Android. You'll be working with this library in this tutorial.
There are other native navigation solutions out there including AirBnB's Native Navigation and React Native Navigation from Wix. Be sure to check out the alternatives if you're looking for a more native look and feel for your future app.
Install React Navigation by running the following in terminal:
yarn add react-navigation
You're now ready to use its navigation components.
In App.js, add the following after the import statements near the top:
import {
  createStackNavigator,
} from 'react-navigation';
createStackNavigator enables your app to transition from one screen to another with the new screen being placed on top of a stack.
Next, replace the App class definition with the following:
class SearchPage extends Component {
Next, add the following to SearchPage just before render():
static navigationOptions = {
  title: 'Property Finder',
};
This sets the title in the navigation bar for this screen.
Add the following below the SearchPage component:
const App = createStackNavigator({
  Home: { screen: SearchPage },
});
export default App;
This configures the SearchPage component as the initial component in the navigation stack.
Save your changes and check the emulator to see the updated UI:

Excellent --- you now have the basic navigation structure in place.
Building out the Search Page
Add a new file named SearchPage.js and place it in the same folder as App.js. Add the following code to this file:
'use strict';

import React, { Component } from 'react';
import {
  StyleSheet,
  Text,
  TextInput,
  View,
  Button,
  ActivityIndicator,
  Image,
} from 'react-native';
This imports the modules you'll need to build the UI.
Add the following Component subclass after the import statements:
type Props = {};
export default class SearchPage extends Component<Props> {
static navigationOptions = {
title: 'Property Finder',
};
render() {
return (
<View style={styles.container}>
<Text style={styles.description}>
Search for houses to buy!
</Text>
<Text style={styles.description}>
Search by place-name or postcode.
</Text>
</View>
);
}
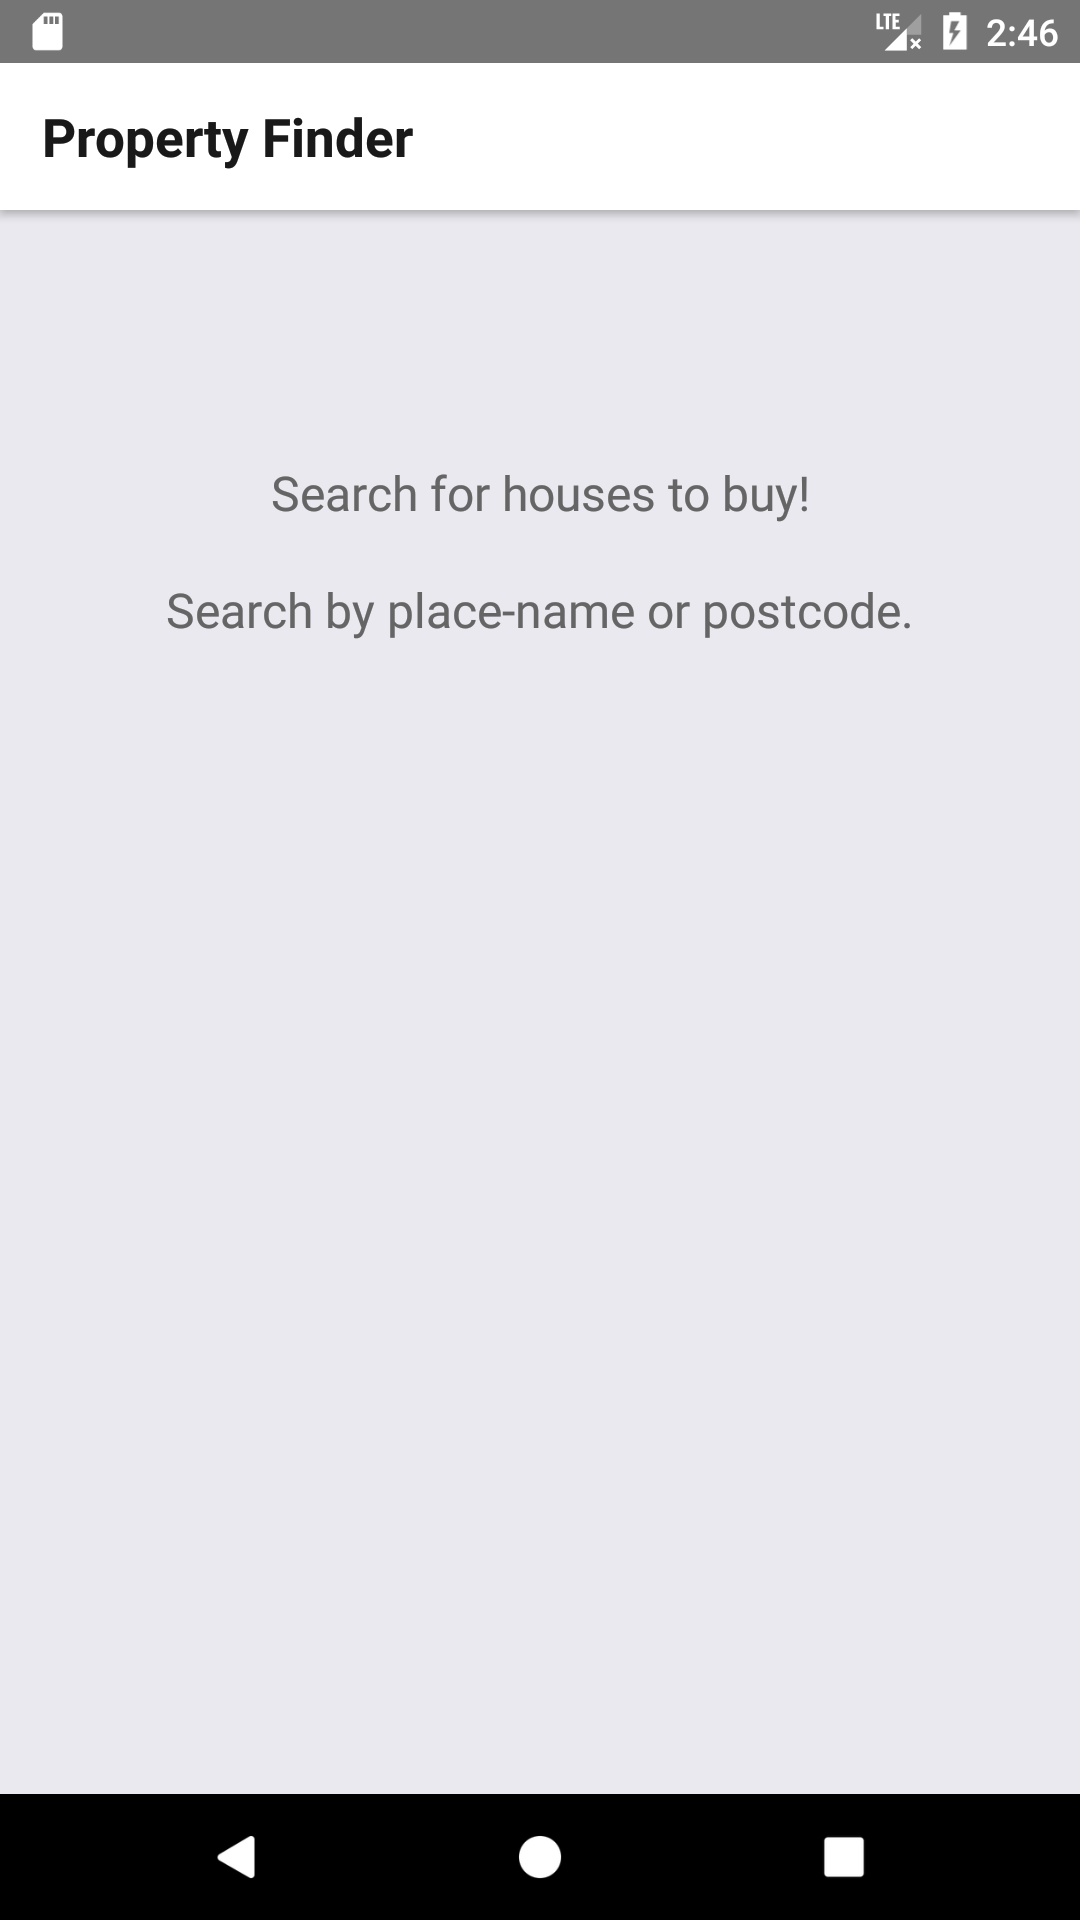
}render is a great demonstration of JSX and the structure it provides. Along with the style, you can very easily visualize the UI constructed by this component: a container with two text labels.
Now, add the following style code at the bottom of the file:
const styles = StyleSheet.create({
  description: {
    marginBottom: 20,
    fontSize: 18,
    textAlign: 'center',
    color: '#656565'
  },
  container: {
    padding: 30,
    marginTop: 65,
    alignItems: 'center'
  },
});
Again, these are standard CSS properties. Setting up styles like this is less visual than using Android Studio's layout design editor, but it's better than setting view properties one by one in your onCreate() methods! :]
Save your changes.
Open App.js and add the following just after the current import statements near the top of the file:
import SearchPage from './SearchPage';This imports SearchPage from the file you just created.
Remove the SearchPage class and its associated description style from App.js. You won't be needing that code any longer. This may also be a good time to get rid of the all unused imports: those from react and react-native.
Save your changes and return to the emulator to check out the new UI:
Styling with Flexbox
So far, you've seen basic CSS properties that deal with margins, paddings and color. However, you might not be familiar with Flexbox, a more recent addition to the CSS specification that's useful for handling complex layout across different screen sizes.
React Native uses the Yoga library under the hood to drive layout. Yoga is a C implementation of Flexbox and it includes bindings for Java (for Android), Swift, Objective-C, and C# (for .NET).
Generally you use a combination of Yoga's flexDirection, alignItems, and justifyContent properties to manage your layout.
So far, your layout has a container with two children arranged vertically:

This is due to the default flexDirection value of column being active. flexDirection helps define the main axis and cross axis. Your container's main axis is vertical. It's cross axis is therefore horizontal.
alignItems determines the placement of children in the cross axis. Your app has set this value to center. This means the children are center-aligned.
You're going to see some other layout options at play.
Open SearchPage.js and insert the following just after the closing tag of the second Text element:
<View style={styles.flowRight}>
  <TextInput
    underlineColorAndroid={'transparent'}
    style={styles.searchInput}
    placeholder='Search via name or postcode'/>
  <Button
    onPress={() => {}}
    color='#48BBEC'
    title='Go'
  />
</View>
You've added a view that holds a text input and a button.
In your styles definition, add the following new styles below the container style:
flowRight: {
  flexDirection: 'row',
  alignItems: 'center',
  alignSelf: 'stretch',
},
searchInput: {
  height: 36,
  padding: 4,
  marginRight: 5,
  flexGrow: 1,
  fontSize: 18,
  borderWidth: 1,
  borderColor: '#48BBEC',
  borderRadius: 8,
  color: '#48BBEC',
},
These set the placement of the text input and button.
Save your changes and check the emulator to see your updates:
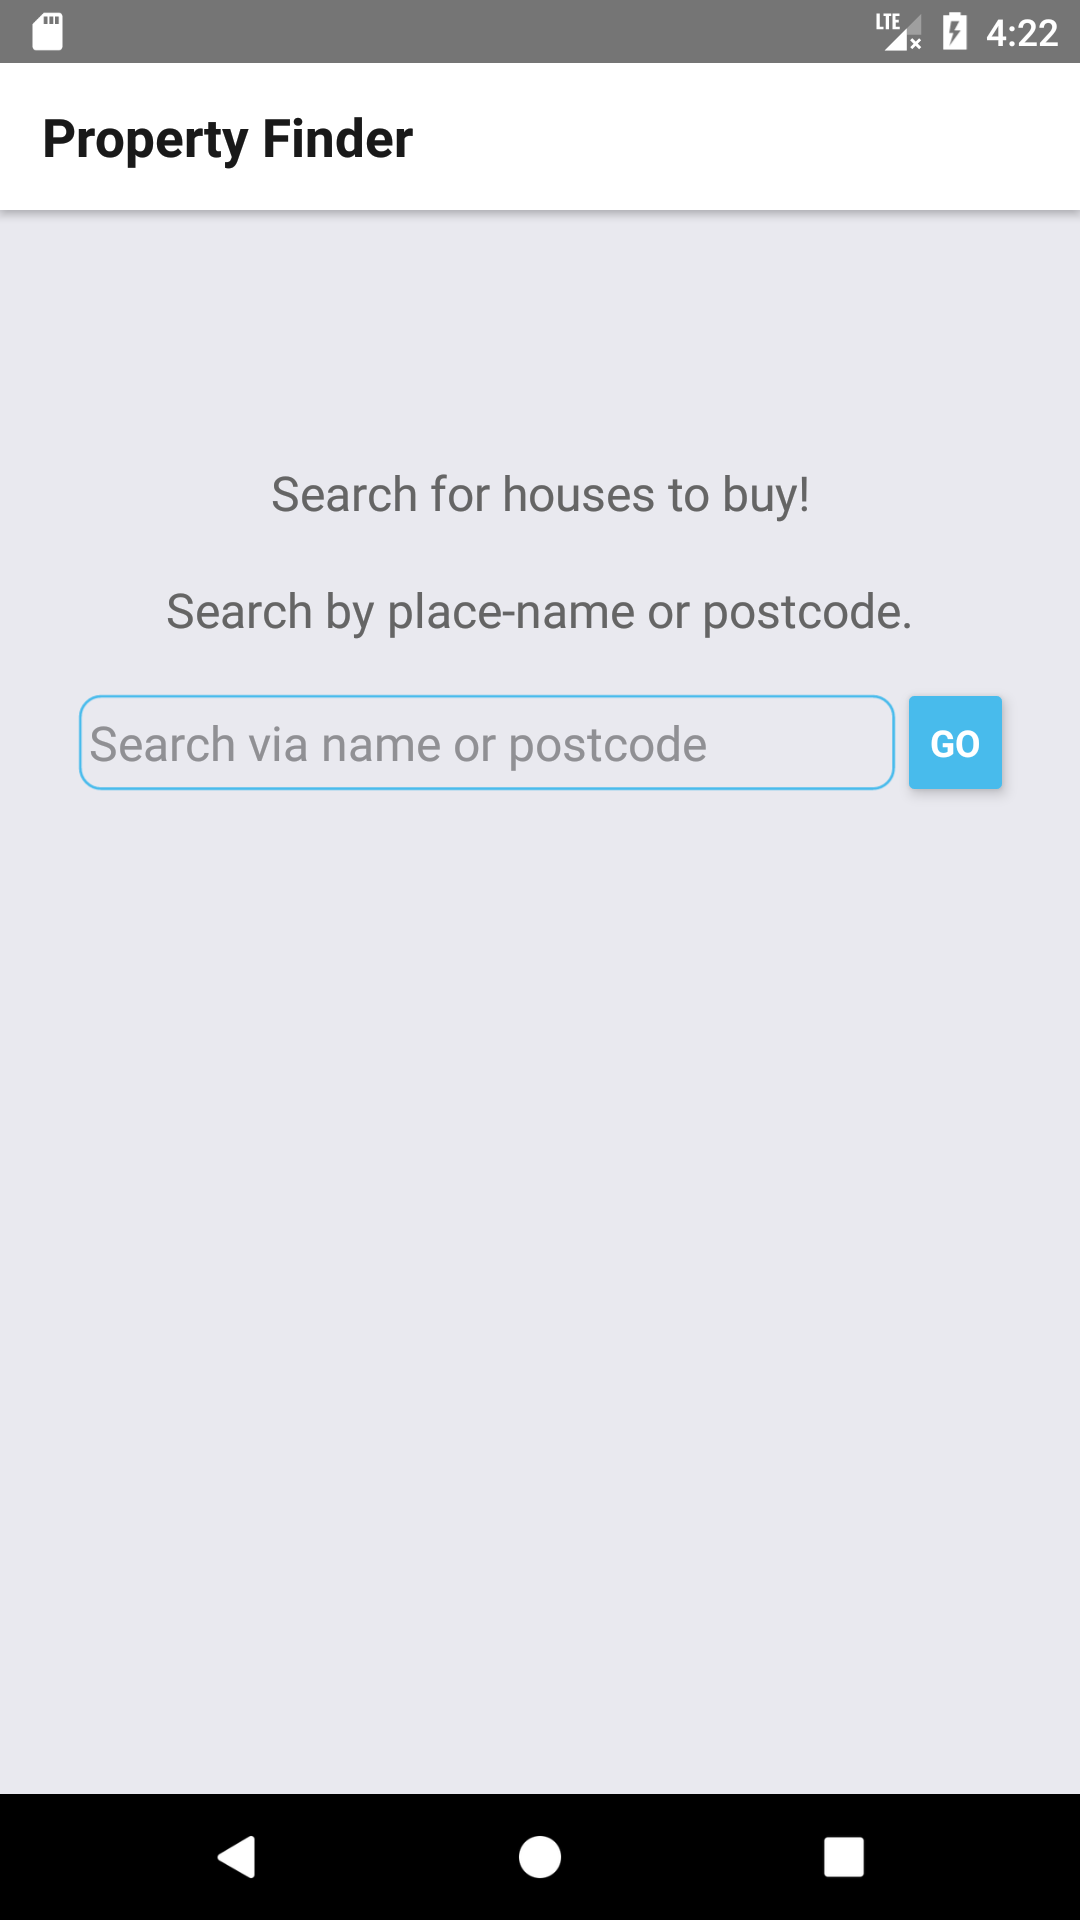
The text field and Go button are on the same row, so you've wrapped them in a container view using the flowRight style which uses flexDirection: 'row' to horizontally place the items in a row.
You've also added a flexGrow: 1 style to the text input. Yoga first lays out the text input and button according to their sizes. It then distributes the remaining space according to the flexGrow values. The text input therefore takes over the remaining space.
Handling Assets
The final step to complete the search screen of the application is to add the house graphic. Download and unzip the images zip file.
Next, create a directory in your root project folder named Resources. Place the three images of the house in this directory.
Drawables: In Android, static app images are typically added to the project's res/drawable folder. In React Native, however, it's recommended not to. Placing your image assets alongside your components helps to keep your components self contained, doesn't require the app to be relaunched if you add new images. It also provides a single place for adding images if you are building for both iOS and Android.
Back in SearchPage.js, add the following beneath the closing tag of the Viewcomponent that wraps the text input and button:
<Image source={require('./Resources/house.png')} style={styles.image}/>Now, add the image's corresponding style to the end of the style list:
image: {
  width: 217,
  height: 138,
},
Save your changes and check out your new UI:

You may need to restart the packager on Windows if the image doesn't show up.
Your current app looks good, but it's somewhat lacking in functionality. Your task now is to add some state to your app and perform some actions.
Adding Component State
A React component can manage its internal state through an object called, you guessed it, state. Whenever a component's state changes, render() is called.
Within SearchPage.js, add the following code just before render():
constructor(props) {
  super(props);
  this.state = {
    searchString: 'london'
  };
}
Your component now has a state variable, with searchString set to an initial value of london.
Within render(), change TextInput to the following:
<TextInput
  underlineColorAndroid={'transparent'}
  style={styles.searchInput}
  value={this.state.searchString}
  placeholder='Search via name or postcode'/>
This sets the TextInput value property --- that is, the text displayed to the user --- to the current value of the searchString state variable. This takes care of setting the initial state, but what happens when the user edits this text?
The first step is to create a method that acts as an event handler. Within the SearchPage class add the following method below the constructor:
_onSearchTextChanged = (event) => {
  console.log('_onSearchTextChanged');
  this.setState({ searchString: event.nativeEvent.text });
  console.log('Current: '+this.state.searchString+', Next: '+event.nativeEvent.text);
};
This defines a function using the => syntax. This is an arrow function, another recent addition to the JavaScript language that provides a succinct syntax for creating anonymous functions.
The function takes the value from the native browser event's text property and uses it to update the component's state. It also adds some logging code that will make sense shortly.
Note: JavaScript classes do not have access modifiers, so they have no concept of private. As a result you often see developers prefixing methods with an underscore to indicate that they should be considered private.
To wire up this method so it gets called when the text changes, return to the TextInput field within the render method and add an onChange property so the tag looks like the following:
<TextInput
  underlineColorAndroid={'transparent'}
  style={styles.searchInput}
  value={this.state.searchString}
  onChange={this._onSearchTextChanged}
  placeholder='Search via name or postcode'/>
Whenever the user changes the text, you invoke the function supplied to onChange; in this case, it's _onSearchTextChanged.
There's one final step before you refresh your app again: add the following logging statement to the top of render(), just before return:
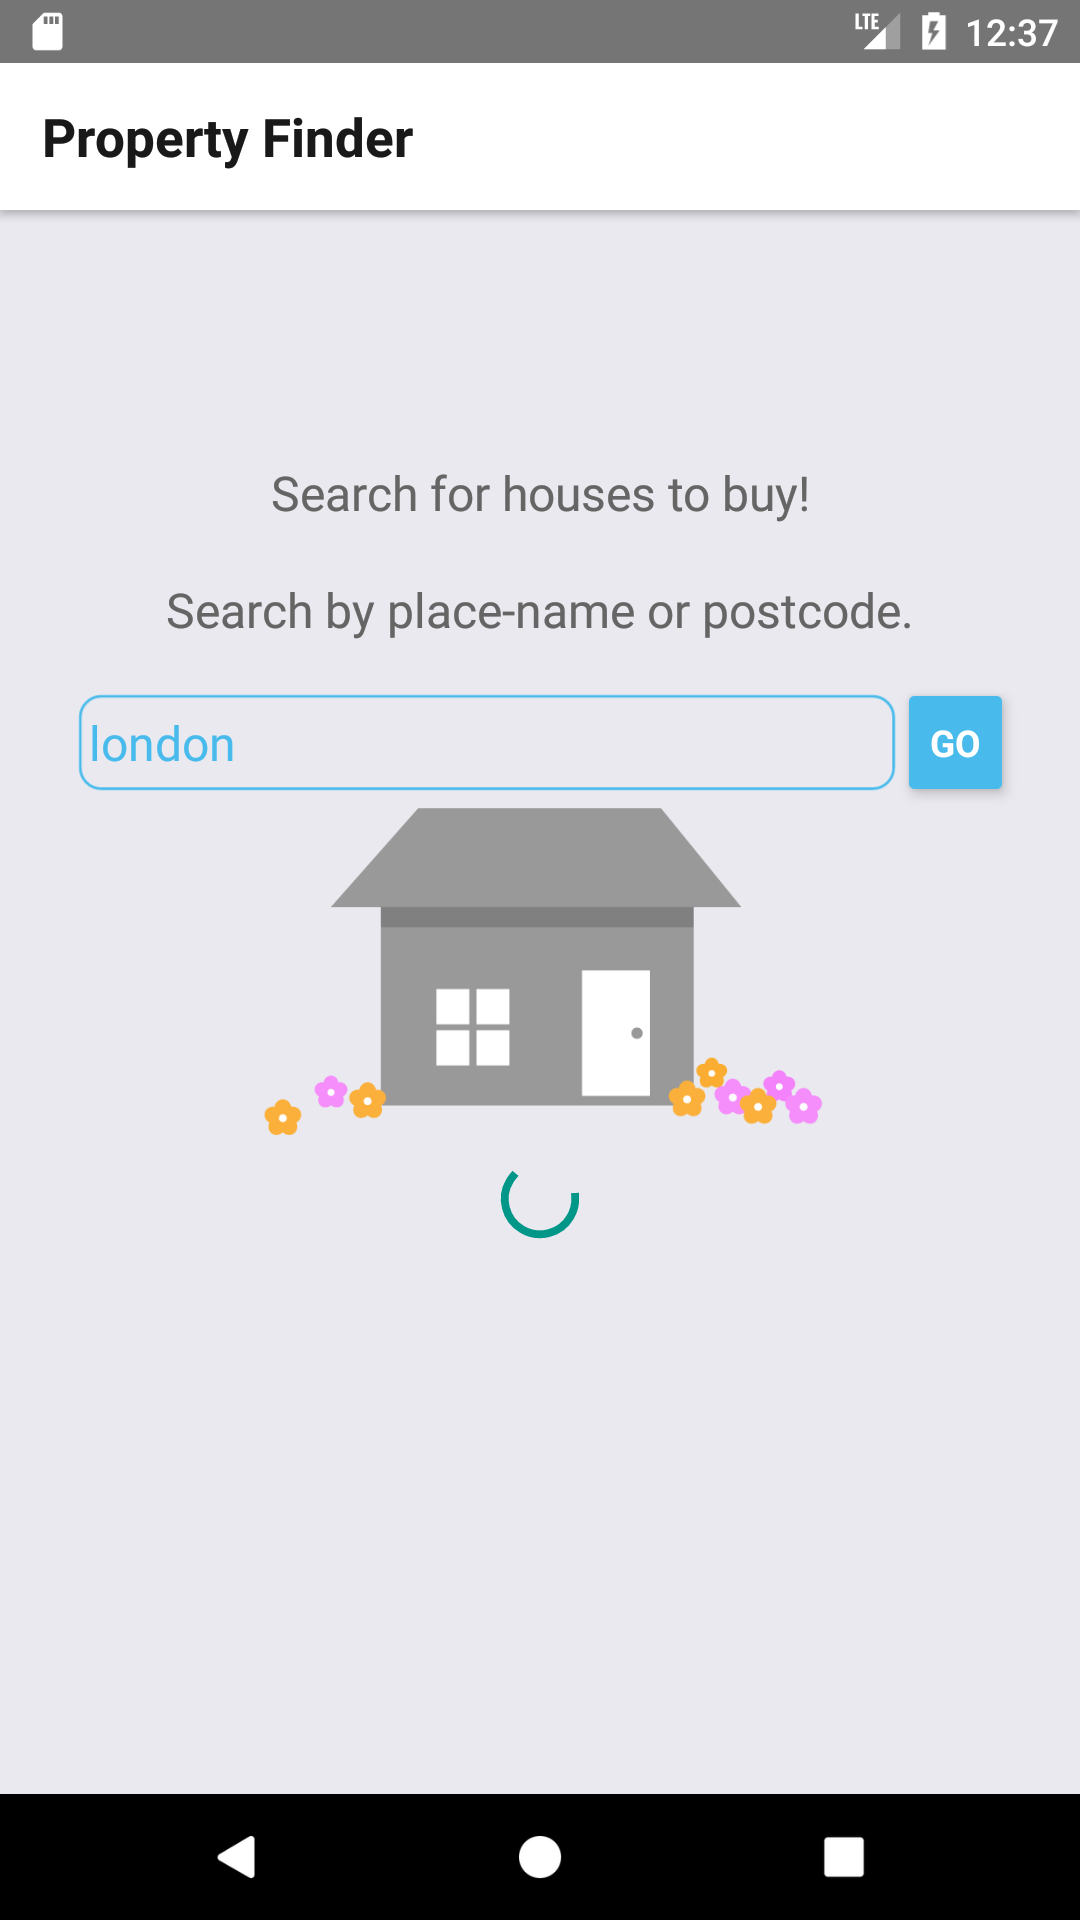
console.log('SearchPage.render');Save your changes and return to your emulator. You should see the text input's initial value set to london:

Run the following in terminal to view the debug logs:
react-native log-android
In the emulator, edit the input text. You should see something like this:
08-01 18:09:02.720  5444  8028 I ReactNativeJS: SearchPage.render
08-01 18:09:33.453  5444  8028 I ReactNativeJS: _onSearchTextChanged
08-01 18:09:33.453  5444  8028 I ReactNativeJS: Current: london, Next: londona
08-01 18:09:33.454  5444  8028 I ReactNativeJS: SearchPage.render
Looking at the console logs, the order of the logging statement seems a little odd:
- This is the initial call to
render()to set up the view. - You invoke
_onSearchTextChanged()when the text changes. - You call
this.setState()to schedule an update to the component state to reflect the new input text. This triggers another render. - You log the current and the next search text values.
A React component state change triggers a UI update. This de-couples the rendering logic from state changes affecting the UI. Most other UI frameworks put the onus on you to update the UI based on state changes. Alternatively, the updates are done through an implicit link between the state and UI, for example by using Android's Data Binding Library.
At this point you've probably spotted a fundamental flaw in this concept. Yes, that's right --- performance!
Surely you can't just throw away your entire UI and re-build it every time something changes? This is where React gets really smart.
Each time the UI renders itself, it takes the view tree returned by your render methods, and reconciles --- or diffs --- it with the current Android UI view. The output of this reconciliation process is a simple list of updates that React needs to apply to the current view. That means only the things that have actually changed will re-render!
You can wrap your head around all that later; you still have some work to do in the app.
Initiating a Search
First, remove the logging code you just added above, you'll no longer need it.
In order to implement the search functionality you need to handle the Go button press, create a suitable API request, and provide a visual indication that a query is in progress.
Within SearchPage.js, update the initial state within the constructor:
this.state = {
  searchString: 'london',
  isLoading: false,
};
The new isLoading property will keep track of whether a query is in progress.
Add the following logic to the start of render:
const spinner = this.state.isLoading ?
  <ActivityIndicator size='large'/> : null;
This is a ternary if statement that optionally adds an activity indicator, depending on the component's isLoading state. Because the entire component is rendered each time, you are free to mix JSX and JavaScript logic.
Within the JSX that defines the search UI in return, add the following line below the Image to place the spinner:
{spinner}Next, add the following methods to the SearchPage class:
_executeQuery = (query) => {
  console.log(query);
  this.setState({ isLoading: true });
};

_onSearchPressed = () => {
  const query = urlForQueryAndPage('place_name', this.state.searchString, 1);
  this._executeQuery(query);
};
_executeQuery() will eventually run the query, but for now it simply logs a message to the console and sets isLoading appropriately so the UI can show the new state.
_onSearchPressed() configures and initiates the search query. This should kick off when the Go button is pressed.
To accomplish that, go back to the render method and replace the onPress prop for the Go Button as follows:
onPress={this._onSearchPressed}
Finally, add the following utility function just above the SearchPage class declaration:
function urlForQueryAndPage(key, value, pageNumber) {
  const data = {
      country: 'uk',
      pretty: '1',
      encoding: 'json',
      listing_type: 'buy',
      action: 'search_listings',
      page: pageNumber,
  };
  data[key] = value;

  const querystring = Object.keys(data)
    .map(key => key + '=' + encodeURIComponent(data[key]))
    .join('&');

  return 'https://api.nestoria.co.uk/api?' + querystring;
}
urlForQueryAndPage doesn't depend on SearchPage, so it's implemented as a free function rather than a method. It first creates the query string based on the parameters in data. Then it transforms the data into name=value pairs separated by ampersands. Finally, it calls the Nestoria API to return the property listings.
Save your changes, head back to the emulator and press Go. You'll see the activity indicator spin:
In terminal, the debug logs should show something like this:
08-01 18:14:45.110 5444 8308 I ReactNativeJS: https://api.nestoria.co.uk/api?country=uk&pretty=1&encoding=json&listing_type=buy&action=search_listings&page=1&place_name=london
Copy and paste that URL into your browser to see the result. You'll see a massive JSON object. Don't worry --- you don't need to understand that! You'll add code to parse that now.
Performing an API Request
Still within SearchPage.js, update the initial state in the class constructor to add a message variable to the end of the list:
message: '',Within render, add the following to the bottom of your UI, right after the spinner:
<Text style={styles.description}>{this.state.message}</Text>You'll use this to display a range of messages to the user.
Add the following code to the end of _executeQuery:
fetch(query)
  .then(response => response.json())
  .then(json => this._handleResponse(json.response))
  .catch(error =>
     this.setState({
      isLoading: false,
      message: 'Something bad happened ' + error
   }));
This makes use of the fetch function, which is part of the Fetch API. The asynchronous response is returned as a Promise. The success path calls _handleResponse which you'll define next, to parse the JSON response.
Add the following function to SearchPage:
_handleResponse = (response) => {
  this.setState({ isLoading: false , message: '' });
  if (response.application_response_code.substr(0, 1) === '1') {
    console.log('Properties found: ' + response.listings.length);
  } else {
    this.setState({ message: 'Location not recognized; please try again.'});
  }
};
This clears isLoading and logs the number of properties found if the query was successful.
Note: Nestoria has a number of non-1** response codes that are potentially useful. For example, 202 and 200 return a list of best-guess locations.
Save your changes, head back to the emulator and press Go. You should see a debug log message saying that 20 properties (the default result size) were found:
08-01 18:18:07.261 5444 8447 I ReactNativeJS: Properties found: 20
Also note that when this message is logged, the spinner goes away.
It's time to see what those 20 properties actually look like!
Displaying the Results
Create a new file SearchResults.js, and add the following:
'use strict';

import React, { Component } from 'react'
import {
  StyleSheet,
  Image,
  View,
  TouchableHighlight,
  FlatList,
  Text,
} from 'react-native';
This imports the relevant modules you'll use.
Next, add the component:
type Props = {};
export default class SearchResults extends Component<Props> {
  static navigationOptions = {
    title: 'Results',
  };

  _keyExtractor = (item, index) => index.toString();

  _renderItem = ({item}) => {
    return (
      <TouchableHighlight
        underlayColor='#dddddd'>
        <View>
          <Text>{item.title}</Text>
        </View>
      </TouchableHighlight>
    );

  };

  render() {
    const { params } = this.props.navigation.state;
    return (
      <FlatList
        data={params.listings}
        keyExtractor={this._keyExtractor}
        renderItem={this._renderItem}
      />
    );
  }
}
The above code makes use of a more specialized component --- FlatList --- which displays rows of data within a scrolling container, similar to RecyclerView. Here's a look at the FlatList properties:
dataprovides the data to displaykeyExtractorprovides a unique key that React uses for efficient list item managementrenderItemspecifies how the UI is rendered for each row
Save your new file.
In App.js, add the following just beneath the import statements:
import SearchResults from './SearchResults';This brings in the newly added SearchResults class.
Now, modify your createStackNavigator as follows:
const App = createStackNavigator({
  Home: { screen: SearchPage },
  Results: { screen: SearchResults },
});
This adds a new route named Results to the navigator and registers SearchResultsas the component that will handle this route. When a component is registered with a navigator, it gets a navigation prop added to it that can be used to manage screen transitions and pass in data.
Save your file changes.
In SearchPage.js, go to _handleResponse and replace the console.log statement with the following:
this.props.navigation.navigate( 'Results', {listings: response.listings});
This navigates to your newly added route and passes in the listings data from the API request via the params argument.
Save your changes, head back to the emulator and press Go. You'll be greeted by a list of properties:

It's great to see the property listings, but that list is a little drab. Time to liven things up a bit.
A Touch of Style
Add the following style definition at the end of SearchResults.js:
const styles = StyleSheet.create({
  thumb: {
    width: 80,
    height: 80,
    marginRight: 10
  },
  textContainer: {
    flex: 1
  },
  separator: {
    height: 1,
    backgroundColor: '#dddddd'
  },
  price: {
    fontSize: 25,
    fontWeight: 'bold',
    color: '#48BBEC'
  },
  title: {
    fontSize: 20,
    color: '#656565'
  },
  rowContainer: {
    flexDirection: 'row',
    padding: 10
  },
});
This defines all the styles that you are going to use to render each row.
Add a new component representing a row by adding the following just under the import statements:
class ListItem extends React.PureComponent {
  _onPress = () => {
    this.props.onPressItem(this.props.index);
  }

  render() {
    const item = this.props.item;
    const price = item.price_formatted.split(' ')[0];
    return (
      <TouchableHighlight
        onPress={this._onPress}
        underlayColor='#dddddd'>
        <View>
          <View style={styles.rowContainer}>
            <Image style={styles.thumb} source={{ uri: item.img_url }} />
            <View style={styles.textContainer}>
              <Text style={styles.price}>{price}</Text>
              <Text style={styles.title}
                numberOfLines={1}>{item.title}</Text>
            </View>
          </View>
          <View style={styles.separator}/>
        </View>
      </TouchableHighlight>
    );
  }
}
This manipulates the returned price, which is in the format 300,000 GBP, to remove the GBP suffix. Then it renders the row UI using techniques that you are by now quite familiar with. Of note, an Image is added to the row and is loaded from a returned URL (item.img_url) which React Native decodes off the main thread.
You may have noticed that this component extends React.PureComponent. React re-renders a Component if its props or state changes. React only re-renders a PureComponent if a shallow compare of the state and props shows changes. Used under the right conditions, this can give your app a performance boost.
Now replace _renderItem with the following:
_renderItem = ({item, index}) => (
  <ListItem
    item={item}
    index={index}
    onPressItem={this._onPressItem}
  />
);

_onPressItem = (index) => {
  console.log("Pressed row: "+index);
};
_onPressItem is passed into ListItem to handle a row selection. This design pattern is equivalent to a callback. In this callback, the index for the selected row is logged.
Save your work, head back to the emulator, press Go, and check out your results:

Tap the first row and verify that your debug console reflects the selection:
08-01 18:32:00.670 5444 9047 I ReactNativeJS: Pressed row: 0
Try tapping other listings or searching other locations in the UK.
Where To Go From Here?
Congratulations on completing this React Native tutorial! You can find the complete project here if you want to compare notes. :]
As a challenge, try showing a property's details when the user selects one from the search list. You can check out the challenge solution if you get stuck.
Before opening the finished project or the challenge solution, first run yarn in terminal in the root folder of the project.
Check out the React Native's source code if you're curious. I suggest taking a look at this ES6 resource to continue brushing up on modern JavaScript.
You may also want to check out the equivalent tutorial for building React Native apps on iOS.
If you're a web developer, you've seen how to use JavaScript to easily create a native app. If you're a native app developer, you've gained some appreciation for React Native's fast iteration cycle. Whether you decide to use React Native in a future app or simply stick with native Android, I hope you've learned some interesting principles to apply to your next project.
If you have any questions or comments on this React Native tutorial, feel free to join the discussion in the forums below!