Today we'll build a shopping cart for a sticker store:
You can play with this live: http://redux-cart.surge.sh/
The workshops starts us off with a basic "store listing" page. Lots of items are for sale, but nothing is wired up; there's no behaviour yet.
Please take a moment to poke at the existing components, and learn how the app is structured.
Before we do anything else, we need to get some basic Redux structure in place!
Install the following NPM dependencies:
- redux
- react-redux
Create a new file, src/reducers/index.js. For now, our reducer won't be very interesting:
const initialState = {};

export default function cartReducer(state = initialState, action) {
  switch (action.type) {
    default:
      return state;
  }
}
⚠️ Friendly reminder, you'll be much better off if you take the time to write out the snippets on this page! Copying/pasting is faster, but you'll never learn this structure if you don't take the time to write it out.
Let's use that reducer in our main index, src/index.js:
import React from 'react';
import ReactDOM from 'react-dom';
+import { createStore } from 'redux';
+import { Provider } from 'react-redux';

+import reducer from './reducers';
import App from './components/App';

+const store = createStore(
+  reducer,
+  window.__REDUX_DEVTOOLS_EXTENSION__ && window.__REDUX_DEVTOOLS_EXTENSION__()
+);

const rootElement = document.getElementById('root');

ReactDOM.render(
-  <App />
+  <Provider store={store}>
+    <App />
+  </Provider>,
  rootElement
);
To review, a few things are happening here:
- We import the reducer we just created
- We create a new Redux store with that reducer, as well as some code to enable the Redux browser devtools.
- We import
Providerfrom the react-redux bindings, and pass it our new store. TheProviderwraps around our entire application.
Finally, create 1 more new file: src/actions.js. For now, it can remain empty.
Take some time to create the components and styles we'll need for the shopping cart!
It's up to you how to structure this, but one way to do this involves creating two new components:
<Cart /><CartItem />
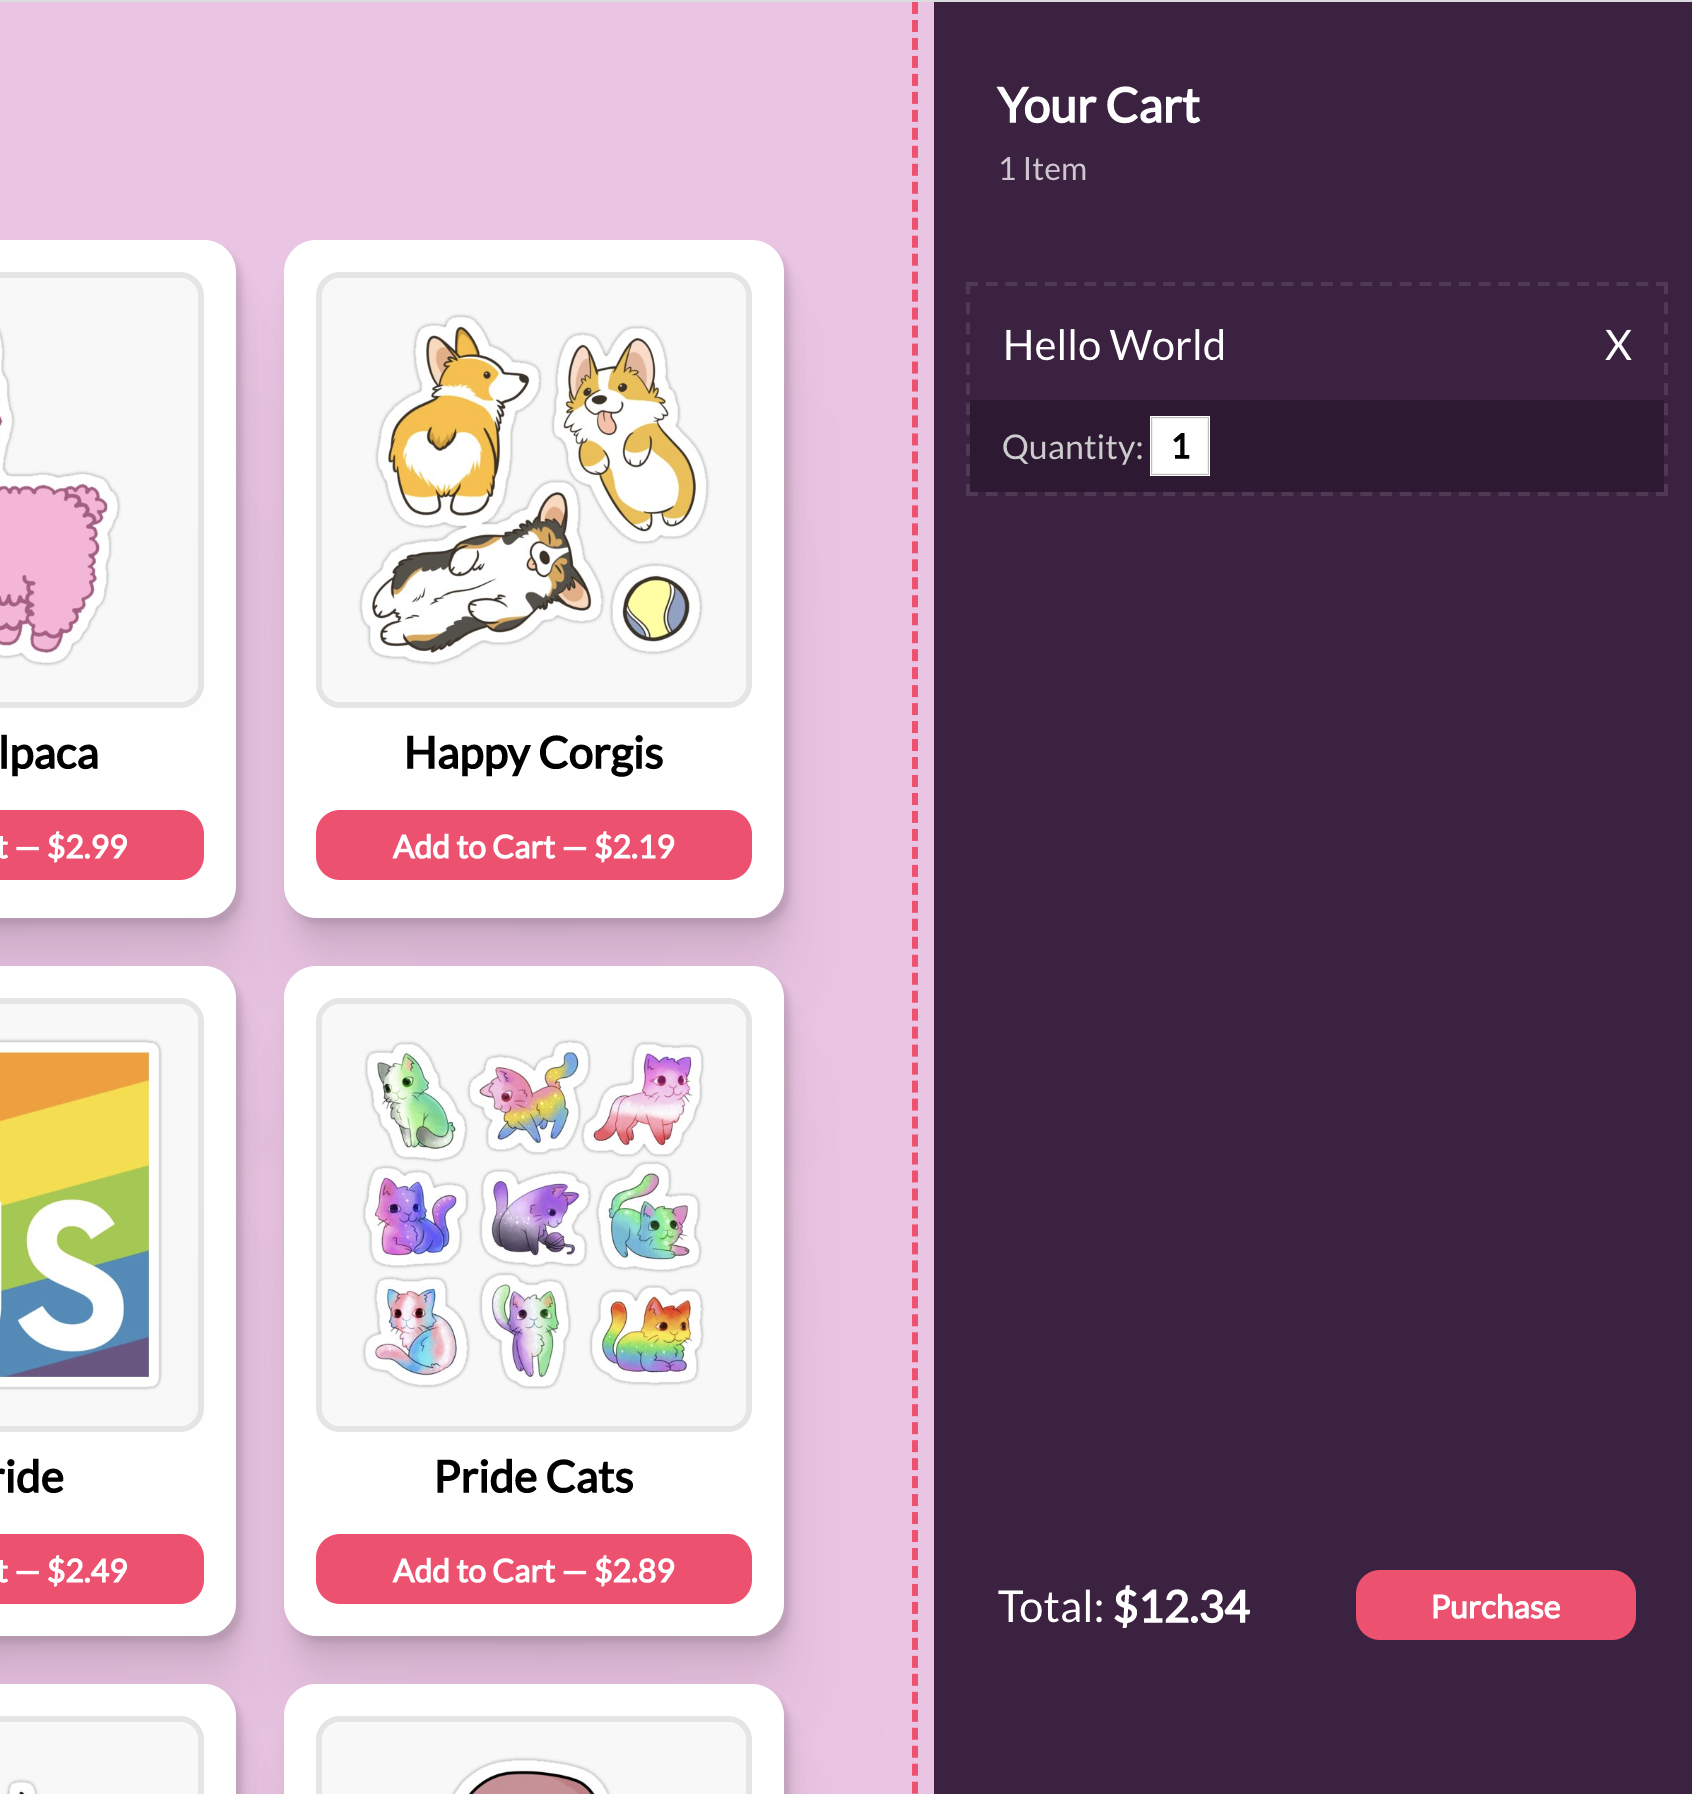
For now, feel free to use fake data. Make sure that your cart UI looks something like this:
This is a "rough" match of the final solution. It's up to you how closely you want to match the styling.
HINT: If you'd rather not use the letter "X" for the close button, feel free to use react-icons-kit!
HINT: If you want the input to have that "underline" style, set the background to transparent, and remove all but the bottom border.
Inside the empty actions.js file, let's add our first action creator:
+export const addItem = item => ({
+  type: 'ADD_ITEM',
+  item,
+});
This is the action we'll dispatch when the user clicks "Add to cart".
Inside StoreItem.js, let's wire it up to dispatch this action.
import React from 'react';
+import { useDispatch } from 'react-redux';
import styled from 'styled-components';

+import { addItem } from '../../actions';

import Button from '../Button';

const StoreItem = ({ id, title, src, price }) => {
+ const dispatch = useDispatch();

  return (
    <Wrapper>
      <ImageWrapper>
        <Image src={src} alt={`${title} sticker`} />
      </ImageWrapper>
      <Title>{title}</Title>
-     <Button>Add to Cart</Button>
+     <Button
+       onClick={() =>
+         dispatch(addItem({ id, title, price }))
+       }
+     >
+       Add to Cart
+     </Button>
    </Wrapper>
  );
};
dispatch is a function we get from the useDispatch Redux hook. We call this when we want to tell redux that something happened.
When the user clicks the button, we create the ADD_ITEM action with the addItem function, and dispatch it to the store.
Next, we need to update our reducer to handle this action. Remember, actions describe a change, but they aren't opinionated about what should happen as a result.
Add this to our reducer/index.js file:
const initialState = {};

export default function cartReducer(state = initialState, action) {
  switch (action.type) {
+   case 'ADD_ITEM': {
+     return {
+       ...state,
+       [action.item.id]: {
+         ...action.item,
+         quantity: 1,
+       }
+     }
+   }

    default:
      return state;
  }
}
When we receive the ADD_ITEM action, we produce a new copy of the state, with an added item.
All the ... might be confusing, so to clarify: Redux works with immutable state. That means we aren't allowed to mutate the state object, we have to produce a brand new object.
We can imagine the following transformations:
Our initial state: {}

We dispatch an action that looks like this:
{ type: 'ADD_ITEM', item: { id: 'a', price: 100 } }

Our state now looks like:
{
  a: {
    id: 'a',
    price: 100,
    quantity: 1,
  }
}

Next, we dispatch this action:
{ type: 'ADD_ITEM', item: { id: 'b', price: 200 } }

This produces a new state object:
{
  a: {
    id: 'a',
    price: 100,
    quantity: 1,
  },
  b: {
    id: 'b',
    price: 200,
    quantity: 1,
  },
}
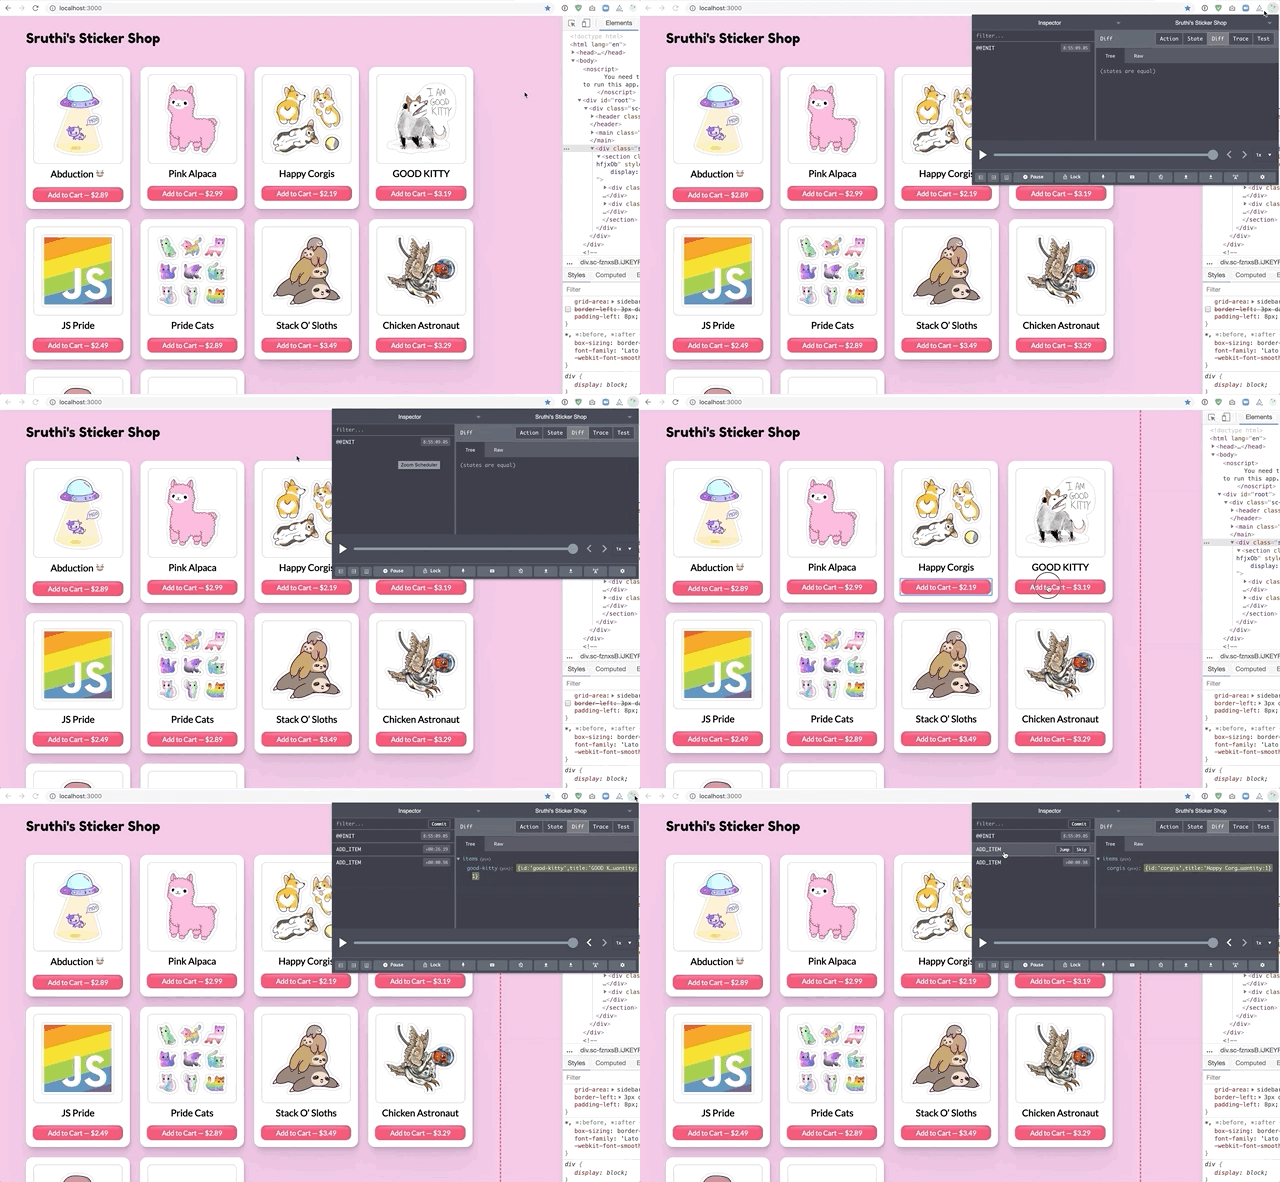
Verify that this works using the Redux devtools. Whenever you click "Add to Cart", you should see the update reflected:
Next, in the Cart component you created, we need to select that state and do something with it. The initial state will depend based on how you built the component, but here's the relevant Redux part:
const Cart = () => {
+ const state = useSelector(state => state)
  return (
    <Wrapper>
      {/* Your stuff here */}
    </Wrapper>
  )
}
useSelector selects a slice of the Redux state. In this first example we're selecting all of the state.
There's a problem though. We want to select the state as an array of items, so that we can map through them in our React component. Right now our state is an object.
We need to specify a custom selector function, something like:
const getStoreItemArray = (state) => Object.values(state);It's good practice to keep selector functions colocated with the reducers. So, let's move this function to the reducer file:
const initialState = {};

export default function cartReducer(state = initialState, action) {
  switch (action.type) {
    case 'ADD_ITEM': {
      return {
        ...state,
        [action.item.id] = {
          ...action.item,
          quantity: 1,
        }
      }
    }

    default:
      return state;
  }
}

+export const getStoreItemArray = state =>
+ Object.values(state);
We can then import that selector into our Cart component, and use it to get an array of store items:
import { getStoreItemArray } from '../../reducers';

const Cart = () => {
  const storeItems = useSelector(getStoreItemArray);

  return <Wrapper>{/* Your stuff here */}</Wrapper>;
};
At this point, you have an array full of store items. Mapping over data should be familiar territory at this point, so the instructions will leave you to it. You can consult previous workshops to see how we map over data in JSX.
In Exercise 2, we added a little "x" icon to each cart item. Now we need to use it to remove items from the cart!
This is very similar to adding items, so it's left as an exercise.
HINT: Create a new action creator, removeItem, that creates an action, REMOVE_ITEM.
HINT: the delete operator is a mutative argument, and you can't use it directly on the state. Instead you can create a new copy of the state, and delete it from that copy:
const state = {
  /* immutable state obhect */
};
const stateCopy = { ...state }; // New object we CAN mutate
delete stateCopy[someId];We want to let the user change the quantity of items in the cart, in two different ways:
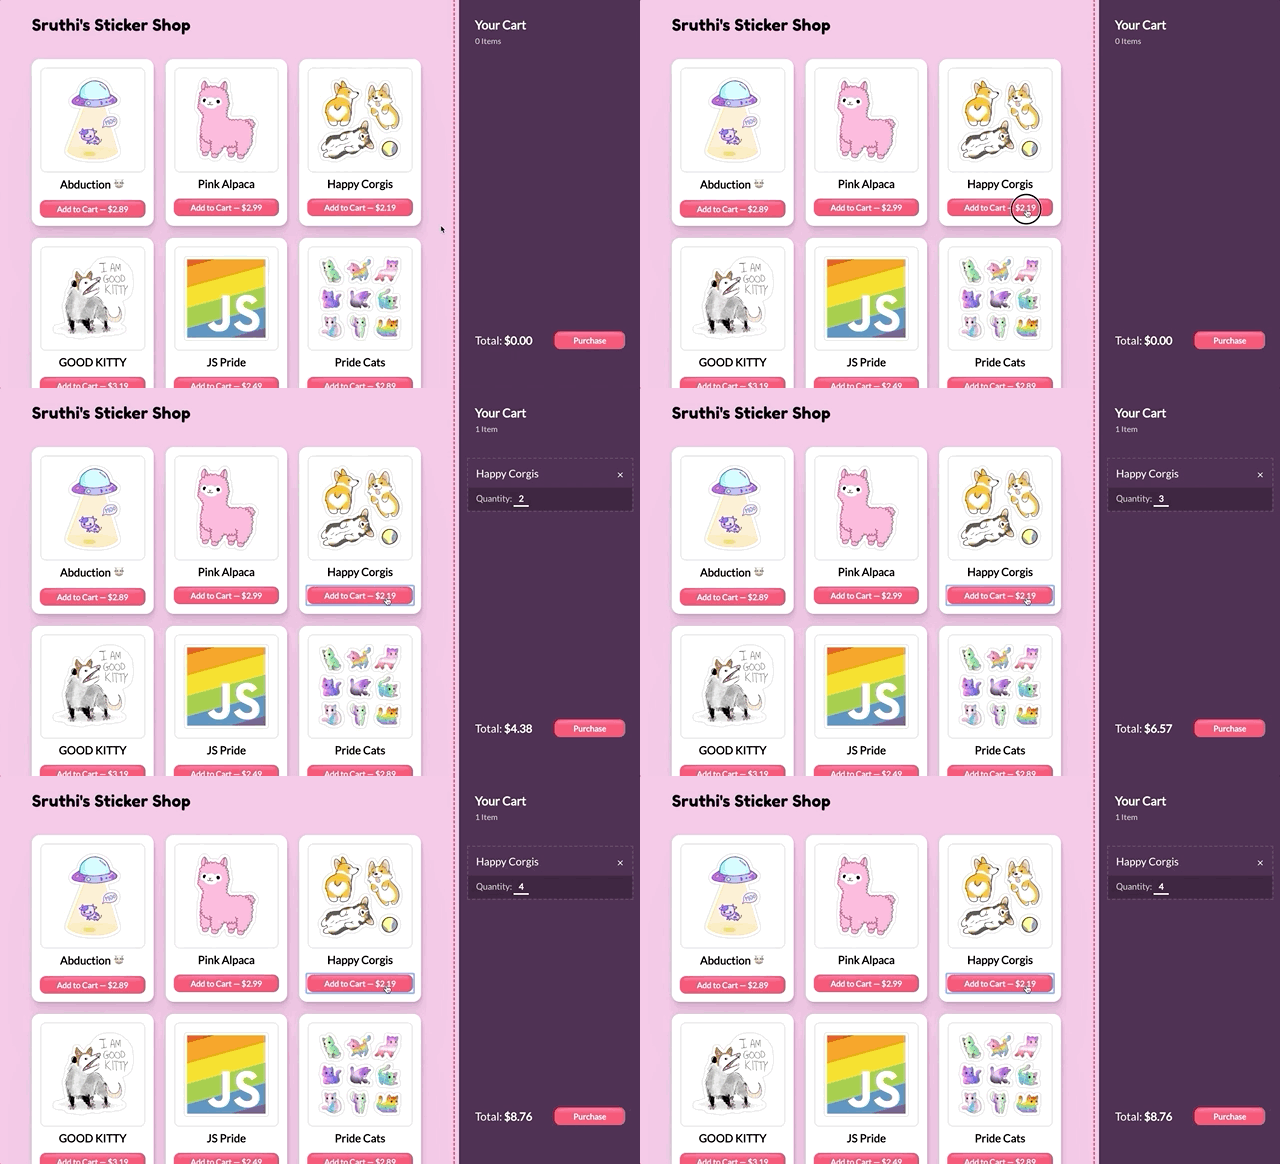
- Clicking the "Add to cart" button should add 1 more quantity each time:
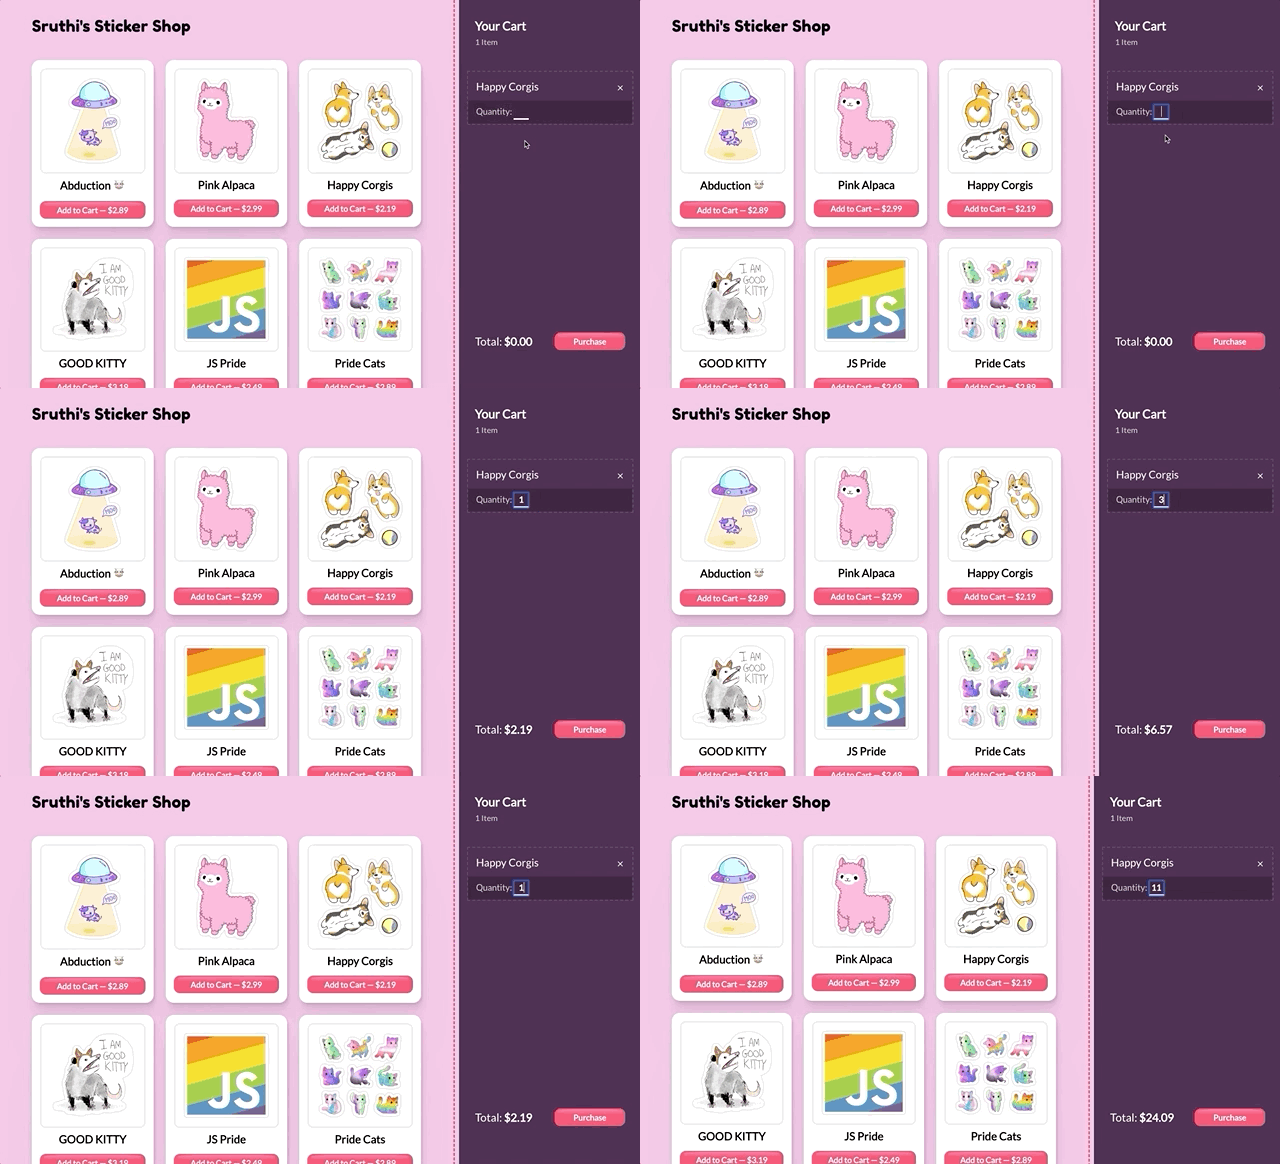
- Typing a new number in the input:
Once again, this will be left up to you. The nice thing about Redux is that it's generally pretty consistent: new features follow the same patterns.
HINT: For clicking "Add to cart", it can continue to use the ADD_ITEM action. You'll need to tweak the reducer, to increment the quantity in that slice of the reducer.
HINT: For interacting with the "Quantity" input, you'll want to create a new action, UPDATE_QUANTITY. The action will need two pieces of information: the new quantity, and the item ID.
HINT: We want the "Total" shown in the bottom right to update immediately, so be sure to dispatch the action when the user types in the input (onChange).
The Redux Devtools are awesome. Now that your app has a few different actions, it's time to experiment with them!
Start by performing a bunch of actions (add some items, update quantities, remove items, re-add them). Then, try some of these things out:
- Jump to items in the past, notice how that change is reflected in the UI
- What happens if you skip a few actions? What happens to the current state of the UI?
- What does the "Diff" tab in the devtools tell you?
- Use the scrubber to rewind, and press the "Play" button
- Download the Redux state, refresh the page, and upload it (see the up and down arrows in the bottom row).
NOTE: There is nothing to hand in for this exercise. This is meant as practice!
Add a new button, "Clear cart", which removes all items from the cart.
The design does not specify where this button should go, so consider this a good opportunity to hone your design instincts as well as your programming skills!
Some considerations:
-
It should be placed in a location that is prominent enough to be found without too much hunting, but also not easy to accidentally click (imagine a user spending 10 minutes building up a precise order, only to accidentally throw all that state away!)
-
The only button style right now is "primary": it's big and glossy and prominent. The "Clear cart" button should probably be a bit more subdued. Consider adding a "type" prop to the
Buttoncomponent. Maybe the button could have a translucent black background, or a transparent background with a subtle border? Consider looking at established design libraries like "Material UI" to see how they manage alternate button styles
In a real e-commerce store, users might have to pay sales tax.
Add a <select> input to the cart side-panel, and add options for each of the Canadian provinces. Depending on which province is selected, the province's relevant sales tax should be applied to the total price.
For reference, sales taxes by province:
| Province | Tax |
|---|---|
| Alberta | 5% |
| British Columbia | 12% |
| Manitoba | 12% |
| New-Bruinswick | 15% |
| Newfoundland/Labrador | 15% |
| Northwest Territories | 5% |
| Nova Scotia | 15% |
| Nunavut | 5% |
| Ontario | 13% |
| PEI | 15% |
| Quebec | 14.975% |
| Saskatchewan | 11% |
| Yukon | 5% |


