
A simple and minimalistic static-site generator for Python.
Current version: v0.1.1 - "Danger noodle"
- Concept
- Getting Started
- Folders structure
- Configuration
- Content management
- Shared data
- Templating
- Netlify and Netlify CMS (optional)
- API reference ?
- Contributing
Follow me on Twitter: @macargnelutti.
- It has to be as simple as possible, end to end
- It has to work as a Python module so it can be integrated in any program
- JSON front-matter + Markdown content files
- JSON shared data files that can be accessed from any template
- Works as a Python module, can be integrated and extended easily
- Mako templating engine
- Out-of-the box SASS processing
- Compatible with Netlify and Netlify CMS
- Simple structure: few requirements and interchangeable folders architecture.
I really hope you'll like this very first version of Snek. Without further ado: let's get started.
- A UNIX-like OS (Linux, MacOS, etc ...)
- Curl (Mac users can install it via brew.sh.)
- Python 3.7.3 minimum
- pipenv
From your empty project's folder, run the following command:
curl https://raw.githubusercontent.com/matteocargnelutti/snektools/master/snektools.sh > snektools.sh && chmod a+x snektools.sh && ./snektools.shThis will install the snektools, a series of bash scripts that will help you with your Snek project, and run snekinit that will install a basic project template.
We'll review the project's structure in the Folders structure chapter of this document.
If you'd rather install everything manually, you can install snek-framework from Pypi via pip.
Snek's main mission is to process files to generate HTML pages. The project template installed by snekinit contains enough data to do just that, let's give it a try.
website.py contains a bit of minimal bootstrap code allowing to build the website:
website = Snek()
website.build()
To build the current project, simply run pipenv run python website.py (or simply python website.py if you already are within your pipenv environment): this will generate your website in a folder named build/.
Inside this folder, you will see an index.html file: the Snek has done its job and has built the website.
One of the snektools, snekserve, does two things:
- It builds your website by calling
website.pyevery time a file changes within the project - It serves the content of the
build/folder over HTTP. The page refreshes automatically when something changes.
This allows you to edit your website and see the changes in real-time in the browser.
Inside your project folder, simply run:
./snekserve.shOpen your browser, and go to http://localhost:8081 to see your website:
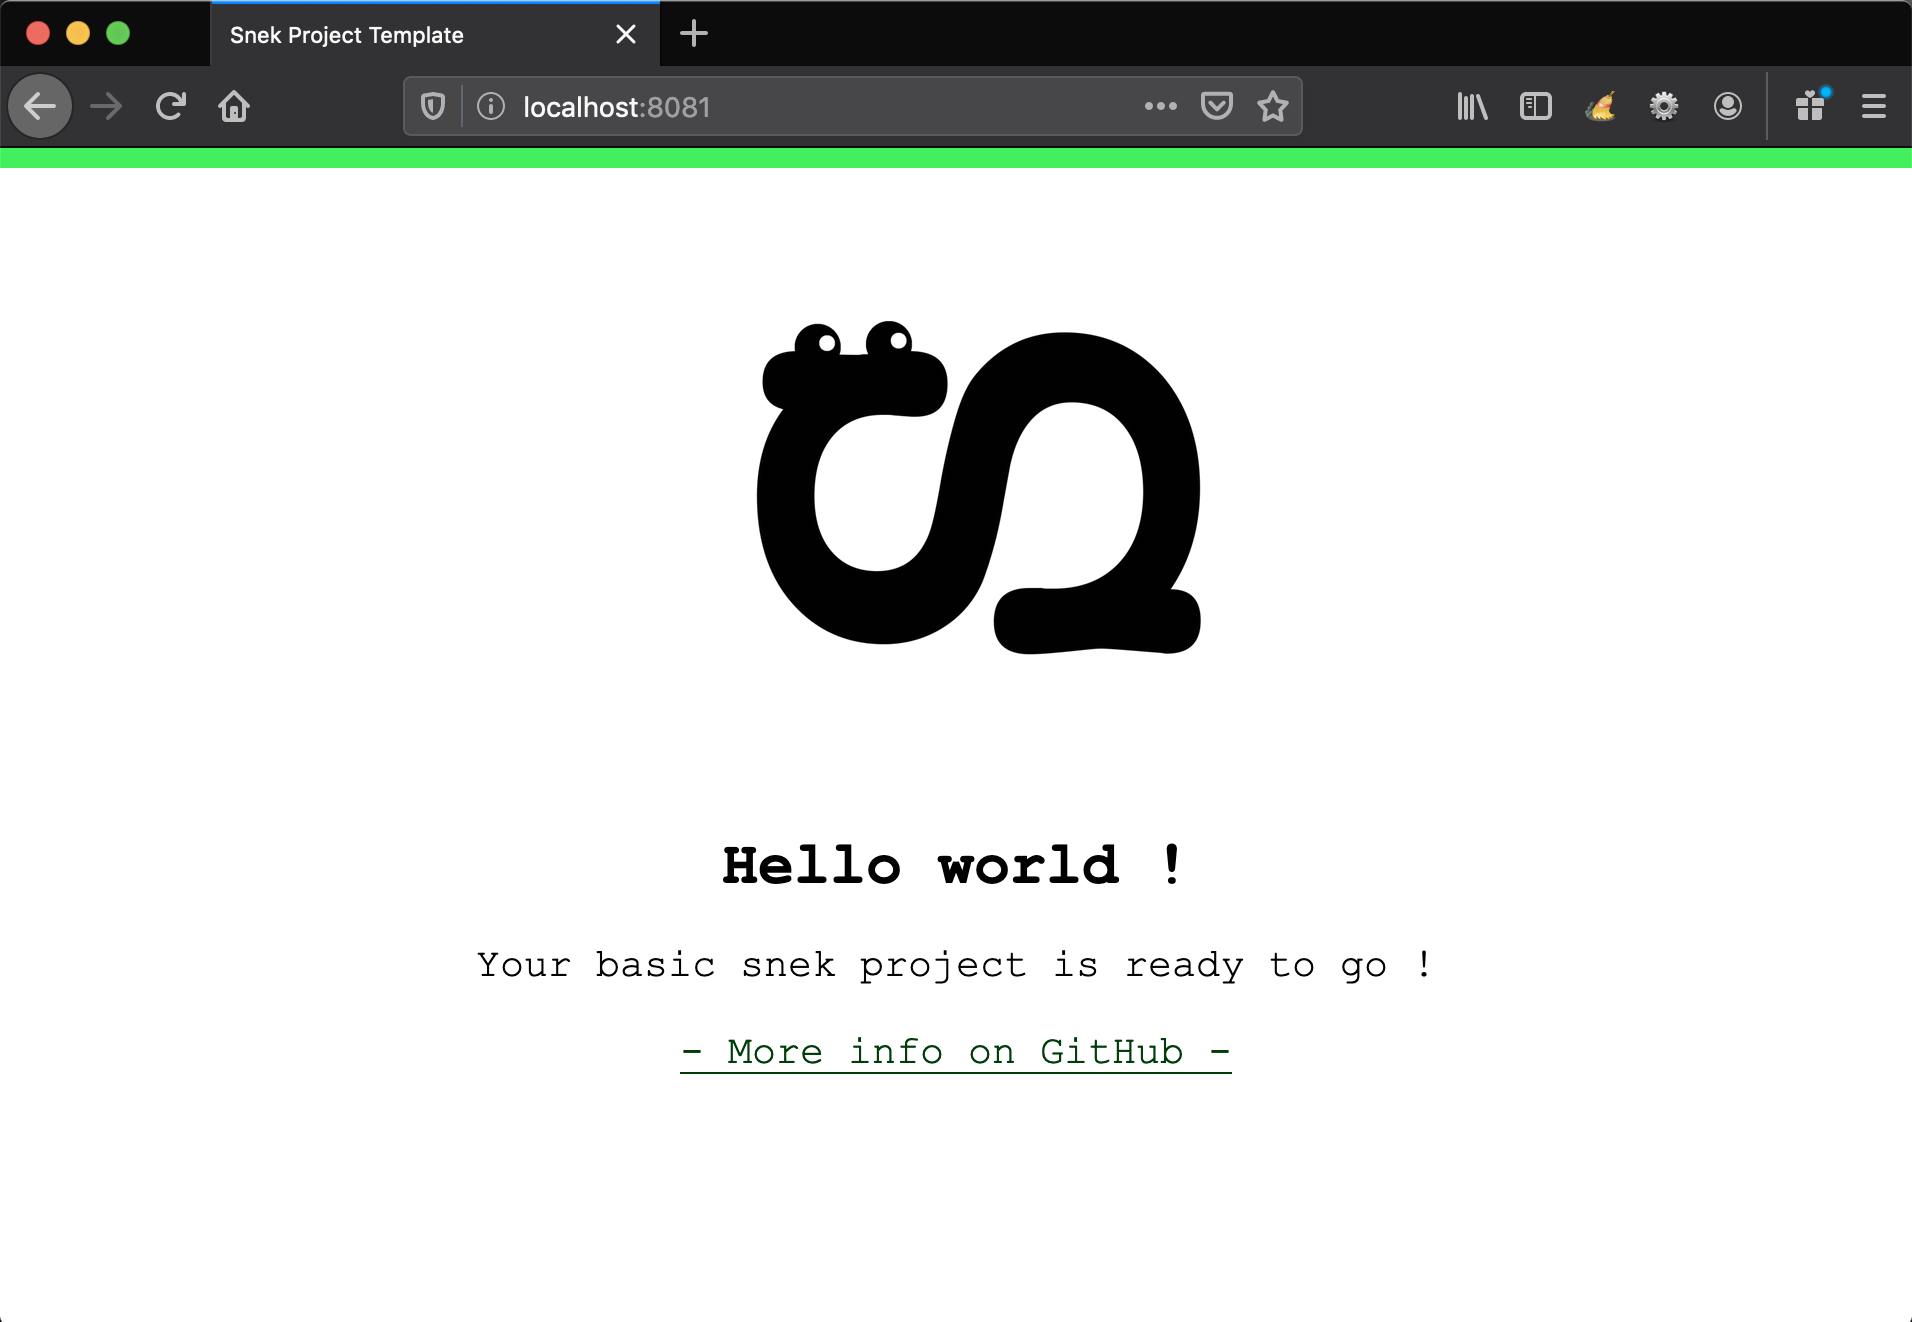
You are now ready to go ! Let's dive a little bit deeper to see what we can do.
Once your project is initialized, its structure should look like this. The folder structure described here can be entierly changed via SnekConfig
| Folder or file | Role |
|---|---|
assets/ |
Contains all the static files that the website needs. |
build/ |
The generated website will live here. Created on the spot if need be. |
content/ |
Contains .json.md (json front-matter markdown) representing content pages. Can contain nested folders. |
data/ |
Contains .json file used as "shared data" across all templates. Can contain nested folders. |
js/ |
Contains JavaScript files that the website needs. |
scss/ |
Contains .scss files to be processed. Processed files will be in a css sub-folder of build/ once the website is built. |
css/ |
Optional. To be used if scss processing is deactivated. Will contain all the css files the website needs. |
templates/ |
Contains mako templates. |
website.py |
Main entry point. This file will build the website. |
Snek's can be used out of the box without any configuration, but every parameter can be changed via SnekConfig object passed to Snek.
| Parameter name | Type | Description | Default |
|---|---|---|---|
build_path |
str | Path to the project's build destination. Will be created if it does not exists. | './build' |
content_path |
str | Path to the project's content files. Must exist. | './content' |
data_in_build |
bool | If True, will copy data files to the built websites so they can be accessed via JavScript. | 'False' |
data_path |
str | Path to the project's data files. | './data' |
templates_path |
str | Path to the project's templates files. | './templates' |
js_path |
str | Path to the project's JavaScript files. | './js' |
assets_path |
str | Path to the project's assets files. | './assets' |
css_path |
str | Path to the project's CSS files. Ignored if scss_active is True. | './css' |
scss_active |
bool | Determines if files from the SCSS folder should be processed instead of CSS. | True |
scss_path |
str | Path to the project's SCSS files. | './scss' |
scss_output_style |
str | Can be 'compressed' , 'nested' or 'expanded'. |
'/compressed' |
To replace the default configuration by a custom one, simply create a SnekConfig object to be passed to Snek.
from snek import Snek, SnekConfig

config = SnekConfig(scss_active=False)
website = Snek(config)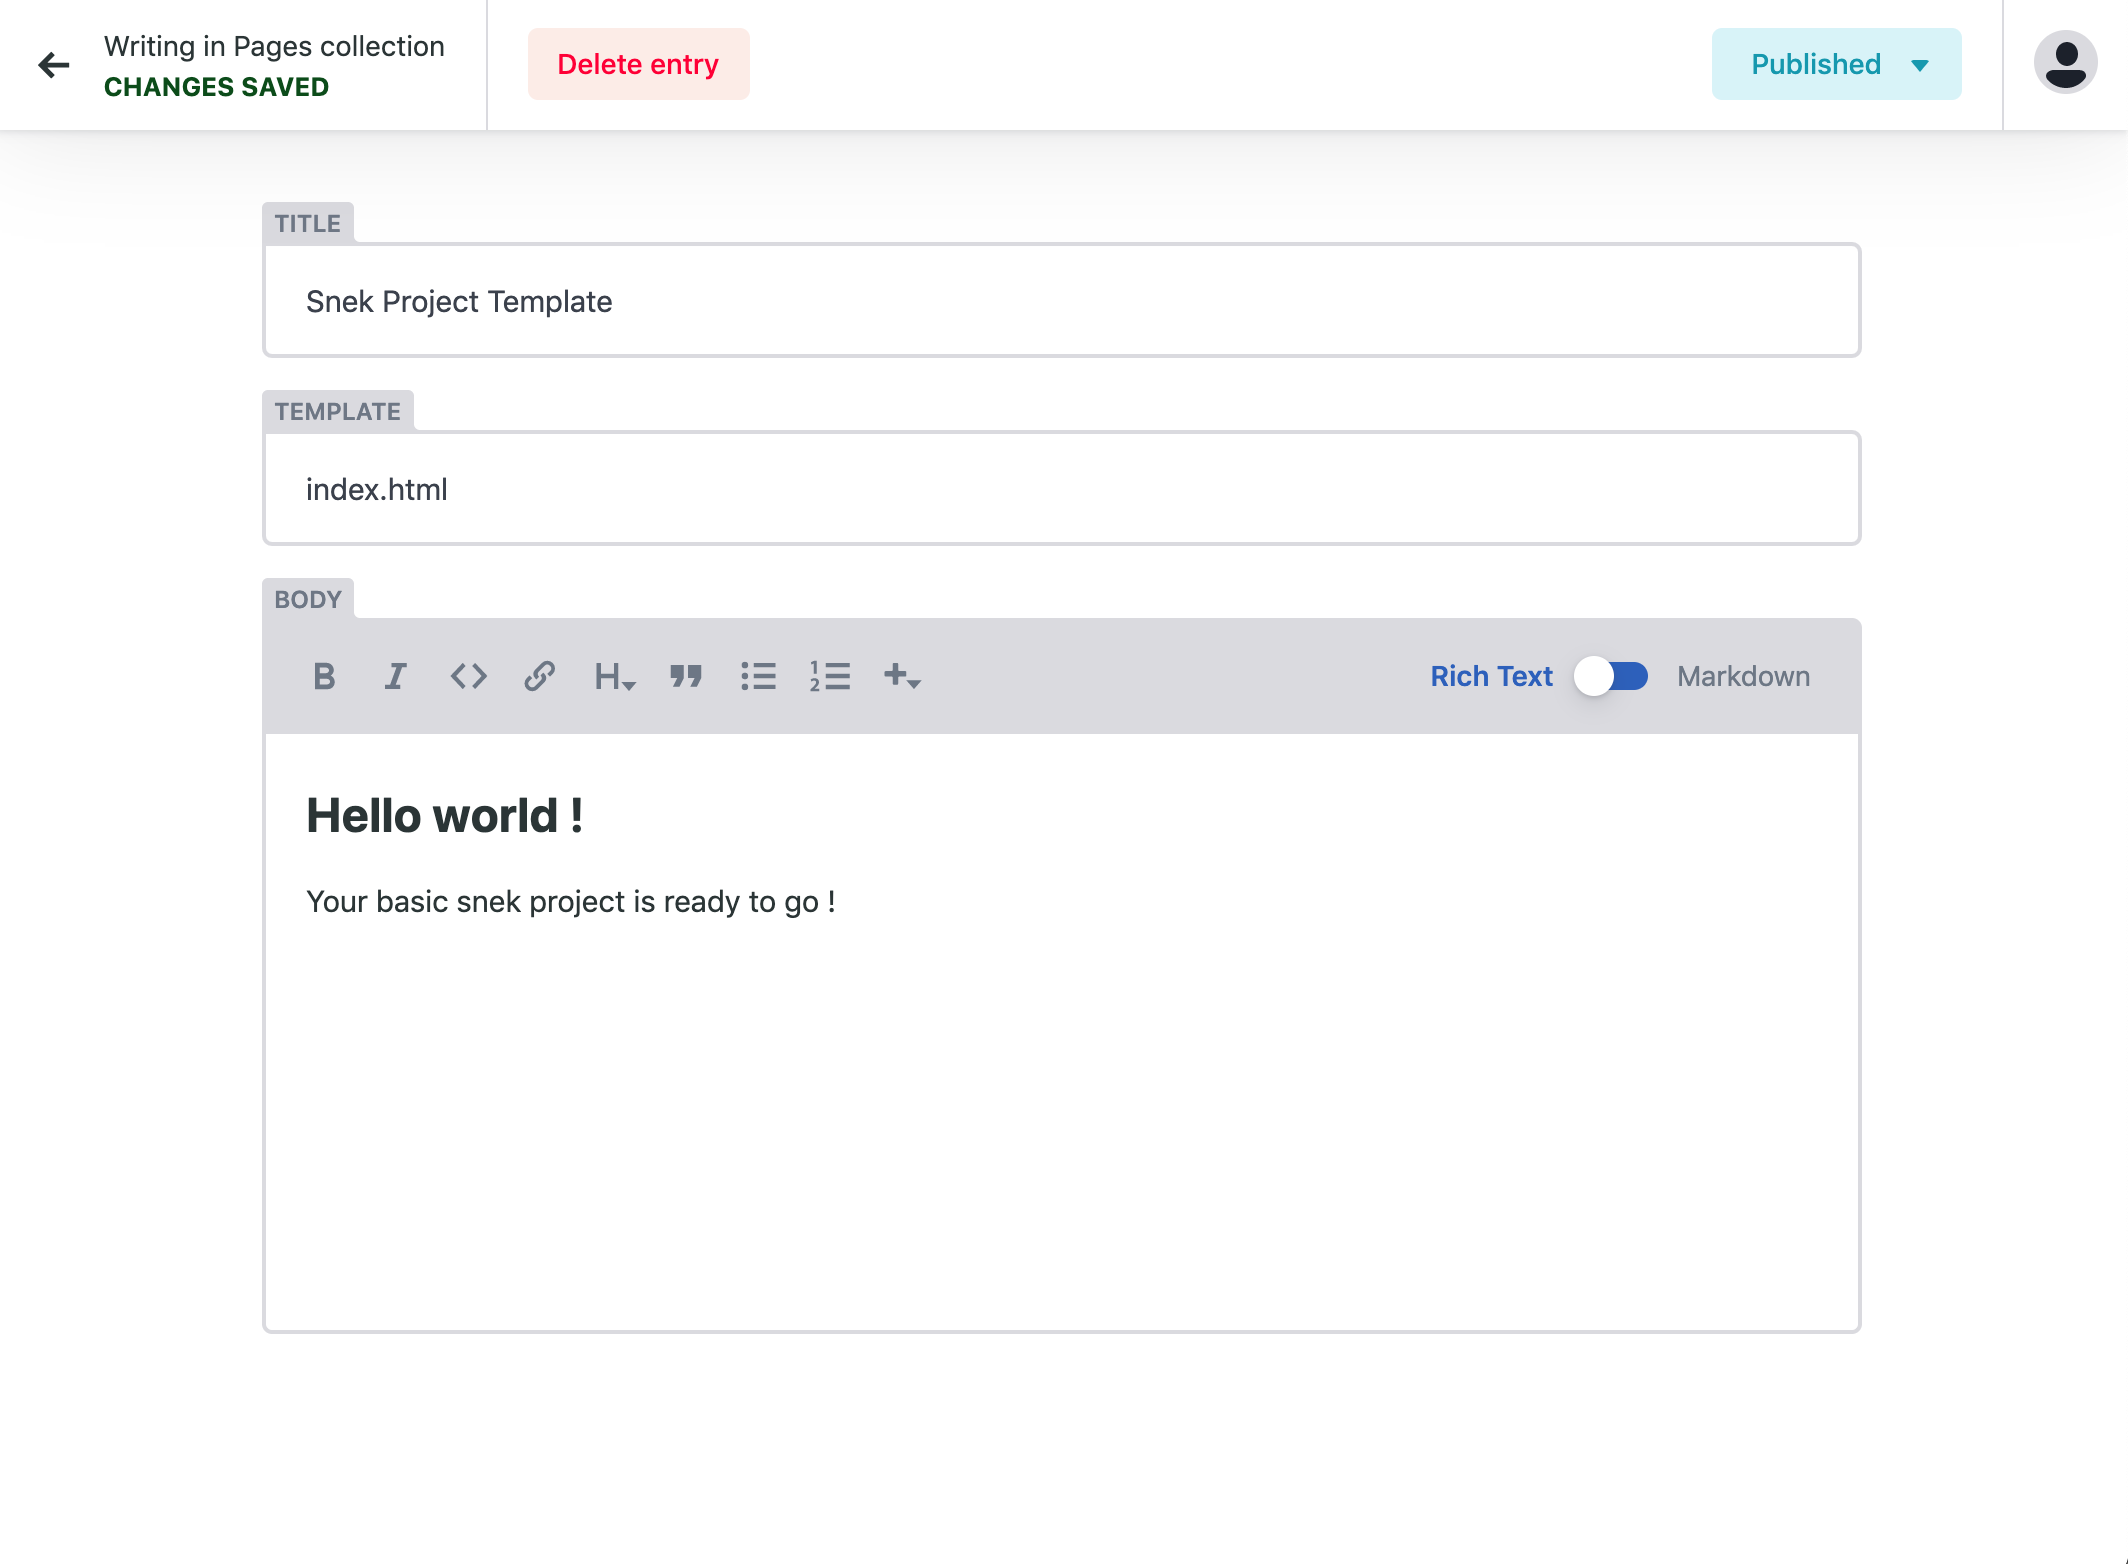
website.build()Files in the content folder are expected to use the JSON frontmatter markdown format: that means that the file contains first a JSON object with meta data, and then some markdown content.
{
    "title": "Snek Project Template",
    "template": "index.html"
}

## Hello world !
Your basic snek project is ready to go !The template frontmatter field of a content file defines the template that will be used to render the file.
If none defined, Snek will pick the first template available.
The name must match a file present in the templates folder (templates/). Having sub-folders of templates work.
When a Snek object is created, it parses content to build a sitemap. You can access this sitemap programmatically.
website = Snek()
website.sitemap # dict containing the complete sitemap and all the metadata of every content file.
Each entry in the sitemap contains all the meta data of all the files.
website.sitemap['index']['title'] # "Snek Project Template"Editing this dict will have no impact on the built pages: consider it read-only.
A flat version of the sitemap, containing only the filenames, is also available:
website.sitemap_flat # List of content filesThe content of the shared data folder (data/) is parsed and made accessible across the entire website.
This is really usefull to build features that live on multiple pages.
website = Snek()
website.data # dict containing all the data from the shared data folder
As opposed to the sitemap, Snek.data can be edited: this means that you can dynamically add data items easily to your website at build time: This is usefull for example to fetch content from an API that you want to display.
Snek uses the Mako templating engine: please have a look at their great documentation for details.
Each template has access to the following variables:
| Name | Type | Description |
|---|---|---|
data |
dict | Shared data object (contents from the data folder). |
sitemap |
dict | Complete sitemap, allowing to access all the other pages' filename and metadata. |
config |
dict | dict version of Snek's config. |
metadata |
dict | Parsed JSON front matter of the content file. |
content |
string | Parsed Markdown (HTML) of the content file. |
<!-- Accessing a meta data field of the current page -->
<title>${metadata['title']}</title>
<!-- Accessing the content of the current page -->
<div>${content}</div><!-- Accessing shared data -->
<a href="${data['globals']['github_url']}" title="Snek on GitHub">- More info on GitHub -</a>This quick guide will provide details to help setting up Snek on Netlify and Netlify CMS,but won't go step-by-step into configuring both.
Please have a look at their respective documentations if you are not familiar with these technologies.
As you are hooking your GitHub repository containing your Snek website to Netlify, simply use the following build configuration:
- Build command:
python website.py(change name accordingly if need be) - Publish directory:
build/(change name accordingly if need be)
That is it ! Your website will automatically deploy, just like this one.
If you have followed the "Getting Started" guide, you probably have a sneklifycms.sh file in your folder: executing this file will created an admin/ folder containing a basic Netlify CMS configuration matching the basic project template.
./sneklifycms.shOn Netlify, simply edit the build command to the following, so admin/ files are part of the built website:
- Build command:
python website.py; mv admin/ build/admin/;(change name accordingly if need be)
You will need to have Netlify Identity in Invite mode as well as GitHub Gateway enabled to be able to connect to Netlify CMS (see documentation).
Once you invited yourself as an Identity user, make sure the invite url contains /admin/ to be able to register:
- From:
https://[WEBSITE-NAME].netlify.com/#invite_token=[INVITE-TOKEN] - To:
https://[WEBSITE-NAME].netlify.com/admin/#invite_token=[INVITE-TOKEN]
You will then be able to edit your website via Netlify CMS:
Snek is made of two main files which are extensively commented and purposefuly simple that you can consult here:
Having a look at the current test suite for the project can provide useful insights.
Snek is in its infancy: if you find bugs, have ideas on how to improve it, or would like to get involved in any other way please feel free to reach out in the issues.