Library for ease of sending Push Notifications for XCUITests
As of Xcode 11.4, push notifications in the simulator are now available. Unfortunately, the way you do it does not lend itself well to automated tests, especially XCUITests. But have no fear, the Pterodactyl library aims to solve that!
Simply add the Pterodacyl library to your UI Test target, and you have an easy-to-use method of sending push notifications in your UI tests!
Xcode 11.4 added the ability to send push notifications to your simulator. There are two ways you can do this:
- Create an APNS payload JSON file, and manually drag it into the running simulator
- Create an APNS payload JSON file, and run a command from the terminal supplying your JSON file as an argument.
Apple unfortunately did not leave us an API to use this new functionality within XCUITest. Pterodactyl works around this limitation by starting up a local macOS server on your computer. This server listens for a specific HTTP request, and when it gets it, runs the applicable xcrun command. The library you add to your app streamlines all messy stuff like creating an appropriate JSON file and sending the right network request to the local server.
Currently Pterodactyl supports CocoaPods and Carthage
First add the PterodactylLib pod to your project's UI Test Target in your Podfile:
target 'MyProjectUITests' do
    # Other UI Test pods....
    pod 'PterodactylLib'
end
Then go to your UI Test Target in Xcode, click Build Phases, and add a new run script with the following code:
"${PODS_ROOT}/PterodactylLib/run_server.sh"
Add the Pterodactyl library to your Cartfile:
github "mattstanford/Pterodactyl"
After you've linked the library properly to your UI Test Target, click on the project in Xcode, select the UI Test Target, click Build Phases, and add a new run script with the following code:
"${PROJECT_DIR}/Carthage/Build/iOS/PterodactylLib.framework/run_server.sh"
Add Pterodactyl library to your project, and make sure to add to your UI Test Target. Then in your UI Test Target, click Build Phases, and add a new run script with the following code:
"${BUILD_DIR%Build/*}/SourcePackages/checkouts/Pterodactyl/run_server.sh"
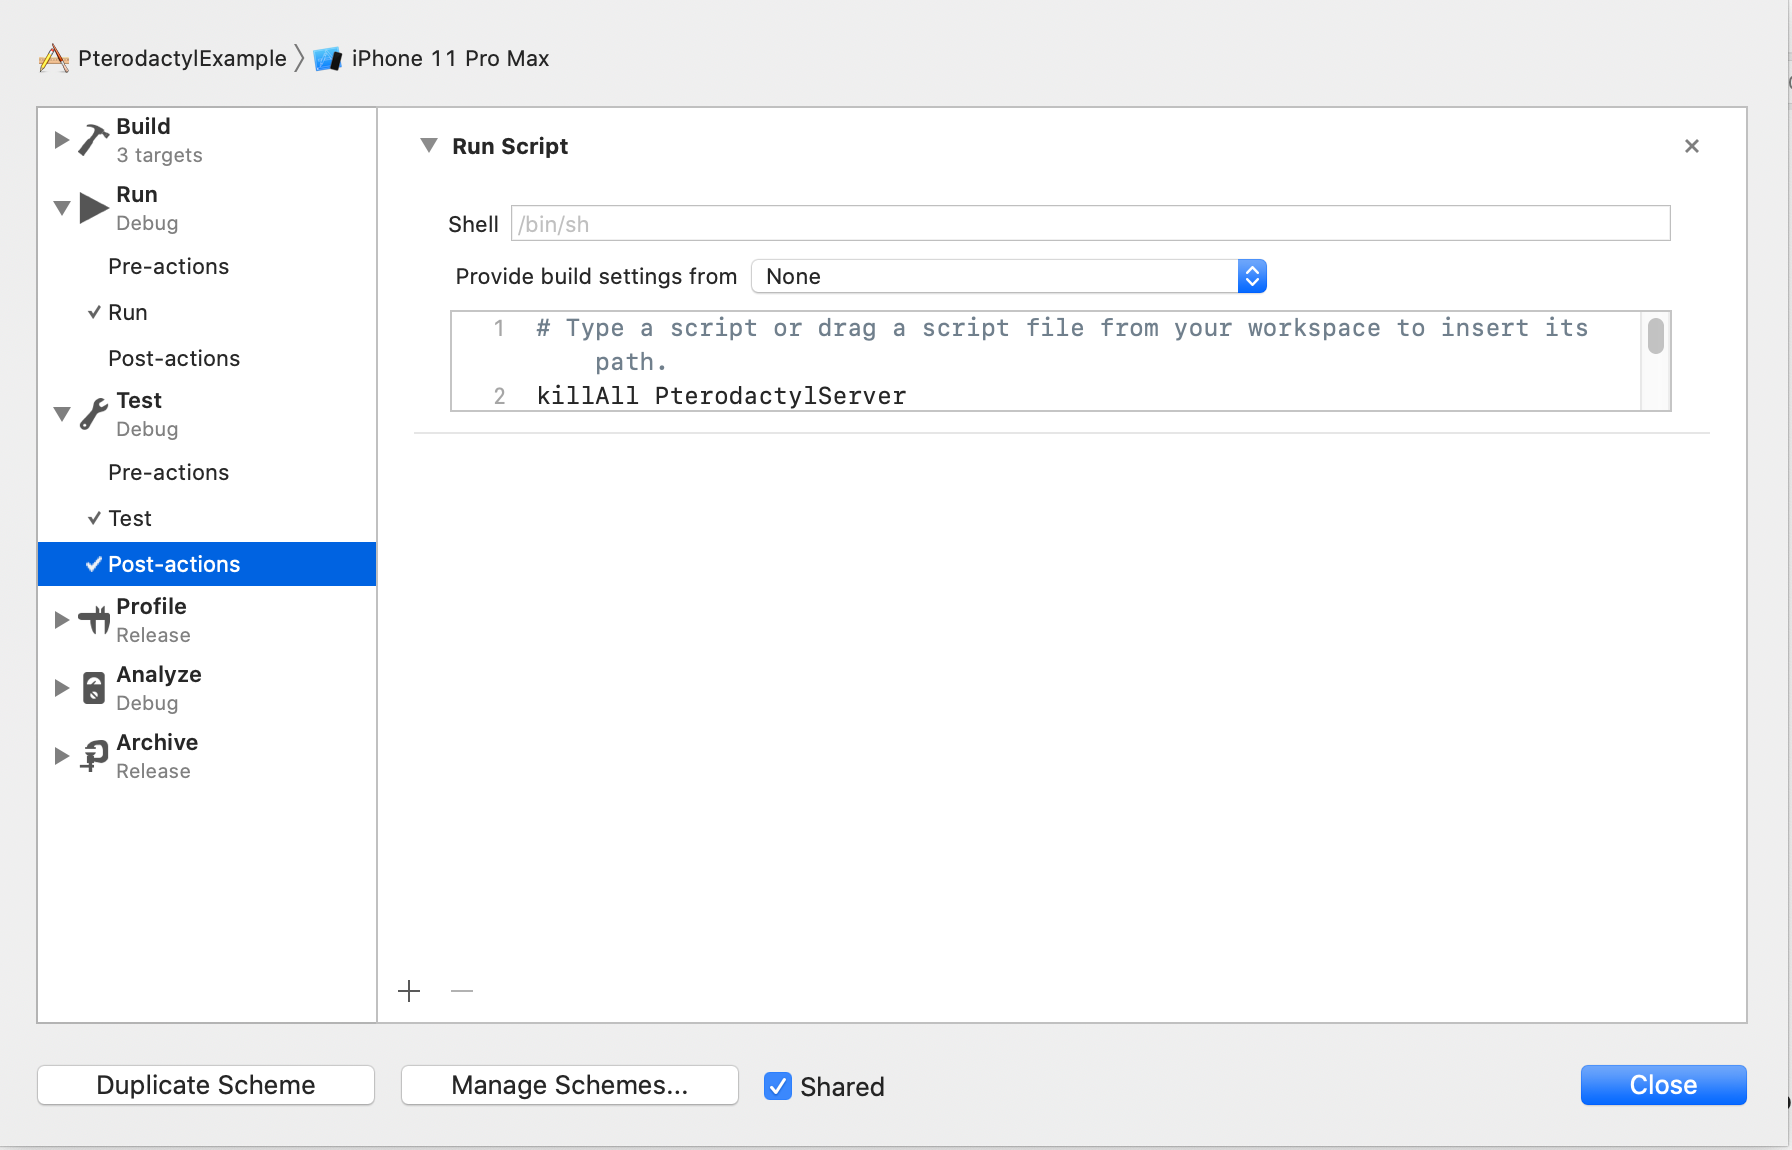
The run_server.sh script will start up a mac app called PterodactylServer. You may want this server to stop running once your tests are done. To do this, you can add a "post-action" in your current scheme to stop the server. To do this, do the following:
- Click on your scheme in Xcode and click "Edit Scheme..."
- Go to the "Test" action on the right sidebar and click the little arrow next to it to expand the list of actions.
- Click "post-action" and add a new run script
- Enter the following in the shell script:
killAll PterodactylServer
When Pterodacyl Server starts, it will by default start on port 8081. If for some reason this doesn't work for you, you can specify a different port by supplying it in the run script by supplying a -port <port number> option. For example, if you are using Swift Package Manager and want to run the server on port 8191, your run script would look like this:
"${BUILD_DIR%Build/*}/SourcePackages/checkouts/Pterodactyl/run_server.sh" -port 8191
Then, in the code for your UI tests, make sure to specify the port when initializing the Pterodactyl instance:
let pterodactyl = Pterodactyl(targetAppBundleId: targetAppBundleId, port: 8191)
First intialize a Pterodactyl instance with the name of the app you are testing:
let app = XCUIApplication()
let pterodactyl = Pterodactyl(targetAppBundleId: "com.mattstanford.PterodactylExample")
You can send a push notification to your app with a custom message like so:
pterodactyl.triggerSimulatorNotification(withMessage: "here's a simple message")If your APNS notifications are more complex, you can also specify custom keys that will be part of the apns payload:
pterodactyl.triggerSimulatorNotification(withMessage: "here's a more complicated message", additionalKeys: ["badge": 42, "myWeirdCustomKey": "foobar"])The example above will send an APNS payload to the app that is the equivalent to the following:
{
    "aps": {
        "alert": "here's a more complicated message",
        "badge": 42,
        "myWeirdCustomKey": "foobar""
    }
}
And if you want FULL control over the payload (i.e. you want to supply a key that's outside the aps payload, you can trigger the notification by specifying the payload as Dictionary:
pterodactyl.triggerSimulatorNotification(withFullPayload: ["aps": ["alert": "here's a message with the full payload supplied", "badge": 1, "sound": "default"], "someOtherKey": "some other key defined outside the aps payload"])This sends a payload that's equivalent to the following:
{
    "aps": {
        "alert": "here's a message with the full payload supplied",
        "badge": 42,
        "myWeirdCustomKey": "foobar""
    },
    "someOtherKey": "some other key defined outside the aps payload"
}
Here's a sample UI test that utilizes the Pterodactyl app for testing a very simple push notification use case:
import XCTest
import PterodactylLib

class MyUITestExample: XCTestCase {

    func testSimulatorPush() {
        var app = XCUIApplication()

        let pterodactyl = Pterodactyl(targetAppBundleId: "com.mattstanford.PterodactylExample")
        waitForElementToAppear(object: app.staticTexts["Pterodactyl Example"])

        //Tap the home button
        XCUIDevice.shared.press(XCUIDevice.Button.home)
        sleep(1)

        //Trigger a push notification
        pterodactyl.triggerSimulatorNotification(withMessage: "here's a simple message")

        //Tap the notification when it appears
        let springboard = XCUIApplication(bundleIdentifier: "com.apple.springboard")
        let springBoardNotification = springboard.otherElements["NotificationShortLookView"]
        waitForElementToAppear(object: springBoardNotification)
        springBoardNotification.tap()

        waitForElementToAppear(object: app.staticTexts["Pterodactyl Example"])
    }

    func waitForElementToAppear(object: Any) {
        let exists = NSPredicate(format: "exists == true")
        expectation(for: exists, evaluatedWith: object, handler: nil)
        waitForExpectations(timeout: 5, handler: nil)
    }
}The PterodactylServer Icon is made by FreePik from www.flaticon.com)
