DISCLAIMER: This is not a Koolnova official product. Use at your own risk.
koolnova2mqtt is a bidirectional bridge between MQTT and Koolnova's 100-CPND00 family of controllers, featuring auto-discovery for Home Assistant, and compatible with OpenHAB and any other automation platform that supports MQTT.
- Bi-directional synchronization between MQTT topics and Koolnova thermostats.
- Home Assistant auto-discovery as
climatecomponent thermostats andsensorreporting current temperature - Written in go, cross-platform.
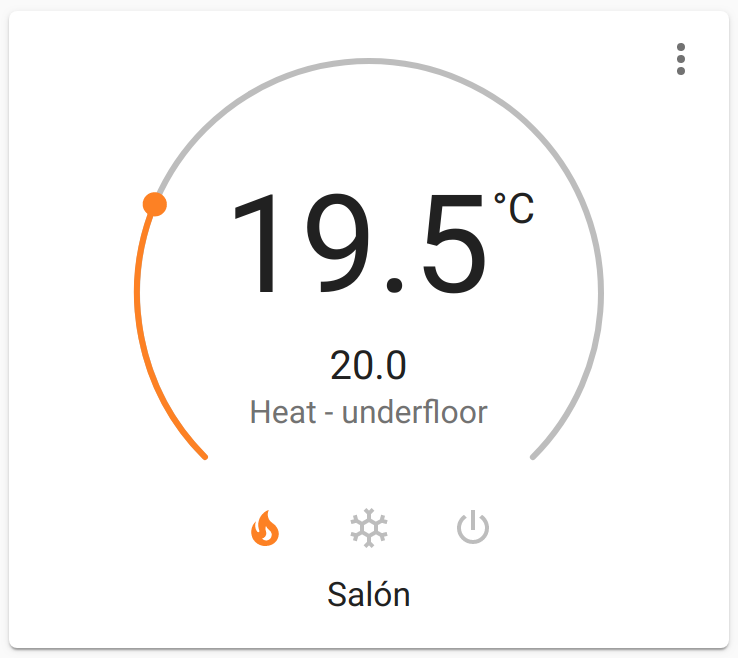
When connected, koolnova2mqtt reads all configuration parameters and exports to your MQTT server a topic structure and configuration parameters for Home Assistant. This allows to use thermostats and temperature sensor cards like this one:

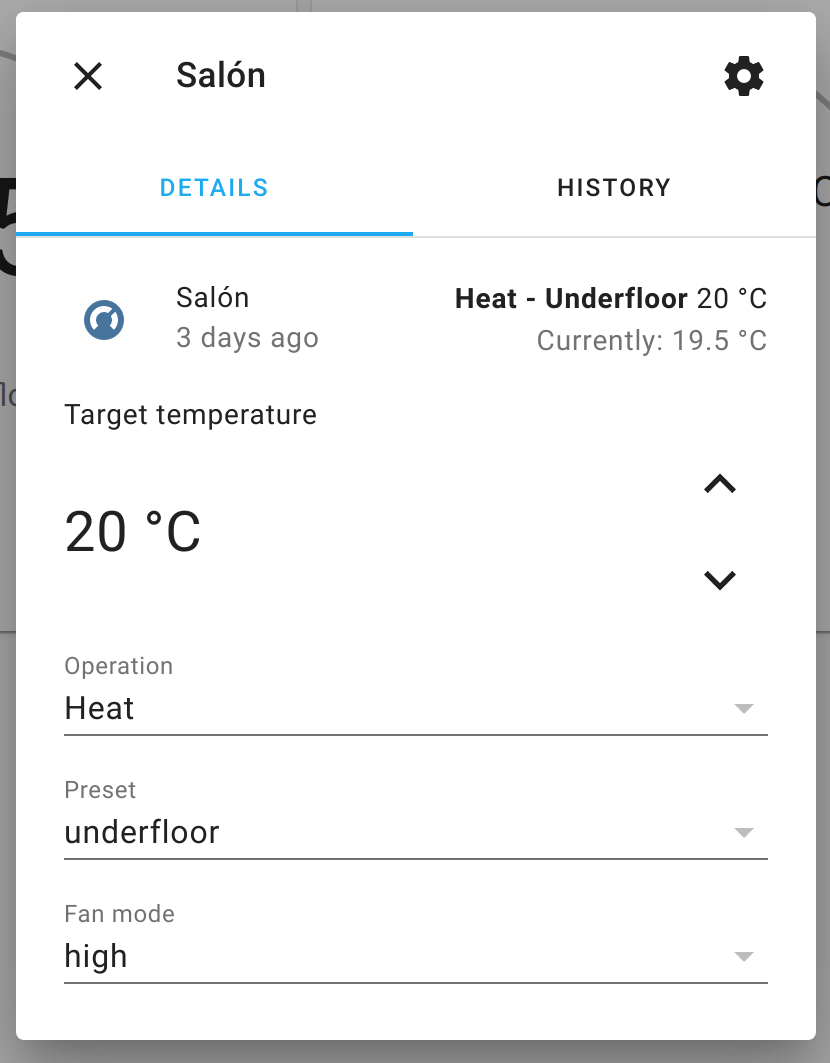
Koolnova thermostat modes can be changed by entering the thermostat settings menu (three dots in the top right) and selecting various modes:
- A Raspberry Pi or a PC
- A RS4835 USB dongle, such as this one:

Wire the controller's D+ and D- ports as follows:
- Controller D+ to USB dongle A
- Controller D- to USB dongle B
- Controller GND to USB dongle GND
Check the Releases page and download the appropriate binary for your platform.
Before using koolnova2mqtt, test your connection with a tool such as modpoll to ensure your PC and controller can communicate. For example, the following command should return the controller's slave id (default 49):
./modpoll -b 9600 -p even -d 8 -s 1 -m rtu -t 4 -a 49 -1 -r 78 -4 100 /dev/ttyUSB0Where:
-a 49means send the message to slave with id49-r 78means read register #40078, which contains the slave ID/dev/ttyUSB0is the USB dongle's serial port. In Windows it would look likeCOM3or similar. Look in/dev/ttyUSB*or in Windows Device Manager to locate the port for your dongle.
Check modpoll documentation for further information.
Once you are certain your dongle is properly connected, you can launch koolnova2mqtt with these parameters:
SYNTAX:

koolnova2mqtt [options]

options:
  --clientid string
    	A clientid for the connection (default "your hostname")
  --hassPrefix string
    	Home assistant discovery prefix (default "homeassistant")
  --modbusDataBits int
    	Modbus port data bits (default 8)
  --modbusParity string
    	N - None, E - Even, O - Odd (default E) (The use of no parity requires 2 stop bits.) (default "E")
  --modbusPort string
    	Serial port where modbus hardware is connected (default "/dev/ttyUSB0")
  --modbusRate int
    	Modbus port data rate (default 9600)
  --modbusSlaveIDs string
    	Comma-separated list of modbus slave IDs to manage (default "49")
  --modbusSlaveNames string
    	Comma-separated list of modbus slave names. Defaults to 'slave#'
  --modbusStopBits int
    	Modbus port stop bits (default 1)
  --password string
    	Password to match MQTT username
  --prefix string
    	MQTT topic root where to publish/read topics (default "koolnova2mqtt")
  --server string
    	The full url of the MQTT server to connect to ex: tcp://127.0.0.1:1883 (default "tcp://127.0.0.1:1883")
  --username string
    	A username to authenticate to the MQTT server
koolnova2mqtt --server tcp://192.168.1.1:1883 --modbusPort '/dev/ttyUSB1' --modbusSlaveIDs '49,50' --modbusSlaveNames 'firstFloor,secondFloor'
The generated structure in MQTT looks as follows:
koolnova2mqtt
└── firstFloor
    ├── zone1
    │   ├── fanMode = auto
    │   ├── targetTemp = 20.5
    │   ├── currentTemp = 21
    │   └── hvacMode = heat
    ├── zone2
    │   ├── fanMode = low
    │   ├── targetTemp = 21
    │   ├── currentTemp = 20
    │   └── hvacMode = heat
    ├── zone3
    │   ├── fanMode = auto
    │   ├── targetTemp = 21
    │   ├── currentTemp = 21.5
    │   └── hvacMode = heat
    └── sys
        ├── ac1
        │   ├── airflow = 0
        │   ├── targetTemp = 0
        │   └── fanMode = high
        ├── ac2
        │   ├── airflow = 0
        │   ├── targetTemp = 0
        │   └── fanMode = high
        ├── ac3
        │   ├── airflow = 0
        │   ├── targetTemp = 0
        │   └── fanMode = high
        ├── ac4
        │   ├── airflow = 0
        │   ├── targetTemp = 0
        │   └── fanMode = high
        ├── efficiency = 3
        ├── enabled = true
        ├── serialBaud = 9600
        ├── serialParity = even
        └── holdMode = underfloor and fan
Most of the topics have a child set topic that allow you to modify that value. Thus, to change the target temperature of zone2 to 20.5ºC, write the string 20.5 to koolnova2mqtt/firstFloor/zone2/targetTemp/set topic. With the tool mosquitto_pub:
mosquitto_pub -t "koolnova2mqtt/firstFloor/zone2/targetTemp/set" -m "20.5"If the operation is successful, the topic "koolnova2mqtt/firstFloor/zone2/targetTemp" (without set) will be updated with the new target temperature, and the thermostat will show the new value.
This package is written and maintained by Javier Peletier (@jpeletier)


