Due to Google closing down the Works with Nest-program, the only people who can currently use this module are the ones that already have a non-migrated Nest API account (there is no way to create a new Nest API account anymore).
When Google launches their Device Access program in 2020, I'll hopefully be able to update this module to use that API instead, but right now there's nothing I can do about this, unfortunately.
The mmm-nest-status module is a MagicMirror addon.
This module requires MagicMirror version 2.5 or later.
This module displays both your Nest thermostats and protect smoke detectors on your Magic Mirror and supports multiple modes to get you exactly the views that you want.
 An example showing multiple thermostats and multiple smoke detectors (using the large size & classic mode for the thermostats, and the small size & dark mode for the protects)
- all states for the Nest thermostat (including Eco mode, Away mode, leaf/fan icons, etc) in 2 different designs and 3 sizes
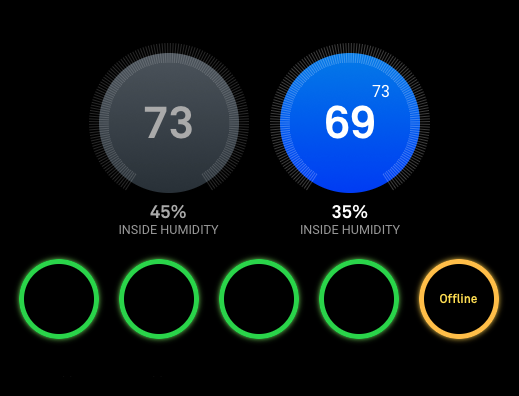
- all states for the Nest protect in 2 different designs and 3 sizes
- 2 different modes -
gridandlist- allows you to easily customize your display - choose to display all of your thermostats/protects, or pick & choose which devices to show
- choose to display the name of the thermostat/protect for easy identification
- group the thermostats and protects together, or split them up into stackable containers
- only re-renders the devices when data has actually changed
- Installing the module
- Using the module
- General Configuration Options
- Configuration Options specific to the Grid view
- How It Looks
- FAQ
- How do I use
thermostatsToShowandprotectsToShow? - I have a humidifier hooked up to my thermostat and on the Nest app, I can see a humidifying icon when it is running. Do you show this too?
- When I run this module, the fonts look different than your screenshots. Why is that?
- Does this module support touch or mouse interactions? Eg. can I change the temperature of my thermostat using this?
- I'm getting a "Nest API rate limit has been exceeded"-error - what does it mean?
- How does the motionSleep setting work?
- How do I use
- Using Handlebars
Run git clone https://github.com/michael5r/mmm-nest-status.git from inside your MagicMirror/modules folder.
To use this module, simply add it to the modules array in the MagicMirror config/config.js file:
{
    module: "mmm-nest-status",
    position: "lower_third", // pick whichever position you want
    config: {
        token: "<YOUR_NEST_API_TOKEN>",
        displayType: "grid",
        displayMode: "all",
        thermostatsToShow: "all",
        // ... and whatever else configuration options you want to use
    }
},
This module uses the excellent Handlebars library to serve up precompiled templates for the various designs. If you're just using this module as is, you don't need to do anything - this module already comes with all the templates you need.
If, however, you wish to modify the HTML structure of the thermostats or smoke detectors, read the Using Handlebars guide at the bottom of this page.
| Option | Type | Default | Description |
|---|---|---|---|
token |
string |
- | This value is required for this module to work. |
displayType |
string |
grid |
One of: grid, list, list-id |
displayMode |
string |
all |
One of: thermostat, protect, all |
thermostatsToShow |
string,array |
all |
One of: all, first, or an array with device IDs |
protectsToShow |
string,array |
all |
One of: all, first, or an array with device IDs |
units |
string |
config.js | One of: imperial (fahrenheit), metric (celsius) |
updateInterval |
int |
120000 |
Default is 2 minutes - Nest recommends updating no more than once pr. minute. |
initialLoadDelay |
int |
0 |
How long to delay the initial load (in ms) |
motionSleep |
boolean |
false |
Suspend module when triggered by MMM-PIR-Sensor |
motionSleepSeconds |
int |
300 |
When motion is triggered, how long to wait before going to sleep. Default is 5 minutes. |
Note: units get their default value from the MagicMirror config.js file. I'd strongly suggest adding the value in there instead of adding it in this module.
The following options only apply if your displayType has been set to grid - they have no effect on the list view:
| Option | Type | Default | Description |
|---|---|---|---|
showNames |
boolean |
true |
Displays the device name above the device |
alignment |
string |
center |
One of: left, center, right |
groupTogether |
boolean |
false |
Whether thermostats and protects share the same box |
thermostatSize |
string |
large |
One of: small, medium, large |
thermostatClassic |
boolean |
true |
Classic view of the thermostat |
protectSize |
string |
'small' | One of: small, medium, large |
protectDark |
boolean |
'false' | Switches protects to use the dark design |
protectShowOk |
boolean |
'true' | Shows the text ok in a protect when everything is ok. |
With showNames set to false.
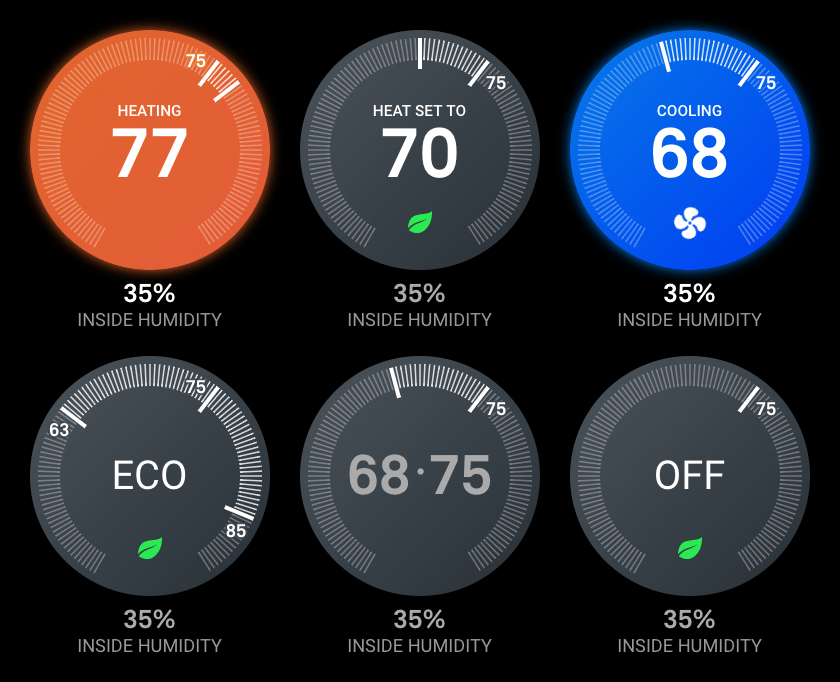
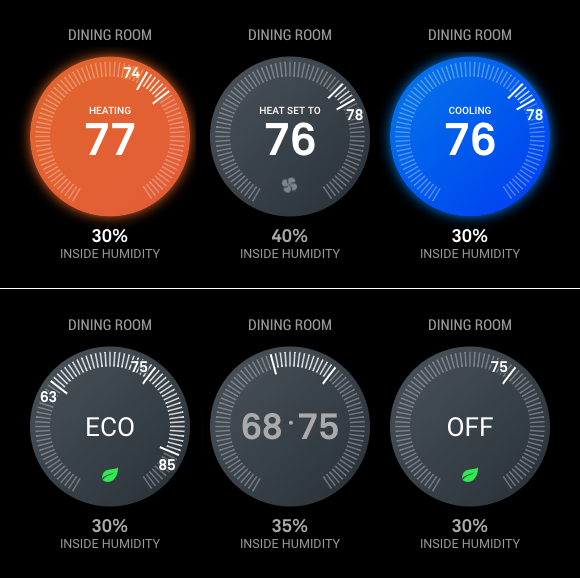
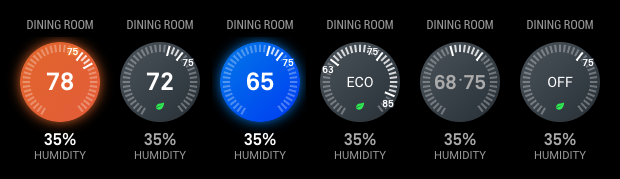
The non-classic view is a bit more abstract and doesn't include quite as detailed information as the classic mode.
With showNames set to false.
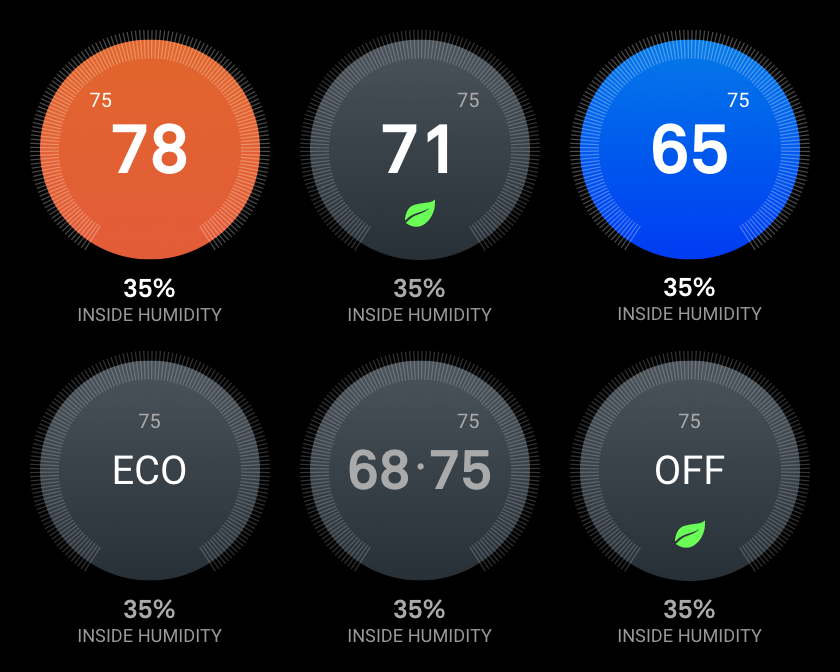
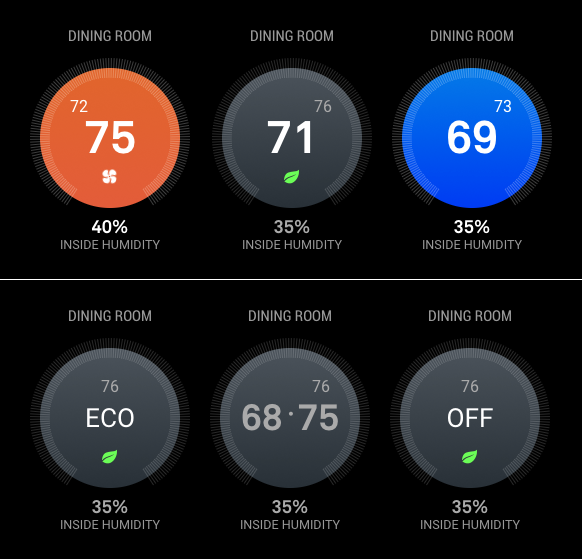
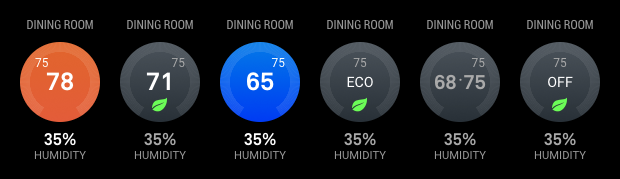
I'm not showing screenshots of the large size, but just imagine they're the same as the medium size below just ... well ... larger.

Thermostats and protects with the same size parameter line up nicely next to each other if groupTogether is set to true.


Lined up with thermostats that have thermostatClassic set to false:


If you prefer just looking at text, set the displayType to list:

All states show up in the list view as well:

If the displayType is set to list-id, you get the list view but with IDs in front of every device:

You can use these IDs to specify which devices to show in thermostatsToShow and protectsToShow.
For a very minimal & clean look, set thermostatClassic to false, showNames to false and protectDark to true.
It's simple - both of these configurations take the following values:
all: This is the default, it means that all thermostats or all protects will be displayed.first: Setting this value means that only the first thermostat and the first protect in the list will be displayed.array: Each device has an ID (which can be seen by settingdisplayTypetolist-id), so by adding these IDs to an array, you can select exactly which devices you want to display.
In config.js:
protectsToShow: [0,1,2,3,8],This results in only the 5 protects above being displayed.
I have a humidifier hooked up to my thermostat and on the Nest app, I can see a humidifying icon when it is running. Do you show this too?
No, unfortunately not - there's currently no way to get this information from the Nest API. It only tells me that a fan is running, but doesn't distinguish between a fan and a humidifier.
Nest uses their own, proprietary font named Akkurat for all their devices. Seeing that this font isn't open source, I'm not able to include it with this module - if you want to use it, purchase a license and follow the instructions in the mmm-nest-status.css file to install.
If you don't own this font, this module will just fall back to using the standard Roboto font - don't worry, it still looks great.
Does this module support touch or mouse interactions? Eg. can I change the temperature of my thermostat using this?
No, right now this module only displays information - it does not allow you to control your Nest devices.
Nest applies data rate limits for accessing their API - if you get this error, it means your account has reached that limit and is now temporarily blocked from getting Nest API data. When this happens, the module will automatically try to load data again after 10 minutes.
There is, unfortunately, nothing you can do about this - you simply have to wait for their block to expire.
You can read more here.
Setting the motionSleep setting to true makes this module continually listen for USER_PRESENCE notifications from the MMM-PIR-Sensor module. Whenever a positive USER_PRESENCE notification is received, the module will reset a timer based on your motionSleepSeconds setting. When the timer reaches zero, the module will then do two things:
- temporarily stop pulling new data from Nest
- hide the mmm-nest-status module
You specify how long this timer should last by using the motionSleepSeconds setting - please note that this setting is in seconds (not ms).
This sleep mode will last till the next positive USER_PRESENCE notification is received, at which point the module will resume by immediately pulling new Nest data and then showing the mmm-nest-status module again.
This is a good option to enable if you're using a monitor that shows an ugly "no signal message" when the HDMI signal is lost and you've therefore turned off the powerSaving setting in the MMM-Pir-Sensor module.
The Handlebars templates can all be found in the templates folder in the root of this module.
Before you do anything, if you don't have Handlebars installed, install it globally on your system:
npm install handlebars -gMake any changes you wish in the relevant .hbs files in the templates folder.
Once you're done, precompile all templates by running this in your terminal:
handlebars <path-to-MM-modules>/mmm-nest-status/templates/*.hbs -f <path-to-MM-modules>/mmm-nest-status/mmm-nest-status-templates.js -mMake sure you replace <path-to-MM-modules> with the correct file path to your Magic Mirror modules folder.
If you have any problems, check out the Handlebars documentation (or open an issue in this repo).