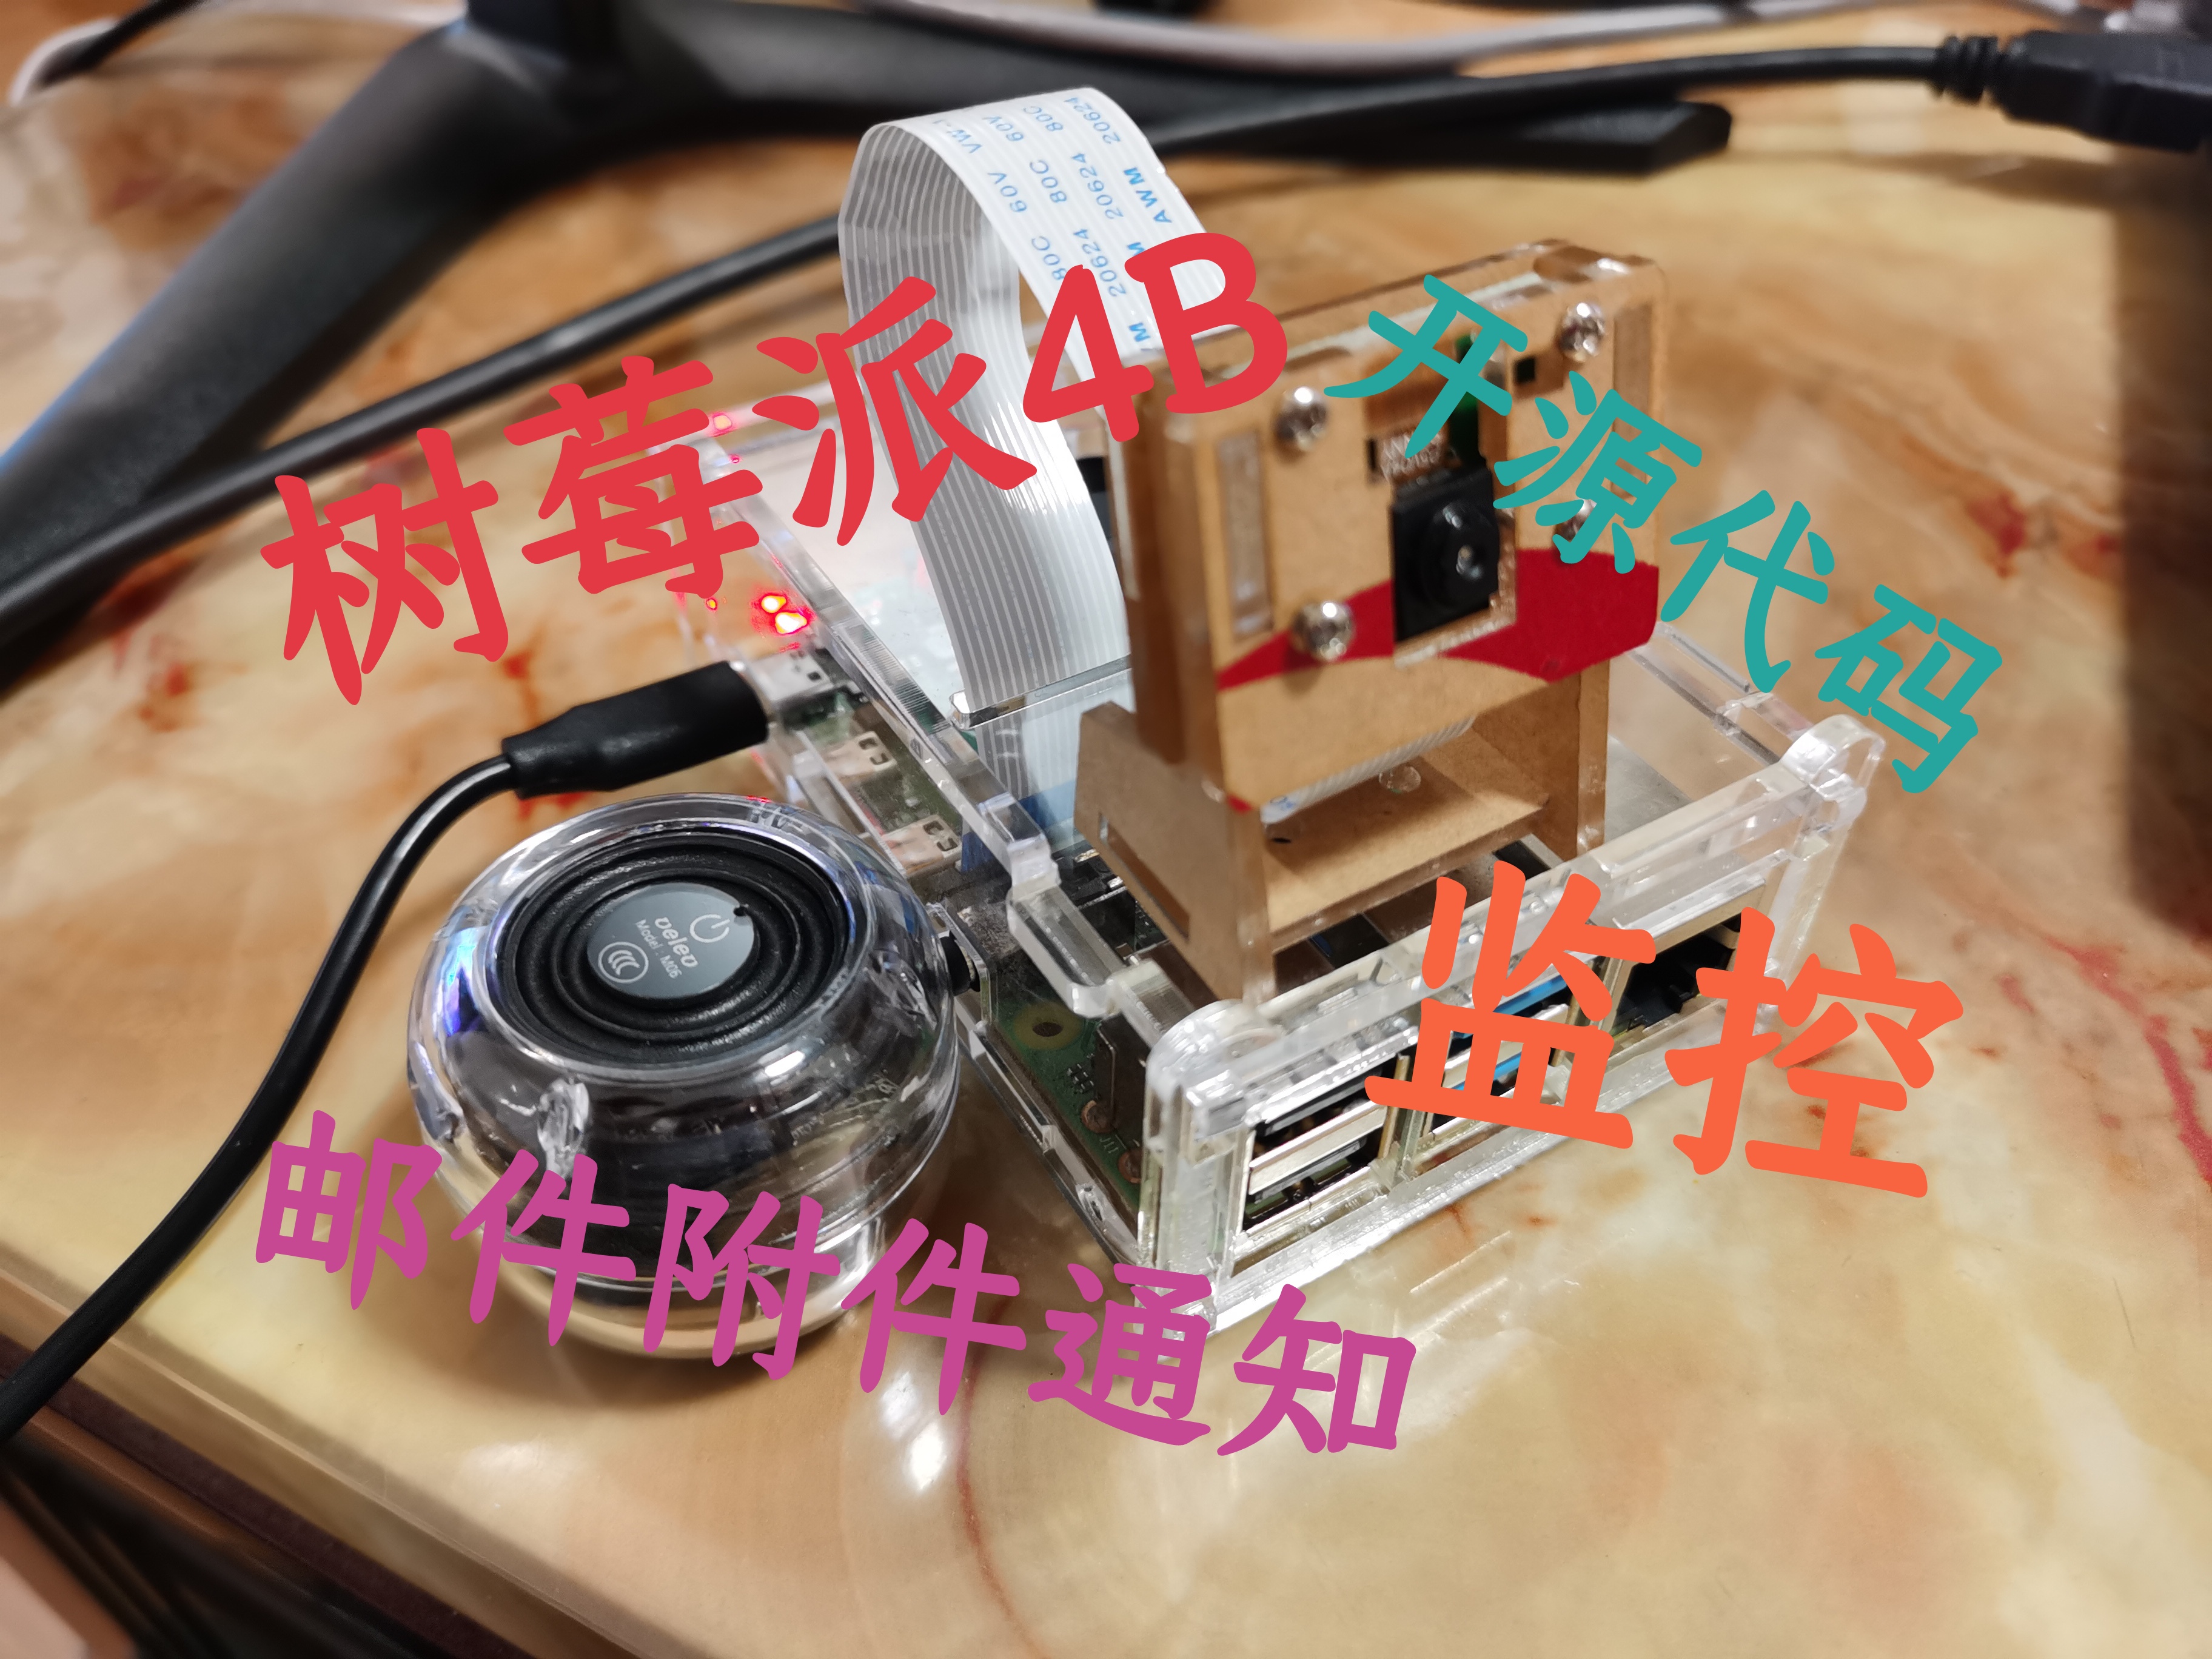
部署在树莓派4B上实现移动物体的实时监控。当移动物体进入树莓派摄像头的视野时,树莓派会发出连续的报警提示音,同时会将移动物体拍照后保存为图片以邮件附件的方式发送给事先指定好的邮箱地址。当移动物体从树莓派摄像头视野中消失时则会停止报警。
- 树莓派4B,内存2GB;
- 树莓派专用摄像头一个;
- 扬声器一个。
Ubuntu Server 20.04.2 LTS(RPi 2/3/4/400)64位
树莓派烧录好ubuntu系统,配置好网络和摄像头(配置方法可见下文疑难解答),连接扬声器。
克隆项目到你树莓派的工作目录,cd进入项目根目录。
# 克隆
×××@×××:~$ git clone https://github.com/red-fox-yj/MovingEye_OpenSource.git
# 切换目录
×××@×××:~$ cd MovingEye_OpenSource
利用vim编辑configuration/configuration.yaml,输入发送者邮箱地址、邮箱服务器密码、邮箱服务器、接收者邮箱地址(邮件服务器的配置较为简单,可以自行谷歌,这里不再赘述)。
# vim编辑
×××@×××:~$ vim configuration.yaml
运行monitor.py。
×××@×××:~$ python3 monitor.py
遇到缺少python依赖时可以利用pip工具下载安装。
×××@×××:~$ pip install 模块名
正确指令应该为
sudo apt-get install python3-pygame
修改/etc/netplan/50-cloud-init.yaml,修改后的文件如下:
# This file is generated from information provided by the datasource.  Changes
# to it will not persist across an instance reboot.  To disable cloud-init's
# network configuration capabilities, write a file
# /etc/cloud/cloud.cfg.d/99-disable-network-config.cfg with the following:
# network: {config: disabled}
network:
    ethernets:
        eth0:
            dhcp4: true
            optional: true
    version: 2

    wifis:
        wlan0:
            dhcp4: true
            access-points:
                "wifi的帐户名":
                    password: "wifi密码"
配置生效:
ubuntu@ubuntu:~$ sudo netplan try
ubuntu@ubuntu:~$ sudo netplan apply
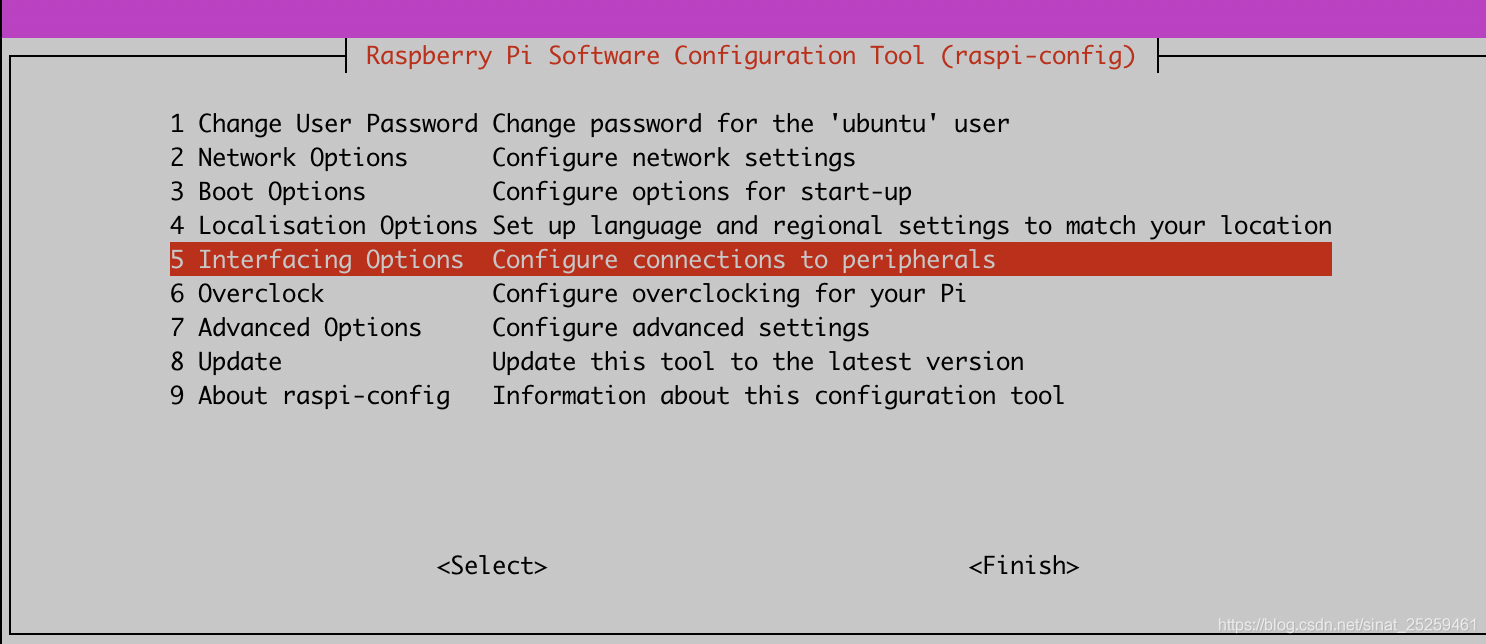
启动摄像头需要用到官方的raspi-config配置程序,进入官网地址,下载最新的deb程序。
wget http://archive.raspberrypi.org/debian/pool/main/r/raspi-config/raspi-config_20200817_all.deb
然后安装:
sudo dpkg -i raspi-config_20200817_all.deb
发现有依赖报错,修复依赖:
sudo apt --fix-broken install
然后再重新安装。
启动raspi-config
sudo raspi-config
选择第5项,交互设置:
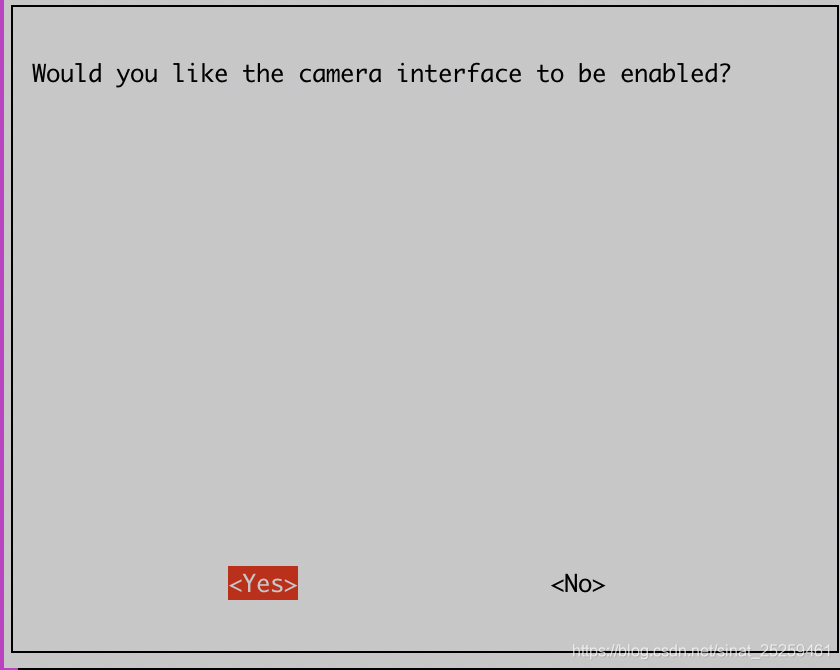
选择第1项:

如果出现固件过时的错误时:
Your firmwave appears to be out of date (no start_x.elf). Please update
解决方法:
1.查看boot分区所在的设备号,设备号可能是:/dev/mmcblk0p1
df -h
2将该设备号挂载在/boot上
mount /dev/mmcblk0p1 /boot
完美解决 随后会出现是否设置为enabled,选择yes。
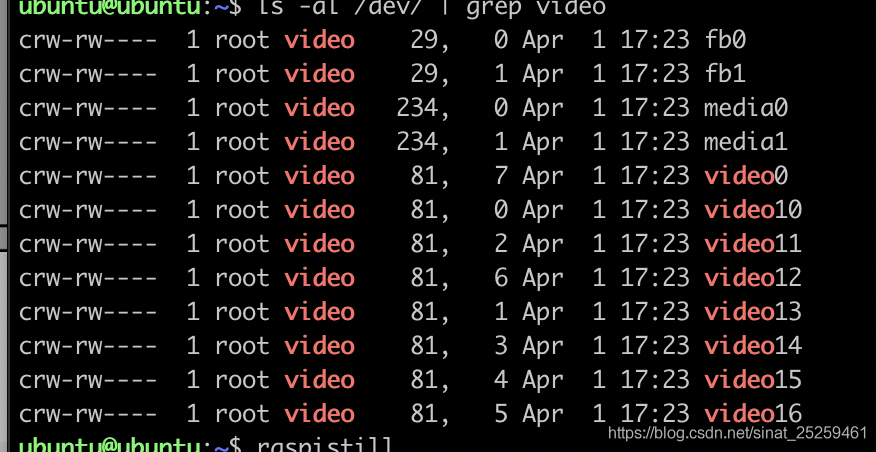
等待树莓派重启。 重启后检查是否有摄像头设备:
ls -al /dev/ | grep video
如下图:
安装完毕。
报错
Traceback (most recent call last): File "monitor_ubuntu.py", line 1, in import cv2 File "/usr/local/lib/python3.8/dist-packages/cv2/init.py", line 5, in from .cv2 import * ImportError: libGL.so.1: cannot open shared object file: No such file or directory
先把之前用上面命令安装的opencv删除,使用这条命令:
sudo pip uninstall opencv-python
然后用这条命令安装:
sudo pip install opencv-python-headless
这样就问题就解决了。