Edge Impulse enables developers to create the next generation of intelligent device solutions with embedded Machine Learning. This repository contains the Edge Impulse firmware for the Nordic Semiconductor nRF9160 DK development boards, in combination with the ST IKS02A shield. This combination supports all Edge Impulse device features, including ingestion, remote management and inferencing.
Note: Do you just want to use this development board with Edge Impulse? No need to build this firmware. See these instructions for prebuilt images and instructions, or use the data forwarder to capture data from any sensor.
Hardware
-
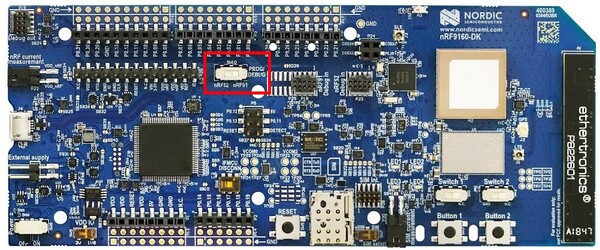
Nordic Semiconductor nRF9160 DK development board.
-
X-NUCLEO-IKS02A1 shield.
No IKS02A1 shield? You can modify this firmware relatively easily to work with other accelerometers or PDM microphones that are supported in Zephyr. See Working with other sensors.
Software
- nRF Connect SDK - make sure you select version v1.6.0.
- GNU ARM Embedded Toolchain 9-2019-q4-major.
- nRF Command Line Tools.
Or you can build this application with Docker (see below).
-
Install and configure the nRF Connect SDK:
-
nRF Connect SDK in a separate folder from this repository (e.g.
~/repos/ncs). -
Check out NCS version 1.6.0:
$ cd ~/repos/ncs/nrf $ git checkout v1.6.0 $ cd .. $ west update -
Set your
ZEPHYR_BASEenvironment variable to~/repos/ncs/zephyr.
-
-
Clone this repository:
$ git clone https://github.com/edgeimpulse/firmware-nrf91 -
You'll need to flash the board controller once:
-
Build and flash the application:
-
Clone this repository:
$ git clone https://github.com/edgeimpulse/firmware-nrf91 -
Build the Docker container:
$ docker build -t edge-impulse-nordic . -
You'll need to flash the board controller once:
-
Build and flash the application:
To see the output of inference process, make to following steps after deploying ML model:
-
Insert SIM Card to nRF9160DK and power cycle the board.
-
Open Serial Port Terminal of the nRF9160DK (use first port eg.
ttyACM0on Linux) on baud rate 115,200. -
Connect the board to MQTT server via:
AT+CONNECTThe connection can take while and as a result you should get the
OKresponse orERRORif something went wrong. -
After successfull connection run the model:
AT+RUNIMPULSEor:
AT+RUNIMPULSECONT -
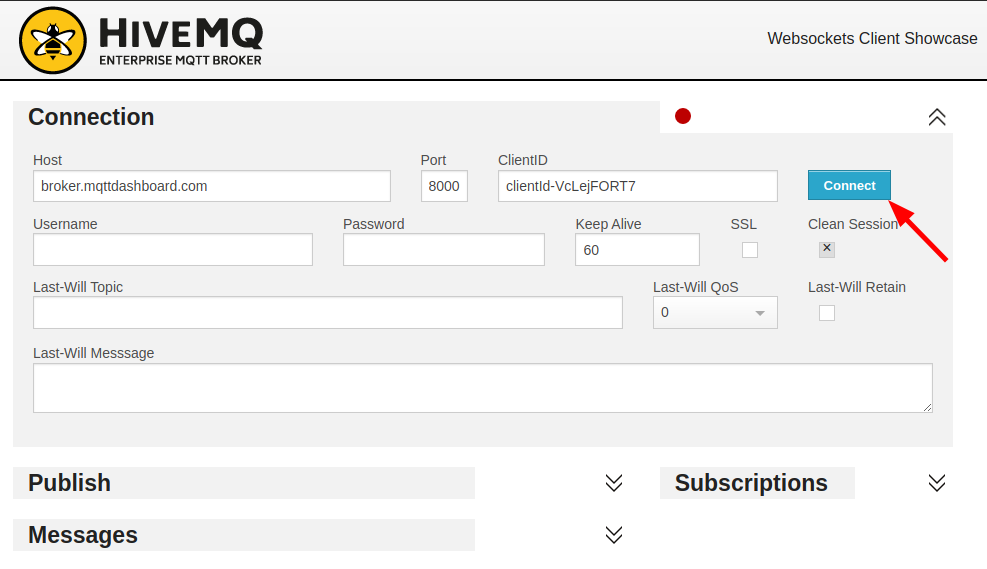
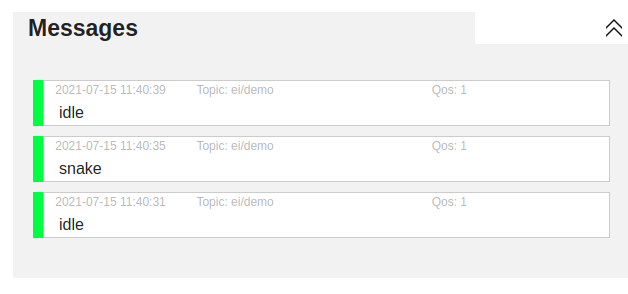
Open HiveMQ Online MQTT Client and click
Connect -
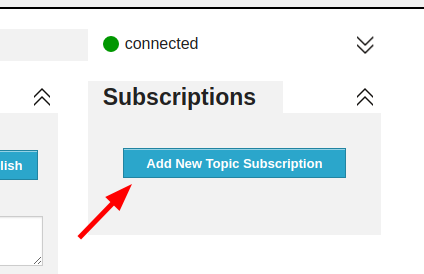
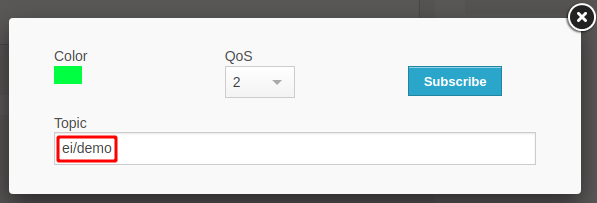
After connection, click
Add New Topic Subscription, in the dialog enter topicei/demoand clickSubscribe -
After that you should start seeing messages incoming from
nRF9160DK
