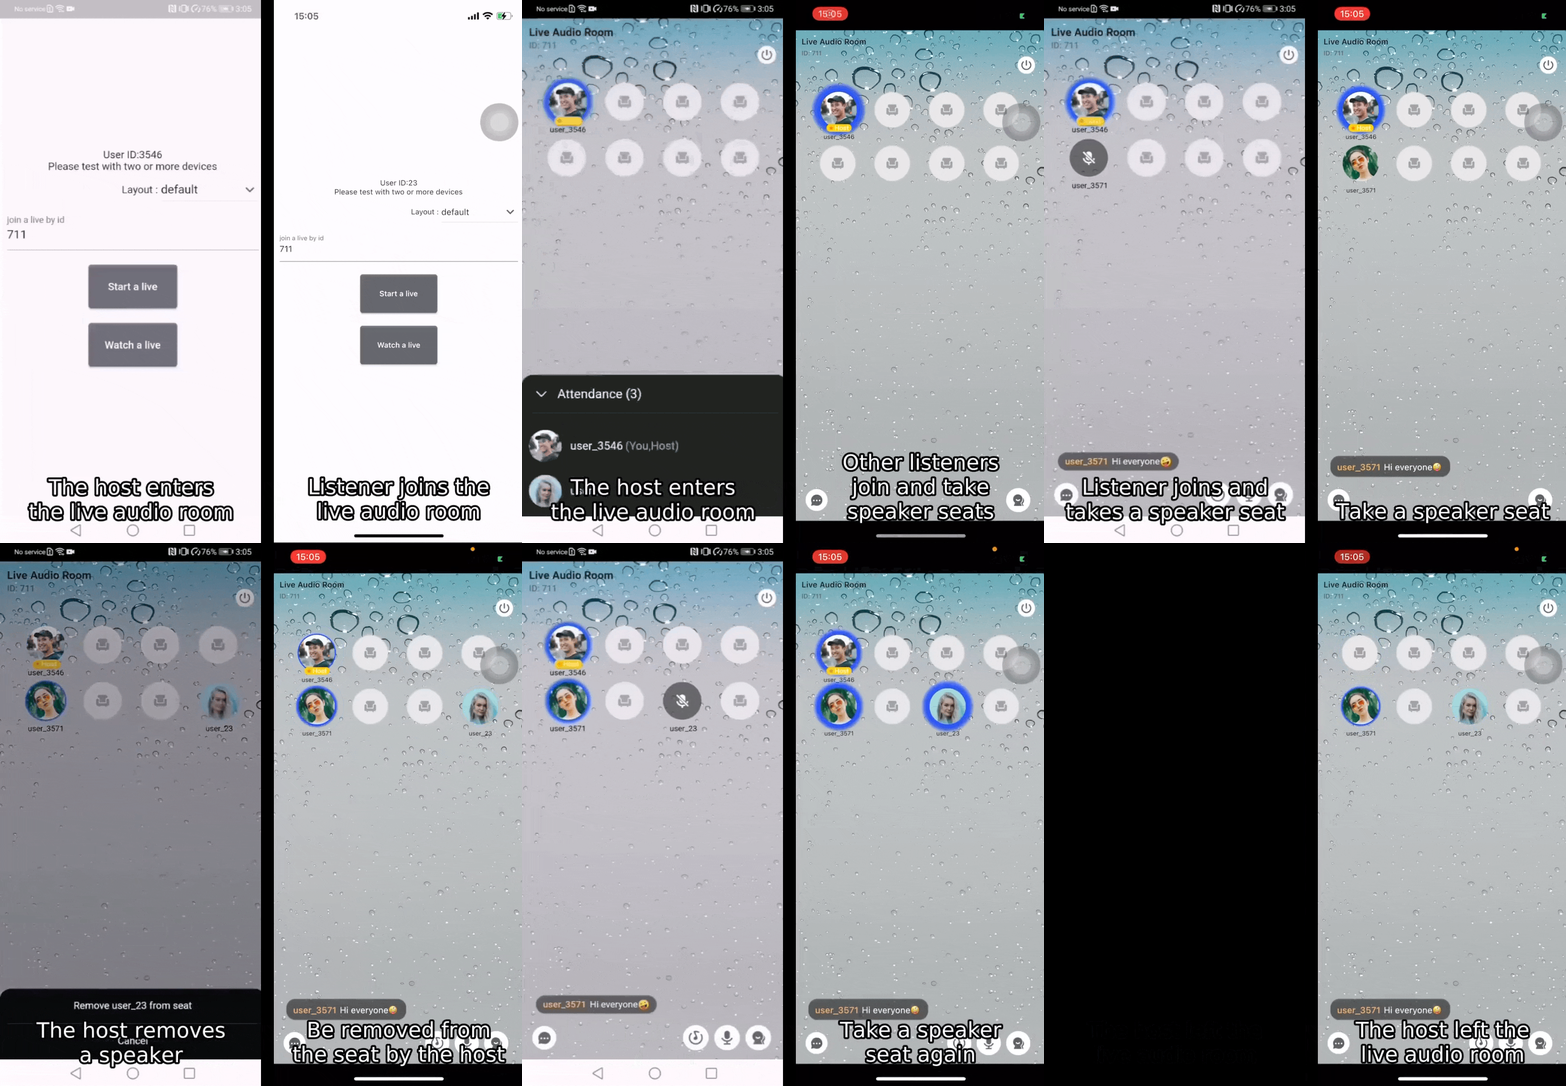
If you have any questions regarding bugs and feature requests, visit the ZEGOCLOUD community .
Live Audio Room Kit is a prebuilt component that helps you to build full-featured live audio rooms into your apps easier.
And it includes the business logic along with the UI, enabling you to customize your live audio apps faster with more flexibility.
-
When you want to build live audio rooms easier and faster, it allows you:
Build or prototype live audio apps ASAP
Finish the integration in the shortest possible time
-
When you want to customize UI and features as needed, it allows you:
Customize features based on actual business needs
Spend less time wasted developing basic features
Add or remove features accordingly
To build a live audio app from scratch, you may check our Voice Call.
- Ready-to-use Live Audio Room
- Remove speakers
- Speaker seats changing
- Customizable seat layout
- Extendable menu bar
- Device management
- Customizable UI style
- Real-time interactive text chat
- Go to ZEGOCLOUD Admin Console, and do the following:
- Create a project, get the AppID and AppSign.
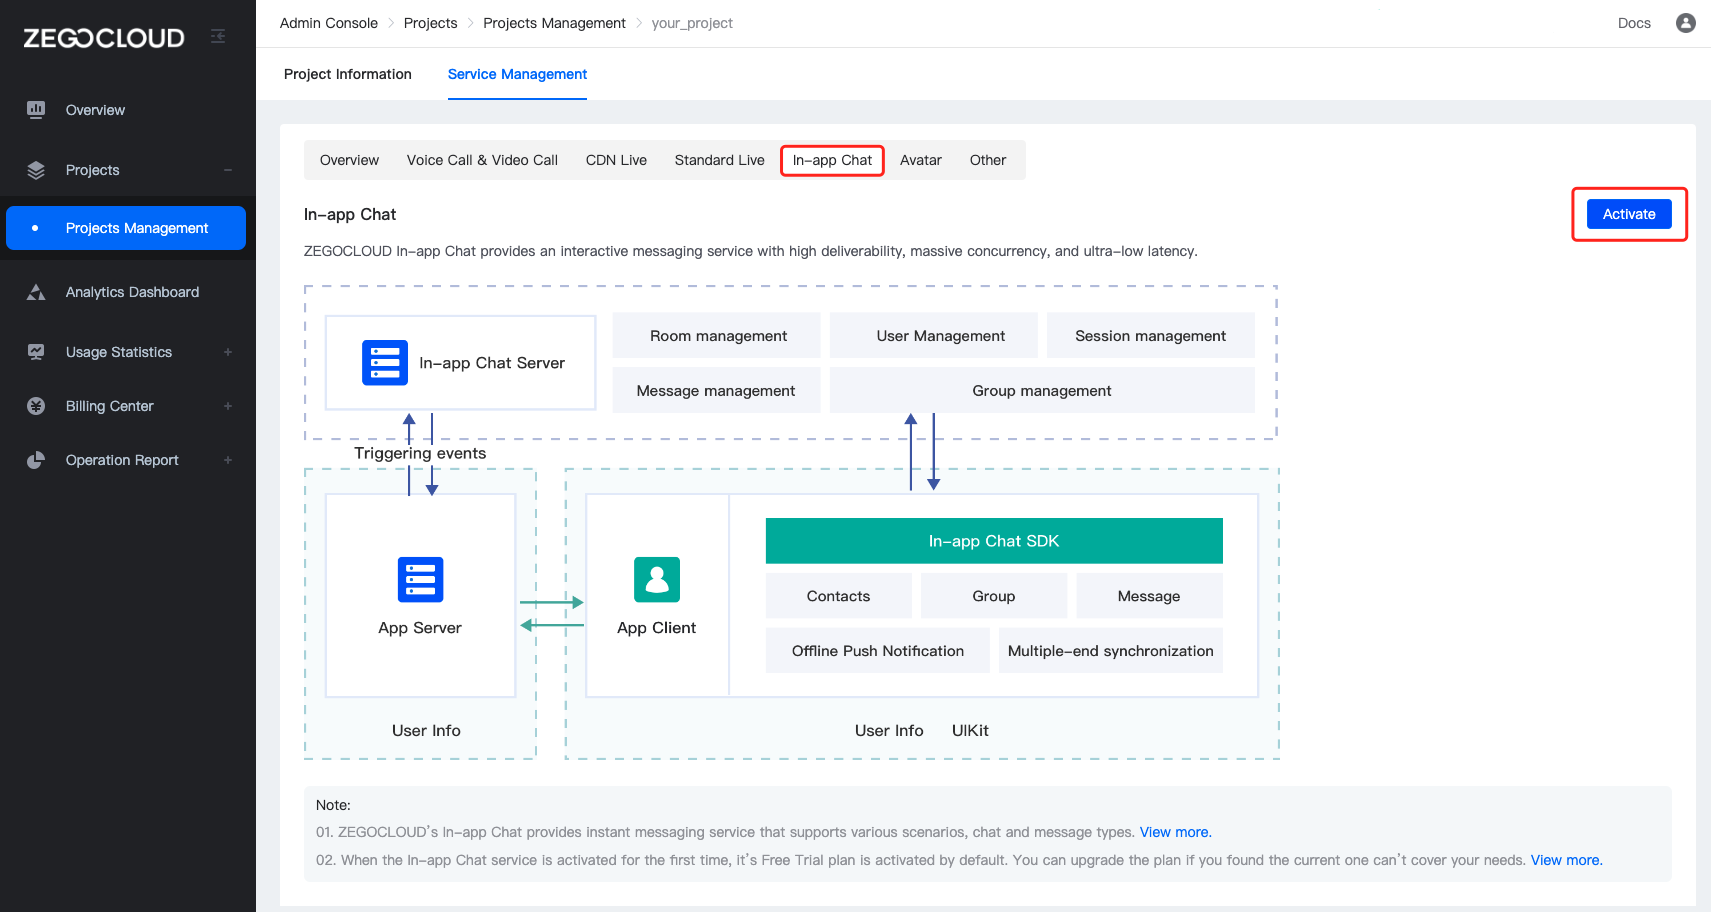
- Activate the In-app Chat service (as shown in the following figure).
- Add the
jitpackconfiguration.
- If your Android Gradle Plugin is 7.1.0 or later: enter your project's root directory, open the
settings.gradlefile to add the jitpack todependencyResolutionManagement>repositorieslike this:
dependencyResolutionManagement {
   repositoriesMode.set(RepositoriesMode.FAIL_ON_PROJECT_REPOS)
   repositories {
      google()
      mavenCentral()
      maven { url 'https://www.jitpack.io' } // <- Add this line.
   }
}If you can't find the above fields in settings.gradle, it's probably because your Android Gradle Plugin version is lower than v7.1.0.
- If your Android Gradle Plugin is earlier than 7.1.0: enter your project's root directory, open the
build.gradlefile to add the jitpack toallprojects->repositorieslike this:
allprojects {
    repositories {
        google()
        mavenCentral()
        maven { url "https://jitpack.io" }  // <- Add this line.
    }
}- Modify your app-level
build.gradlefile:
dependencies {
    ...
    implementation 'com.github.ZEGOCLOUD:zego_uikit_prebuilt_live_audio_room_android:1.0.0'    // Add this line to your module-level build.gradle file's dependencies, usually named [app].
}- Specify the
userIDanduserNamefor connecting the Live Audio Room Kit service. - Create a
roomIDthat represents the live audio room you want to create.
userID,userName, androomIDcan only contain numbers, letters, and underlines (_).- Using the same
roomIDwill enter the same live audio room.
With the same roomID, only one user can enter the live audio room as host. Other users need to enter the live audio room as the audience.
public class LiveAudioRoomActivity extends AppCompatActivity {

    @Override
    protected void onCreate(Bundle savedInstanceState) {
        super.onCreate(savedInstanceState);
        setContentView(R.layout.activity_call);

        addFragment();
    }

    public void addFragment() {
        long appID = yourAppID;
        String appSign = yourAppSign;
        String userID = yourUserID;
        String userName = yourUserName;

        boolean isHost = getIntent().getBooleanExtra("host", false);
        String roomID = getIntent().getStringExtra("roomID");

        ZegoUIKitPrebuiltLiveAudioRoomConfig config;
        if (isHost) {
            config = ZegoUIKitPrebuiltLiveAudioRoomConfig.host();
        } else {
            config = ZegoUIKitPrebuiltLiveAudioRoomConfig.audience();
        }

        ZegoUIKitPrebuiltLiveAudioRoomFragment fragment = ZegoUIKitPrebuiltLiveAudioRoomFragment.newInstance(
            appID, appSign, userID, userName,roomID,config);
        getSupportFragmentManager().beginTransaction()
            .replace(R.id.fragment_container, fragment)
            .commitNow();
    }
}
Then, you can create a live audio room by starting your LiveAudioRoomActivity.


