This small project allow you to push notification in a Vue application from a Redis PUBLISH using WebSockets.
- Push Notification using Vue.js, Redis and WebSocket
Using Docker:
If you don't have Docker installed on your computer, you need to install it before you can continue. When you have Docker running, you can run this command to start the redis server:
docker run --name <CONTAINER_NAME> -p 6379:6379 -d redis
Using Homebrew (Mac):
To install:
brew install redis
To run:
redis-server
or
brew services start redis
> git clone https://github.com/mdrhmn/vue-redis-websocket-notification.git

> cd vue-redis-websocket-notification
You can change the HTTP Port and the Redis connection string in the ./notif-server/server.js.
> cd ./notif-server

> npm install

> npm start server.js
> cd ./web-client

> npm install

> npm run serve
Open your browser to http://localhost:8080
Open redis-cli in Terminal Redis Insight and publish messages on the app:notifications channel.
> redis-cli

127.0.0.1:6379> PUBLISH app:notifications "Hello from Redis!"
127.0.0.1:6379> PUBLISH app:notifications "Another message!"
You should see some notifications poping up in the Vue application.
Refer to this official Microsoft documentation
Windows:
set REDISCACHEHOSTNAME=DNS_NAME.redis.cache.windows.net
set REDISCACHEKEY=XXXXXXXXXXXXXXXXXXXXXXXXXXXXXXXXXXXXXXXXXXXX
MacOS:
export REDISCACHEHOSTNAME=DNS_NAME.redis.cache.windows.net
export REDISCACHEKEY=XXXXXXXXXXXXXXXXXXXXXXXXXXXXXXXXXXXXXXXXXXXX
Amend the Redis client connection in the notif-server/server.js file:
// notif-server/server.js

// METHOD 2: Using Azure Cache for Redis server
// Connect to the Azure Cache for Redis over the TLS port using the key.
var cacheHostName = process.env.REDISCACHEHOSTNAME;
var cachePassword = process.env.REDISCACHEKEY;
var redisClient = redis.createClient({
    // With Azure Cache for Redis, only the TLS port (6380) is enabled by default.
    // https://docs.microsoft.com/en-us/azure/azure-cache-for-redis/cache-how-to-redis-cli-tool
    url: "rediss://" + cacheHostName + ":6380",
    password: cachePassword,
});

/* -------------------------------------------------------------------------- */

// Subscribe to "app:notifications" channel
redisClient.subscribe("app:notifications");You can change the HTTP Port and the Redis connection string in the ./notif-server/server.js.
> cd ./notif-server

> npm install

> npm start server.js
> cd ./web-client

> npm install

> npm run serve
Open your browser to http://localhost:8080
> cd ./web-pub

> npm install

> npm start
Send GET request to http://localhost:3015
Unlike local Redis server connection, redis-cli doesn’t work with SSL connections. There are 3 ways to use redis-cli for Azure Cache for Redis server:
-
Disable SSL-only configuration (not recommended due to security concerns)
-
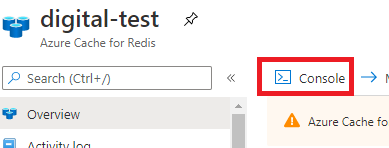
Connect using the Azure console
Open the console and publish messages on the
app:notificationschannel.> PUBLISH app:notifications "Hello from Redis!" > PUBLISH app:notifications "Another message!"You should see some notifications poping up in the Vue application.
-
Using
stunnelto tunnel your redis connection over a TLS connectionRefer to the Medium tutorial or official Microsoft documentation
- How to Create Notification Services with Redis, Websockets, and Vue.js
- Build a notification service with Redis, Web Sockets and Vue.js
- Quickstart: Use Azure Cache for Redis in Node.js
- Use the Redis command-line tool with Azure Cache for Redis
- Connecting to Azure Cache (Redis) with redis-cli and stunnel
- Implementing Redis Pub/Sub in Node.js Application

