White-labeling is the process of customizing an application's branding and appearance to match different clients or brands. With Codemagic, you can easily create white-labeled versions of your Flutter application by leveraging variables and configurations.
To customize your application for white-labeling, you need to add variables in the Codemagic dashboard. These variables will allow you to change the app icon, package name in Android, bundle identifier for iOS, and other configurations. In addition, you can set a white-label group to organize your white-labeled versions.
- Open the Codemagic dashboard and navigate to your project.
- Go to the "Environment" section and click on "Add Variable".
- Add variables for the specific configurations you want to customize, such as
packageName,appName,bundleIdentifier, orfirebaseConfigFile. - Save the variables.
- To set the white-label group, add a variable named
APP_NAMEand set its value to the desired app name. - Save the variable.
To configure Codemagic for your Flutter project, you need to create a codemagic.yaml file in the root directory of your project. This file will contain the necessary configuration settings for building your app on Codemagic.
Follow these steps to create the codemagic.yaml file:
- Open your project in a text editor.
- Create a new file in the root directory of your project.
- Name the file
codemagic.yaml. - Add the necessary configuration settings for Android and iOS platforms.
- Specify the target group for your app.
- Choose the machine on which you want to build your Flutter app.
- Add any other required configuration settings.
Here's an example of how the codemagic.yaml file might look:
Android:
name: Android client release
instance_type: mac_mini_m1
environment:
  flutter: 3.13.7
  groups:
    - sandbox
iOS:
ios-client-release:
  name: iOS client release
  instance_type: mac_mini_m1
  environment:
    groups:
      - sandbox
    vars:
XCODE_SCHEME: "Runner"To change the app name in Android and iOS, you can use the following scripts:
Android:
- name: Change package name
  script: |
    flutter pub add rename
    dart pub global activate rename
    rename setAppName --targets ios,android --value $APP_NAME
iOS:
- name: Change iOS app name
  script: |
    echo "Change iOS app name to $APP_NAME"
    /usr/libexec/PlistBuddy -c "Set :CFBundleName $APP_NAME" -c "Set :CFBundleDisplayName $APP_NAME" ios/${XCODE_SCHEME}/Info.plist
as we mentioned before we defined the $APP_NAME in valirable sections.
To change the app packageName in Android or BundleIdentifier iOS, you can use the following scripts:
Android:
- name: Change package name
  script: |
    rename setBundleId --targets android --value $ANDROID_PACKAGE_NAME
iOS:
- name: Set bundle id
  script: |
    echo "Change iOS Bundle Id to $IOS_BUNDLE_ID"
sed -i '' -e 's/PRODUCT_BUNDLE_IDENTIFIER \= [^\;]*\;/PRODUCT_BUNDLE_IDENTIFIER = '${IOS_BUNDLE_ID}';/' ios/${XCODE_SCHEME}.xcodeproj/project.pbxprojThis step is same for Andoird and IOS
- name: Download and unzip assets
  script: |
    echo "Downloading assets from $ASSETS_URL"
    curl -O $ASSETS_URL || echo "Failed to download assets"
    echo "Unzipping assets.zip"
unzip -o assets.zip || echo "Failed to unzip assets.zip"In this step we configure Firebase and download firebase config files for ANdroid and iOS:
Android:
- name: Download and unzip Android Google service json file
  script: |
    echo "Downloading firebase from $ANDROID_FIREBASE"
    curl -O $ANDROID_FIREBASE || echo "Failed to download google-service"
    echo "Unzipping google-service.zip"
    unzip -o <COMPANY_NAME>-sandbox-android.zip -d android/app || echo "Failed to unzip google-service.zip"
iOS:
- name: Download and unzip GoogleService-Info.plist file
  script: |
    echo "Downloading firebase from $IOS_FIREBASE"
    curl -O $IOS_FIREBASE || echo "Failed to download GoogleService-Info"
    echo "Unzipping GoogleService-Info.zip"
unzip -o <COMPANY_NAME>-sandbox-android.zip -d ios/Runner || echo "Failed to unzip GoogleService-Info.zip"Next, We can change the app icon with this script
Android:
- name: Download and unzip Android App Icon
  script: |
    echo "Downloading icon from $ANDROID_ICON"
    curl -O $ANDROID_ICON || echo "Failed to download res.zip"
    echo "Unzipping res.zip"
    unzip -o res.zip -d android/app/src/main || echo "Failed to unzip res.zip"
iOS:
- name: Download and unzip Android App Icon
  script: |
    echo "Downloading icon from $IOS_ICON"
    curl -O $IOS_ICON || echo "Failed to download Assets.xcassets.zip"
    echo "Unzipping Assets.xcassets.zip"
    unzip -o Assets.xcassets.zip -d ios/Runner || echo "Failed to unzip Assets.xcassets.zip"
After Step 7, we have some specefic steps for Android and iOS:
To sign the Android build, we first need to encode the key.jks and key.properties files on your local machine. This can be achieved using the following commands:
openssl base64 -in key.jks -out jksEncoded.txt
openssl base64 -in key.properties -out keyEncoded.txt
Note: Ensure that you execute these commands in the same directory where key.properties and key.jks are located.
Executing these commands will generate encoded text for key.jks and key.properties. This encoded text should then be added to your Codemagic environment variables.
- name: Decode Keystore and Properties
  script: |
    echo "$KEYSTORE" | base64 --decode > ./android/app/<COMPANY_NAME>.jks
    echo "$KEY_PROPERTIES" | base64 --decode > ./android/key.properties
Ensure that $KEYSTORE corresponds to your encoded key.jks file and $KEY_PROPERTIES corresponds to your encoded key.properties file. Verify that these variables have been correctly added to your Codemagic dashboard.
In this section of the workflow, we are installing the necessary dependencies for our project. The flutter packages pub get command fetches the Flutter packages needed for the project. We then navigate into the Android directory and run the Gradle wrapper command to ensure the correct Gradle version is used. Finally, we navigate back to the project root.
- name: Install dependencies
  script: |
    flutter packages pub get
    cd android && ./gradlew wrapper --gradle-version 7.4 --distribution-type all
    cd ..
Please replace 7.4 with the specific version of Gradle that your project requires.
In this step, we will build the Android APK. The flutter build apk --split-per-abi command is used to build an APK file that is split by ABI. This results in smaller APK files that users download, which is particularly useful if your app supports multiple ABIs.
- name: Flutter build after package name change
  script: |
    flutter build apk --split-per-abi
Good! You've done white-labeling for Android. See the final codmagic.yaml at the end of this document.
We make sure the iOS dependencies already installed
- name: Install pods
script: find . -name "Podfile" -execdir pod install \;This step is the hardest, So please pay attention:
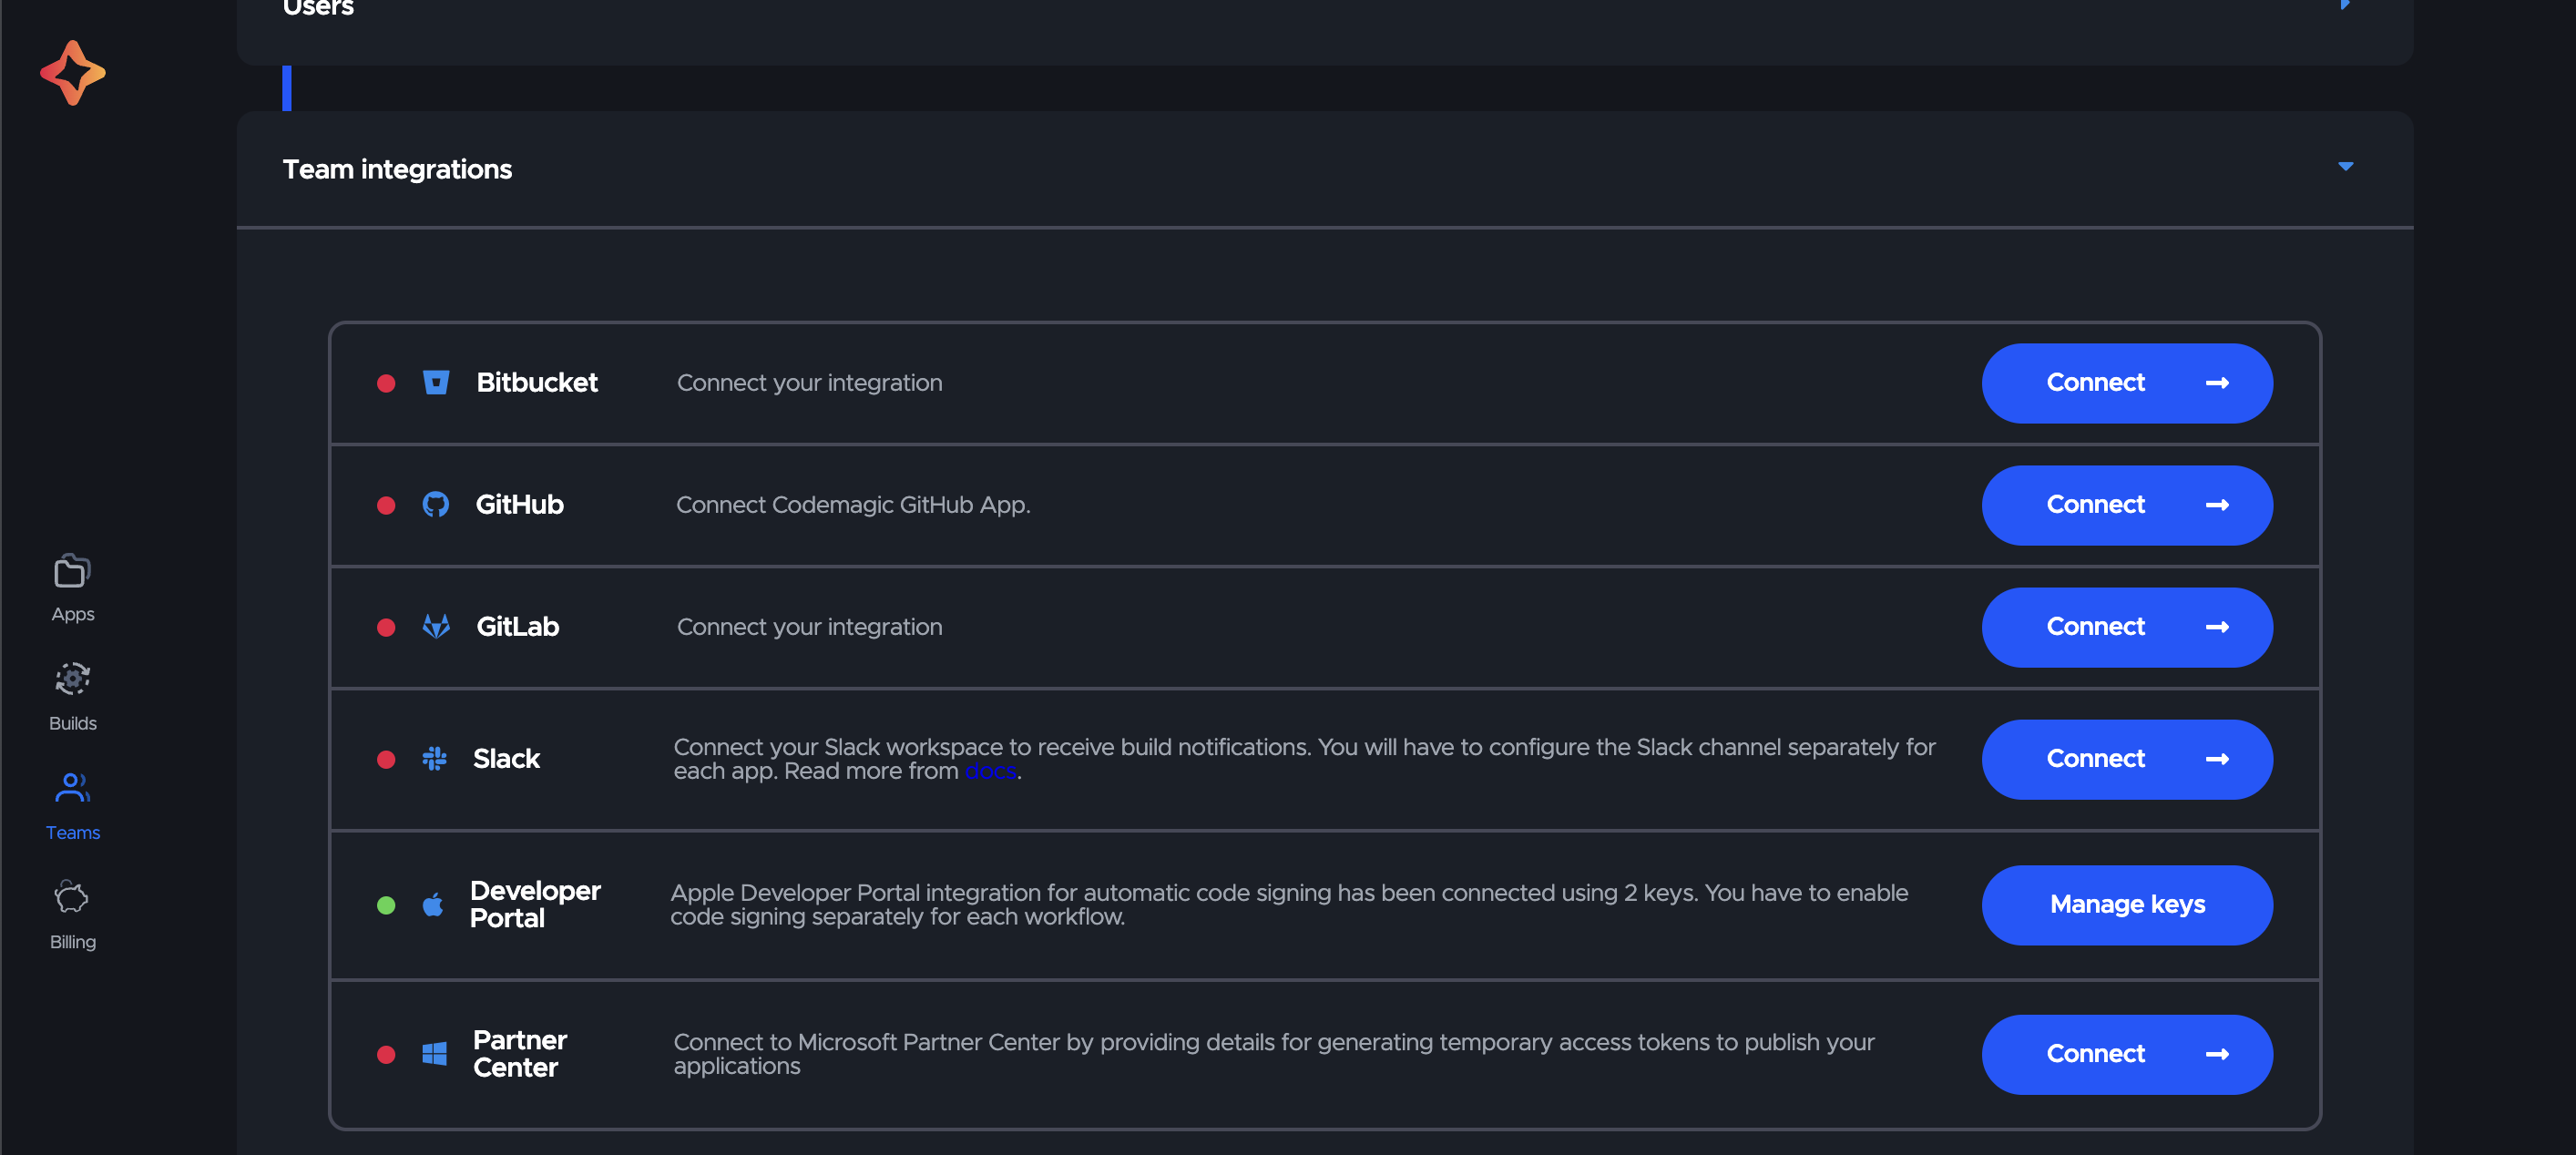
First Make sure you already connected Developer Portal to codemagic like this picture:
Second, you should add 3 variables to codemagic dashboard with this names:
- APP_STORE_CONNECT_ISSUER_ID
- APP_STORE_CONNECT_KEY_IDENTIFIER
- APP_STORE_CONNECT_PRIVATE_KEY
APP_STORE_CONNECT_ISSUER_ID: You can get it from apple developer console
APP_STORE_CONNECT_KEY_IDENTIFIER: For this, you should add KEY ID from console.
APP_STORE_CONNECT_PRIVATE_KEY: For this you should create a new key with admin permission and download it(.p8 file). then you have to add .p8 file content to codemagic for APP_STORE_CONNECT_PRIVATE_KEY.
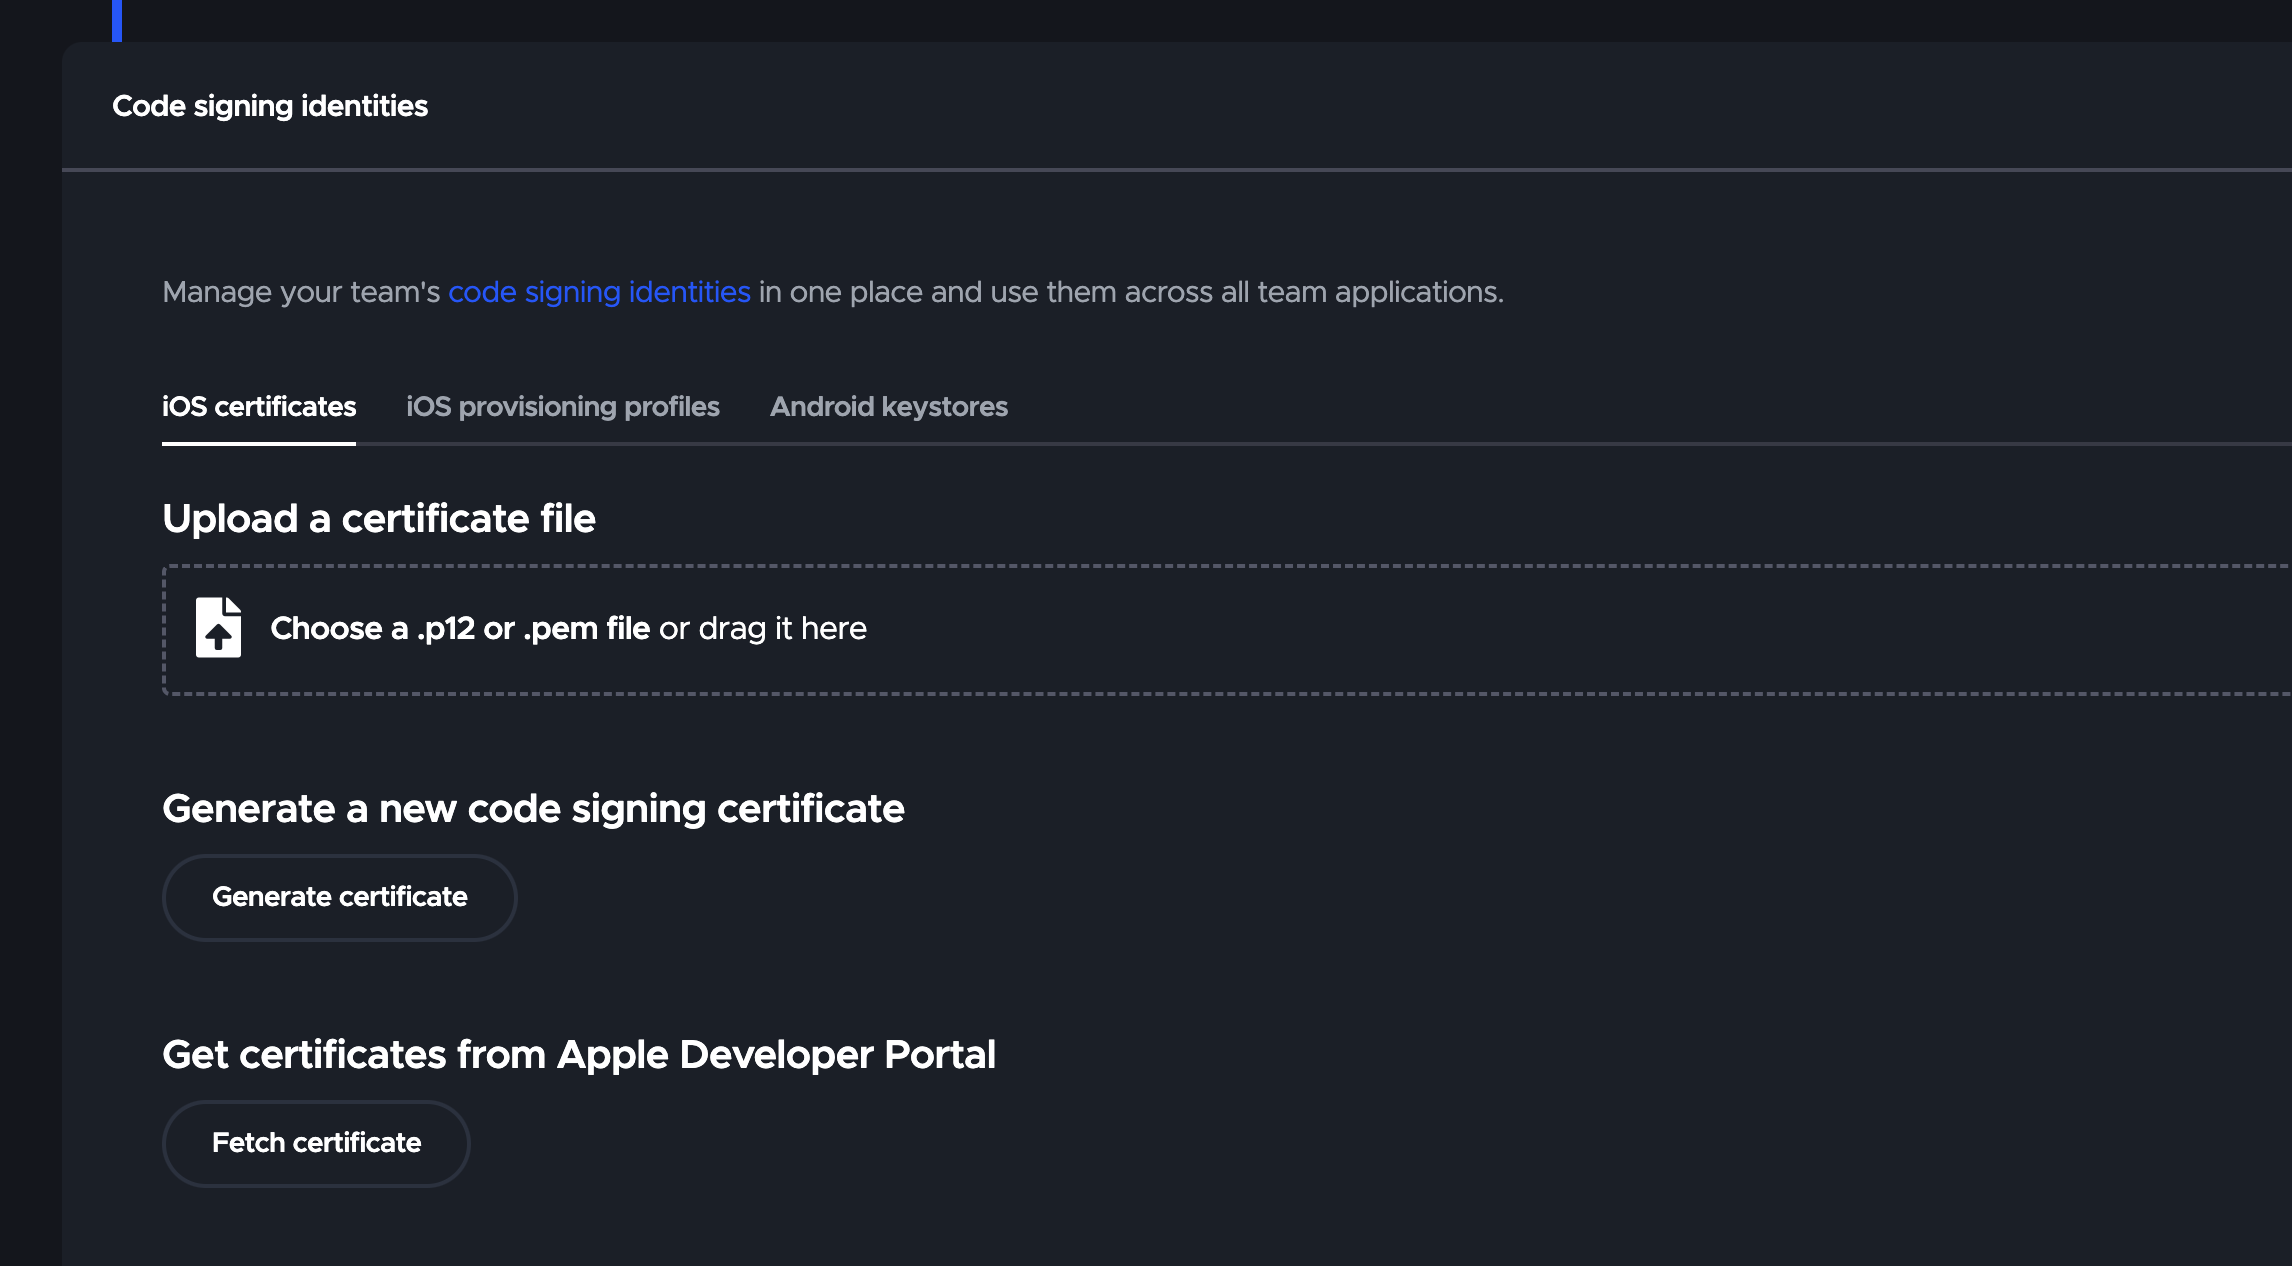
Then, You should fetch certificates from Apple Developer Portal
Then, Add CERTIFICATE_PRIVATE_KEY variable. For CERTIFICATE_PRIVATE_KEY value we export IOS_DISTRIBUTION.p12 file from keychain (Keychain > My Certificates). Then you need to create a private key from the key in the keychain with this command:
openssl pkcs12 -legacy -in IOS_DISTRIBUTION.p12 -nodes -nocerts | openssl rsa -out ios_distribution_private_key
Or create a new one with this lasso:
ssh-keygen -t rsa -b 2048 -m PEM -f ~/Desktop/ios_distribution_private_key -q -N ""
Now, we sign the flutter project for iOS with this script:
- name: iOS code signing
  script: |
    keychain initialize
    app-store-connect fetch-signing-files "$IOS_BUNDLE_ID" --type IOS_APP_STORE --create
    keychain add-certificates
xcode-project use-profilesIn the last step, we run pub get to get all packages and then build ipa:
- name: Install dependencies
  script: flutter packages pub get

- name: Flutter build ipa and automatic versioning
  script: |
    flutter build ipa --release --export-options-plist /Users/builder/export_options.plist
Here is the final codemagic.yaml file:
workflows:
  android-client-release:
    name: Android client release
    instance_type: mac_mini_m1
    environment:
      flutter: 3.13.7
      groups:
        - sandbox
    scripts:
      - name: Change package name
        script: |
          flutter pub add rename
          dart pub global activate rename
          rename setBundleId --targets android --value $ANDROID_PACKAGE_NAME

      - name: Change Android app name
        script: rename setAppName --targets ios,android --value $APP_NAME

      - name: Download and unzip assets
        script: |
          echo "Downloading assets from $ASSETS_URL"
          curl -O $ASSETS_URL || echo "Failed to download assets"
          echo "Unzipping assets.zip"
          unzip -o assets.zip || echo "Failed to unzip assets.zip"

      - name: Download and unzip Android Google service json file
        script: |
          echo "Downloading firebase from $ANDROID_FIREBASE"
          curl -O $ANDROID_FIREBASE || echo "Failed to download google-service"
          echo "Unzipping google-service.zip"
          unzip -o <COMPANY_NAME>-sandbox-android.zip -d android/app || echo "Failed to unzip google-service.zip"

      - name: Download and unzip Android App Icon
        script: |
          echo "Downloading icon from $ANDROID_ICON"
          curl -O $ANDROID_ICON || echo "Failed to download res.zip"
          echo "Unzipping res.zip"
          unzip -o res.zip -d android/app/src/main || echo "Failed to unzip res.zip"

      - name: Decode Keystore and Properties
        script: |
          echo "$KEYSTORE" | base64 --decode > ./android/app/<COMPANY_NAME>.jks
          echo "$KEY_PROPERTIES" | base64 --decode > ./android/key.properties

      - name: Install dependencies
        script: |
          flutter packages pub get
          cd android && ./gradlew wrapper --gradle-version 7.4 --distribution-type all
          cd ..
      - name: Flutter build after package name change
        script: |
          flutter build apk --split-per-abi

    artifacts:
      - build/**/outputs/**/*.apk

  ios-client-release:
    name: iOS client release
    instance_type: mac_mini_m1
    environment:
      groups:
        - sandbox
      vars:
        XCODE_SCHEME: "Runner"
    scripts:
      - name: Change iOS app name
        script: |
          echo "Change iOS app name to $APP_NAME"
          /usr/libexec/PlistBuddy -c "Set :CFBundleName $APP_NAME" -c "Set :CFBundleDisplayName $APP_NAME" ios/${XCODE_SCHEME}/Info.plist

      - name: Set bundle id
        script: |
          echo "Change iOS Bundle Id to $IOS_BUNDLE_ID"
          sed -i '' -e 's/PRODUCT_BUNDLE_IDENTIFIER \= [^\;]*\;/PRODUCT_BUNDLE_IDENTIFIER = '${IOS_BUNDLE_ID}';/' ios/${XCODE_SCHEME}.xcodeproj/project.pbxproj

      - name: Change iOS icons
        script: |
          echo "Downloading icon from $IOS_ICON"
          curl -O $IOS_ICON || echo "Failed to download Assets.xcassets"
          echo "Unzipping Assets.xcassets.zip"
          unzip -o Assets.xcassets.zip -d ios/${XCODE_SCHEME}/Assets.xcassets/ || echo "Failed to unzip Assets.xcassets"

      - name: Download and unzip assets
        script: |
          echo "Downloading assets from $ASSETS_URL"
          curl -O $ASSETS_URL || echo "Failed to download assets"
          echo "Unzipping assets.zip"
          unzip -o assets.zip || echo "Failed to unzip assets.zip"

      - name: Install pods
        script: find . -name "Podfile" -execdir pod install \;

      - name: iOS code signing
        script: |
          keychain initialize
          app-store-connect fetch-signing-files "$IOS_BUNDLE_ID" --type IOS_APP_STORE --create
          keychain add-certificates
          xcode-project use-profiles

      - name: Install dependencies
        script: flutter packages pub get

      - name: Flutter build ipa and automatic versioning
        script: |
          flutter build ipa --release --export-options-plist /Users/builder/export_options.plist

    artifacts:
      - build/ios/ipa/*.ipa
# Document
# Make key.properties base64 with this command -> openssl base64 -in key.properties -out outName.txt
# Make <COMPANY_NAME>.jks base64 with this command -> openssl base64 -in <COMPANY_NAME>.jks -out jskOutName.txt
# make rsa CERTIFACE_KEY | ssh-keygen -t rsa -b 2048 -m PEM -f ~/Desktop/ios_distribution_private_key -q -N ""This concludes the setup and build process for white-label in flutter application. If you encounter any issues or have any questions, please open an issue in the GitHub repository. We appreciate your contribution to this project and look forward to working together to improve it.


