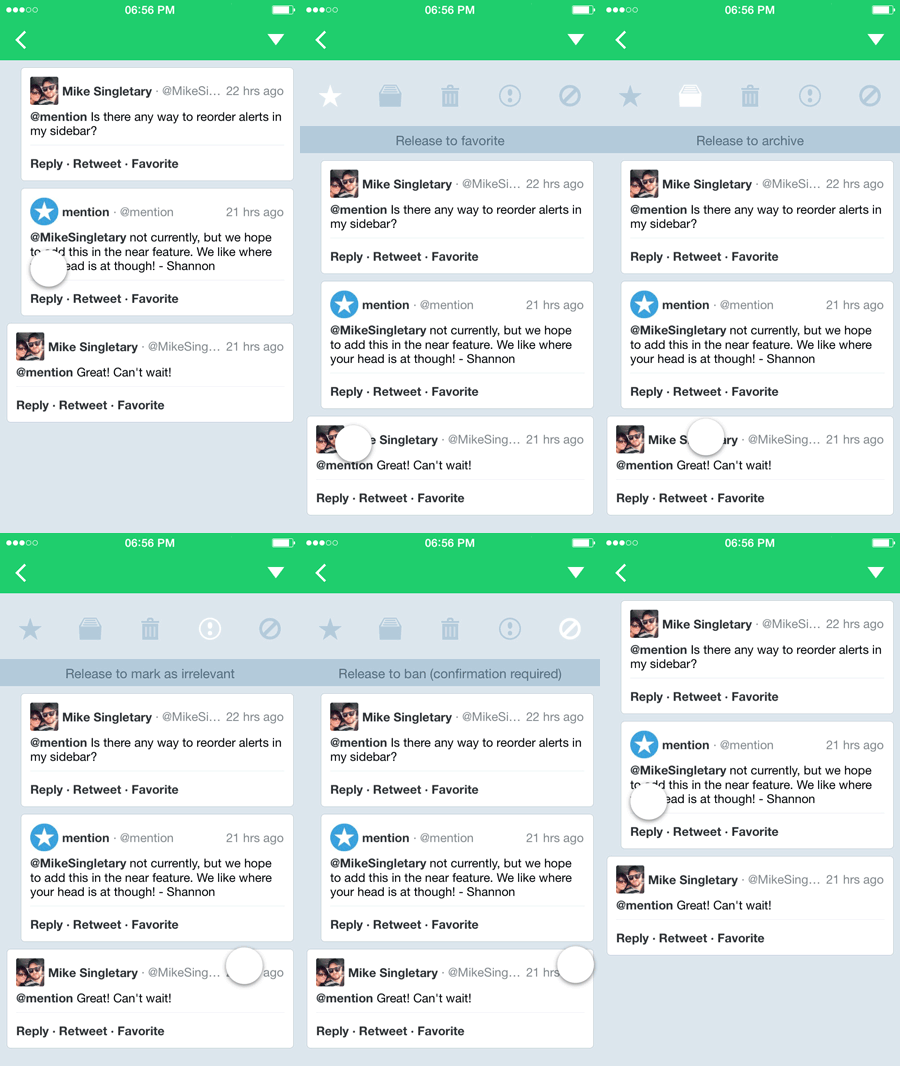
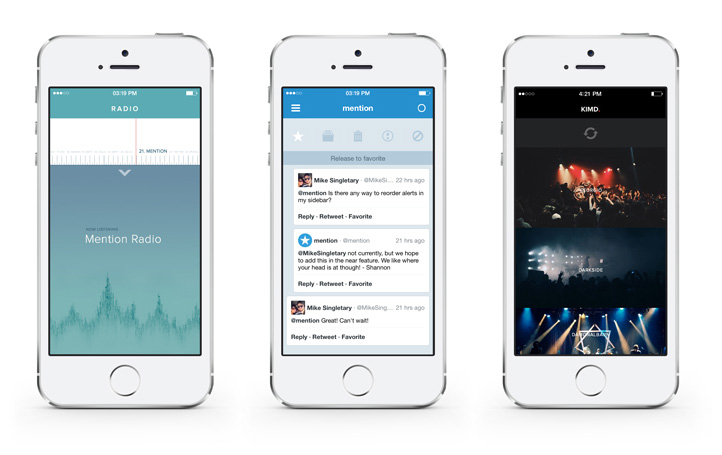
MNTPullToReact is an extended evolution of the famous Pull to Refresh interaction. The main idea comes from a unique question: can the natural pulling gesture do more than just refresh and therefore avoid ugly action buttons that take up precious content space?
You can bind as many reactions as you'd like to MNTPullToReact and have your user access specific application actions through this unique and well known gesture.
MNTPullToReact is very easy to use and highly customizable.
If you're using MNTPullToReact in your application, add your application link to the application list.
Finally, before the demo, I'd like to thank all of the contributors. If I forget, please add yourself to the contributors list. There will always be something to do or improve, and as such, you can read the to-do list if you're looking for a specific way to contribute.
-- Guillaume Sempe, Lead Mobile Developer, mention
MNTPullToReact is a subclass of UIControl and embraces the common target-action design pattern widely used in Apple's own controls. It also mimics the Apple UIRefreshControl control interface to facilitate its usage by developers already familiar with the Apple Pull to Refresh control.
| What | UIRefreshControl |
MNTPullToReact |
|---|---|---|
| Property to know the status | BOOL refreshing |
NSInteger action |
| Initiate an action | beginRefreshing |
beginAction: |
| Terminate an action | endRefreshing |
endAction: |
| Event on action needed | UIControlEventValueChanged |
UIControlEventValueChanged |
Here is a short code sample that uses the MNTPullToReactDefaultView under the hood. The following code creates a pull to react with 4 actions.
// Import the library header
#import "PullToReact.h"

// In the viewDidLoad create the control
MNTPullToReactControl *reactControl = [[MNTPullToReactControl alloc] initWithNumberOfActions:4];
[reactControl addTarget:self action:@selector(reaction:) forControlEvents:UIControlEventValueChanged];
self.tableView.reactControl = reactControl;

// Than create the target-action method
- (void)reaction:(id)sender
{
    // Do the reaction thing
    [reactControl endAction:reactControl.action];
}- Add it to your project
If you use CocoaPods, add this line to your Podfile:
pod 'MNTPullToReact', '~> 1.0'If you don't use CocoaPods, then add all of the required files to your project and set the needed settings according to the podspec of the library. Please note: do not forget to add -ObjC to the other linker flags.
OTHER_LDFLAGS -ObjC
- In your view controller or your subclass, import the library header.
#import "PullToReact.h"- Set the new
reactControlproperty of theUITableViewclass to the Pull to React you want to use.
MNTPullToReactControl *reactControl = [[MNTPullToReactControl alloc] initWithNumberOfActions:4];
[reactControl addTarget:_delegateAndDataSource action:@selector(reaction:) forControlEvents:UIControlEventValueChanged];
self.reactControl = reactControl;- Add the target class to the action method implementation.
#pragma mark - Pull to react target-action method
- (void)reaction:(id)sender
{
    MNTPullToReactControl *reactControl = (MNTPullToReactControl *)sender;
    NSLog(@"Doing action %ld", (long)reactControl.action);
    dispatch_async(dispatch_get_global_queue(DISPATCH_QUEUE_PRIORITY_BACKGROUND, 0), ^{
        usleep(1100 * 1000);
        dispatch_async(dispatch_get_main_queue(), ^{
            [reactControl endAction:reactControl.action];
        });
    });
}
Once your asynchronous task has terminated, do not forget to call the endAction: method to inform the Pull to React control.
You can customize your own Pull to React features without any limits by subclassing the MNTPullToReactView class.
To see how to make amazing Pull to React designs, you can go through the [examples](https://github.com/mentionapp/mntpulltoreact/tree/master/ExampleCustomContent) provided in the library. ## To-do - Improve and finish the documentation to get it added to http://cocoadocs.org/. - Extended the library to be able to have a Pull to React control above a `UIWebView`. - Add the ability to put Pull to React controls on other sides of the targeted view (on the left, on the right, and at the bottom).If you're using MNTPullToReact in your application, add your App Store link to the list here.

