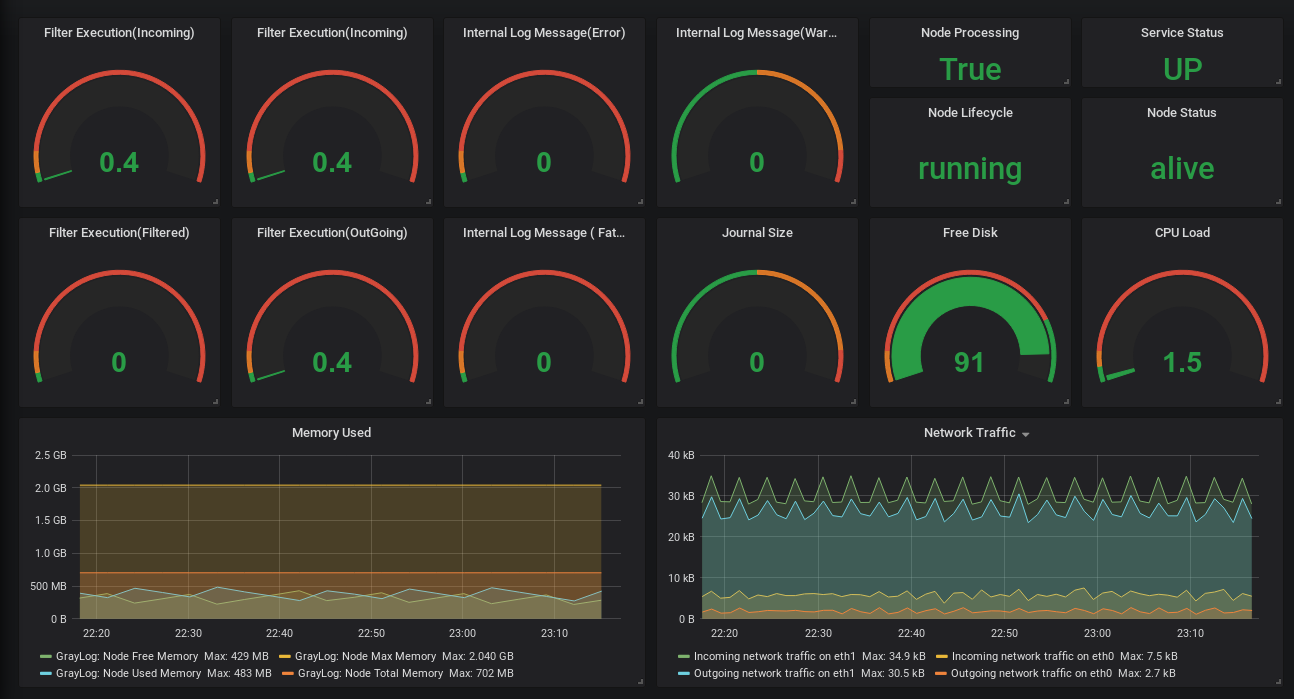
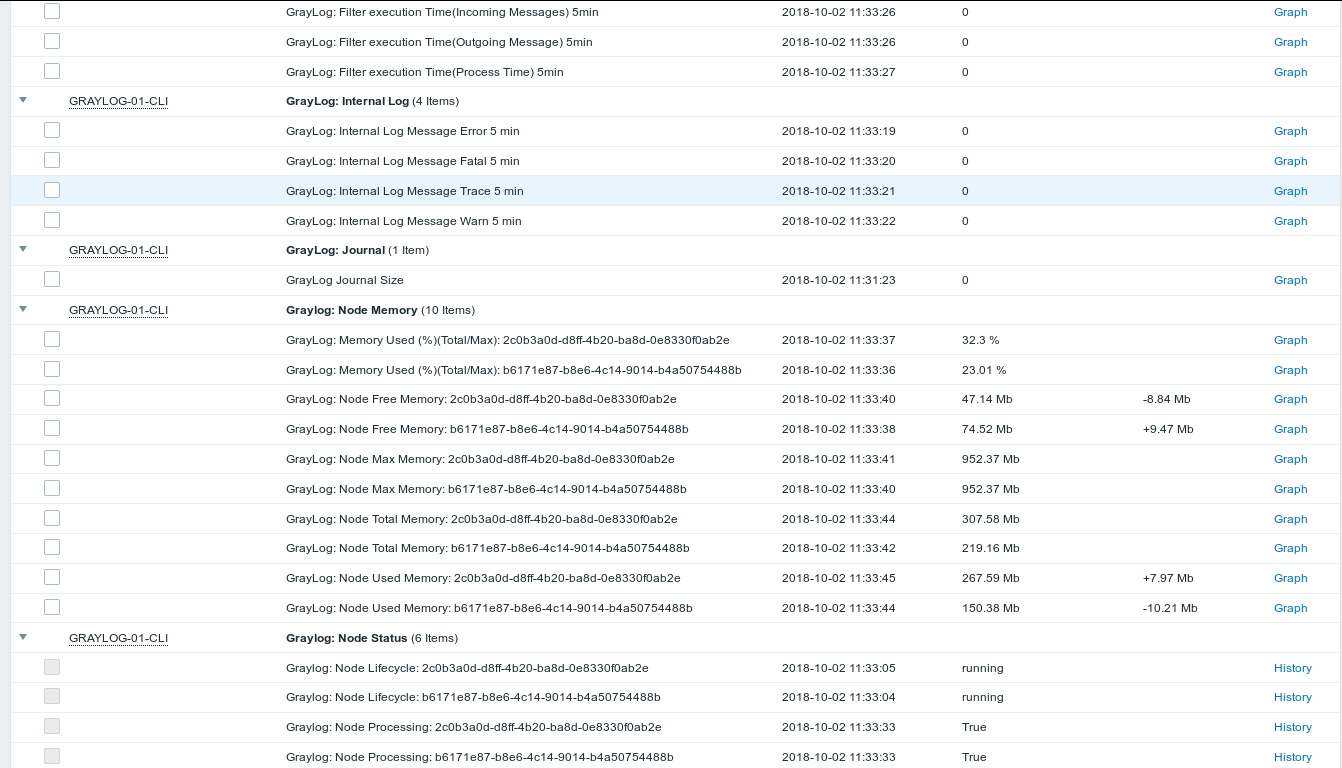
Template created to monitor GrayLog nodes through LLD (Low Level Discovery)
We added a feature of Zabbix called LLD (Low Level Discovery) in the model, this automation seeks to facilitate the discovery of the nodes in GrayLog, so that you do not have to register the nodes manually just set the time of the discovery rule.
- GrayLog: Filter execution Time (FIltered, Incomming, Outgoing, Process)
- GrayLog: Internal Log Message (Error, Fatal, Trace, Warn)
- GrayLog: Journal ( Journal Size)
- GrayLog: Node Memory(LLD)/( Free Memory, Max Memory, Total Memory, Used Memory)
- GrayLog: Node Status (Lifecycle, Processing, Status )
- GrayLog: Services
- Zabbix 3.4 or above;
- GrayLog 2.4 (works with Graylog 3.3);
- Zabbix Agent installed on Graylog server;
- Python 3.4 or simply Python > 3;
- Imports:
- import requests
- import json
- import sys
- Download the monitoring-graylog.py file and copy it to the scripts folder on your server:
# cp monitoring-graylog.py  /etc/zabbix/scripts/
# chmod +x monitoring-graylog.py- Create Graylog user (local) with password and change the variables in the monitoring-graylog.py file:
cat monitoring-graylog.py
apiUserGray="<Username Graylog>"
apiPassGray="<Password Username>"

## Functions to login in Api Rest ##
def apiGrayLog(valueApi):
    r = requests.get('http://<Ip GrayLog Server>:9000/api/%s' % valueApi, auth=(apiUserGray,apiPassGray))
    return r.text
In most cases "<Ip GrayLog Server>" will be 127.0.0.1
- Run the script by passing the lldgraylognode parameter to check if it's working properly:
# python3.4 monitoring-graylog.py lldgraylognode
{
    "data":[
        {
            "{#NODEID}":"b6171e87-b8e6-4c14-9014-b4a50754488b"
        },
        {
            "{#NODEID}":"2c0b3a0d-d8ff-4b20-ba8d-0e8330f0ab2e"
        }
    ]
}- Check where the * .conf files in the zabbix agent are stored::
# grep Include /etc/zabbix/zabbix_agentd.conf
Include=/etc/zabbix/zabbix_agentd.conf.d/*.conf- Copy the file user_parameter_graylog.conf to the includes directory and change the path of the binary python:
# cp user_parameter_graylog.conf /etc/zabbix/zabbix_agentd.conf.d/
# cat user_parameter_graylog.conf
UserParameter=graylog.node.men[*],/etc/zabbix/scripts/monitoring-graylog.py monnode $1 $2
UserParameter=graylog.cluster.status[*],/etc/zabbix/scripts/monitoring-graylog.py moncluster $1 $2
UserParameter=graylog.inter.log[*],/etc/zabbix/scripts/monitoring-graylog.py monmetric $1 $2
UserParameter=graylog.journal.size[*],/etc/zabbix/scripts/monitoring-graylog.py monmetric $1 $2
UserParameter=graylog.proc.buffer[*],/etc/zabbix/scripts/monitoring-graylog.py monprocessbuffer $1 $2
UserParameter=graylog.discovery.node,/etc/zabbix/scripts/monitoring-graylog.py lldgraylognode
- Restart zabbix agent
# systemctl restart zabbix-agent6.Use zabbix_get (from zabbix server) to test some items:
# zabbix_get -s < IP Agent Zabbix > -k graylog.discovery.node
{
    "data":[
        {
            "{#NODEID}":"2c0b3a0d-d8ff-4b20-ba8d-0e8330f0ab2e"
        }
    ]
}

# zabbix_get -s < IP Agent Zabbix > -k graylog.cluster.status['2c0b3a0d-d8ff-4b20-ba8d-0e8330f0ab2e',lb_status]
alive- Import proper version of template to Zabbix Server:
- Zabbix Server 3.4, 4.x - zabbix_3.4_template_graylog-node.xml
- Zabbix Server 5.x - zabbix_5.0_template_graylog-node.xml
Fonte: https://www.graylog.org/post/back-to-basics-monitoring-graylog
Blog Onx Solutions: http://blog.onxsolutions.net/monitorando-node-graylog-usando-zabbix/
MarketPlaceGraylog: https://marketplace.graylog.org/addons/1ad55d59-09a0-4dd4-9da6-2eccbbfbed1e
ZabbixShare: https://share.zabbix.com/cat-app/monitoring-system/graylog-node-monitoring-using-zabbix

