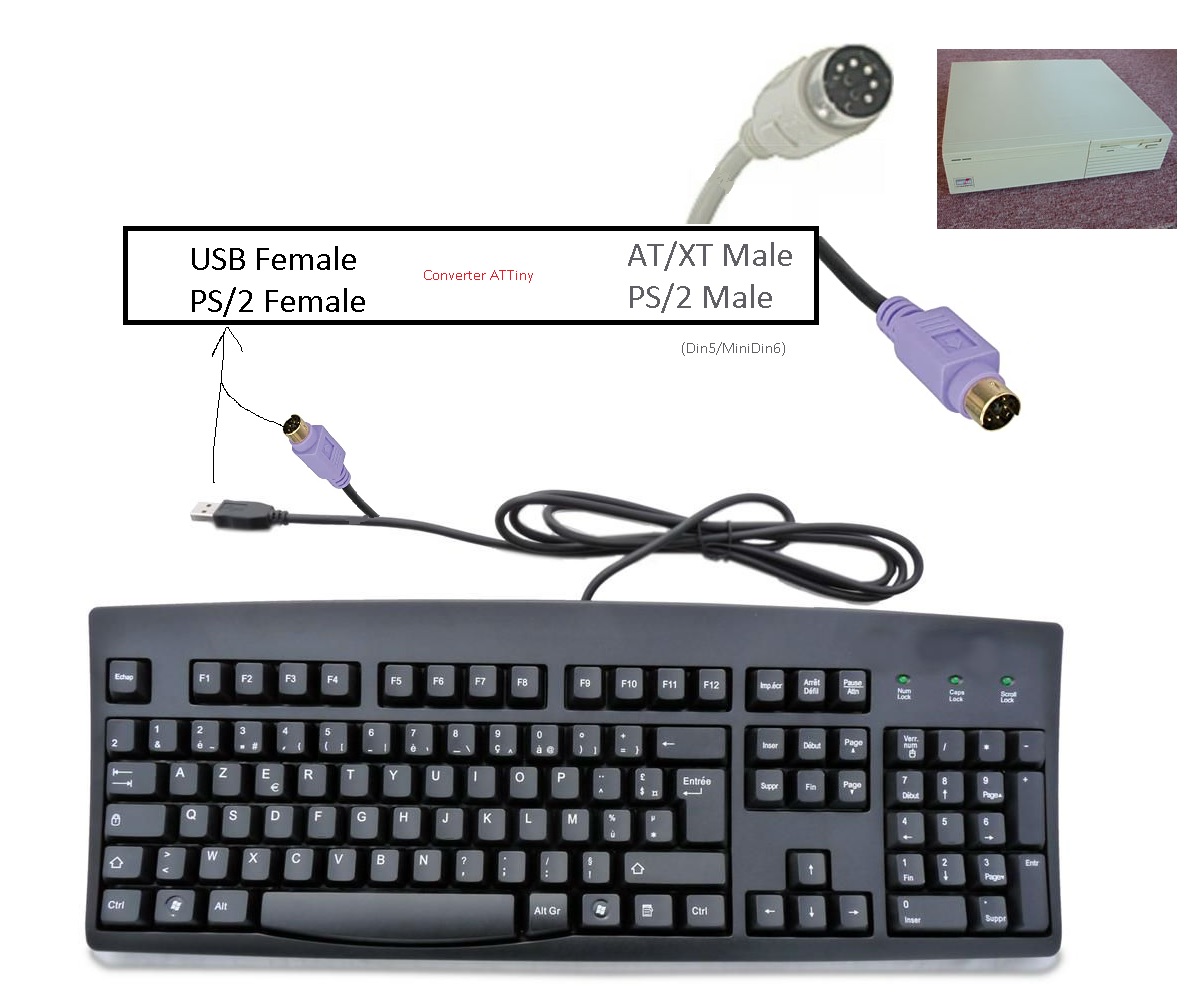
Minimal documentation and hardware schematics to build a working tiny PS/2 keyboard converter.
PC -> XT or AT (PS/2 & DIN5)
This project is available as an affordable kit or finished product that ships worldwide: buy to support my work
Firmware by: https://github.com/kesrut/pcxtkbd (GPL 2.0 License, see his repo for latest updates, may break the stable and working specific code for Uno, Nano and Tiny)
- Amstrad PC5086 (XT Clone)
Or you can build it yourself! It's not that hard, no worries!
Using this nifty piece of gear you'll be able to use a normal PS/2 or sometimes USB keyboard on your old machines such as:
- Pentium 1 machines 286 / 386 / ...
- Amstrad PC1512, PC4086, PC5086
- Commodore Amiga 1000 / 2000 Computers
- Old Bull Micral, Goupil, Olivetti, Thomson, IBM ... computers
- Arduino (eg: Nano) or ATTiny85 + IC Socket (ATTiny45 may be compatible)
- Breadboard or PCB
- DIN5 or PS/2 male connector (for the XT PC eg: a mouse or keyboard cable)
- PS/2 or USB female connector (for the keyboard)
- Cables/Jumpers if breadboard
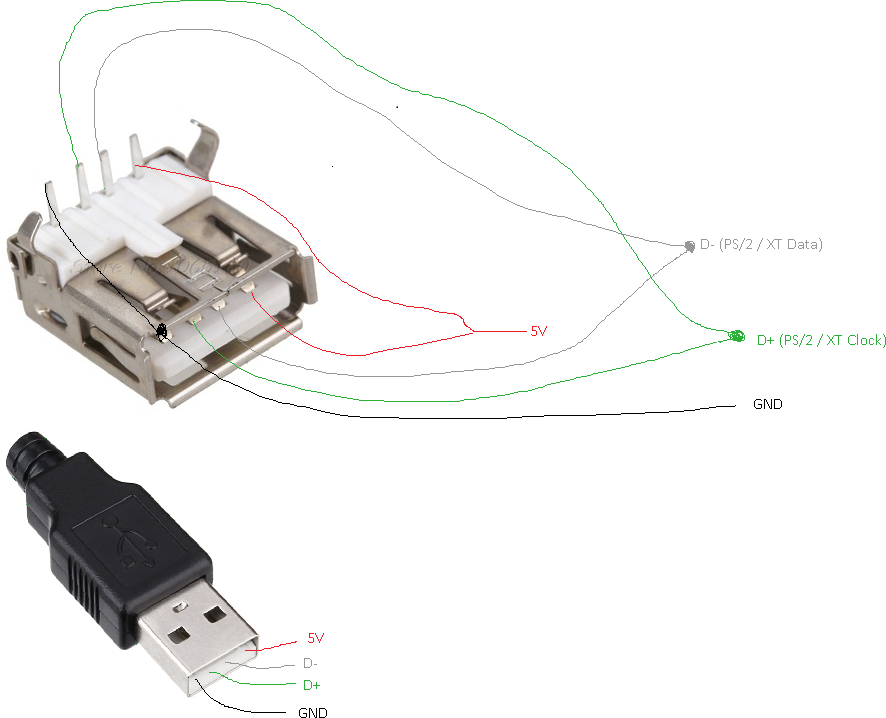
If you have an USB keyboard, follow this pinout schematic to connect it to the duino/PCB.
There is a dependency which is the PS2Keyboard.h library.
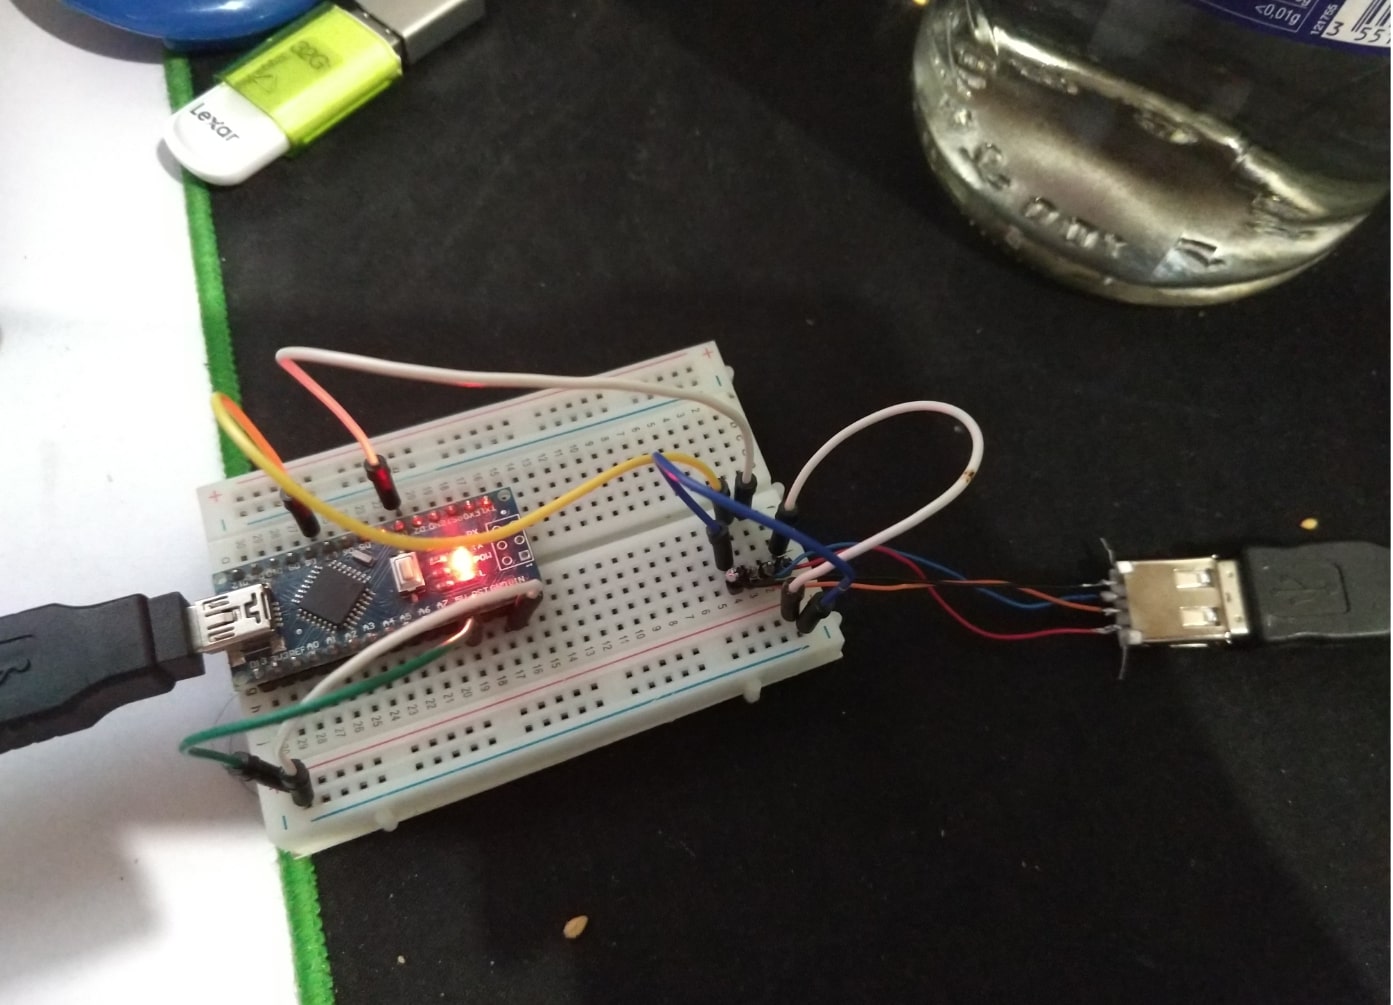
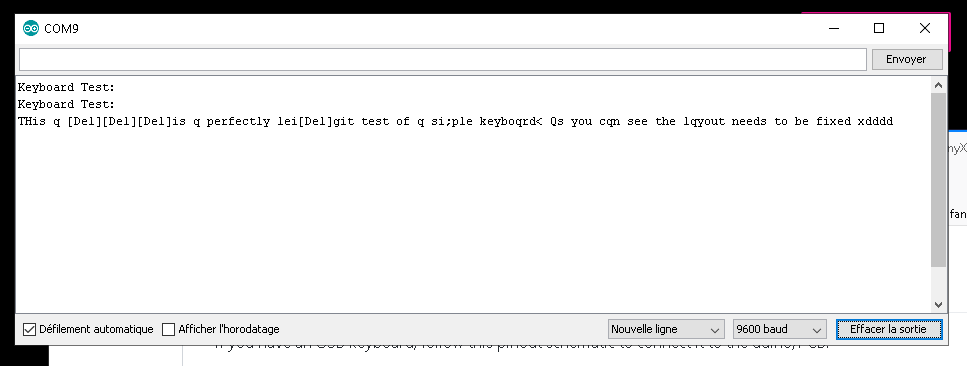
You can then test that the communication is occuring with the script PS-2_Tester.ino
You may copy the code directly from here
(open Tools>Serial Monitor to see the key presses)
Pins for the KB tester:
- D3 = Data
- D8 = Clock
- 5V = 5V
- GND = GND
/!\ This converter uses a microcontroller that doesn't have USB Host capabilities, thus it will be unable to convert an USB keyboard that doesn't have legacy protocol fallback to PS/2 (many commercial USB keyboards have this feature).
See this project for an USB to AT Keyboard converter. (it does USB -> Apple ADB as well :p)
Tested on Arduino Nano. Adapt accordingly.
Numlock and Capslock are not implemented on this test script, no worries!
Once you've tested your keyboard, you can take it to the next level: creating a prototype converter. Considering the price of an arduino these days (<5€) this is a perfectly okay solution compared to the converters currently available that cost between 25-30€ for less functionality (the arduino can be reused in another project, those converters can't)
I strongly advise reusing old connectors for the build as well as avoiding to use a breadboard, flying wire mounting is perfectly fine for such a low voltage, low current, low speed project.
The only con of using an arduino is the power consumption that jumps from 5mW to 150mW, it should be fine in most cases but for some really old computers, a more finely engineered setup might be preferable.
If you have an USB keyboard, here's the pinout for the converter input:
If you have a PS/2 mini-din keyboard, here's the pinout for the input (colors are just indicative and may vary if you salvaged a cable):
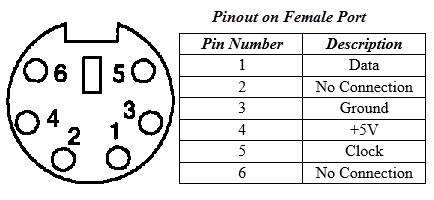
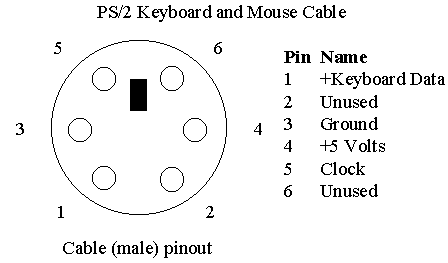
On the motherboard side, please wire accordingly to your connector or cable either just over here for a mini-din or here for DIN 5 (don't forget to flip depending if you have a male or female connector):
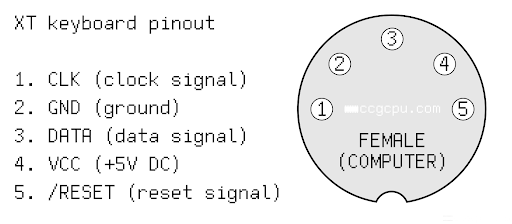
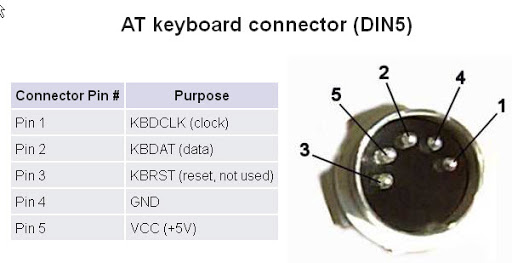
The pins can be edited in the code to suit your board!
- Keyboard 5V = VCC = Computer 5V
- Keyboard Clock = Pin D3
- Keyboard Data = Pin D4
- Computer Clock = Pin D2
- Computer Data = Pin D5
- Computer Ground = Keyboard Ground = Arduino GND
When programming the arduino board (or everytime it is plugged on the USB port of another PC, please remove the lead that wires VCC with the 5V coming from the old computer)
Don't forget to install the PS2KeyAdvanced library and configure your board and serial com port accordingly.
Here's the code.
Program your board, THEN ONLY connect the VCC to the 5V that will be coming from the old computer AND disconnect the USB from your modern PC.
It's time to try!!! If it doesn't work raise an issue with some details and please investigate and report on your side when it works and when it doesn't and your hypotheses about why it's like that.
When raising an issue, include your arduino platform, version of arduino IDE, brand and model of keyboard (+if you tried the serial tester or not), and machine you're trying to get the converter working on.
the megaxt.ino script is for Arduino Uno or Nano or ProMini328 !
Coming soon! Coming soon! Coming soon!
You want to build your own version of TinyXT, well you CAN! (you can even sell them if you want to)
-
Attiny85
-
PCB
-
DIN5 or minidin6 male connector (or cable, can be salvaged from old electronics)
-
minidin6 or USB female connector (can be salvaged)
-
DIP8 IC socket
-
USB to Serial converter (CH340, FTDI, ...), must support 5V Levels such as the advertised CH340
-
Some female-female jumper leads
You need to install the board definitions for the AtTiny chip.
Then please download
Pins
Configuring the proper board and com_port (Windows Linux) Installing new board definitions Etching a PCB Setting up the Arduino IDE Installing an arduino library Using a breadboard
Attiny keylogger Attiny wifi wireless keylogger PS/2 TO ADB PS/2 TO A
techpaul's ps/2 advanced library
djsadeepa's instructables on interfacing a PS/2 keyboard and an arduino
Pedro Umbelino Hackaday article on the old PIC solution
kesrut software implementation on Arduino ATMega/ATTiny platform
& Kicad's creators and contributors (CERN)
also thanks to pinouts.ru
