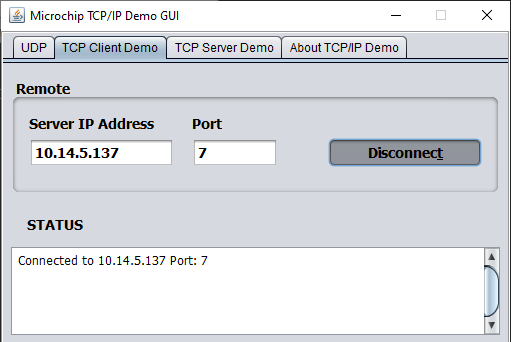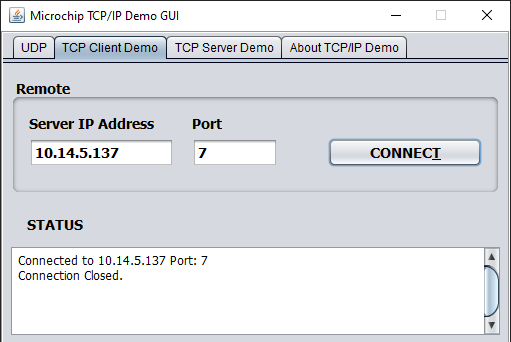
This repository provides MPLAB® X IDE projects that will work out of the box with the hardware and software listed below. The solutions in the repository include functionalities for the User Datagram Protocol (UDP), Transmission Control Protocol (TCP) Server and TCP Client Demos. Note that the TCP/IP Lite stack needs to be serviced every one second and the timer callback function needs to be set to one second. Change the pin allocations for the Serial Peripheral Interface (SPI), Switch and LED if a different device is used.
- MPLAB X IDE v6.10 or later
- MPLAB XC8 v2.41 or later
- MPLAB Code Configurator v5.3.7 or later
- TCP/IP Lite Stack v5.0.0
- Ethernet Drivers Library v6.0.0
- TCPIP Demo GUI v1.0
- Wireshark Tool
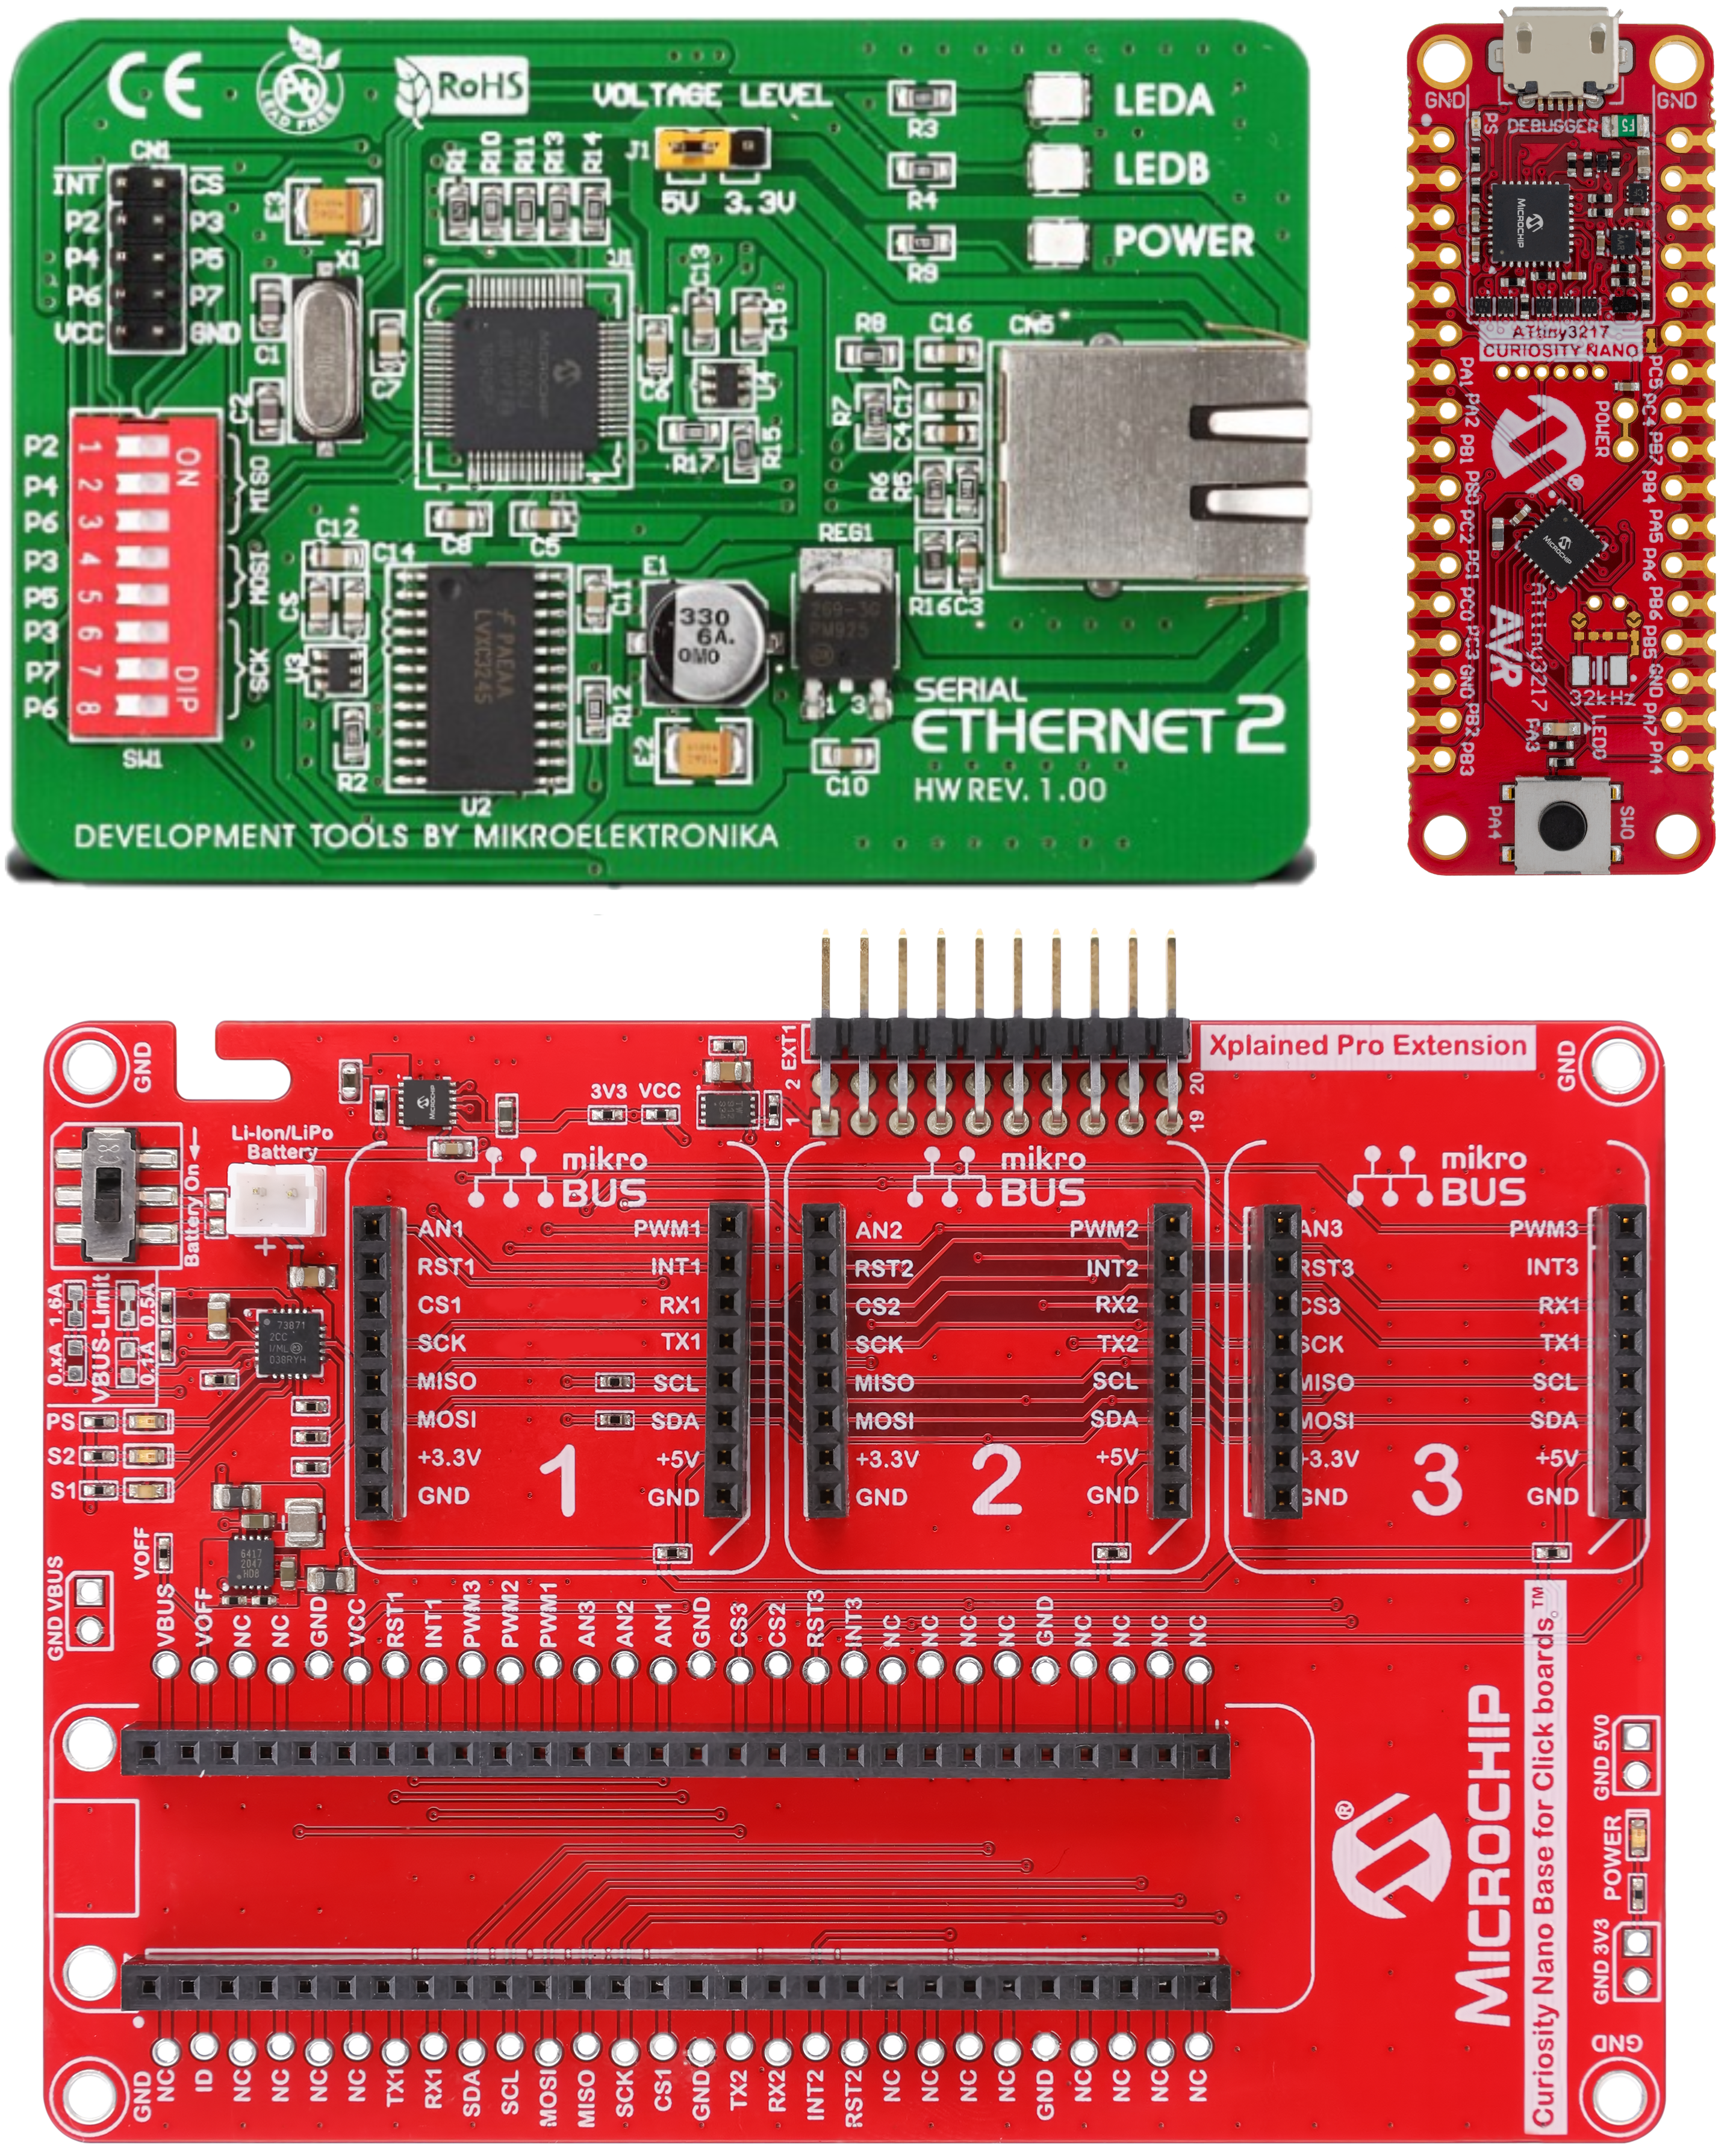
- Curiosity Nano Base for Click boards
- ATtiny3217 Curiosity Nano Evaluation Kit
- Serial Ethernet 2 Board
-
Place the ATtiny3217 Curiosity Nano Evaluation Kit on the Curiosity Nano Base.
-
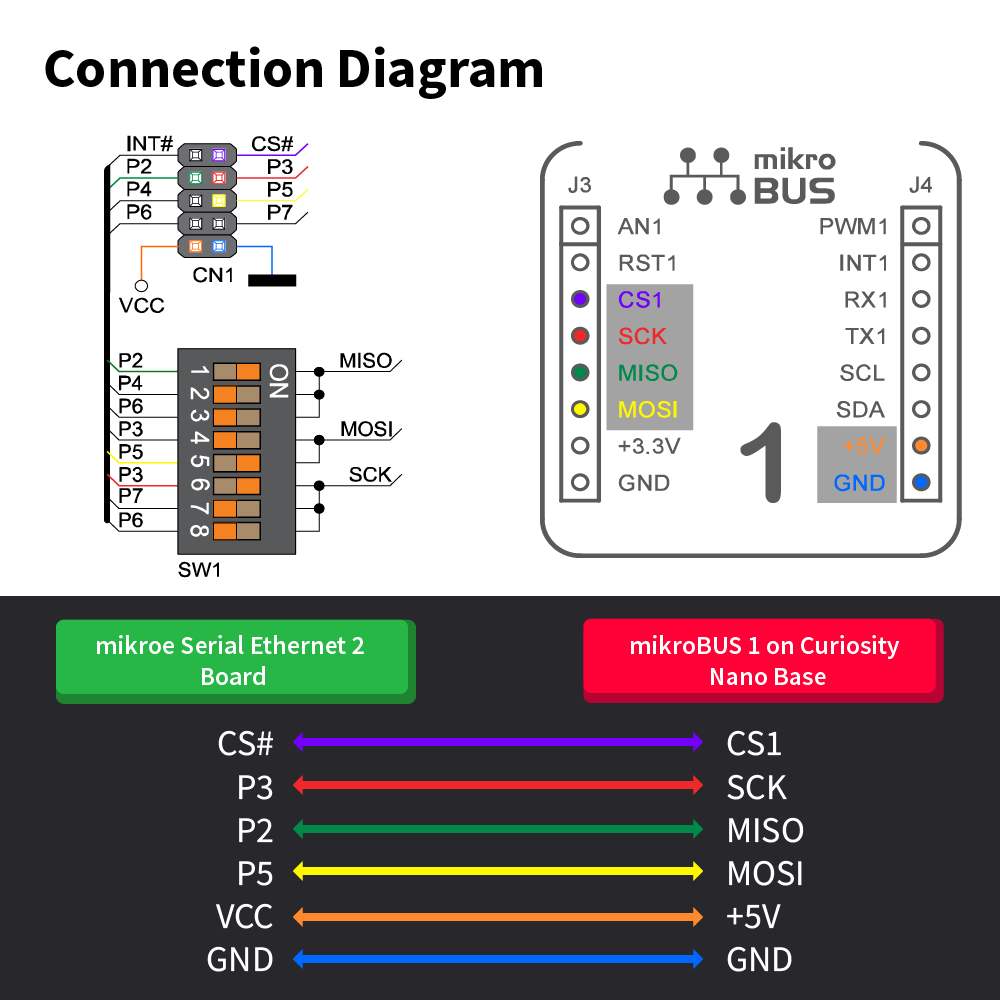
Connect the Serial Ethernet 2 Board to the mikroBUS™ 1 port on the Curiosity Nano Base and set the DIP switches according to the following connection diagram:
-
The pins were set in MPLAB Code Configurator based on the available pins on ATtiny3217 Curiosity Nano.
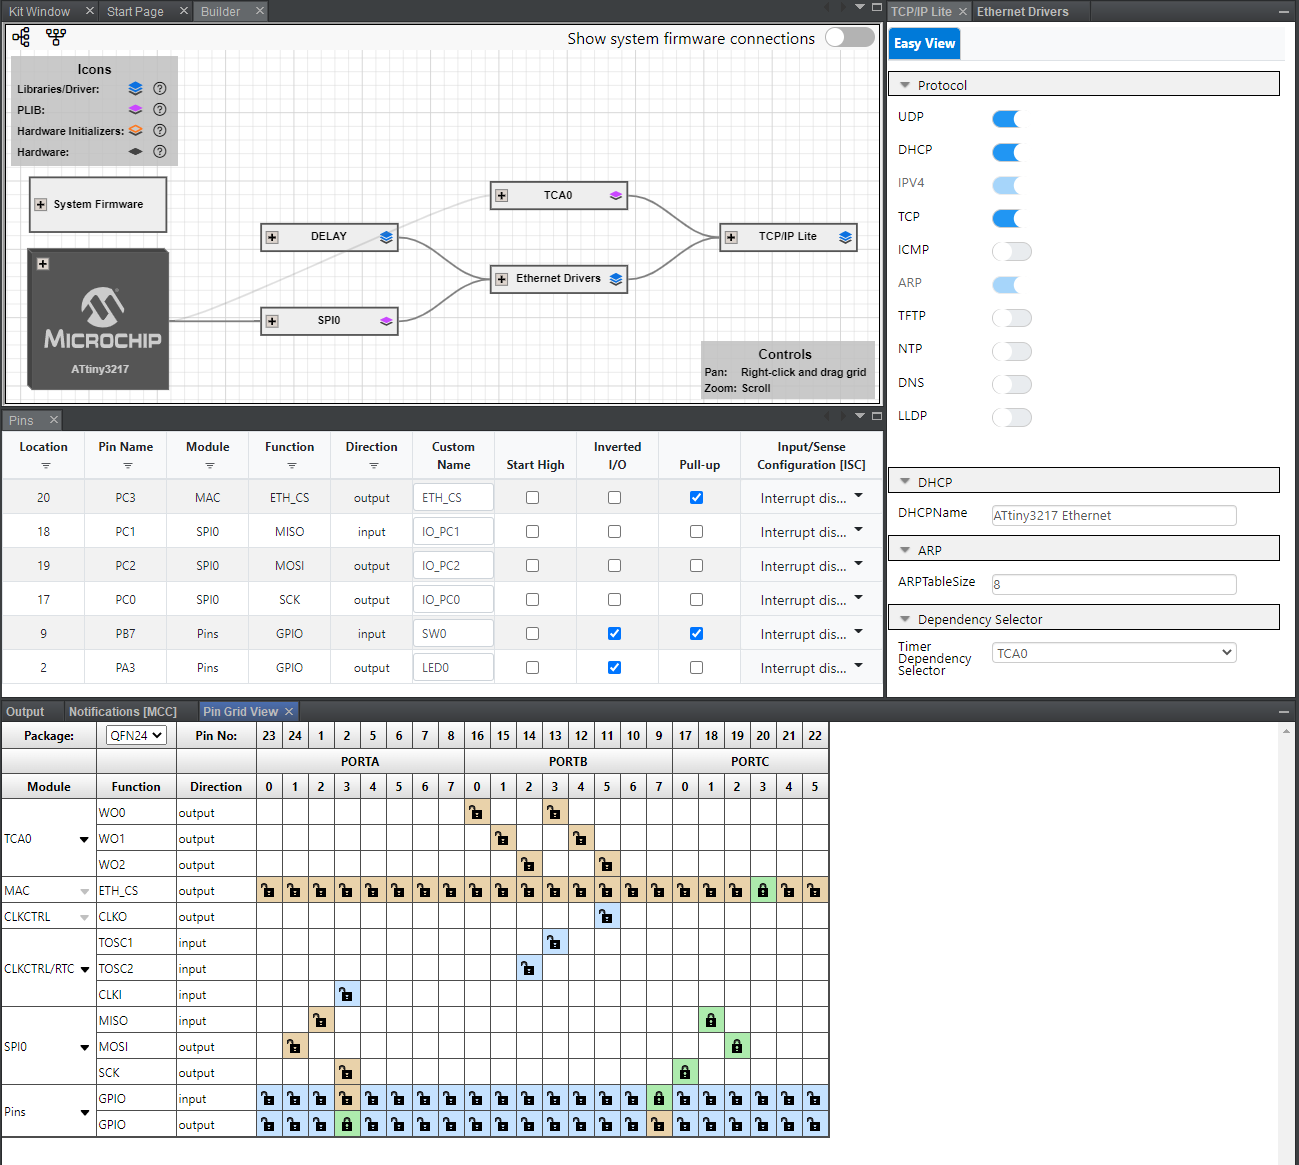

-
Open the MPLAB X IDE. Connect the ATtiny3217 Curiosity Nano Evaluation Kit.
-
From the downloaded projects, open
encx24j600-udp-solution.X.
Right click the project name and select Set as Main Project.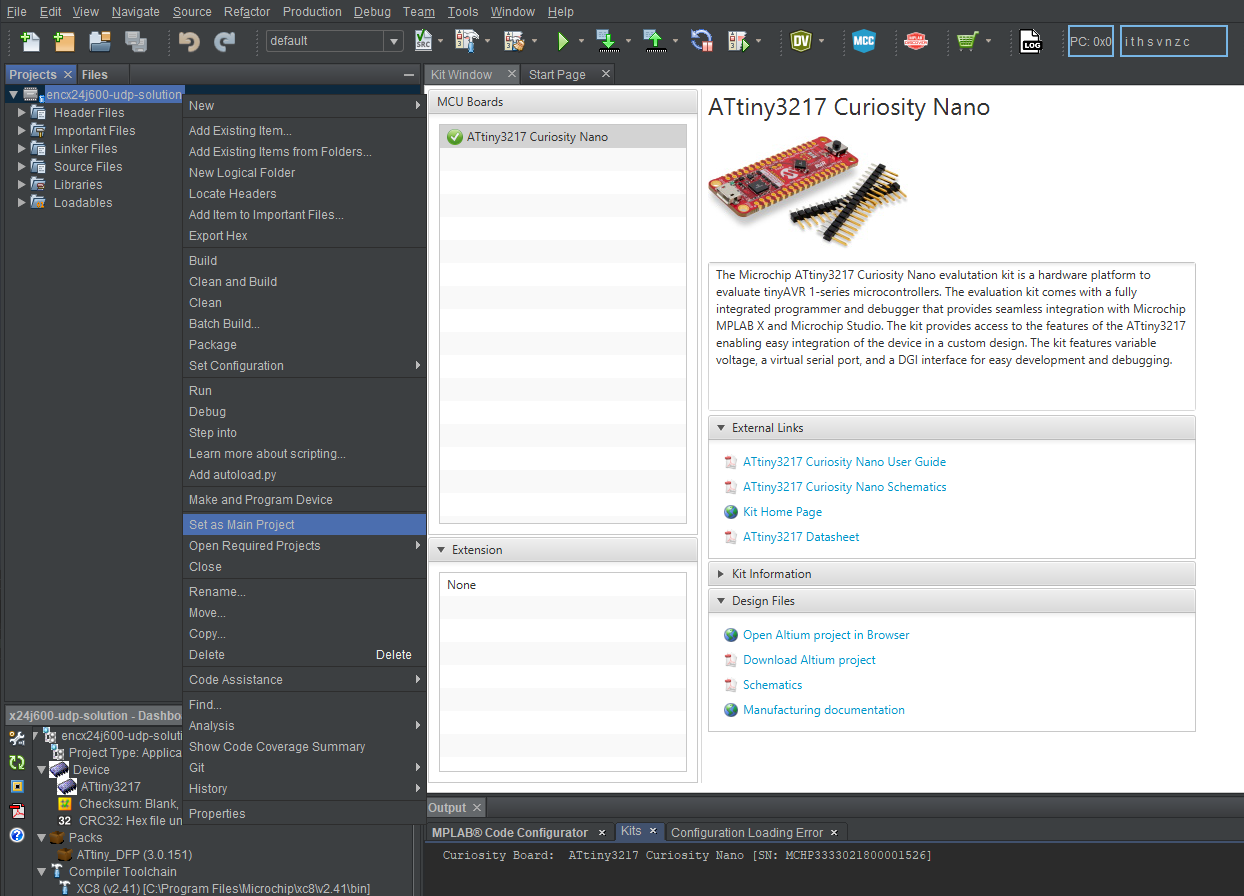
-
Open the Windows Command Prompt application on your PC. Type
ipconfigto get the IP address of your PC.
-
Go to
Source Files\App Files\srcand openudp_demo.c. Under the functionUDP_Demo_Initialize():- Modify the destination IP address with PC IP address as noted in Step 3
- Modify the destination port (anything in the range of dynamic ports)

-
Go to
Source Files\MCC Generated Files\tcpiplite\src\and openudpv4_port_handler_table.c.- In
UDP_CallBackTable[], add the following code to perform UDP Receive:{65531, UDP_Demo_Recv}.
65531 is the port chosen in Step 4.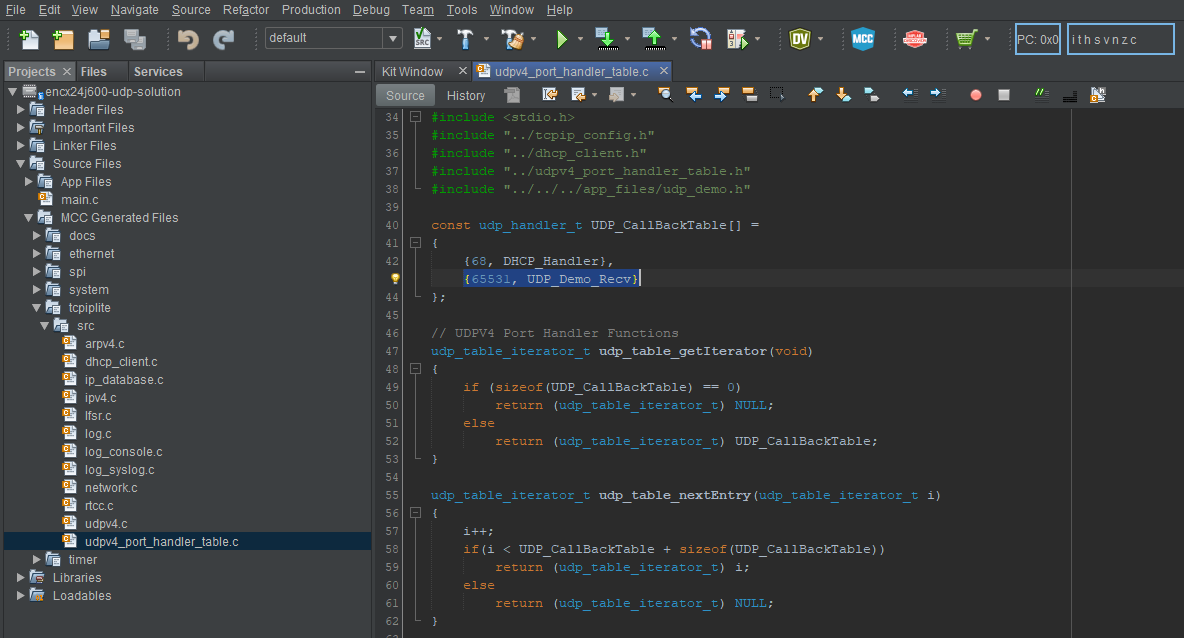
- In
-
Launch Wireshark. From the Capture menu, click Options.
Select an interface from the list to which your evaluation kit and PC are connected, click Start for capturing packets.
Or select the respective interface on the start screen of Wireshark.
E.g., Ethernet from the attached screenshot at Step 3 above.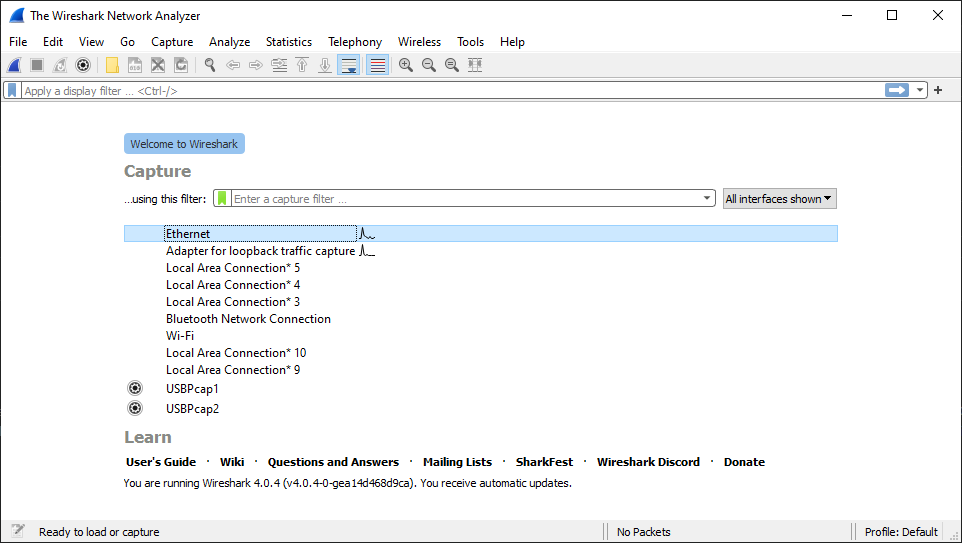
-
In Wireshark, set the filter field as
dhcp||icmpand hit 'Enter' or click the arrow on the right end.
-
Go back to MPLAB X IDE and click Make and Program Device to program the code to the device.

-
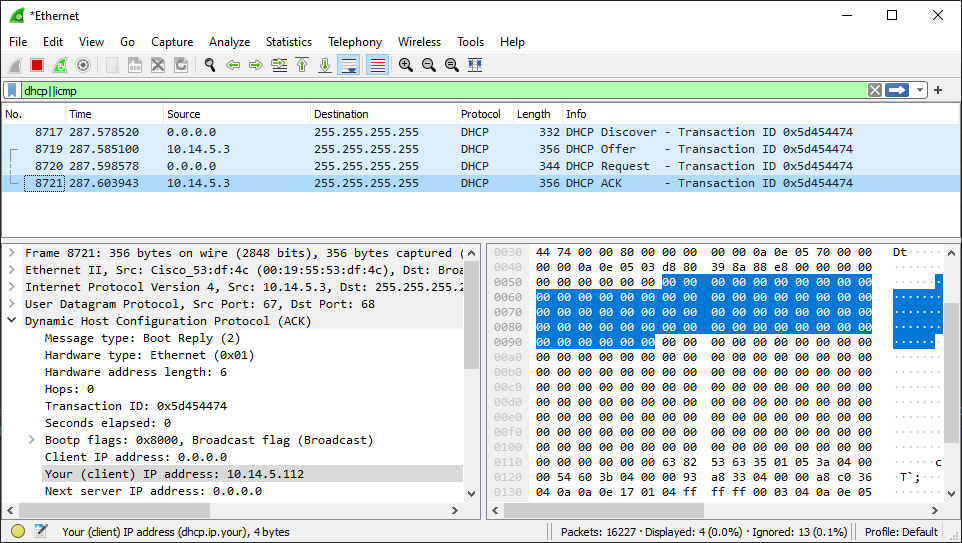
In Wireshark, check the DHCP packets to verify that the device is connected to the selected network. The handshake procedure will look as shown below:

-
In Wireshark, click the “ACK” packet (or double click to open in new window). Expand “Dynamic Host Configuration Protocol” to get the device IP address.
- Open the Java application
TCPIP_Demo.exe. Go to the UDP tab and assign the same port number asudpPacket.destinationPortNumberinUDP_DEMO_Send().
E.g., 65531 was chosen in Step 4.
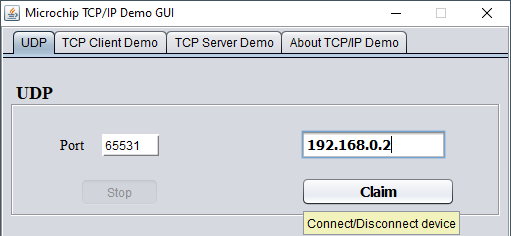
Click the Listen button. Click “Allow Access” if warning occurs. Assign the IP address of your evaluation kit which was found from Step 10.
E.g., 10.14.5.112 from the attached screenshot in Step 10 above.
Click the Claim button.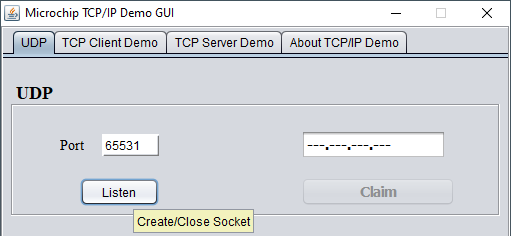
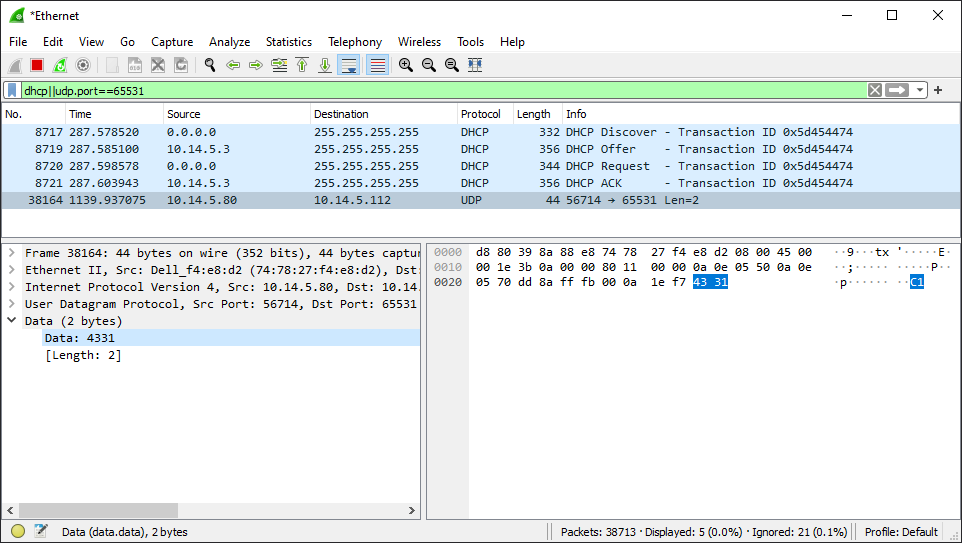
- In Wireshark, set the filter in the format
dhcp||udp.port==65531but with your chosen port number, 65531 in this example.
- In Demo GUI, under UDP Send/Receive click the LED 1 to turn ON LED0 on the Curiosity Nano Evaluation Kit and observe the Wireshark capture.
- In Demo GUI, inside the Send Data box type something (e.g., "Hello CNano").
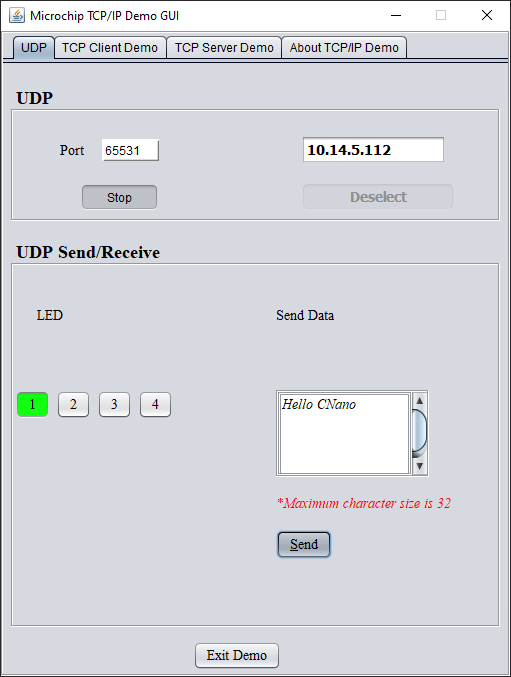
Click the Send button. Check the packet in the Wireshark capture.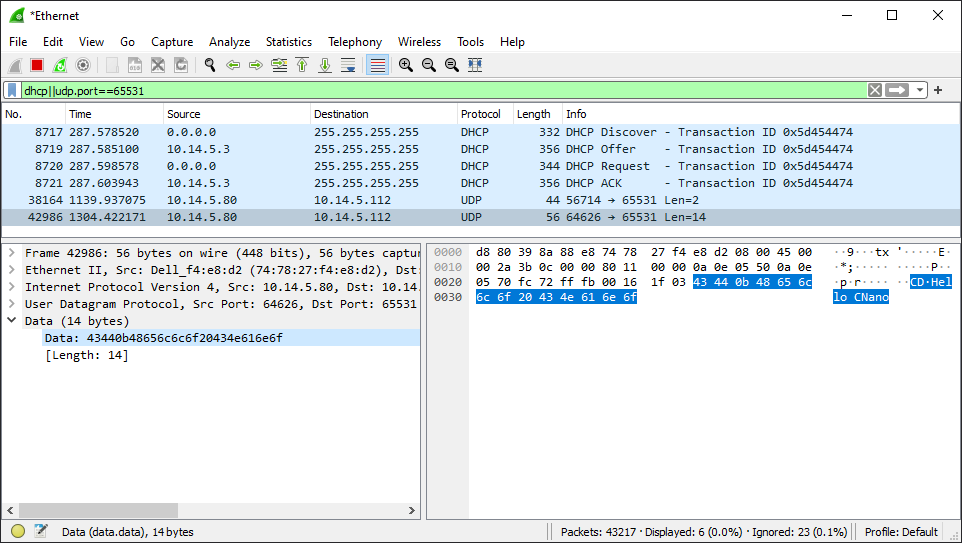
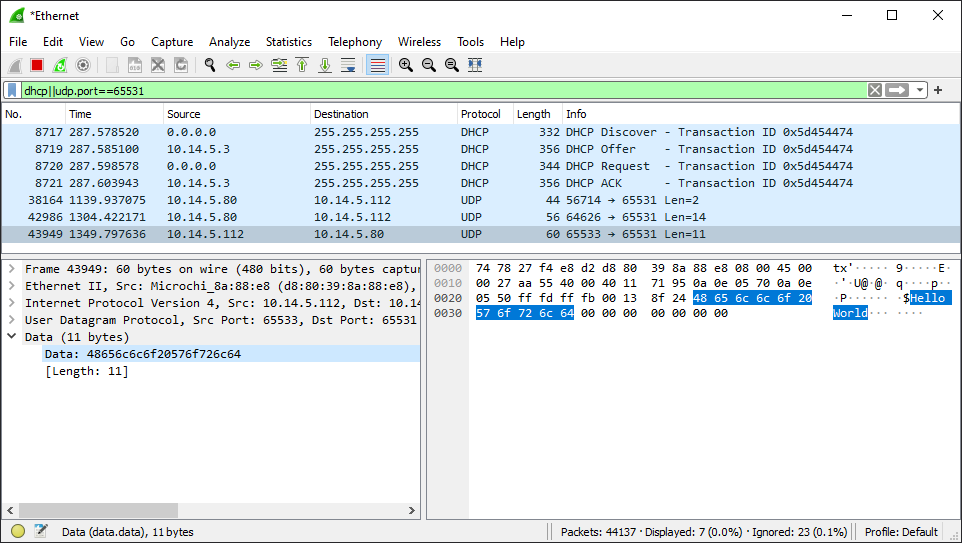
- Press the Switch SW0 on the Curiosity Nano Evaluation Kit. Check the packet in the Wireshark capture.

-
Open MPLAB X IDE. Connect the ATtiny3217 Curiosity Nano Evaluation Kit.
-
From the downloaded projects, open
encx24j600-tcp-client-solution.X.
Right click the project name and select Set as Main Project.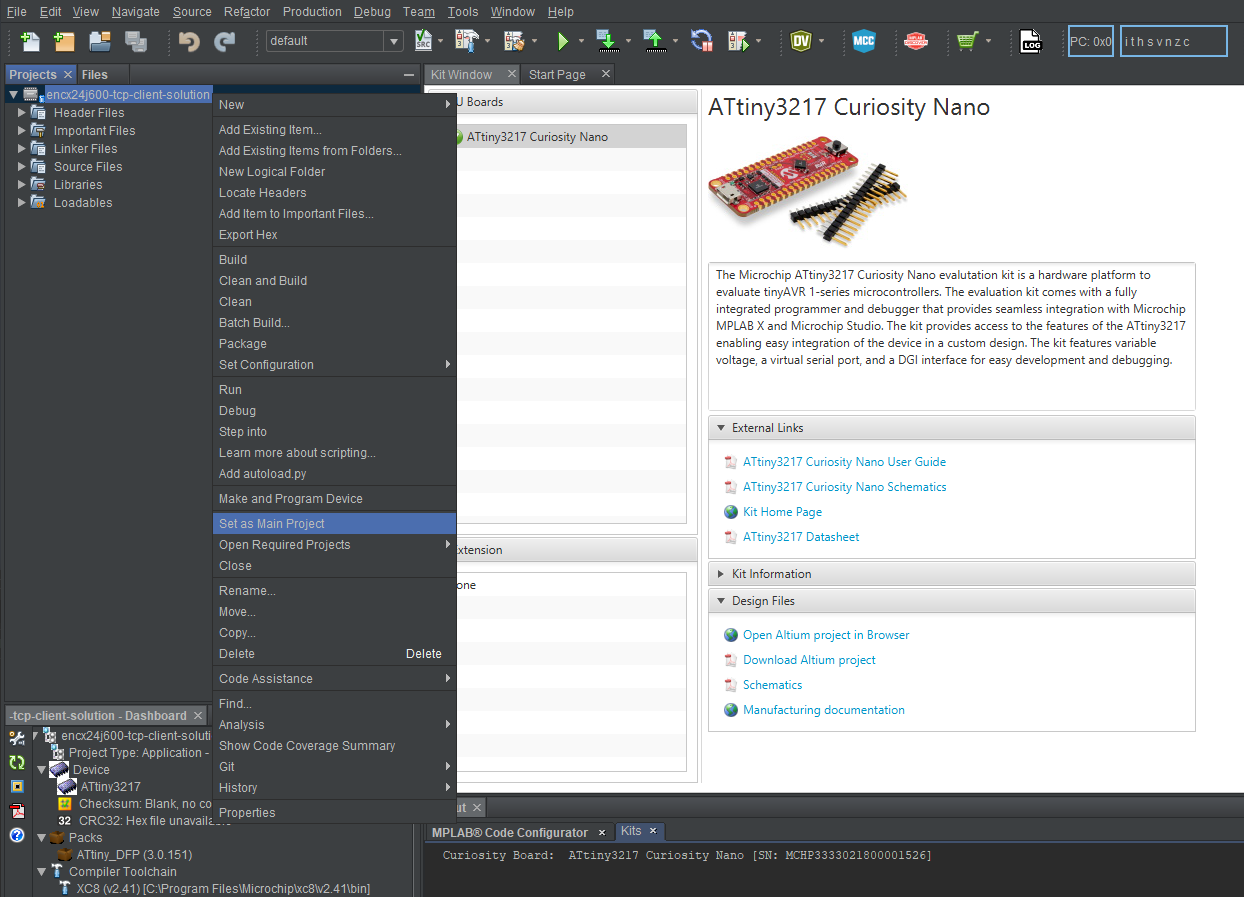
-
Open the Windows Command Prompt application on your PC. Type
ipconfigto get the IP address of the PC.
-
Go to
Source Files\App Files\srcand opentcp_client_demo.cfrom the project files. Under the functionTCP_Client_Initialize():- Modify the remote IP address with PC’s IP address as noted in Step 3
- Modify remote port (anything in the range of dynamic ports)

-
Click the Make and Program Device to program the code to the device.

-
Open the Java application
TCPIP_Demo.exe. Go to the TCP Server Demo tab and assign the same port asremoteSocket.portinTCP_Client_Initialize().
E.g., 65534 chosen in Step 4.
Click the Listen button.
The status of the TCP connection is printed inside the STATUS text box.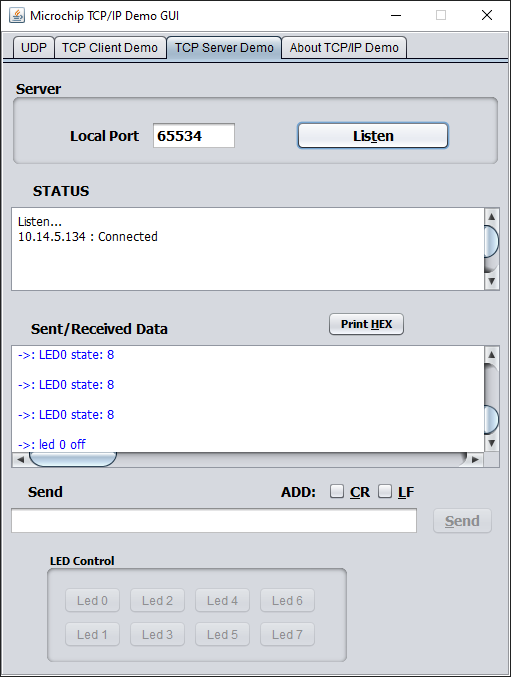
-
Launch Wireshark. From the Capture menu, click Options.
Select an interface from the list to which your evaluation kit and PC are connected, click Start for capturing packets.
Or select the respective interface on the start screen of Wireshark.
E.g., Ethernet from the attached screenshot at Step 3 above.
-
In Wireshark, set the filter in the format
dhcp||tcp.port==65534but with the chosen port number instead of65534.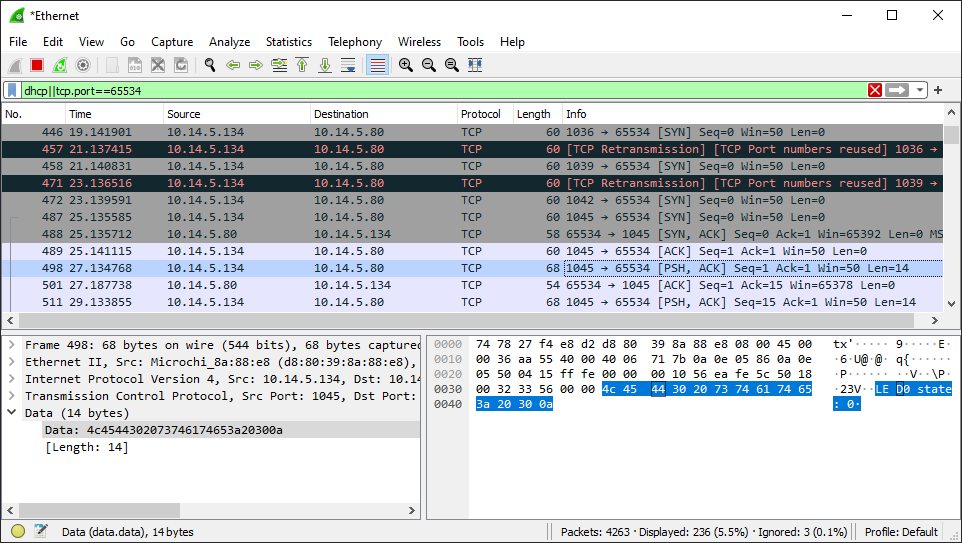
-
After the connection is established, type some text inside the Send text box and click the Send button.
The text sent is displayed inside the Sent/Received Data text box.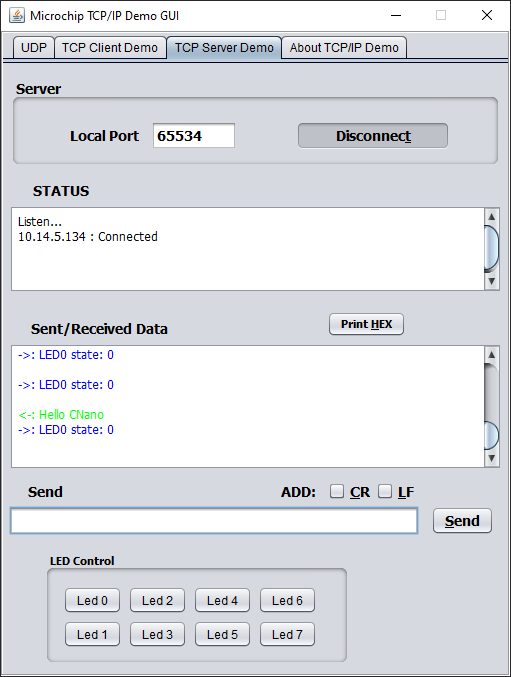
-
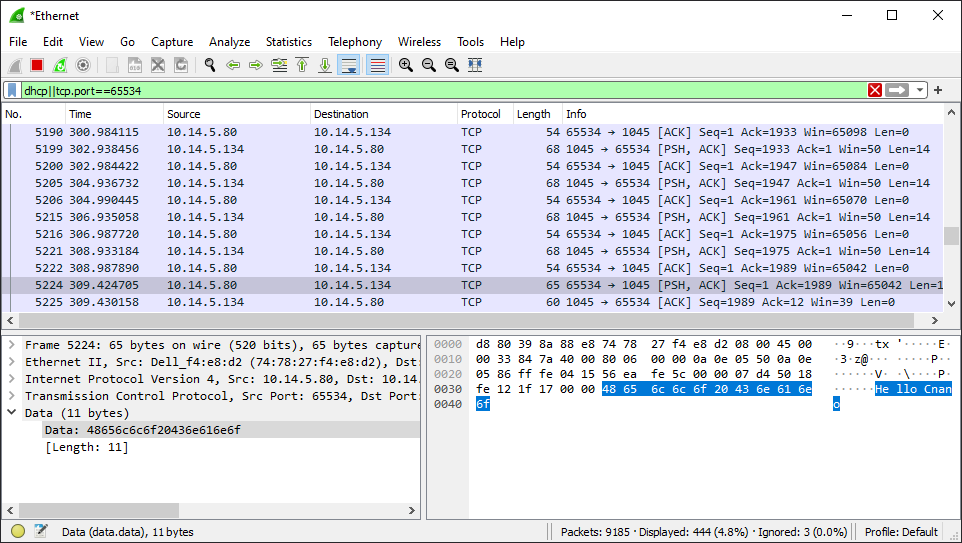
In Wireshark, keeping the same filter settings as in Step 8, check the TCP packets being sent from the PC to the Evaluation Kit.
- Click the Led 0 button inside the
LED ControlField. This will turn on LED0 on the Curiosity Nano Evaluation Kit.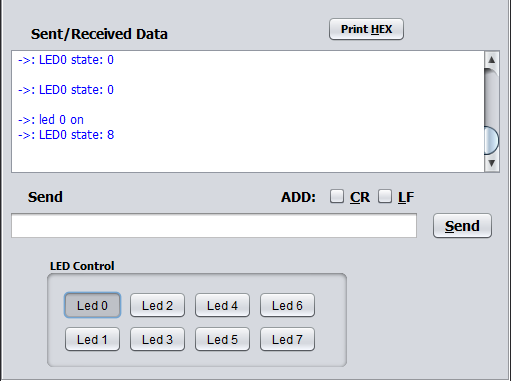
- In Wireshark, keeping the same filter settings as in Step 8, check the TCP packets being sent from the Evaluation Kit to the PC.
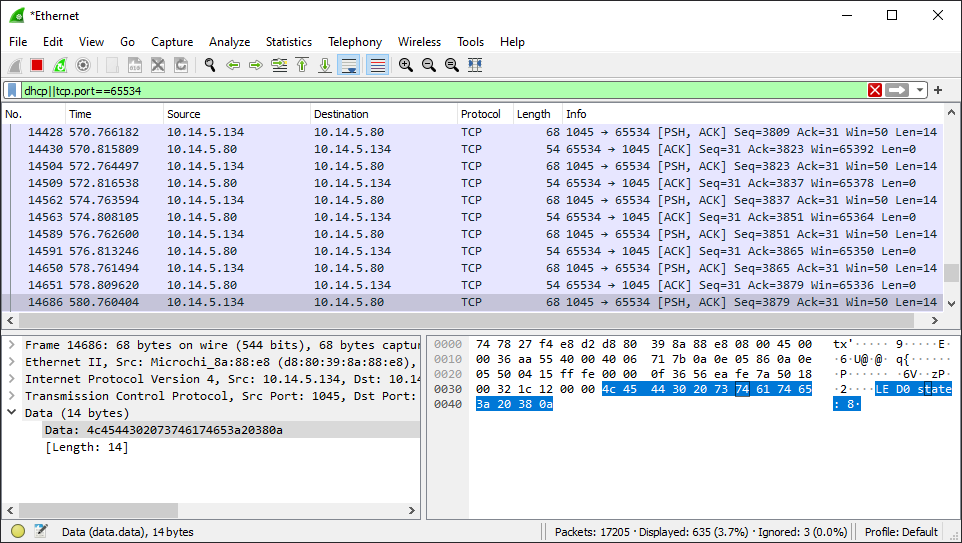
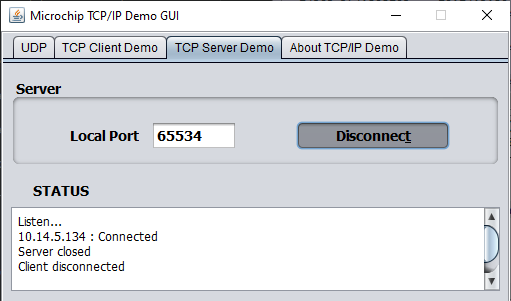
- Click the Disconnect button from the Demo GUI to close the TCP connection. Inside the STATUS text box a message will appear stating "Client Disconnected".

-
Open MPLAB® X IDE. Connect the ATtiny3217 Curiosity Nano Evaluation Kit.
-
From the downloaded projects, open
encx24j600-tcp-server-solution.X.
Right click the project name and select Set as Main Project.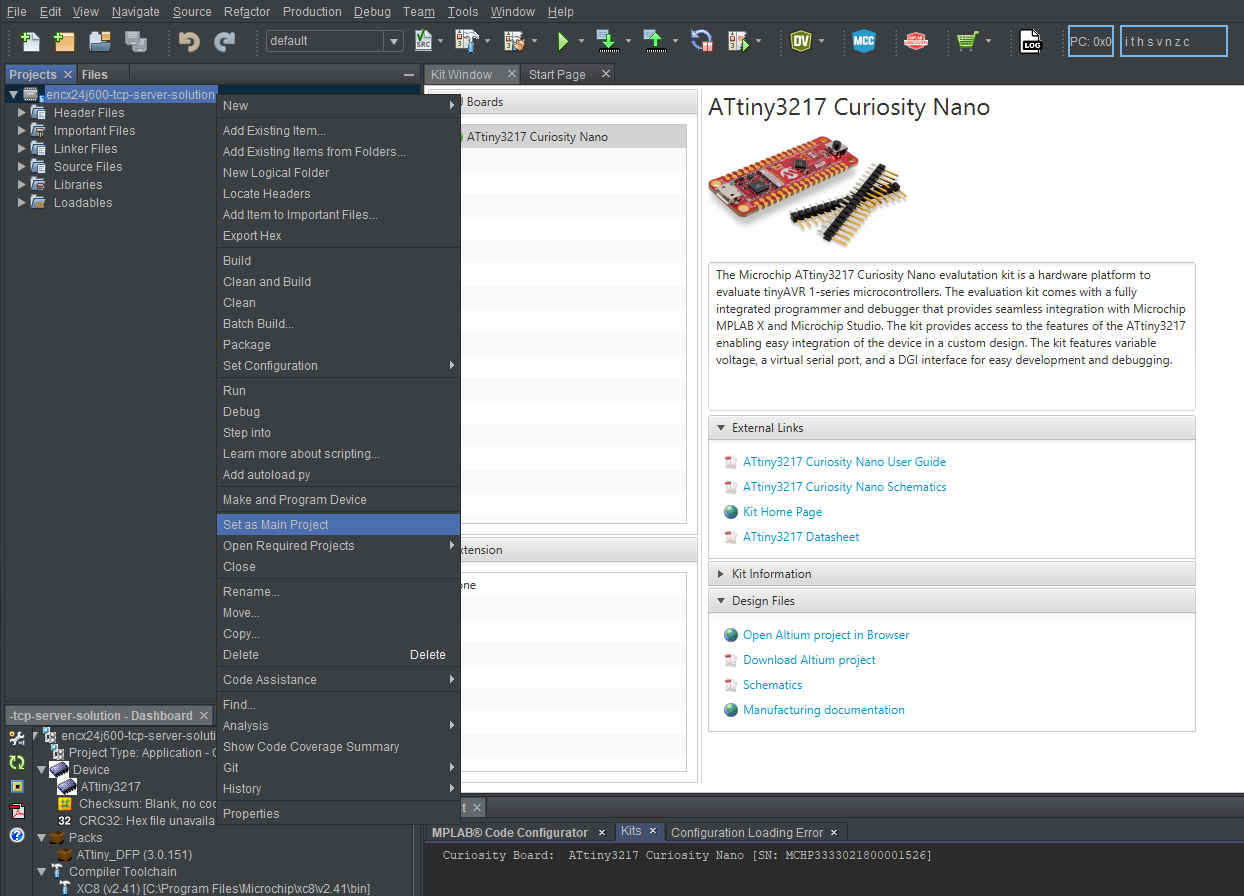
-
Launch Wireshark. From the Capture menu, click Options.
Select an interface from the list to which the HPC Development board and PC are connected, click Start for capturing packets.
Or select the respective interface on the start screen of Wireshark.
-
In Wireshark, set the filter field as
dhcp||icmpand hit 'Enter' or click the arrow on the right end.
-
Go back to MPLAB X IDE and click Make and Program Device to program the code to the device.

-
In Wireshark, check the DHCP packets to verify that the device is connected to the selected network. The handshake procedure will look as shown below:

-
In Wireshark, click the “ACK” packet (or double click to open a new window). Expand the “Dynamic Host Configuration Protocol” to get the device IP address.

-
Open the Java application
TCPIP_Demo.exe. Go to the TCP Client Demo tab.
Assign the server IP address as the IP address noted from Wireshark in Step 7.
Assign the port number as 7.
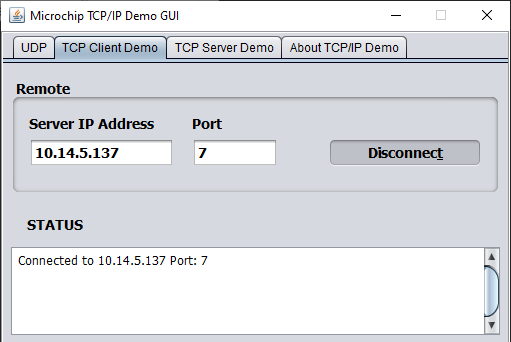
Click the Connect button. The status of the TCP connection is printed inside the STATUS text box.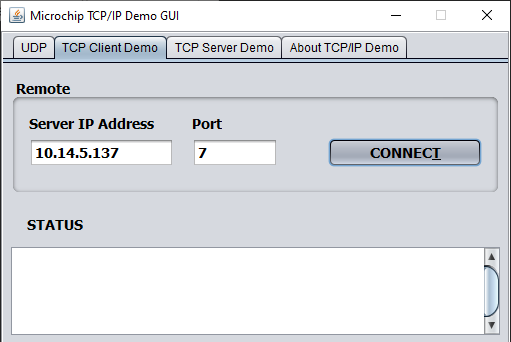
-
After the connection is established, type some text inside the Send text box and click the Send button.
The text sent is echoed and displayed inside the Sent/Received Data text box.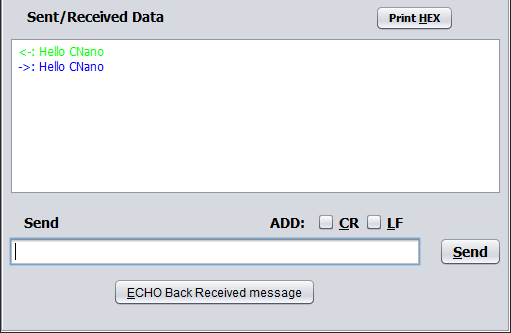
-
In Wireshark, set the filter as
dhcp||tcp.port==7
Check the TCP packets being sent from the Evaluation Kit destined to the PC.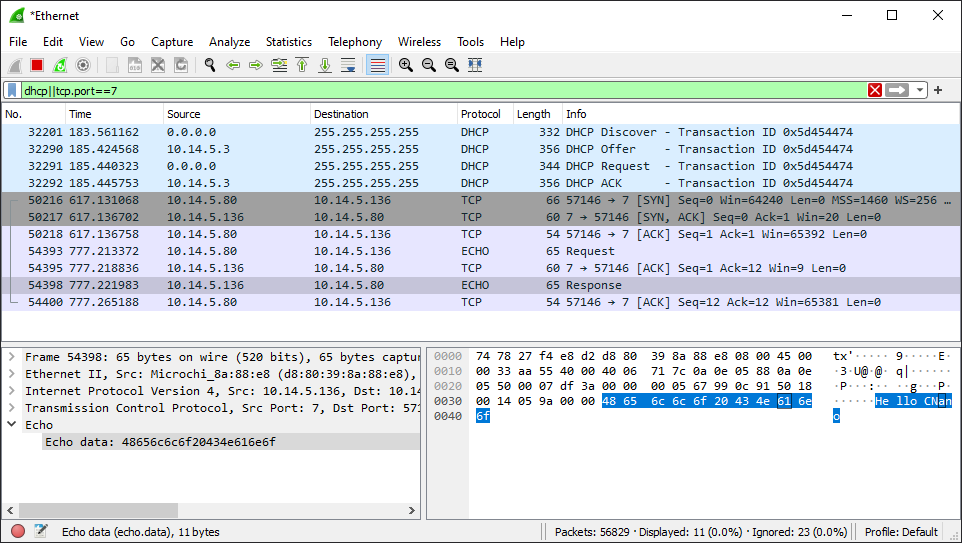
- Push the Disconnect button in the Demo GUI to close the TCP connection. Inside the STATUS text box a message will appear stating "Connection Closed".
