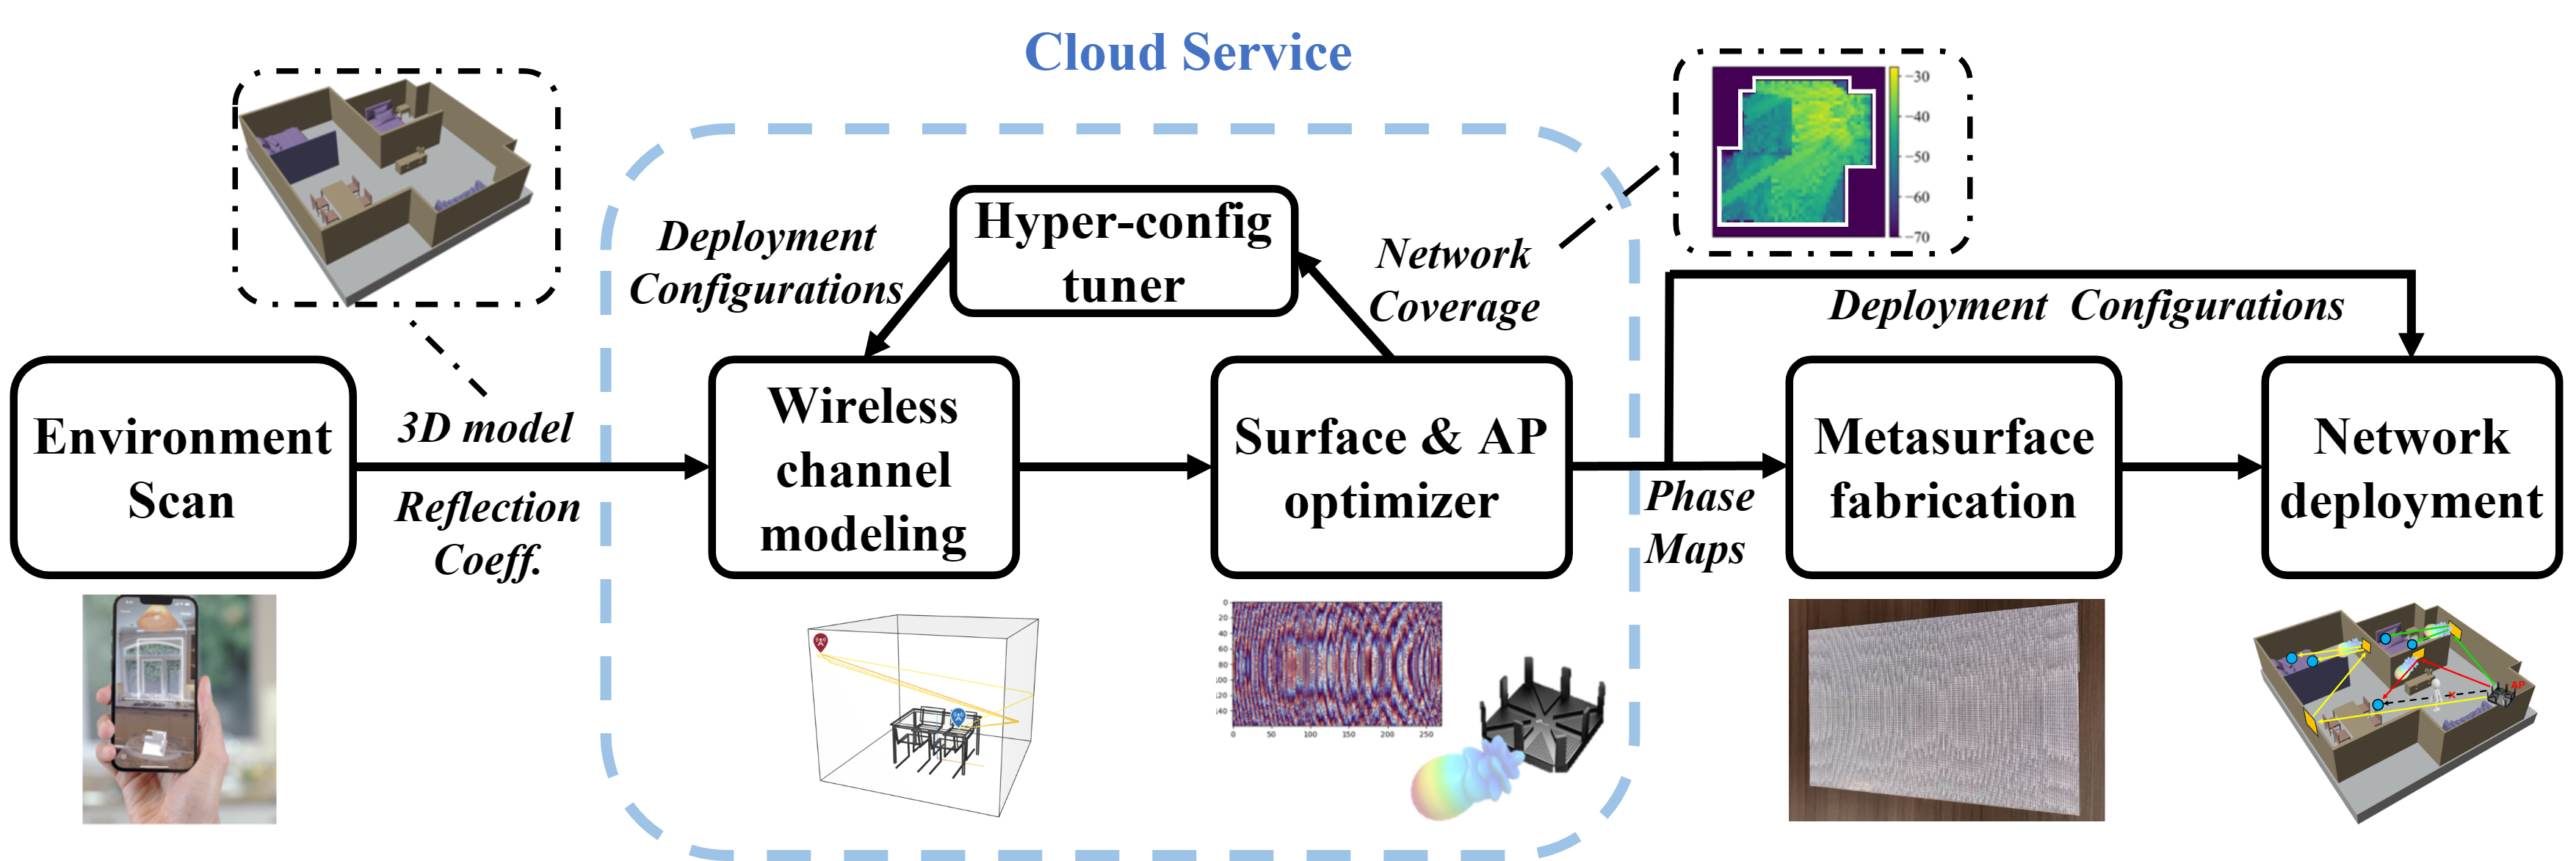
This repository presents the software implementation of the paper
AutoMS: Automated Service for mmWave Coverage Optimization using Low-cost Metasurfaces
Ruichun Ma*, Shicheng Zheng*, Hao Pan, Lili Qiu, Xingyu Chen, Liangyu Liu, Yihong Liu, Wenjun Hu, Ju Ren
ACM International Conference on Mobile Computing and Networking (MobiCom), 2024
It includes the code for the optimization framework (hyper-config tuner and phase map tuner), and wireless channel/coverage simulator.
A Linux computer with at least GPU GTX1650 is needed to run the wireless channel simulator without metasurface and an NVIDIA GPU with over 16G memory is needed to run full optimization.
fig/: Figures showed in this doc.optix/: Slightly trimmed optix libraryoutput/: output folders generated when optimizing metasurfacestl/: folders providing different scenes.bf: build fix script. There is a high probability of linking errors when compiling, use this script to fix it.channel.png: Simulation output. Signal coverage heatmap.cudaMemManager.h: Used to check if there is any cuda memory that has not been freed.go.py: Apart from the core ray tracing, almost all the rest of the functionality is implemented here.optixPathTracer.cpp,optixPathTracer.h,optixPathTracer.cpp: Core code files, including ray tracing, channel modeling, and other basic functions.physical_exp_nni_main.py: nni script, used to search for best metasurface placement.physical_exp_nni_model.py: Given the placement of the metasurface, output the optimization results.
CPU: No explicit requirements, but should be able to run the required software.
RAM: At least 8~GB
Nvidia GPU:
A CUDA-enabled GPU
If you simulate without the metasurface, A normal gaming laptop with `GTX1650' will be sufficient.
To run channel simulation and joint optimization with metasurfaces, an NVIDIA GPU with over 16~GB memory is required.
Software
Linux based operating system with latest conda and Nvidia driver (version number 470 or later). We use Ubuntu 20.04 and Miniconda 23.3.1.
- Create Conda environment and activate it
conda create -n optix_env python=3.10
conda activate optix_env- Install CUDA 11.7
conda install -c "nvidia/label/cuda-11.7.1" cuda-toolkit- Install pytorch
conda install pytorch=2.0.1 pytorch-cuda=11.7 -c pytorch -c nvidia- Install cmake (>3.18)
conda install cmake- Install package
sudo apt install libglfw3-dev- Create folder for build files and generate makefile.
mkdir build
cd build
cmake ..- Compile the project. Run command below in
build
make -j- There may be linking issues. Run command below in project folder, then build again
./bf- Install python packages
pip install matplotlib tqdm numpy-stl
pip install nni==3.0
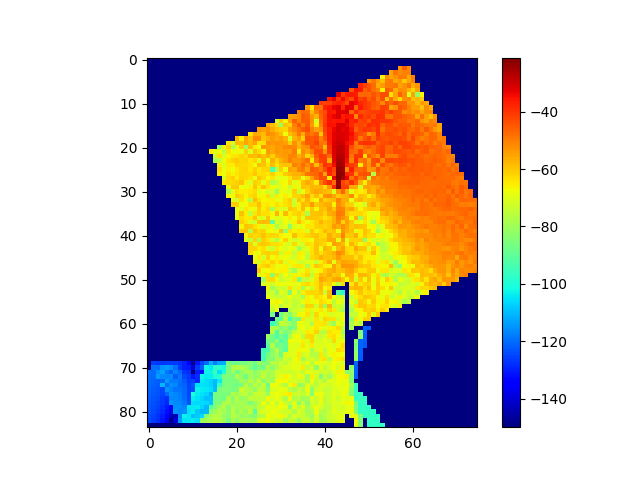
pip install "nni[Anneal]"==3.0python go.pyThen user will obtain the channel information of the given environment, with the output file named channel.png.
To accomplish this, a Tx array and Rx array are specified in go.py. The Tx array generates the wireless signals, and then the signal strength of each Rx is calculated. Each pixel in the output image represents an Rx.
Our optimization framework comprises a hyper-configuration tuner and a phase map optimizer for mmWave network deployment. The phase map optimizer operates as the inner loop, determining the phase configurations for the given hyper-configurations.
The phase map optimizer identifies the optimal phase configurations for metasurfaces and mmWave AP phased arrays to maximize the coverage objective function in a target environment. This optimization is based on the channel matrices provided by the simulator and the current hyper-configurations.
Given all the configuration para except for the AP's codebook and metasurface's phase map, run the following command to optimize them.
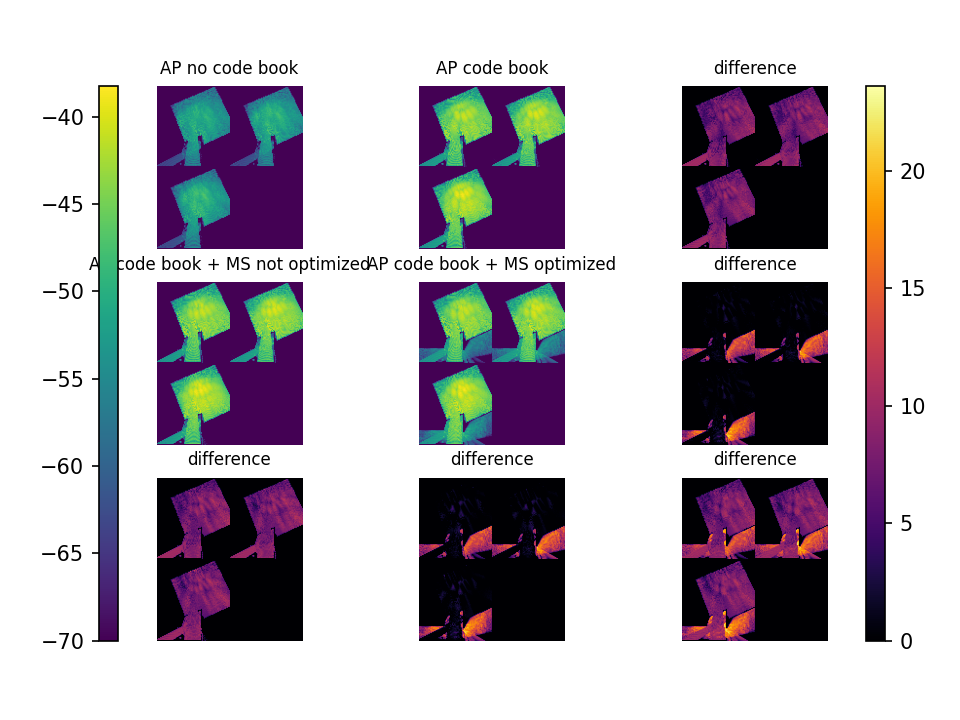
python physical_exp_nni_model.pyThe result will be generated at output/, with the gain comparisons and channel heatmaps included.
With our hardware setup, it takes about 140s with A100 GPU.
Hyper-configurations are high-level deployment parameters, such as the quantity, dimensions (element count), and locations of metasurfaces, as well as the orientation(s) and location(s) of AP(s). AutoMS allows for the optimization of certain deployment configurations based on the specific scenario and user preferences, while users can manually set the remaining according to their requirements. Various algorithms can optimize these configurations; our implementation employs simulated annealing from NNI.
The hyper-configuration tuner, informed by the phase map optimizer's performance metrics, iteratively explores and updates configurations.
physical_exp_nni_main.py is the code for hyper-tuner, it is the outer optimization loop, using NNI to run physical_exp_nni_model.py multiple times. Check nni console and you'll see current best result.
Set SINGLE_RUN to False in physical_exp_nni_model.py, then:
python physical_exp_nni_main.pyIt may take many iterations (hours) to converge to a good result, depending on how many iterations you set with NNI.
The output expected from the experiment is already in the repository.
channel.png shows the result of the signal distribution without placing any metasurface.
output/ folder contains the gain comparisons and channel heatmaps. In output/*/optimization_result.png, significant gains should be seen. output/*/ms_and_codebook.pt stores optimized metasurface phase map and codebook of AP, which will be applied in hardware experiment.
To customize, mainly modify the if __name__ == "__main__": section of go.py. The following changes are made in this section.
Adjust wave_len parameter of build_channel() to set wavelength. Unit: m. Default value in go.py is 3e8 / 60e9.
Adjust max_reflection parameter of build_channel() to set wavelength. Default value in go.py is 4.
Adjust launch_x and launch_y parameter of build_channel() to trade off simulation accuracy and running time.
launch_x*launch_y represents the number of rays emitted by each antenna of a phased array. Since neighboring antennas share the path during simulation, the effect is equivalent to a pair of antennas with a larger launchesize.
Use gen_pos_matrix() or gen_pos_from_endpoint() to generate positions for Tx/Rx. See comments for details.
src parameter of build_channel() refers to positions of all Tx elements. dst parameter of build_channel() refers to positions of all Rx elements.
See comments of functions for more related customizations.
Set scene_folder parameter for build_channel. scene_folder should be a folder containers all files to decribe a scene.
Structure:
-
wall.txt: The top left, bottom left, and bottom right coordinates of walls where the metasurface can be placed. -
mat.txt: Stores the value of reflectivity from 0° to 90° for each material. Some items here use estimated constant values. -
<object_name>_<material type>.stl: stl files of all objects in this scene.<material type>should be defined inmat.txt.
If you found this repository useful, please consider citing the paper:
@inproceedings{ma2024automs,
  author    = {Ruichun Ma, Shicheng Zheng, Hao Pan, Lili Qiu, Xingyu Chen, Liangyu Liu, Yihong Liu, Wenjun Hu, Ju Ren},
  title     = {AutoMS: Automated Service for mmWave Coverage Optimization using Low-cost Metasurfaces},
  booktitle = {ACM International Conference on Mobile Computing (MobiCom)},
  year      = {2024},
  doi       = {https://doi.org/10.1145/3636534.3649347},
}

